Table of Contents
Advertisement
Quick Links
Advertisement
Table of Contents

Related Manuals for JVC 5030057088


Summary of Contents for JVC 5030057088
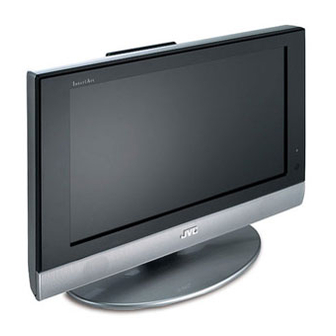
- Page 1 LT-17S2 LT-23S2 WIDE LCD PANEL TV INSTRUCTIONS 5030057088...
- Page 2 Thank you for buying this JVC WIDE LCD PANEL TV To make sure you understand how to use your new TV, please read this manual thoroughly before you begin. (“LCD” stands for Liquid Crystal Display.) WARNING: TO PREVENT FIRE OR SHOCK HAZARD, DO NOT EXPOSE THIS APPLIANCE TO RAIN OR MOISTURE.
-
Page 3: Cleaning The Screen
Point defects LCDs use collections of fine pixels to display images. While there is no problem with more than 99.99% of these pixels, please understand that a very small number of pixels may not light or may light all the time. Distance recommendations Avoid improper installation and never position the unit where good ventilation is impossible. -
Page 4: Table Of Contents
Watch images from external equipment ...11 Displaying the source information ...11 ZOOM function...12 Sleep timer funtion...13 Picture mode...13 Using the PCPIP function ...13 Operating a JVC brand VCR or DVD player ...14 Teletext function...15 Basic operation ...15 Hold...15 Sub-page ...16 Reveal...16 Size ...16... -
Page 5: Setting Up Your Tv
Setting up your TV Installation Cautions for installation • Install the TV in a corner on a wall or on the floor so as to keep cords out of the way. • The TV will generate a slight amount of heat during operation. Ensure that sufficient space is available around the TV to allow satisfactory cooling. -
Page 6: Putting The Batteries Into The Remote Control
Putting the batteries into the Remote control Use two AA/R6 dry cell batteries. Insert the batteries from the - end, making sure the + and - polarities are correct. • Follow the warnings printed on the batteries. • Battery life is about six months to one year, depending on your frequency of use. •... -
Page 7: Connecting The Aerial And Video Cassette Recorder (Vcr)
Setting up your TV Connecting the aerial and video cassette recorder (VCR) • Aerial cable is not supplied. Use a good quality 75-ohm coaxial cable. • Read the manual that came with the VCR before connecting. If not connecting a VCR (follow 1 1 ): Connect an aerial cable to the aerial socket on this TV. -
Page 8: Initial Settings
Initial settings When the TV is first turned on, it enters the initial setting mode. Follow the instructions on the on-screen display to make the initial settings. Yellow button Blue but BACK 1 Make sure to set the VCR/TV/DVD switch to the TV position. - Page 9 Initial settings Now, the initial settings are complete, and you can watch the TV • If your TV can detect the TV channel name from the TV channel broadcast signal, the TV channel name is assigned to the programme number to which the TV channel has been set.
-
Page 10: Tv Buttons And Functions
TV buttons and functions Power lamp 2 Remote control sensor MENU button TV/AV OK button (Volume) button buttons (Standby) botton 8 Headphone jack (mini jack) Turn the TV on from standby mode Press the on from standby mode • Check that the AC plug on the power cord from the TV is connected to correctly AC outlet. -
Page 11: Remote Control Buttons And Functions
Remote control buttons and functions Turn the TV on or off from standby mode 1 Make sure to set the VCR/TV/DVD switch to the TV position. • You cannot turn the TV on or off when the VCR/TV/ DVD switch is set to the VCR or DVD position. 2 Press the (standby) button to turn the TV on or off. -
Page 12: Adjust The Volume
Adjust the volume Press the buttons to adjust the volume. The volume indicator appears and the volume changes as you press the buttons. Muting the sound Press the (muting) button to turn off the sound. Pressing the (muting) button again restores the previous volume level. -
Page 13: Zoom Function
Remote control buttons and functions ZOOM function You can change the screen size according to the picture aspect ratio. Choose the optimum one from the following ZOOM modes. AUTO: When a WSS (Wide Screen Signalling) signal, which shows the aspect ratio of the picture, is included in the broadcast signal or the signal from an external device, the TV automatically changes the ZOOM mode to 16:9 ZOOM mode or FULL mode according to the WSS signal. -
Page 14: Sleep Timer Funtion
Sleep timer function The Sleep Timer can turn the TV off for you after you fall asleep. Programme it to work in intervals of 10 minutes, for a total time of up to 120 minutes. Press the button. SLEEP TIMER SLEEP TIMER Picture mode You can choose one of four PICTURE MODEs to adjust... -
Page 15: Operating A Jvc Brand Vcr Or Dvd Player
(Standby) button. 2 Press the VCR/DVD Control Button to control your VCR or DVD player • If your device is not made by JVC, these buttons will not work. • Even if your device is made by JVC, some of these buttons may not work, depending on the device you are using. -
Page 16: Teletext Function
Teletext function Basic operation 1 Choose a TV channel with a teletext broadcast 2 Make sure to set the VCR/TV/DVD switch to the TV position. 3 Press (Text) button to display the teletext Pressing (Text) button changes the mode as follows: TV mode TEXT--- TEXT---... -
Page 17: Sub-Page
Teletext function Sub-page Some teletext pages include sub-pages that are automatically displayed. 1 Choose a teletext page that includes sub-pages Press the button, Sub-page numbers can be viewed and displayed at the screen. 2 Press the number buttons to choose a sub-page number Sxxxx : xxxx is the number 0 ~ 9 that you entered. -
Page 18: Using The Tv's Menu
Using the TV’s menu This TV has a number of functions you can operate using menus. To use all your TV’s functions, you need to understand the basic menu operating techniques fully. BACK Basic operation 1 Press the MENU button to display the MENU (main menu) MENU PICTURE... -
Page 19: Picture Setting
PICTURE SETTING Refer to “Using the TV’s menu” (see page 17) for details of displaying the menu. PICTURE PICTURE MODE BRIGHT CONTRAST BRIGHT-1 SHARP COLOUR BRIGHT-2 WHITE BALANCE COOL RESET : SELECT : MOVE PICTURE MODE You can choose one of four PICTURE MODEs to adjust the picture settings automatically. -
Page 20: Sound
SOUND Refer to “Using the TV’s menu” (see page 17) for details of displaying the menu. SOUND BASS TREBLE BALANCE HYPER SOUND : SELECT Sound Adjustment You can adjust the sound to your liking. BASS: You can adjust the low tone of the sound. : weaker : strong TREBLE:... -
Page 21: Features
FEATURES Refer to “Using the TV’s menu” (see page 17) for details of displaying the menu. FEATURES BLUE BACK CHILD LOCK :MOVE : SELECT BLUE BACK You can set the TV to automatically change to a blue screen and mute the sound if the signal is weak or absent, or when there is no input from an external device. -
Page 22: Install
INSTALL Refer to “Using the TV’s menu” (see page 17) for details of displaying the menu. INSTALL LANGUAGE ENGLISH AUTO PROGRAM MANUAL PR LIST : MOVE :SELECT LANGUAGE ress t buttons to choose the ENGLISH. The on-screen display will then be in English. AUTO PROGRAM AUTO PROGRAM You can automatically store the TV channels for which you... -
Page 23: To Edit The Pr List Menu
30 ----- 10 ----- STORE CANCEL buttons to edit the PR LIST 01 ----- 11 ----- 21 ----- 02 JVC 12 ----- 22 ----- 13 ----- 23 ----- 03 ----- 04 ----- 14 ----- 24 ----- 05 ----- 15 -----... - Page 24 INSERT 1 Press t buttons to choose a program number for which you want Every time you press the programme number changes and the picture of the TV channel stored in the programme number appears on the screen. PR LIST 01 ----- 11 ----- 21 -----...
- Page 25 INSTALL DELETE buttons to choose a 1 Press t program number for which you want Every time you press the programme number changes and the picture of the TV channel stored in the programme number appears on the screen. PR LIST 11 ----- 21 ----- 01 -----...
-
Page 26: Pc Menu
PC MENU (In PC mode only) This TV also has a number of functions on PC mode, you can operate using pc menus. PC MENU PC PICTURE POSITION PC PICTURE SOUND : SELECT OK : MOVE 1024 X 768 H : 48 kHz V : 60 Hz PC PICTURE POSITION You can adjust the picture settings as following functions. -
Page 27: Pc Support Mode List
PC MENU PC support mode list LT-17S2 Mode NO. Mode Name Resolution VGA 60 Hz 640x480 SVGA 56 Hz 800x600 SVGA 60 Hz 800x600 XGA 60 Hz 1024x768 WXGA 1280x768 LT-23S2 Mode NO. Mode Name Resolution VGA 70 Hz 640x350 VGA 60 Hz 640x480 SVGA 56 Hz... -
Page 28: Additional Preparation
Additional preparation Connecting external equipment Connect the equipment to the TV, making the correct rear panel and front panel connections. Before connecting anything: • Read the manuals that came with the equipment. Depending on the equipment, the connection method may be different from the diagram. Also, the equipment settings may need to change depending on the connection method. -
Page 29: Connecting Headphones
Additional preparation Equipment which can output the S-VIDEO signal (Y/C signal) such as an S-VHS VCR Connect the equipment to an EXT terminal. You can choose between an S-VIDEO signal (Y/C signal). Connecting headphones Connect the headphones with a stereo mini-jack (3.5 mm diameter) to the headphone socket at the TV. -
Page 30: Troubleshooting
Troubleshooting If a problem arises while you are using the TV, please read this troubleshooting guide carefully before you ask to have the TV repaired. You may be able to fix it easily by yourself. For example, if the mains plug is disconnected from the mains outlet, or the TV aerial has problems, you may think there is a problem with the TV itself. - Page 31 Troubleshooting Other concerns • When the SLEEP TIMER function operates, the TV is automatically turned off. If the TV suddenly turns off, try to press the (standby) button to turn on the TV once again. If the TV goes back to normal, there is no problem.
-
Page 32: Specifications
Specifications Model Item Broadcasting systems CCIR B/G, I, D/K Colour systems PAL, SECAM • The EXT terminals also support the NTSC 3.58/4.43 MHz system. Channels and frequencies • E2-E12, E21-E69, S1-S41, X, Y, Z, Z+1, Z+2, ITALY A-H, ITALY H+1, ITALY H+2, F2-F10, F21-F69, R1-R12, R21-R69, IR A-J •... - Page 33 © 2004 Victor Company of Japan, Limited 0704-MK-TU...