Table of Contents
Advertisement
Quick Links
FOREWORD
This manual contains an introductory description on
HYOSUNG
for its inspection/service and overhaul of its main
components.
Other information considered as generally known is
not included.
Read GENERAL INFORMATION section to familiar-
ize yourself with outline of the vehicle and MAINTE-
NANCE and other sections to use as a guide for
proper inspection and service.
This manual will help you know the vehicle better so
that you can assure your customers of your optimum
and quick service.
� � This manual has been prepared on the basis of
the latest specification at the time of publica-
tion.
If modification has been made since then,
difference may exist between the content of
this manual and the actual vehicle.
� � Illustrations in this manual are used to show
the basic principles of operation and work pro-
cedures.
They may not represent the actual vehicle
exactly in detail.
WARNING
This manual is intended for those who have
enough knowledge and skills for servicing
HYOSUNG vehicles. Without such knowledge and
skills, you should not attempt servicing by relying
on this manual only.
Instead, please contact your nearby authorized
HYOSUNG motorcycle dealer.
� COPYRIGHT S&T Motors Co., Ltd.
GENERAL INFORMATION
and procedures
PERIODIC MAINTENANCE
ENGINE
FI SYSTEM DIAGNOSIS
FUEL SYSTEM AND THROTTLE BODY
COOLING SYSTEM
ELECTRICAL SYSTEM
CHASSIS
SERVICING INFORMATION
GROUP INDEX
1
2
3
4
5
6
7
8
9
Advertisement
Chapters
Table of Contents
Troubleshooting

Related Manuals for HYOSUNG MS3 250


Summary of Contents for HYOSUNG MS3 250
- Page 1 This manual is intended for those who have enough knowledge and skills for servicing SERVICING INFORMATION HYOSUNG vehicles. Without such knowledge and skills, you should not attempt servicing by relying on this manual only. Instead, please contact your nearby authorized HYOSUNG motorcycle dealer.
- Page 2 HOW TO USE THIS MANUAL TO LOCATE WHAT YOU ARE LOOKING FOR : 1. The text of this manual is divided into sections. 2. As the title of these sections is listed on the previous page as GROUP INDEX, select the section where you are looking for. 3.
- Page 3 SYMBOL Listed in the table below are the symbols indicating instructions and other information necessary for servicing and meaning associated with them respectively. SYMBOL DEFINITION SYMBOL DEFINITION Torque control required. Apply THREAD LOCK “1324” . Data beside it indicates specified torque. Apply oil.
- Page 4 ABBREVIATIONS USED IN THIS MANUAL ABDC : After Bottom Dead Center : Maximum : Alternating Current : Minimum : American Petroleum Institute ATDC : After Top Dead Center Sensor : Oxygen Sensor (O BBDC : Before Bottom Dead Center : Bettom Dead Center : Right Hand BTDC : Before Top Dead Center...
- Page 5 WIRE COLOR : Black : Gray : Light blue : Blue : Light green : White : Brown : Orange : Yellow : Green : Red : Black with Blue tracer : Black with Brown tracer : Black with Green tracer : Black with Orange tracer : Black with Red tracer : Black with White tracer...
- Page 6 NOTE Difference between photographs and actual motorcycles depends on the markets.
-
Page 7: Table Of Contents
GENERAL INFORMATION CONTENTS INFORMATION LABELS ………………………………………………… 1 - 1 GENERAL PRECAUTIONS …………………………………………… 1 - 2 SERIAL NUMBER LOCATION ………………………………………… 1 - 3 FUEL, OIL AND ENGINE COOLANT RECOMMENDATIONS …… 1 - 4 BREAK-IN PROCEDURES ……………………………………………… 1 - 6 EXTERIOR ILLUSTRATION ……………………………………………... - Page 8 1-1 GENERAL INFORMATION WARNING / CAUTION / NOTE Please read this manual and follow its instructions carefully. To emphasize special information, the symbol and the words WARNING, CAUTION and NOTE have special mean- ings. Pay special attention to the messages highlighted by these signal words. WARNING Indicates a potential hazard that could result in death or injury.
-
Page 9: General Precautions
WARNING � � If parts replacement is necessary, replace the parts with HYOSUNG Genuine Parts or their equivalent. � � When removing parts that are to be reused, keep them arranged in an orderly manner so that they may be reinstalled in the proper order and orientation. -
Page 10: Serial Number Location
1-3 GENERAL INFORMATION SERIAL NUMBER LOCATION The frame serial number or V.I.N. (Vehicle Identification Number) is stamped on the right downside frame. The engine serial number is stamped on the left rearside of the crankcase assembly. These numbers are required especially for registering the machine and ordering spare parts. ◉... -
Page 11: Fuel, Oil And Engine Coolant Recommendations
GENERAL INFORMATION 1-4 FUEL, OIL AND ENGINE COOLANT RECOMMENDATIONS ◉ ◉ FUEL Gasoline used should be graded 91 octane (Research Method) or higher. An unleaded gasoline type is recom- mended. ◉ ◉ ENGINE OIL ▣ ▣ ENGINE OIL SPECIFICATION Classification system Grade 20W50 15W40 15W50... -
Page 12: Front Fork Oil
Hyosung recommends the use of HYOSUNG COOLANT anti-freeze / engine coolant. If this is not available, use an equivalent which is compatible with an aluminum radiator. -
Page 13: Break-In Procedures
GENERAL INFORMATION 1-6 BREAK-IN PROCEDURES During manufacture only the best possible materials are used and all machined parts are finished to a very high standard but it is still necessary to allow the moving parts to “BREAK-IN” before subjecting the engine to maximum stresses. -
Page 14: Exterior Illustration
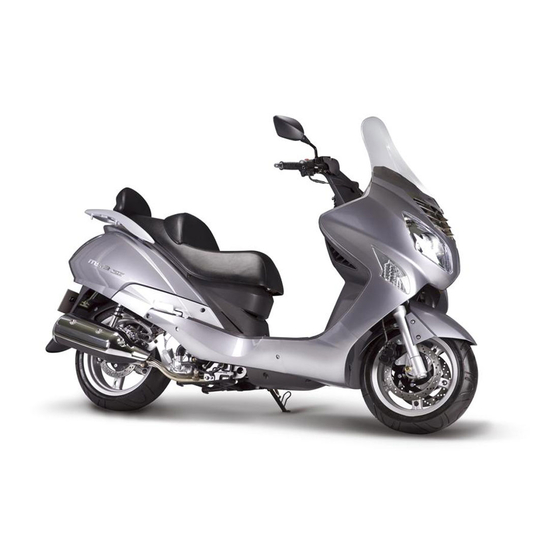
1-7 GENERAL INFORMATION EXTERIOR ILLUSTRATION 1,500 (WHEEL BASE) 2,125 (LENGTH) Turn signal lamp (Rear) Head lamp Turn signal lamp (Front) Position lamp Tail / Brake lamp Rear reflector... -
Page 15: Specifications
GENERAL INFORMATION 1-8 SPECIFICATIONS ◉ ◉ DIMENSIONS AND DRY MASS I T E M Overall length 2,125 mm (83.7 in) Overall width 765 mm (30.1 in) Overall height 1,365 mm (53.7 in) Wheelbase 1,500 mm (59.1 in) Ground clearance 120 mm (4.7 in) Mass 180 kg (397 lbs) 175 kg (386 lbs) - Page 16 1-9 GENERAL INFORMATION ◉ ◉ CHASSIS I T E M Front suspension Telescopic type Rear suspension Swingarm type Steering angle 37°(right & left) Caster 26° Trail 88.5 mm (3.5 in) Front brake Double disk brake Rear brake Disk brake Front tire size 120/70 - 13M/C 53S Rear tire size 140/60 - 14M/C 64S...
- Page 17 PERIODIC MAINTENANCE CONTENTS PERIODIC MAINTENANCE SCHEDULE ………………………… 2 - 1 PERIODIC MAINTENANCE CHART …………………………………… 2 - 1 LUBRICATION POINTS ………………………………………………… 2 - 4 MAINTENANCE PROCEDURES …………………………………… 2 - 5 AIR CLEANER …………………………………………………………… 2 - 5 EXHAUST PIPE NUTS AND MUFFLER BOLTS ……………………… 2 - 6 VALVE CLEARANCE ……………………………………………………...
-
Page 18: Periodic Maintenance Schedule
2-1 PERIODIC MAINTENANCE PERIODIC MAINTENANCE SCHEDULE The chart below lists the recommended intervals for all the required periodic service work necessary to keep the motor- cycle operating at peak performance and economy. CAUTION More frequent servicing should be performed on motorcycles that are used under severe conditions. PERIODIC MAINTENANCE CHART ▣... - Page 19 PERIODIC MAINTENANCE 2-2 ▣ ▣ SIDE COVER STAY have the “Side cover stay” inside the side cover. Use the “Side cover stay” to inspect the engine or the other parts easily. ◆ USE OF SIDE COVER STAY ● Position the motorcycle on the center stand. ●...
- Page 20 2-3 PERIODIC MAINTENANCE ▣ ▣ HELMETBOX INNER COVER have the “Helmetbox inner cover” inside the personal trunk. Use the “Helmetbox inner cover” to inspect the fuel injection system easily. ◆ USE OF HELMETBOX INNER COVER ● Position the motorcycle on the center stand. ●...
-
Page 21: Lubrication Points
PERIODIC MAINTENANCE 2-4 LUBRICATION POINTS Proper lubrication is important for smooth operation and long life of each working part of the motorcycle. Major lubrication points are indicated below. ① ④ ③ ② ⑥ ⑤ ⑦ ① Rear brake lever holder ⑤... -
Page 22: Maintenance Procedures
: do not twist or wring the element or it will � develop tears. ● Immerse the element in HYOSUNG genuine oil �, and then squeeze out the excess oil leaving the element slightly wet. ● Reinstall the cleaned or new air cleaner element... -
Page 23: Exhaust Pipe Nuts And Muffler Bolts
PERIODIC MAINTENANCE 2-6 CAUTION � � Inspect the air cleaner element for tears. A torn element must be replaced. � � If driving under dusty conditions, clean the air cleaner element more frequently. The surest way to accelerate engine wear is to operate the engine without the element or with torn ele- ment. -
Page 24: Valve Clearance
2-7 PERIODIC MAINTENANCE � � � � � � VALVE CLEARANCE Inspect Interval Inspect Initial 1,000 km and Every 4,000 km there- after. Excessive valve clearance results in valve noise and insufficient valve clearance results in valve damage and reduced power. Check the intake and exhaust valve clearances at the distances indicated above and adjust the valve clearances to specification, if necessary. - Page 25 PERIODIC MAINTENANCE 2-8 ● Remove the cylinder head cover. The valve clearance specification is different for both intake and exhaust valves. Valve clearance adjustment must be checked and adjusted : 1) at the time of periodic inspection, 2) when the valve mechanism is serviced, and 3) when the camshafts are removed for servicing.
- Page 26 2-9 PERIODIC MAINTENANCE ● Rotate the crankshaft clockwise with a socket wrench to set the piston at TDC on the compres- sion stroke. (Rotate the crankshaft until the “-” line on the magneto rotor is aligned with the triangle mark on the magneto cover.) ●...
-
Page 27: Spark Plug
PERIODIC MAINTENANCE 2-10 SPARK PLUG Inspect Interval Clean Initial 1,000 km and Every 4,000 km thereafter. ① Replace Every 8,000 km. ● Disconnect the spark plug cap ① and remove the spark plug. TYPE SPARK PLUG SPECIFICATION Hot type CR7E Standard type CR8E Cold type... -
Page 28: Fuel Hose
2-11 PERIODIC MAINTENANCE CAUTION To avoid damaging the cylinder head threads ; first, finger tighten the spark plug, and then tight- en it to the specified torque using the spark plug wrench. ● Insert the spark plug and finger tighten it to the cylinder head and then tighten it to the specified torque. -
Page 29: Engine Oil And Oil Filter
PERIODIC MAINTENANCE 2-12 ● Remove the helmetbox inner cover. (Refer to page 2-3) ② ● Connect the engine tachometer to the high-ten- sion cord. ① ● Start the engine and inspect the engine idle speed between specified range. Engine idle speed 1,400 ~ 1,600 rpm 1,350 ~ 1,550 rpm Engine tachometer : 09900-26006... - Page 30 2-13 PERIODIC MAINTENANCE ● Reinstall the engine oil drain plug ① , and O-ring. Tighten the engine oil drain plug ① to the speci- fied torque. Engine oil drain plug : 35 ~ 45 N∙ ∙ m (3.5 ~ 4.5 kgf∙ ∙ m) ●...
-
Page 31: Transmission Oil
PERIODIC MAINTENANCE 2-14 TRANSMISSION OIL ① Inspect Interval Inspect Initial 1,000 km and Every 8,000 km there- after. ▣ ▣ TRANSMISSION OIL REPLACEMENT After a long period of use, the transmission oil quali- ties will deteriorate and quicken the wear of sliding and interlocking surfaces. -
Page 32: Engine Coolant
2-15 PERIODIC MAINTENANCE ENGINE COOLANT Inspect Interval Replace Every 2 years. ▣ ▣ ENGINE COOLANT LEVEL CHECK ● Keep the motorcycle upright. ● Check the engine coolant level by observing the “F”(FULL) and “L”(LOW) level lines on the engine coolant reservoir tank through the front frame cover. - Page 33 PERIODIC MAINTENANCE 2-16 ▣ ▣ ENGINE COOLANT REPLACEMENT ● Remove the radiator cap cover. ● Remove the radiator cap ① . ● Open the coolant reservoir tank filler cap cover ② by light pressing. ● Remove the coolant reservoir tank filler cap ③ . ●...
-
Page 34: Radiator Hose
2-17 PERIODIC MAINTENANCE ▣ ▣ AIR BLEEDING THE COOLING CIRCUIT ● Add engine coolant up to the raditor cap inlet. ● Support the motorcycle upright. ● Slowly swing the motorcycle, right and left, to bleed the air trapped in the cooling circuit. ●... -
Page 35: Brake System
PERIODIC MAINTENANCE 2-18 BRAKE SYSTEM Inspect Interval [ BRAKE ] Inspect Initial 1,000 km and Every 4,000 km thereafter. [ BRAKE HOSES & BRAKE FLUID ] Inspect Initial 1,000 km and Every 4,000 km thereafter. Replace the brake hoses Every 4 years, CAUTION Replace the brake fluid Every 2 years. - Page 36 2-19 PERIODIC MAINTENANCE ▣ ▣ FRONT AND REAR BRAKE PAD REPLACEMENT ● Remove the brake caliper. ● Remove the brake pads. ● To reassemble, reverse the above sequence. Front brake caliper mounting bolt : 18 ~ 28 N∙ ∙ m (1.8 ~ 2.8 kgf∙ ∙ m) Rear brake caliper mounting bolt : 18 ~ 28 N∙...
- Page 37 PERIODIC MAINTENANCE 2-20 ● Loosen the air bleeder valve and pump the brake lever until the old brake fluid is completely out of the brake system. ● Close the air bleeder valve and disconnect the transparent hose. Fill the reservoir with new brake fluid to the upper line.
- Page 38 2-21 PERIODIC MAINTENANCE ● Squeeze and release the brake lever several times in rapid succession and sqeeze the lever fully without releasing it. Loosen the bleeder valve by turning it a quarter of a turn so that the brake fluid runs into the receptacle, this will remove the tension of the brake lever causing it to touch the handlebar grip.
-
Page 39: Steering
PERIODIC MAINTENANCE 2-22 STEERING Inspect Interval Inspect Initial 1,000 km and Every 4,000 km thereafter. Steering should be adjusted properly for smooth turn- ing of handlebars and safe running. Overtight steer- ing prevents smooth turning of the handlebars and too loose steering will cause poor stability. Check that there is no play in the steering stem while grasp- ing the lower fork tubes by supporting the machine so that the front wheel is off the ground, with the... -
Page 40: Tire
The use of tires other than those specified may Cold inflation tire pressure is as follows. cause instability. It is highly recommended to use a HYOSUNG Genuine Tire. SOLO RIDING DUAL RIDING COLD INFLATION... -
Page 41: Compression Pressure
PERIODIC MAINTENANCE 2-24 COMPRESSION PRESSURE Low compression pressure can indicate some of the The compression of a cylinder is a good indicator of following conditions : ● Excessively worn cylinder wall its internal condition. ● Worn-down piston or piston rings The decision to overhaul the cylinder is often based ●... -
Page 42: Automatic Clutch Inspection
2-25 PERIODIC MAINTENANCE AUTOMATIC CLUTCH INSPEC- TION ● These motorcycles are equipped with an automat- ic clutch and variable ratio belt drive transmission. The engagement of the clutch is governed by engine RPMs and centrifugal mechanism located in the clutch. ●... - Page 43 ENGINE CONTENTS ENGINE REMOVAL AND REMOUNTING ………………………… 3 - 1 ENGINE REMOVAL ……………………………………………………… 3 - 1 ENGINE REMOUNTING ………………………………………………… 3 - 4 ENGINE DISASSEMBLY ………………………………………………… 3 - 5 ENGINE COMPONENT INSPECTION AND SERVICE ……… 3 - 16 CYLINDER HEAD ………………………………………………………… 3 - 16 CYLINDER …………………………………………………………………...
-
Page 44: Engine Removal And Remounting
3-1 ENGINE ENGINE REMOVAL AND REMOUNTING ENGINE REMOVAL ● Remove the 『Seat, side cover & rear fender assembly』 . (Refer to page 8-7) ● Drain the engine oil. (Refer to page 2-12) ● Remove the engine oil filter. (Refer to page 2-13) ●... - Page 45 ENGINE 3-2 ● Disconnect the ignition coil lead wires ① . ① ● Loosen the air cleaner hose clamp screw. ③ ● Remove the air cleaner mounting bolts ② . ● Remove the air cleaner box ③ . ② ● Disconnect the starter motor lead wire ④ and the ④...
- Page 46 3-3 ENGINE ● Remove the water hoses ① and ② . ② ① ● Remove the exhaust pipe nuts �. � ● Remove the muffler mounting bolts �, �. � � � � � �...
-
Page 47: Engine Remounting
ENGINE 3-4 ● Remove the muffler connecting bolt �. � ● Remove the rear brake caliper mounting bolts ① . ● Remove the rear brake hose union bolt ② . ② ● Remove the rear brake caliper ③ . ● Loosen the rear shock absorber lower mounting bolt ④... -
Page 48: Engine Disassembly
3-5 ENGINE ● After remounting the engine, route wiring harness, cables and hoses properly by referring to the sec- tions, for wire routing, cable routing and hose rout- ing. (See pages 9-31 through 36.) ● Pour the specified amount of transmission oil. (Refer to page 2-14) ●... - Page 49 ENGINE 3-6 ● Remove the starter motor ① and the oil return tank ② . ① ② ● Remove the clutch cover ③ . ● Remove the gasket and dowel pins. ③ ● Loosen the fixed drive face nut ④ and clutch ⑥...
- Page 50 3-7 ENGINE ● Remove the belt roller ① . (only for ① ● Remove the thermostat case ② . ② ● Remove the four water pump case mounting bolts, and then remove the water pump case ③ . ③ ● Remove the magneto cover ④ . ④...
- Page 51 ENGINE 3-8 ● Remove the starter idle gear shaft and the starter ① idle gear ① . ● Loosen the magneto rotor nut. ● Remove the magneto rotor ② by using the special tool. ② Rotor remover sliding shaft : 09930-30102 Rotor remover : 09930-30162 ●...
- Page 52 3-9 ENGINE ● Remove the oil pump cover mounting bolt, and then remove the oil pump cover ① . ① ● Remove the oil pump sprocket circlip ② , oil pump chain ③ and oil pump sprocket ④ . ③ ②...
- Page 53 ENGINE 3-10 ● Remove the three front rear fender mounting ① bolts, and then remove the front rear fender ① . ● Remove the rear suspension arm ② . ● Remove the rear axle nut ③ . ③ ② ● Remove the cam chain tension adjuster bolt ④ . ④...
- Page 54 3-11 ENGINE ● Remove the cylinder head cover bolts in diagonal stages, and then remove the cylinder head cover ① . ① ● Remove the cam chain guide ② and camshaft housing ③ . ② ③ ● Remove the dowel pins, intake camshaft ④ exhaust camshaft ⑤...
- Page 55 3-12 ENGINE ● Remove the four cylinder head bolts in diagonal stages. ● Remove the cam chain guide ① . ● Remove the cylinder head ② . ② ① ● Remove the cylinder head gasket ③ and dowel pins ④ . ④...
- Page 56 3-13 ENGINE ● Remove the cylinder gasket ① and dowel pins ② . ② ① ● Place a clean rag over the cylinder base to pre- vent the piston pin circlip from dropping into the crankcase. ● Remove the piston pin circlip. ●...
- Page 57 ENGINE 3-14 ● Remove the rear axle spacer ① , and then remove the rear wheel ② . ② ① ● Remove the rear axle shaft ③ together with the gear box cover ④ . ③ ④ ● Remove the idle shaft ⑤ , idle driven gear ⑥ drive shaft ⑦...
- Page 58 3-15 ENGINE ● Remove the crankcase bolt. ● Separate the crankcase into left and right halves using the special tool. Crankcase separator : 09920-13120 NOTE The crankcase separator plate is parallel with the end face of the crankcase. CAUTION The crankshaft must remain in the left crankcase half.
-
Page 59: Engine Component Inspection And Service
ENGINE 3-16 ● Remove the jet ① . ① ENGINE COMPONENT INS- PECTION AND SERVICE CAUTION ② ② Identify the position of each removed part. Organize the parts in their respective group (for example, exhaust or intake) so that they can be installed in their original positions. - Page 60 3-17 ENGINE ● Remove the valve spring retainer ① , valve spring ② . ● Remove the valve ③ from the other side. ① ● Remove the oil seal ④ with long-nose pliers. ④ ● Remove the valve spring seat ⑤ . ⑤...
- Page 61 ENGINE 3-18 ● Install the valve spring retainer by pressing down ③ ② the spring using the valve spring compressor. Fit the cotter halves to the stem end and release the lifter to allow the cotter ① to wedge between the retainer and the valve stem.
- Page 62 3-19 ENGINE ▣ ▣ VALVE STEM RUNOUT Check the valve stem for abnormal wear or bend. Support the valve using a V-blocks and measure the valve stem runout using the dial gauge, as shown. If the service limit is exceeded or abnormal condition exists, replace the valve with a new one.
- Page 63 ENGINE 3-20 ▣ ▣ VALVE HEAD RADIAL RUNOUT Support the valve using a V-block and measure the valve head radial runout using the dial gauge, as shown. If the runout exceeds the service limit, replace the valve with a new one. Service limit Valve head radial Cylinder head...
- Page 64 3-21 ENGINE ▣ ▣ VALVE SPRING The force of the coil spring keeps the valve seat tight. A weakened spring results in reduced engine power output and often accounts for the chattering noise coming from the valve mechanism. Check the valve springs for proper strength by mea- suring their free length and also by the force required to compress them.
- Page 65 ENGINE 3-22 ▣ ▣ CAMSHAFT The camshaft should be checked for runout and also for wear of cams and journals if the engine has been noted to produce abnormal noise or vibration or a lack of out-put power. Any of these abnormality could be caused by a worn camshaft.
-
Page 66: Cylinder
3-23 ENGINE If the camshaft journal oil clearance exceeds the ser- vice limit, measure the inside diameter of the camshaft housing and outside diameter of the camshaft journal. Replace the camshaft or the cylin- der head and camshaft housing depending upon which one exceeds the specification. -
Page 67: Cam Chain Tension Adjuster And Tensioner
ENGINE 3-24 ▣ ▣ CYLINDER BORE Measure the cylinder bore diameter at six place. If any one of the measurements exceeds the limit, overhaul the cylinder and replace the cylinder. Service limit Standard Cylinder bore 73.080 mm 73.000 ~ 73.015 mm (2.8772 in) (2.8740 ~ 2.8746 in) Standard... -
Page 68: Piston And Piston Ring
3-25 ENGINE PISTON AND PISTON RING ▣ ▣ PISTON DIAMETER INSPECTION Measure the outside diameter of piston in the direc- tion perpendicular to the piston pin axis at the height from the skirt as shown in the illustration using a micrometer. - Page 69 ENGINE 3-26 ▣ ▣ PISTON PIN DIAMETER INSPECTION Using a micrometer, measure the piston pin outside diameter at three position, both the ends and the center. If any of the measurements is founds less than the service limit, replace the pin with a new one. Service limit Piston 18.980 mm...
- Page 70 3-27 ENGINE ▣ ▣ PISTON RING-TO-GROOVE CLEAR- ANCE INSPECTION Remove carbon deposit both from the piston ring and its groove. Fit the piston ring into the groove. With the ring com- pressed and lifted up, measure the clearance on the bottom side of the ring using a thickness gauge.
-
Page 71: Conrod
ENGINE 3-28 CONROD ▣ ▣ CONROD SMALL END INSIDE DIAME- TER INSPECTION Using a dial calipers, measure the conrod small end inside diameter both in vertical and horizontal direc- tions. If any of the measurements exceeds the service limit, replace the conrod. Standard Service limit Conrod small... -
Page 72: Crankshaft
3-29 ENGINE ▣ ▣ CONROD BIG END SIDE CLEARANCE INSPECTION Push the big end of the conrod to one side and mea- sure the side clearance using a thickness gauge. If the clearance exceeds the service limit, replace the crankshaft assembly with a new one or bring the deflection and the side clearance within the service limit by replacing the worn parts (conrod, big end bearing, crankshaft, crank pin, etc.) with new ones. -
Page 73: Crank Balancer And Balancer Driven Gear (Only For )
ENGINE 3-30 CRANK BALANCER AND BALANCER DRIVEN GEAR (Only for ▣ ▣ DISASSEMBLY ● Disassemble the crank balancer and balancer driven gear as shown in the illustration. ▣ ▣ REASSEMBLY Reassemble the crank balancer and balancer driven gear in the reverse order of disassembly. -
Page 74: Movable Drive Face
3-31 ENGINE MOVABLE DRIVE FACE ▣ ▣ ROLLER INSPECTION Inspect each roller and its sliding surface for abnor- mal wear or damage. Measure the diameter of roller with a vernier calipers. If any defects are found or measurement exceeds the limit, replace the rollers as a set. - Page 75 ENGINE 3-32 ● Remove the clutch shoe nut while holding down the clutch shoe assembly by hand. WARNING Gradually back off the clutch shoe assembly pressed down by hand to reduce the clutch spring load. Releasing the hand suddenly may cause the parts to fly apart.
- Page 76 3-33 ENGINE ▣ ▣ CLUTCH SHOE INSPECTION Inspect the linings for crack, uneven wear or burning. Measure the lining thickness with a vernier calipers. If any defects are found or measurement exceeds the limit, replace the clutch shoe assembly with a new one.
- Page 77 ENGINE 3-34 ▣ ▣ DRIVE BELT INSPECTION Inspect the drive belt for crack, separation, abnormal wear or contamination with oil. Measure the belt width with a vernier calipers. If any defects are found or width is less than the ser- vice limit, replace the drive belt with a new one.
-
Page 78: Belt Roller (Only For )
3-35 ENGINE ● Install the movable driven face seat ① . ① ● Install the spring and clutch shoe assembly ② . ● Install the clutch shoe nut ③ while pressing down ③ the clutch shoe assembly. ② ● Tighten the clutch shoe nut ④ to the specified torque with the special tool. -
Page 79: Crankcase Oil Seal, Bearing And Bushing
ENGINE 3-36 CRANKCASE OIL SEAL, BEAR- ING AND BUSHING ▣ ▣ BEARING INSPECTION Rotate the bearing inner race by finger to inspect for abnormal play, noise and smooth rotation whlie the bearings are in the crankcase. Replace the bearing if there is anything unusual. ▣... -
Page 80: Engine Reassembly
3-37 ENGINE ENGINE REASSEMBLY Reassemble the engine in the reverse order of disassembly. Pay special attention to the following points : NOTE � � Apply engine oil to each running and sliding part before reassembling the engine. � � Always keep the drive belt, drive faces and driven faces away from any greasy matter. ◉... - Page 81 ENGINE 3-38 ● Install the crankshaft ① into the left crankcase half. CAUTION Never strike the crankshaft with a plastic hammer when inserting it into the crankcase. It will be easy to install the crankshaft to left crankcase. ① ◉ ◉ CRANKCASE ②...
-
Page 82: Idle Shaft
3-39 ENGINE ◉ ◉ REAR AXLE SHAFT ① ③ ● Install the final driven gear ① and rear axle shaft ② to the gear box cover. ● Install the circlip ③ . ② ◉ ◉ IDLE SHAFT ⑥ ⑤ ● Install the idle shaft ④ , idle driven gear ⑤ drive shaft ⑥... - Page 83 ENGINE 3-40 ◉ ◉ CRANK BALANCER GEAR ② ① � � ● When installing the crank balancer driven No.1 gear ① , align the pawl � of the crank balancer with the recess � of the crank balancer driven No.1 gear ① . (Only for ●...
- Page 84 3-41 ENGINE ◉ ◉ PISTON RING ● Install the oil ring first, the 2nd ring second, and ① the 1st ring last. NOTE � � The 1st ① ① and 2nd ② ② piston rings differ in shape. � � The 1st and 2nd piston rings should be ②...
- Page 85 ENGINE 3-42 ◉ ◉ PISTON AND CYLINDER ● Apply MOLY PASTE on the piston pin and small end of the conrod. MOLY PASTE NOTE Install the piston with the punch mark ① ① on the ① piston head facing toward the exhaust side. ●...
- Page 86 3-43 ENGINE ● Tighten the cylinder base nut ① to the specified ① torque. Cylinder base nut : 7 ~ 11 N∙ ∙ m (0.7 ~ 1.1 kgf∙ ∙ m) ● Install the dowel pins ② and new gasket ③ . CAUTION Use a new cylinder head gasket to prevent gas ③...
- Page 87 ENGINE 3-44 ● After tightening the cylinder head bolts to the specification, tighten the cylinder head base nuts ① to the specified torque. Cylinder head base nut : 7 ~ 11 N∙ ∙ m (0.7 ~ 1.1 kgf∙ ∙ m) ①...
- Page 88 3-45 ENGINE NOTE The cam chain should now be on all three sprockets. Be careful not to move the crankshaft until the camshaft housing and cam chain tensioner are secured. 16 Pins � � � 1 ② ③ ①...
-
Page 89: Cylinder Head Cover
ENGINE 3-46 ● Install the dowel pins ① . ● Place each camshaft housing and cam chain guide into the correct position. NOTE Camshaft housing marked “EX” are for the exhaust side and those marked “IN” are for the ① intake side. - Page 90 3-47 ENGINE ◉ ◉ CAM CHAIN TENSION ADJUSTER ● Apply engine oil to the push rod. ● Unlock the ratchet mechanism and push the push rod ① all the way. ① ● Install the new gasket and cam chain tension adjuster to the cylinder.
-
Page 91: Oil Pump
ENGINE 3-48 ● Install the front rear fender ① , and then tighten ① the three front rear fender mounting bolts. ● Install the washer ② and the crank balancer driv- ③ en gear nut ③ . (Only for ② ●... -
Page 92: Idle Gear
3-49 ENGINE ● Install the oil pump cover ① . ● Tighten the oil pump cover mounting bolt to the specified torque. Oil pump cover mounting bolt : 8 ~ 12 N∙ ∙ m (0.8 ~ 1.2 kgf∙ ∙ m) ①... -
Page 93: Magneto Cover
ENGINE 3-50 ◉ ◉ MAGNETO COVER ① ● Install the dowel pins and gasket. CAUTION Replace the gasket with a new one. ● Install the magneto cover ① . ● Tighten the magneto cover bolts to the specified torque. Magneto cover bolt : 8 ~ 12 N∙... - Page 94 3-51 ENGINE ◉ ◉ CLUTCH SHOE / MOVABLE DRIVEN FACE ASSEMBLY ● Insert the drive belt between the driven faces as deep inside as possible while pulling the movable driven face all the way outside to provide the max- imum belt clearance. CAUTION �...
-
Page 95: Starter Motor
ENGINE 3-52 ● Install the fixed drive face ① . ② ④ ● Install the washer ② and fixed drive face nut ③ . CAUTION Check that the fixed drive face is not fouled with grease or other substance and if found, clean and degrease completely. - Page 96 3-53 ENGINE ◉ ◉ THROTTLE BODY ① ● Install the insulator ① and O-ring. ● Install the intake pipe ② together with the throttle ② body ③ . ● Tighten the intake pipe bolts to the specified torque. Intake pipe bolt : 8 ~ 12 N∙...
- Page 97 FI SYSTEM DIAGNOSIS CONTENTS PRECAUTIONS IN SERVICING ………………………………………… 4- 1 FI SYSTEM TECHNICAL FEATURES ………………………………… 4- 5 SELF-DIAGNOSIS FUNCTION ………………………………………… 4- 9 FI SYSTEM TROUBLESHOOTING …………………………………… 4-12 CUSTOMER COMPLAINT ANALYSIS ………………………………… 4-12 SELF-DIAGNOSTIC PROCEDURES …………………………………… 4-14 SELF-DIAGNOSIS RESET PROCEDURE ……………………………… 4-14 MALFUNCTION CODE AND DEFECTIVE CONDITION ………………...
-
Page 98: Precautions In Servicing
4-1 FI SYSTEM DIAGNOSIS PRECAUTIONS IN SERVICING When handling the component parts or servicing the FI system, observe the following points for the safety of the system. ◉ ◉ ELECTRICAL PARTS ▣ ▣ CONNECTOR / COUPLER ● When connecting a connector, be sure to push it in until a click is felt. - Page 99 FI SYSTEM DIAGNOSIS 4-2 ● When connecting meter probe from the terminal side of the coupler (connection from harness side not being possible), use extra care not to force and cause the male terminal to bend or the female terminal to open. Connect the probe as shown to avoid opening of female terminal.
- Page 100 4-3 FI SYSTEM DIAGNOSIS ● When disconnecting and connecting the ECU, make sure to turn “ ”(OFF) the ignition switch, or electronic parts may get damaged. ● Battery connection in reverse polarity is strictly INCORRECT prohibited. Such a wrong connection will damage the components of the FI system instantly when reverse power is applied.
-
Page 101: Using Testers
FI SYSTEM DIAGNOSIS 4-4 ● Never connect any tester (voltmeter, ohmmeter, or whatever) to the ECU when its coupler is disconnected. Otherwise, damage to ECU may result. ● Never connect an ohmmeter to the ECU with its coupler connected. If attempted, damage to ECU or sensors may result. -
Page 102: Fi System Technical Features
4-5 FI SYSTEM DIAGNOSIS FI SYSTEM TECHNICAL FEATURES ◉ ◉ INJECTION TIME (INJECTION VOLUME) The factors to determine the injection time include the basic fuel injection time, which is calculated on the basis of intake air pressure, engine speed and throttle opening angle, and various compensations. These compensations are determined according to the signals from various sensors that detect the engine and driving conditions. -
Page 103: Injection Stop Control
FI SYSTEM DIAGNOSIS 4-6 ◉ ◉ COMPENSATION OF INJECTION TIME (VOLUME) The following different signals are output from the respective sensors for compensation of the fuel injection time (volume). SIGNAL DESCRIPTION WATER COOLANT TEMPERATURE When engine coolant temperature is low, injection time (volume) SENSOR SIGNAL is increased. - Page 104 4-7 FI SYSTEM DIAGNOSIS ◉ ◉ FI SYSTEM PARTS LOCATION ① ⑤ Speedometer Fuel injector ② ⑥ TP sensor Ignition coil ③ ⑦ IAT sensor Fuel pump relay ④ ISC solenoid...
- Page 105 FI SYSTEM DIAGNOSIS 4-8 ⑧ ⑪ IAP sensor SAV solenoid ⑨ ⑫ WT sensor Pick-up coil ⑩ ⑬ TO sensor Oxygen sensor...
-
Page 106: Self-Diagnosis Function
4-9 FI SYSTEM DIAGNOSIS SELF-DIAGNOSIS FUNCTION The self-diagnosis function is incorporated in the ECU. The function has two modes, “USER MODE” and “DEALER ” ① . To check the function of the individual FI MODE”. The user can only be notified by the “FI” check lamp “ system devices, the dealer mode is prepared. -
Page 107: Dealer Mode
FI SYSTEM DIAGNOSIS 4-10 ◉ ◉ DEALER MODE The defective function is memorized in the computer. Use the special tool’s coupler to connect to the dealer mode coupler. (Refer to page 4-14) The memorized malfunction code is displayed on LCD (DISPLAY) panel. Malfunction means that the ECU does not receive signal from the devices. - Page 108 4-11 FI SYSTEM DIAGNOSIS CODE MALFUNCTION PART REMARKS Throttle position sensor (TPS) Water temperature sensor (WTS) Intake air pressure sensor (IAPS) Intake air temperature sensor (IATS) Oxygen sensor (O Tip over sensor (TOS) IG coil Idle speed control solenoid (ISC solenoid) Fuel injector Secondary air valve solenoid (SAV solenoid) Fuel pump relay...
-
Page 109: Fi System Troubleshooting
FI SYSTEM DIAGNOSIS 4-12 FI SYSTEM TROUBLESHOOTING CUSTOMER COMPLAINT ANALYSIS Record details of the problem (failure, complaint) and how it occurred as described by the customer. For this purpose, use of such an inspection form will facilitate collecting information to the point required for proper analysis and diagnosis. - Page 110 4-13 FI SYSTEM DIAGNOSIS MOTORCYCLE / ENVIRONMENTAL CONDITION WHEN PROBLEM OCCURS Environmental condition Weather � � � � � � Fair Cloudy Rain Snow Always Other Temperature � � � � � Warm Cool Cold ( °F / °C) Always Frequency �...
-
Page 111: Self-Diagnostic Procedures
FI SYSTEM DIAGNOSIS 4-14 SELF-DIAGNOSTIC PROCEDURES Don’t disconnect couplers from ECU, battery cable from battery, ECU ground wire harness from engine or main fuse before confirming malfunction code (self-diagnostic trouble code) stored in memory. Such disconnection will erase memorized information in ECU memory. -
Page 112: Malfunction Code And Defective Condition
4-15 FI SYSTEM DIAGNOSIS MALFUNCTION CODE AND DEFECTIVE CONDITION DETECTED FAILURE CONDITION MALFUNCTION DETECTED ITEM CODE CHECK FOR The sensor should produce following voltage. 0.1 V � sensor voltage � 4.8 V Throttle position sensor Without the above range for 4 sec. and more, C14 is indicated. (TPS) Throttle position sensor, lead wire / coupler connection. - Page 113 FI SYSTEM DIAGNOSIS 4-16 DETECTED FAILURE CONDITION MALFUNCTION DETECTED ITEM CODE CHECK FOR When the IC of the ECU electric current gets 6A and more, C24 is indicated. Ignition coil (IG coil) Ignition coil, wiring / coupler connection, power supply from the battery.
-
Page 114: "C14" Tp Sensor Circuit Malfunction
4-17 FI SYSTEM DIAGNOSIS “C14” TP SENSOR CIRCUIT MALFUNCTION DETECTED CONDITION POSSIBLE CAUSE Output voltage is out of the specified range. ● TP sensor circuit open or short. 0.1 V � Sensor voltage � 4.8 V ● TP sensor malfunction. ●... - Page 115 FI SYSTEM DIAGNOSIS 4-18 ◈ Step 2 1) Lift and support the side cover with the side cover stay. (Refer to page 2-2) 2) Turn the ignition switch “ ” (OFF) position. 3) Disconnect the TP sensor coupler. 4) Check the continuity between � and ground. ∞...
- Page 116 4-19 FI SYSTEM DIAGNOSIS ◈ Step 3 1) Connect the TP sensor coupler. 2) Insert the needle pointed probes to the lead wire coupler. 3) Turn the ignition switch “ ” (ON) position. Measure the TP sensor output voltage at the coupler (between �...
-
Page 117: "C15" Wt Sensor Circuit Malfunction
FI SYSTEM DIAGNOSIS 4-20 “C15” WT SENSOR CIRCUIT MALFUNCTION DETECTED CONDITION POSSIBLE CAUSE Output voltage is out of the specified range. ● WT sensor circuit open or short. 0.1 V � Sensor voltage � 4.6 V ● WT sensor malfunction. ●... - Page 118 4-21 FI SYSTEM DIAGNOSIS ◈ Step 2 1) Turn the ignition switch “ ” (OFF) position. 2) Measure the WT sensor resistance. (Refer to page 6-8 for details.) WT sensor resistance Engine Coolant Temp. Resistance (To ECU) 0 ℃ (32 ℉ ) ㏀...
-
Page 119: "C17" Iap Sensor Circuit Malfunction
FI SYSTEM DIAGNOSIS 4-22 “C17” IAP SENSOR CIRCUIT MALFUNCTION DETECTED CONDITION POSSIBLE CAUSE IAP sensor voltage is out of the specified range. ● Clogged vacuum passage between throttle body 0.1 V � Sensor voltage � 4.8 V and IAP sensor. NOTE : ●... - Page 120 4-23 FI SYSTEM DIAGNOSIS ◈ Step 2 1) Connect the IAP sensor coupler. 2) Insert the needle pointed probes to the lead wire coupler. 3) Start the engine at idle speed. 4) Measure the IAP sensor output voltage at the wire side coupler (between BL and BW wires).
-
Page 121: "C21" Iat Sensor Circuit Malfunction
FI SYSTEM DIAGNOSIS 4-24 “C21” IAT SENSOR CIRCUIT MALFUNCTION DETECTED CONDITION POSSIBLE CAUSE Output voltage is out of the specified range. ● IAT sensor circuit open or short. 0.1 V � Sensor voltage < 4.6 V ● IAT sensor malfunction. ●... - Page 122 4-25 FI SYSTEM DIAGNOSIS ◈ Step 2 1) Turn the ignition switch “ ” (OFF) position. 2) Measure the IAT sensor resistance. IAT sensor resistance Intake Air Temp. Resistance ㏀ -10 ℃ (14 ℉ ) Approx. 53.30 ㏀ 0 ℃ (32 ℉ ) Approx.
-
Page 123: "C22" Oxygen Sensor Circuit Malfunction
FI SYSTEM DIAGNOSIS 4-26 “C22” OXYGEN SENSOR CIRCUIT MALFUNCTION DETECTED CONDITION POSSIBLE CAUSE Oxygen sensor signal is not input in ECU since then ● Oxygen sensor, Oxygen sensor heater circuit open more than 120 sec after the engine run. or short. ●... -
Page 124: "C23" To Sensor Circuit Malfunction
4-27 FI SYSTEM DIAGNOSIS “C23” TO SENSOR CIRCUIT MALFUNCTION DETECTED CONDITION POSSIBLE CAUSE Output voltage is out of the specified range. ● TO sensor circuit short or leaned more than 60。 . 4.5 V � Sensor voltage � 5.5 V ●... -
Page 125: "C27" Isc Solenoid Range Abnormal
FI SYSTEM DIAGNOSIS 4-28 “C27” ISC SOLENOID RANGE ABNORMAL DETECTED CONDITION POSSIBLE CAUSE ● ISC solenoid ISC solenoid’s step is out of the specified range. O step � solenoid step � 100 step ● ISC solenoid’s step is out of the specifie range. ●... -
Page 126: "C32" Fuel Injector Circuit Malfunction
4-29 FI SYSTEM DIAGNOSIS “C32” FUEL INJECTOR CIRCUIT MALFUNCTION DETECTED CONDITION POSSIBLE CAUSE Fuel injector not comes in voltage from battery. ● Injector circuit open or short. ● Injector malfunction. ● ECU malfunction. ▣ ▣ INSPECTION ◈ Step 1 1) Lift and support the side cover with the side cover stay. - Page 127 FI SYSTEM DIAGNOSIS 4-30 ◈ Step 2 1) Turn the ignition switch “ ” (ON) position. 2) Measure the injector voltage between YG wire and ground. Battery voltage Injector voltage ( � YG - � Ground ) Tester knob indication : Voltage ( NOTE Injector voltage can be detected only 3 seconds after ignition switch is turned “...
-
Page 128: "C37" Sav Solenoid Malfunction
4-31 FI SYSTEM DIAGNOSIS “C37” SAV SOLENOID MALFUNCTION DETECTED CONDITION POSSIBLE CAUSE ● SAV solenoid circuit open or short. SAV solenoid voltage is not input in ECU. ● SAV solenoid malfunction. ● ECU malfunction. ▣ ▣ INSPECTION 1) Lift and support the side cover with the side cover stay. -
Page 129: "C41" Fuel Pump Relay Circuit Malfunction
FI SYSTEM DIAGNOSIS 4-32 “C41” FUEL PUMP RELAY CIRCUIT MALFUNCTION DETECTED CONDITION POSSIBLE CAUSE No voltage is applied to the both injectors for 3 sec. ● Fuel pump relay circuit open or short. after the contact of fuel pump relay is turned “ON” ●... -
Page 130: C43 " " Oxygen Sensor Heater Circuit Malfunction
4-33 FI SYSTEM DIAGNOSIS “C43” OXYGEN SENSOR HEATER CIRCUIT MALFUNTION DETECTED CONDITION POSSIBLE CAUSE ● Oxygen sensor, Oxygen sensor heater circuit open Oxygen sensor heater signal is not input in ECU. or short. ● Oxygen sensor, Oxygen sensor heater malfunction. ●... -
Page 131: Sensors
FI SYSTEM DIAGNOSIS 4-34 SENSORS ① ◉ ◉ PICK-UP COIL INSPECTION The pick-up coil ① is installed in the magneto cover. (Refer to page 7-6) ◉ ◉ PICK-UP COIL REMOVAL AND INSTALLATION ● Remove the magneto cover. (Refer to page 3-7) ●... - Page 132 4-35 FI SYSTEM DIAGNOSIS ◉ ◉ IAT SENSOR INSPECTION ① The intake air temperature (IAT) sensor ① installed at the left side of the air cleaner case. (Refer to page 4-24) ◉ ◉ IAT SENSOR REMOVAL AND INSTALLATION ● Lift and support the side cover with the side cover stay.
- Page 133 FUEL SYSTEM AND THROTTLE BODY CONTENTS FUEL SYSTEM …………………………………………………………… 5- 1 REMOVAL AND DISASSEMBLY ………………………………………… 5- 2 REASSEMBLY AND INSTALLATION …………………………………… 5- 3 FUEL PRESSURE INSPECTION ………………………………………… 5- 4 FUEL PUMP RELAY INSPECTION ……………………………………… 5- 4 FUEL MESH FILTER INSPECTION AND CLEANING …………………… 5- 5 FUEL LEVEL GAUGE INSPECTION ………………………………………...
-
Page 134: Fuel System
5-1 FUEL SYSTEM AND THROTTLE BODY FUEL SYSTEM... -
Page 135: Removal And Disassembly
FUEL SYSTEM AND THROTTLE BODY 5-2 REMOVAL AND DISASSEMBLY ● Remove the rear leg shield.(Refer to page 8-7) ● Remove the lower leg rear shield. (Refer to page 8-7) ● Remove the 『Seat, side cover & rear fender assembly』 . (Refer to page 8-7) ●... -
Page 136: Reassembly And Installation
5-3 FUEL SYSTEM AND THROTTLE BODY ● Remove the fuel tank forward. CAUTION As gasoline leakage may occur in this operation, keep away from fire and sparks. ● Remove the fuel pump assembly ① by removing its mounting bolts diagonally. WARNING �... -
Page 137: Fuel Pressure Inspection
FUEL SYSTEM AND THROTTLE BODY 5-4 FUEL PRESSURE INSPECTION ● Lift and support the side cover with the side cover stay. (Refer to page 2-2) ● Place a rag under the fuel injector hose. ● Disconnect the fuel injector hose from the fuel delivery pipe. -
Page 138: Fuel Mesh Filter Inspection And Cleaning
5-5 FUEL SYSTEM AND THROTTLE BODY First, check the insulation between ① and ② terminals with pocket tester. Then apply 12 volts to ① ③ ③ and ④ terminals, � to ③ and � to ④ , and check the continuity between ① and ②... -
Page 139: Throttle Body
FUEL SYSTEM AND THROTTLE BODY 5-6 THROTTLE BODY... -
Page 140: Removal
5-7 FUEL SYSTEM AND THROTTLE BODY REMOVAL ● Lift and support the side cover with the side cover stay. (Refer to page 2-2) ● Remove the all coupler to related the throttle body. ● Loosen the clamp screw ① . ①... -
Page 141: Disassembly
FUEL SYSTEM AND THROTTLE BODY 5-8 DISASSEMBLY CAUTION The throttle body is assembled precisely in factory. Do not disassemble it other than shown in this manual. ● Remove the ISC solenoid ① . ① ● Remove the IAP sensor ② . ●... - Page 142 5-9 FUEL SYSTEM AND THROTTLE BODY CAUTION ① Never remove the idle screw ① ① . CAUTION ② Never remove the TP sensor ② ② . CAUTION ③ Never remove the throttle valve ③ ③ . CAUTION ④ Never remove the throttle lever stopper screw ④ ④ .
-
Page 143: Cleaning
FUEL SYSTEM AND THROTTLE BODY 5-10 CLEANING ● Clean all passageways with a spray-type throttle body cleaner and blow dry with compressed air. WARNING Some throttle body cleaning chemicals, especially dip-type soaking solutions, are very corrosive and must be handled carefully. Always follow the chemical manufacture’s instructions on proper use, handling and storage. -
Page 144: Reassembly
5-11 FUEL SYSTEM AND THROTTLE BODY REASSEMBLY ② ① Reassemble the throttle body in the reverse order of disassembly. Pay attention to the following points : CAUTION Never operate the idle screw ① ① and throttle lever stopper screw ② ② to avoid variations of the carburetion setting. -
Page 145: Installation
FUEL SYSTEM AND THROTTLE BODY 5-12 ● Tighten the ISC solenoid bolt to the specified torque. ISC solenoid bolt : 6 ~ 8 N∙ ∙ m (0.6 ~ 0.8 kgf∙ ∙ m) INSTALLATION Installation is the reverse order of removal. THROTTLE CABLE ADJUSTMENT �... - Page 146 COOLING SYSTEM CONTENTS ENGINE COOLANT ……………………………………………………… 6 - 1 COOLING CIRCUIT ……………………………………………………… 6 - 2 RADIATOR …………………………………………………………………… 6 - 2 COOLING FAN ……………………………………………………………… 6- 5 COOLING FAN THERMO-SWITCH ………………………………… 6- 6 WATER TEMPERATURE SENSOR ………………………………… 6 - 8 THERMOSTAT ……………………………………………………………… 6 - 9 WATER PUMP ………………………………………………………………...
-
Page 147: Engine Coolant
6-1 COOLING SYSTEM ENGINE COOLANT Anti-freeze density Freezing point -31 ℃ (-24 ℉ ) At the time of manufacture, the cooling system is filled with a 50 : 50 mixture of distilled water and -40 ℃ (-40 ℉ ) ethylene glycol anti-freeze. -55 ℃... -
Page 148: Cooling Circuit
COOLING SYSTEM 6-2 COOLING CIRCUIT RESERVOIR TANK BY-PASS THERMOSTAT RADIATOR COOLING WT SENSOR FAN THERMO SWITCH CYLINDER CYLINDER HEAD WATER PUMP RADIATOR ◉ ◉ REMOVAL ● Remove the front leg shield and leg shield cover. (Refer to page 8-3 ~ 6) ●... - Page 149 6-3 COOLING SYSTEM ● Remove the radiator inlet hose ① . ① ● Disconnect reserve tank hose ② . ② ● Disconnect the cooling fan motor lead wire cou- pler ③ . ③ ● Remove the radiator by the mounting bolts. ◉...
- Page 150 COOLING SYSTEM 6-4 Fins bent down or dented can be repaired by straightening them with the blade of a small screw- driver. ◉ ◉ INSPECTION OF WATER HOSE ● Remove the lower leg rear shield. (Refer to page 8-7) Any water hose found in a cracked condition or flat- tened or water leaked must be replaced.
-
Page 151: Cooling Fan
6-5 COOLING SYSTEM COOLING FAN ① ◉ ◉ INSPECTION ● Remove the front leg shield and leg shield cover. (Refer to page 8-3 ~ 6) ● Disconnect the cooling fan motor lead wire cou- pler ① and its thermo-switch lead wire coupler. Test the cooling fan motor for load current with an ammeter connected as shown in the illustration. -
Page 152: Cooling Fan Thermo-Switch
COOLING SYSTEM 6-6 COOLING FAN THERMO-SWITCH The cooling fan is secured behind the radiator by three bolts and is automatically controlled by the thermo-switch. The thermo-switch remains open when the temperature of the engine coolant is low, but closes when the tempera- ture reaches approximately 78 ℃... - Page 153 6-7 COOLING SYSTEM ◉ ◉ INSTALLATION Install the cooling fan thermo-switch in the reverse order of removal. Pay attention to the following points : ● Install a new O-ring ① and apply engine coolant to the O-ring. ● Tighten the cooling fan thermo-switch to the speci- fied torque.
-
Page 154: Water Temperature Sensor
COOLING SYSTEM 6-8 WATER TEMPERATURE ① SENSOR ◉ ◉ REMOVAL ● Lift and support the side cover with the side cover stay. (Refer to page 2-2) ● Drain engine coolant. (Refer to page 2-16) ● Disconnect the WT (Water Temperature) sensor lead wire coupler. -
Page 155: Thermostat
6-9 COOLING SYSTEM THERMOSTAT ◉ ◉ REMOVAL ● Lift and support the side cover with the side cover stay. (Refer to page 2-2) ● Drain engine coolant. (Refer to page 2-16) ● Place a rag under the thermostat case. ● Remove the thermostat case cap. ●... - Page 156 COOLING SYSTEM 6-10 ● Keep on heating the water to raise its tempera- ture. ● Just when the water temperature reaches speci- fied value, the thermostat valve should have lifted by at least 8.0 mm (0.32 in). � Standard Thermostat valve lift Over 8.0 mm at 90 ℃...
-
Page 157: Water Pump
6-11 COOLING SYSTEM WATER PUMP ① ◉ ◉ REMOVAL AND DISASSEMBLY ● Drain engine coolant. (Refer to page 2-16) ● Disconnect the water hose ① . ● Remove the water pump case ② . ② ● Remove the O-ring ③ of the water pump case. - Page 158 COOLING SYSTEM 6-12 ● Remove the impeller ① from the other side. ① ● Remove the circlip ② , magneto cover bearing ③ , oil seal ④ and retainer ⑤ . Bearing remover (12mm) : 09921-20210 ② ③ ④ ⑤ ●...
- Page 159 6-13 COOLING SYSTEM ▣ ▣ IMPELLER Visually inspect the impeller and its shaft for damage. ◉ ◉ REASSEMBLY AND REMOUNTING Install the water pump in the reverse order of removal. Pay attention to the following points : ● Install the water pump case bearing. ●...
- Page 160 COOLING SYSTEM 6-14 ● Fix the impeller shaft with the E-ring ① . ● Fill the bearing with engine oil until engine oil comes out from the hole of the bearing housing. ① ● Apply engine collant to the O-ring ② . ●...
- Page 161 ELECTRICAL SYSTEM CONTENTS LOCATION OF ELECTRICAL COMPONENTS …………………… 7 - 1 IGNITION SYSTEM ………………………………………………………… 7 - 3 CHARGING SYSTEM ……………………………………………………… 7 - 5 STARTER SYSTEM ………………………………………………………… 7 - 8 SWITCHES …………………………………………………………………… 7 - 11 LAMPS ………………………………………………………………………… 7 - 12 BATTERY ………………………………………………………………………...
-
Page 162: Location Of Electrical Components
7-1 ELECTRICAL SYSTEM LOCATION OF ELECTRICAL COMPONENTS ① ⑥ ⑤ ② ⑦ ④ ③ ① Cooling fan motor ③ IAP sensor ⑥ ISC solenoid ② ④ ⑦ Cooling fan thermo-switch Fuel injector TP sensor ⑤ Ignition coil ⑬ ⑭ ⑮ ⑫... - Page 163 ELECTRICAL SYSTEM 7-2 � � � � � � � Battery � � Starter motor relay � � Main fuse (30A) Regulator / Rectifier � Head lamp fuse (15A) � � � � � � � WT sensor Oxygen sensor & Oxygen sensor IAT sensor �...
-
Page 164: Ignition System
7-3 ELECTRICAL SYSTEM IGNITION SYSTEM IG. S/W FUSE BATTERY 12V 8Ah ◉ ◉ IGNITION SYSTEM INSPEC- TION ▣ ▣ IGNITION COIL PRIMARY PEAK VOLT- AGE INSPECTION ● Lift and support the side cover with the side cover stay. (Refer to page 2-2) ●... - Page 165 ELECTRICAL SYSTEM 7-4 ● Turn the ignition switch to the “ ” (ON) position. ● Grasp the front or rear brake lever. ● Press the starter switch and allow the engine to crank for a few seconds, and then measure the ignition coil primary peak voltage.
-
Page 166: Charging System
7-5 ELECTRICAL SYSTEM CHARGING SYSTEM Regulator / Rectifier IG. switch A. C generator ◉ ◉ INSPECTION ▣ ▣ CHARGING OUTPUT CHECK Start the engine and keep it running at 5,000 rpm. Using the pocket tester, measure the DC voltage between the battery terminal � and �... - Page 167 ELECTRICAL SYSTEM 7-6 ▣ ▣ MAGNETO Using the pocket tester, measure the resistance between the lead wires in the following table. If the resistance is not within the specified value, replace the stator coil, with a new one. Stator coil resistance Standard G-L 80 ~ 120 Ϊ...
- Page 168 7-7 ELECTRICAL SYSTEM ▣ ▣ REGULATOR / RECTIFIER ● Remove the 『Seat, side cover & rear fender assembly』 . (Refer to page 8-7) ● Disconnect the regulator / rectifier couplers. ● Using the pocket tester, measure the resistance between the terminals in the following table. If the resistance checked is incorrect, replace the regulator / rectifier.
-
Page 169: Starter System
ELECTRICAL SYSTEM 7-8 STARTER SYSTEM ◉ ◉ STARTER SYSTEM DESCRIPTION Ignition Starter Brake Engine stop switch switch switch switch Fuse Starter Starter motor relay These motorcycles can only start the engine with squeezing the front or rear brake. -
Page 170: Starter Motor Removal
7-9 ELECTRICAL SYSTEM ◉ ◉ STARTER MOTOR REMOVAL AND DISASSEMBLY ● Disconnect the starter motor lead wire. ● Loosen the starter motor mounting bolts ① . ● Remove the starter motor. ① ◉ ◉ STARTER MOTOR INSPEC- TION ▣ ▣ CARBON BRUSH Inspect the carbon brush for abnormal wear, crack or smoothness in the brush holder. -
Page 171: Starter Motor Reassembly
ELECTRICAL SYSTEM 7-10 ◉ ◉ STARTER MOTOR REASSEMBLY Reassemble the starter motor. Pay attention to the following points : ● Reassembly the starter motor as shown in the illustration. ● Align the match mark ① on the housing with the ②... -
Page 172: Switches
7-11 ELECTRICAL SYSTEM SWITCHES Measure each switch for continuity using a tester. If any abnormality is found, replace the respective switch assemblies with new ones. Pocket tester : 09900-25002 IGNITION SWITCH HAZARD WARNING SWITCH ○ ○ ○ ○ “ ”(ON) ●... -
Page 173: Lamps
ELECTRICAL SYSTEM 7-12 LAMPS ◉ ◉ HEAD LAMP CAUTION If you touch the bulb with your bare hands, clean the bulb with a cloth moistened with alcohol or soapy water to prevent premature bulb failure. ▣ ▣ HEAD LAMP BULB REPLACEMENT ①... - Page 174 7-13 ELECTRICAL SYSTEM ◉ ◉ TURN SIGNAL LAMP ▣ ▣ TURN SIGNAL LAMP REPLACEMENT These motorcycles’s turn signal lamp is LED (Light Emitting Diode) type. If any abnormal condition are found, replace the turn signal lamp assembly. ◉ ◉ BRAKE / TAIL LAMP CAUTION If you touch the bulb with your bare hands, clean the bulb with a cloth moistened with alcohol or...
-
Page 175: Combination Meter
ELECTRICAL SYSTEM 7-14 ◉ ◉ COMBINATION METER Remove the combination meter. Disassemble the combination meter as shown in the illustration. ▣ ▣ INSPECTION Using the pocket tester, check the continuity between lead wires in the following illustration. If the continuity measured incorrect, replace the respective part. -
Page 176: Battery
7-15 ELECTRICAL SYSTEM BATTERY ◉ ◉ CAUTION OF BATTERY TREATMENT The battery needs attention generally as it occur flammability gas. If you don’t follow the instruction in the below, there may be a explosion and severe accident. Therefore, pay attention to the following points. ●... - Page 177 ELECTRICAL SYSTEM 7-16 Seal ③ Pouring of battery electrolyte When insert the nozzles of the electrolyte container into the battery’s electrolyte filler holes, holding the container firmly so that it does not fall. Take precaution not to allow any fluid to spill. CAUTION The pouring of electrolyte may not be done if the electrolyte container is pushed slopely.
-
Page 178: Recharging Operation
7-17 ELECTRICAL SYSTEM ⑤ Separation of electrolyte container After confirming that you entered the electrolyte into battery completely, remove the electrolyte containers from the battery. CAUTION Draw the empty receptacle out slowly because there may be a chance remaining electrolyte vaporize. ⑥... - Page 179 CHASSIS CONTENTS EXTERIOR PARTS ………………………………………………………… 8- 1 FRONT WHEEL …………………………………………………………… 8 - 9 FRONT BRAKE ……………………………………………………………… 8-15 HANDLEBAR ……………………………………………………………… 8 - 23 FRONT FORK ……………………………………………………………… 8 - 25 STEERING ……………………………………………………………………… 8 -29 REAR WHEEL ……………………………………………………………… 8 -32 REAR BRAKE ………………………………………………………………… 8-35 REAR SHOCK ABSORBER ………………………………………………...
-
Page 180: Exterior Parts
8-1 CHASSIS EXTERIOR PARTS ◉ ◉ HANDLE COVER ● Remove the two screws ① of the handle rear cover. ① ● Remove the three screws ② of the leg shield front upper decoration. ● Remove the leg shield front upper decoration ③ . ②... - Page 181 CHASSIS 8-2 ● Remove the three screws ① of the windscreen. ● Remove the windscreen ② . ② ① ● Remove the two screws ③ of the handle front cover. ● Remove the handle front cover ④ . ④ ③ ●...
- Page 182 8-3 CHASSIS ◉ ◉ SPEEDOMETER COVER ② ① ● Remove the handle cover. (Refer to page 8-1) ● Remove the two screws ① of the speedometer rear cover. ● Remove the speedometer rear cover ② . ● Remove the two screws ③ of the speedometer front cover.
- Page 183 CHASSIS 8-4 ● Remove the two screws ① of the front leg shield. ① ① ● Remove the four screws ② of the leg shield cover, right and left. ② ② ● Disconnect the head lamp coupler ③ and position lamp coupler ④...
- Page 184 8-5 CHASSIS ● Remove the two screws ① of the leg shield cover. ① ● Disconnect the speedometer couplers ② , ③ , ④ . ③ ● Remove the speedometer. ④ ② ◉ ◉ LEG SHIELD COVER ● Remove the front leg shield. (Refer to page 8-3) ●...
- Page 185 CHASSIS 8-6 ● Remove the output terminal coupler ① . ① ● Remove the leg shield cover screws ② , ③ , ④ . ● Remove the leg shield cover. ② ③ ④ ◉ ◉ LOWER LEG FRONT SHIELD ● Remove the leg shield cover. (Refer to page 8-5) ●...
- Page 186 8-7 CHASSIS ◉ ◉ REAR LEG SHIELD ● Remove the rear leg shield bolts ① . ② ● Remove the rear leg shield ② . ① ◉ ◉ LOWER LEG REAR SHIELD ● Remove the screws ③ of the right and left lower leg rear shield.
- Page 187 CHASSIS 8-8 ● Remove the two bolts ① of the rear carrier. ● Push the side cover for the rear side. CAUTION Proceed with care. Do not damage the cover, reflector and lamp. Handle plastic and paint-finished parts with care to avoid scratching or damage.
-
Page 188: Front Wheel
8-9 CHASSIS FRONT WHEEL ◉ ◉ REMOVAL AND DISASSEMBLY ● Remove the front brake caliper, right and left, by removing the mounting bolts �. CAUTION Do not operate the front brake lever while dis- � mounting the caliper. ● Remove the front axle nut �. ●... - Page 189 CHASSIS 8-10 � � [Left front brake] ● Remove the disk plate, right and left, by removing ① the bolts ① . ● Remove the spacer ② . ② ● Remove the oil seal ③ with the special tool. ③ Oil seal remover : 09913-50121...
- Page 190 8-11 CHASSIS Drive out the both bearing with the special tool in the following procedures. ● Insert the adapter into the bearing. ● After inserting the wedge bar from the opposit side, lock the wedge bar in the slit of the adapter. ●...
- Page 191 CHASSIS 8-12 ▣ ▣ TIRE � For inspection of the tire : Refer to page 2-23 Check the tire pressure, and examine the value for evidence of air leakage. SOLD RIDING DUAL RIDING COLD INFLATION TIRE PRESSURE kgf/cm kPa kgf/cm Front 1.75 25.0...
- Page 192 8-13 CHASSIS ● Install the spacer ① . ① ▣ ▣ DISK PLATE ● Install the disk plate and tighten them to the speci- fied torque. ● Apply THREAD LOCK “1324” to the front brake disk bolt, right and left. Front brake disk bolt : 18 ~ 28 N∙...
- Page 193 CHASSIS 8-14 ▣ ▣ FRONT WHEEL ● Tighten the front axle nut to the specified torque. Front axle nut : 50 ~ 70 N∙ ∙ m (5.0 ~ 7.0 kgf∙ ∙ m) ● Tighten the front brake caliper mounting bolts, right and left, to the specified torque.
-
Page 194: Front Brake
8-15 CHASSIS FRONT BRAKE WARNING � � This brake system is filled with an ethylene glycol-based DOT4 brake fluid. Do not use or mix different types of fluid, such as silicone-based or petroleum-based brake fluids. � � Do not use any brake fluid taken from old, used or unsealed containers. Never reuse brake fluid left over from the last servicing or stored for a long periods. -
Page 195: Brake Fluid Replacement
CHASSIS 8-16 ◉ ◉ BRAKE FLUID REPLACEMENT ● For replacing procedure of brake fluid : Refer to page 2-19 ◉ ◉ BRAKE PAD REPLACEMENT ● For replacing procedure of brake pad : Refer to page 2-19 ◉ ◉ CALIPER DISASSEMBLY ●... - Page 196 8-17 CHASSIS ● Remove the brake pad mounting cap bolt ① . ① ● Remove the brake pad mounting bolt ② . ② ● Remove the brake caliper holder ③ . ③ ● Using an air gun, push out the caliper piston. WARNING �...
-
Page 197: Caliper Inspection
CHASSIS 8-18 ● Remove the dust seal ① and piston seal ② . ① NOTE � � Care not to cause scratch on the cylinder bore. � � Do not reuse the piston seal and dust seal that have been removed. ②... - Page 198 8-19 CHASSIS ● Apply SILICONE GREASE to the brake caliper holder. SILICONE GREASE ● Install the brake pads. (Refer to page 2-19) ● Tighten the caliper mounting bolts ① . ● With the hose end seated to the stopper, tighten the right and left front brake hose union bolt ②...
- Page 199 CHASSIS 8-20 Measure the runout using the dial gauge. Replace the brake disk if the runout exceeds the ser- vice limit. Service limit Brake disk runout 0.08 mm (0.003 in) Dial gauge : 09900-20606 Magnetic stand : 09900-20701 ● If measurement exceeds the service limit, replace the brake disk.
-
Page 200: Master Cylinder Inspection
8-21 CHASSIS ● Detach the dust seal boot ① and remove the cir- clip. ③ ② ① ● Pull out the piston/cup set ② and spring ③ . ◉ ◉ MASTER CYLINDER INSPECTION Inspect the master cylinder bore for any scratches or other damage. - Page 201 CHASSIS 8-22 ● When remounting the master cylinder to the han- Master Cylinder dlebars, first tighten the clamp bolts for upside as shown. WARNING Bleed air from the brake fluid circuit after assem- bling master cylinder. (Refer to page 2-20) Handlebar Clearance...
-
Page 202: Handlebar
8-23 CHASSIS HANDLEBAR ① ◉ ◉ REMOVAL ④ ② ● Remove the rearview mirror. ● Remove the handle cover. (Refer to page 8-1) ● Remove the left handle switches ① . ● Disconnect the rear brake lamp switch lead wires ②... - Page 203 CHASSIS 8-24 ● Remove the handlebar by removing the handlebar set bolt ① . ① ◉ ◉ REASSEMBLY Reassemble the handlebars in the reverse order of ① removal. Pay attention to the following points : ● Tighten the handlebar set bolt ① to the specified torque.
-
Page 204: Front Fork
8-25 CHASSIS FRONT FORK ◉ ◉ REMOVAL AND DISASSEMBLY ● Remove the front leg shield. (Refer to page 8-3) ● Remove the front brake caliper by removing the mounting bolts, right and left. CAUTION Do not operate the front brake lever while dis- mounting the caliper. - Page 205 CHASSIS 8-26 ● Remove the front axle nut. ● Support the motorcycle by jack or wooden block. ● Remove the front wheel by removing the front axle shaft. ● Remove the front fender. (Refer to page 8-3) ● Loosen the front fork cap bolt ① , then draw out [Left front brake] the fork spring.
- Page 206 8-27 CHASSIS ● Remove the dust boot ① and stopper ring ② . ① ② ● Remove the oil seal by using the special tool. CAUTION The oil seal removed should be replaced with a new oil seal. Oil seal remover : 09913-50121 ◉...
- Page 207 CHASSIS 8-28 ▣ ▣ FORK SPRING ● Measure the fork spring free length. Standard Front fork spring 280.4 mm (11.04 in) free length 280.4 mm (11.04 in) ◉ ◉ REASSEMBLY AND REMOUNTING Reassemble and remount the fork in the reverse order of removal and disassembly, and also carry out the following steps.
-
Page 208: Steering
8-29 CHASSIS STEERING ① ◉ ◉ REMOVAL AND DISASSEMBLY ● Remove the handle cover. (Refer to page 8-1) ● Remove the handlebar by removing the handlebar set bolt ① . NOTE The front fork removal is not necessary unless the steering stem replacement or front fork disas- sembly work is required. - Page 209 CHASSIS 8-30 ● Remove the steering stem lower bearing ① . ① ◉ ◉ INSPECTION Inspect the removed parts for the following abnormal- ities. ● Handlebar distortion ● Abnormality operation of bearing ● Distortion of steering stem ◉ ◉ REASSEMBLY AND REMOUNTING Reassemble and remount the steering stem in the reverse order of disassembly and removal, and also carry out the following steps.
- Page 210 8-31 CHASSIS ● Install the steering stem spacer ① . ● Tighten the steering stem lower nut ② using the ③ special tool. Clamp wrench : 09940-10122 ② Steering stem lower nut : 82 N∙ ∙ m (8.2 kgf∙ ∙ m) ●...
-
Page 211: Rear Wheel
CHASSIS 8-32 REAR WHEEL ◉ ◉ REMOVAL ● Remove the muffler connecting bolt ① . ① ● Remove the muffler mounting bolts ② , ③ . ● Remove the muffler. ③ ②... - Page 212 8-33 CHASSIS ● Remove the rear suspension arm ① and the rear axle nut ② . ② ① ◉ ◉ INSPECTION WHEEL : Refer to page 8-11 WHEEL BEARING : Refer to page 8-12 TIRE : Refer to page 2-23 ◉...
- Page 213 CHASSIS 8-34 ● Tighten the muffler mounting bolts ① , ② to the specified torque. Muffler mounting bolt : 18 ~ 28 N∙ ∙ m (1.8 ~ 2.8 kgf∙ ∙ m) ① ② ● Tighten the muffler connecting bolt ③ to the speci- fied torque.
-
Page 214: Rear Brake
8-35 CHASSIS REAR BRAKE WARNING � � Do not mix brake fluid with different brand. � � Do not use a brake fluid kept in an open container or stored for a long period. � � To store brake fluid, make sure to seal the container and keep it in a safe place to be out of reach of children. - Page 215 CHASSIS 8-36 ● Brake fluid replacement : Refer to page 2-19 ● Brake pad replacement : Refer to page 2-19 ● Disassembly of caliper : Refer to page 8-16 ● Inspection of caliper : Refer to page 8-18 ● Reassembly of caliper : Refer to page 8-18 ●...
-
Page 216: Rear Shock Absorber
8-37 CHASSIS REAR SHOCK ABSORBER ◉ ◉ REMOVAL ● Remove the 『Seat, side cover & rear fender assembly』 . (Refer to page 8-7) ● Remove the rear shock absorbers by removing their bolts and nuts. - Page 217 CHASSIS 8-38 ◉ ◉ INSPECTION Inspect the rear shock absorber for damage and oil leakage. If any defects are found, replace the rear shock absorber with a new one. CAUTION Do not attempt to disassemble the rear shock absorber. It is unserviceable. ◉...
- Page 218 SERVICING INFORMATION CONTENTS TROUBLESHOOTING …………………………………………………… 9 - 1 SPECIAL TOOLS ………………………………………………………… 9 - 13 TIGHTENING TORQUE ………………………………………………… 9 - 16 SERVICE DATA …………………………………………………………… 9 - 18 WIRE AND CABLE ROUTING ………………………………………… 9 - 31 WIRING DIAGRAM ………………………………………………………… 9 - 35...
-
Page 219: Troubleshooting
9-1 SERVICING INFORMATION TROUBLESHOOTING ◉ ◉ MALFUNCTION CODE AND DEFECTIVE CONDITION DETECTED FAILURE CONDITION MALFUNCTION DETECTED ITEM CODE CHECK FOR The sensor should produce following voltage. 0.1 V � sensor voltage � 4.8 V Throttle position sensor Without the above range for 4 sec. and more, C14 is indicated. (TPS) Throttle position sensor, lead wire / coupler connection. - Page 220 SERVICING INFORMATION 9-2 DETECTED FAILURE CONDITION MALFUNCTION DETECTED ITEM CODE CHECK FOR When the IC of the ECU electric current gets 6A and more, C24 is indicated. Ignition coil (IG coil) Ignition coil, wiring / coupler connection, power supply from the battery.
- Page 221 9-3 SERVICING INFORMATION ◉ ◉ ENGINE Complaint Symptom and possible causes Remedy Engine will not Compression too low Adjust. start or is hard to 1. Tappet clearance out of adjustment. Repair or replace. 2. Worn valve guides or poor seating of valves. start.
- Page 222 SERVICING INFORMATION 9-4 Complaint Symptom and possible causes Remedy 1. Tappet clearance out of adjustment. Adjust. Engine idles poorly. 2. Poor seating of valves. Replace or repair. 3. Defective valve guides. Replace. 4. Worn down camshafts. Replace. 5. Too wide spark plug gap. Adjust or replace.
- Page 223 9-5 SERVICING INFORMATION Complaint Symptom and possible causes Remedy Noisy engine. Excessive valve chatter 1. Too large tappet clearance. Adjust. 2. Weakened or broken valve springs. Replace. 3. Worn tappet or cam surface. Replace. 4. Worn and burnt camshaft journal. Replace.
- Page 224 SERVICING INFORMATION 9-6 Complaint Symptom and possible causes Remedy Engine runs poorly Defective engine internal / electrical parts in high speed range. 1. Weakened valve springs. Replace. 2. Worn camshafts. Replace. 3. Valve timing out of adjustment. Adjust. 4. Too narrow spark plug gap. Adjust.
- Page 225 9-7 SERVICING INFORMATION Complaint Symptom and possible causes Remedy Engine lacks Defective engine internal / electrical parts power. 1. Loss of tappet clearance. Adjust. 2. Weakened valve springs. Replace. 3. Valve timing out of adjustment. Adjust. 4. Worn piston rings or cylinder. Replace.
- Page 226 SERVICING INFORMATION 9-8 Complaint Symptom and possible causes Remedy 1. Too much engine oil in the engine. Check with inspection win- Dirty or heavy dow, drain out excess oil. exhaust smoke 2. Worn piston rings or cylinder. Replace. 3. Worn valve guides. Replace.
- Page 227 9-9 SERVICING INFORMATION ◉ ◉ ELECTRICAL Complaint Symptom and possible causes Remedy 1. Defective ignition coil or spark plug cap. Replace. No sparking or 2. Defective spark plug. Replace. poor sparking. 3. Defective pick-up coil. Replace. 4. Defective ECU. Replace. 5.
- Page 228 SERVICING INFORMATION 9-10 ◉ ◉ BATTERY Complaint Symptom and possible causes Remedy 1. Cracked battery case. Replace the battery. “Sulfation”, acidic 2. Battery has been left in a run-down condition for a long time. Replace the battery. white powdery substance or spots on surface of cell plates.
- Page 229 9-11 SERVICING INFORMATION ◉ ◉ CHASSIS Complaint Symptom and possible causes Remedy 1. Steering stem nut overtightened. Adjust. Steering feels too 2. Worn bearing or race in steering stem. Replace. heavy or stiff. 3. Distorted steering stem. Replace. 4. Not enough pressure in tires. Adjust.
- Page 230 SERVICING INFORMATION 9-12 ◉ ◉ BRAKES Complaint Symptom and possible causes Remedy 1. Not enough brake fluid in the reservoir. Refill to level mark. Poor braking 2. Air trapped in brake fluid circuit. Bleed air out. (FRONT and 3. Pads worn down. Replace.
-
Page 231: Special Tools
9-13 SERVICING INFORMATION SPECIAL TOOLS Special tools Part Number∙ ∙ Part Name∙ ∙ Description Special tools Part Number∙ ∙ Part Name∙ ∙ Description 09900-20101 09900-20806 Vernier Calipers Thickness gauge Used to conveniently measure various dimensions. Measure clearance of piston ring. 09900-20201 09900-21109 Micrometer (0~25mm) - Page 232 SERVICING INFORMATION 9-14 Special tools Part Number∙ ∙ Part Name∙ ∙ Description Special tools Part Number∙ ∙ Part Name∙ ∙ Description 09913-50121 09916HG5100 ( Oil seal remover Valve spring compressor attachment Used to remove the oil seal. Used with valve spring compressor. 09913-70122 09920-13120 Bearing installer...
- Page 233 9-15 SERVICING INFORMATION Special tools Part Number∙ ∙ Part Name∙ ∙ Description 09940-10122 Clamp wrench A hook wrench to adjust the steering head of motorcycle. 09940HP7600 Crank balancer socket wrench Used to remove crank balancer drive nut. 09941-50111 Wheel bearing remover Used to remove wheel bearing.
-
Page 234: Tightening Torque
SERVICING INFORMATION 9-16 TIGHTENING TORQUE ◉ ◉ ENGINE N∙ ∙ m kg∙ ∙ m ITEM Belt roller bolt (Only for 8 ~ 12 0.8 ~ 1.2 Crank balancer drive gear nut 100 ~ 120 10.0 ~ 12.0 Crank balancer driven gear nut (Only for 40 ~ 60 4.0 ~ 6.0 Coolant drain bolt... - Page 235 9-17 SERVICING INFORMATION ◉ ◉ FI SYSTEM PARTS N∙ ∙ m kg∙ ∙ m ITEM Water sensor (WT sensor) Intake air pressure sensor (IAP sensor) bolt 6 ~ 8 0.6 ~ 0.8 Idle speed control solenoid (ISC solenoid) bolt 6 ~ 8 0.6 ~ 0.8 Fuel injector bolt 6 ~ 8...
-
Page 236: Service Data
SERVICING INFORMATION 9-18 SERVICE DATA ◉ ◉ VALVE + GUIDE ( Unit : mm (in) ITEM STANDARD LIMIT 28.3 (1.11) — — — Valve diam. 25.0 (0.98) — — — 0.1 ~ 0.2 (0.004 ~ 0.008) — — — Valve clearance (When cold) 0.2 ~ 0.3 (0.008 ~ 0.012) —... - Page 237 9-19 SERVICING INFORMATION ◉ ◉ VALVE + GUIDE ( Unit : mm (in) ITEM STANDARD LIMIT 22.0 (0.87) — — — Valve diam. 19.0 (0.75) — — — 0.1 ~ 0.2 (0.004 ~ 0.008) — — — Valve clearance (When cold) 0.2 ~ 0.3 (0.008 ~ 0.012) —...
- Page 238 SERVICING INFORMATION 9-20 ◉ ◉ CYLINDER + PISTON + PISTON RING ( Unit : mm (in) ITEM STANDARD LIMIT Compression pressure 11 kgf/cm (at 500 rpm) 10 kgf/cm Piston to cylinder clearance 0.050 ~ 0.060 (0.0020 ~ 0.0024) 0.120 (0.0047) Cylinder bore 73.000 ~ 73.015 (2.8740 ~ 2.8746) 73.080 (2.8772)
- Page 239 9-21 SERVICING INFORMATION ◉ ◉ CYLINDER + PISTON + PISTON RING ( Unit : mm (in) ITEM STANDARD LIMIT Compression pressure 15 kgf/cm (at 500 rpm) 13 kgf/cm Piston to cylinder clearance 0.050 ~ 0.060 (0.0020 ~ 0.0024) 0.120 (0.0047) Cylinder bore 57.000 ~ 57.015 (2.2441 ~ 2.2447) 57.080 (2.2472)
- Page 240 SERVICING INFORMATION 9-22 ◉ ◉ OIL PUMP ( ITEM STANDARD NOTE 2.0 ~ 3.0 kgf/cm — — — Oil pressure (at 65 ℃ (149 ℉ ), 6,000 rpm) Oil pump reduction ratio 1.53 (26/17) — — — ◉ ◉ OIL PUMP ( ITEM STANDARD NOTE...
- Page 241 9-23 SERVICING INFORMATION ◉ ◉ CONROD + CRANKSHAFT ( Unit : mm (in) ITEM STANDARD LIMIT Conrod small end I.D. 19.040 (0.7496) 19.006 ~ 19.014 (0.7483 ~ 0.7486) 3.0 (0.12) Conrod deflection — — — Conrod big end side clearance 1.00 (0.040) 0.10 ~ 0.45 (0.004 ~ 0.018) —...
- Page 242 SERVICING INFORMATION 9-24 ◉ ◉ CLUTCH ( Unit : mm (in) ITEM STANDARD LIMIT Clutch housing I.D. 134.0 ~ 134.2 (5.276 ~ 5.284) 134.5 (5.295) Clutch shoe thickness — — — 1.0 (0.04) Engagement rpm — — — 1,800 ~ 2,400 rpm Lock-up rpm —...
- Page 243 9-25 SERVICING INFORMATION ◉ ◉ FI SENSORS ITEM SPECIFICATION NOTE 4.5 ~ 5.5 V IAP sensor input voltage Approx. 4.0 ~ 4.2 V when ignition switch “ ” (ON) IAP sensor output voltage 4.5 ~ 5.5 V TP sensor input voltage ㏀...
- Page 244 SERVICING INFORMATION 9-26 ◉ ◉ THERMOSTAT + COOLING FAN + COOLANT STANDARD ITEM LIMIT Valve opening 76 ℃ (169 ℉ ) Valve full open 90 ℃ (194 ℉ ) Thermostat valve operating temperature Valve closing 71 ℃ (160 ℉ ) Over 8mm (0.32 in) / 90 ℃...
- Page 245 9-27 SERVICING INFORMATION ◉ ELECTRICAL Unit : mm (in) ITEM STANDARD NOTE BTDC 10� / 2,000rpm ~ 30� / 5,000rpm Ignition timing BTDC 10� / 2,000rpm ~ 28� / 4,000rpm CR8E Type 0.7 ~ 0.8 (0.028 ~ 0.032) Spark plug Hot type CR7E CR8E...
- Page 246 SERVICING INFORMATION 9-28 ◉ WATTAGE Unit : W ITEM SPECIFICATION 55 W Head lamp 55 W Position 5 W × 2 License plate lamp Brake / Tail lamp 21 / 5 W Turn signal lamp LED type 1.7 W × 5 Speedometer lamp Turn signal indicator lamp (Right &...
- Page 247 9-29 SERVICING INFORMATION ◉ ◉ SUSPENSION Unit : mm (in) ITEM STANDARD LIMIT — — — Front fork stroke 85 (3.35) — — — Front fork spring free length 280.4 (11.04) — — — Front fork oil type TELLUS #22 116 mm (4.6 in) from end of outer tube Front fork oil level —...
-
Page 248: Tire Pressure
SERVICING INFORMATION 9-30 ◉ ◉ TIRE PRESSURE NORMAL RIDING COLD INFLATION SOLO RIDING DUAL RIDING TIRE PRESSURE kgf/ ㎠ ㎠ kgf/ ㎠ ㎠ 1.75 25.0 1.75 25.0 FRONT 2.00 29.0 2.50 36.0 REAR ◉ ◉ FUEL + OIL NOTE ITEM SPECIFICATION Gasoline used should be graded 91 octane or higher. -
Page 249: Wire And Cable Routing
9-31 SERVICING INFORMATION WIRE AND CABLE ROUTING... - Page 250 SERVICING INFORMATION 9-32...
- Page 251 9-33 SERVICING INFORMATION...
- Page 252 SERVICING INFORMATION 9-34...
-
Page 253: Wiring Diagram
9-35 SERVICING INFORMATION WIRING DIAGRAM... - Page 254 SERVICING INFORMATION 9-36...
- Page 257 Prepared by 1st Ed. DEC. 2007. Manual No. 99000HP8810 Printed in Korea...