Table of Contents
Advertisement
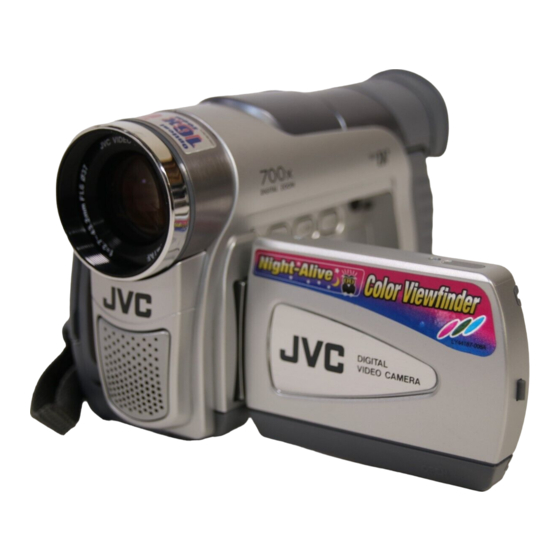
DIGITAL VIDEO CAMERA
GR-D22
Please visit our Homepage on the World Wide Web for Digital
Video Camera:
http://www.jvc-victor.co.jp/english/cyber/
For Accessories:
http://www.jvc-victor.co.jp/english/accessory/
INSTRUCTIONS
CONTENTS
AUTOMATIC
DEMONSTRATION
GETTING STARTED
TAPE
RECORDING &
PLAYBACK
ADVANCED
FEATURES
REFERENCES
For Customer Use:
Enter below the Model No. and Serial
No. which is located on the bottom of the
camcorder. Retain this information for
future reference.
Model No.
Serial No.
LYT1225-001A
ENGLISH
6
7 – 10
11 – 15
16 – 28
29 – Back Cover
EN
Advertisement
Table of Contents

Related Manuals for JVC GR-D22


Summary of Contents for JVC GR-D22
-
Page 1: Digital Video Camera
DIGITAL VIDEO CAMERA GR-D22 Please visit our Homepage on the World Wide Web for Digital Video Camera: http://www.jvc-victor.co.jp/english/cyber/ For Accessories: http://www.jvc-victor.co.jp/english/accessory/ INSTRUCTIONS CONTENTS AUTOMATIC DEMONSTRATION GETTING STARTED TAPE RECORDING & PLAYBACK ADVANCED FEATURES REFERENCES 29 – Back Cover For Customer Use: Enter below the Model No. -
Page 2: Table Of Contents
SAFETY PRECAUTIONS IMPORTANT PRODUCT SAFETY INSTRUCTIONS PROVIDED ACCESSORIES HOW TO ATTACH THE LENS CAP AUTOMATIC DEMONSTRATION GETTING STARTED Power ... 7 – 8 Grip Adjustment ... 8 Viewfinder Adjustment ... 8 Shoulder Strap Attachment ... 9 Tripod Mounting ... 9 Loading/Unloading A Cassette ... -
Page 3: Safety Precautions
However, live recording and LCD monitor/viewfinder playback are possible anywhere. Use the JVC BN-V408U/V416U/V428U battery packs and, to recharge them or to supply power to the camcorder from an AC outlet, use the provided multi-voltage AC Adapter. (An appropriate conversion adapter may be necessary to accommodate different designs of AC outlets in different countries.) -
Page 4: Important Product Safety Instructions
Do not point the lens or the viewfinder directly into the sun. This can cause eye injuries, as well as lead to the malfunctioning of internal circuitry. There is also a risk of fire or electric shock. CAUTION! The following notes concern possible physical damage to the camcorder and to the user. When carrying, be sure to always securely attach and use the provided shoulder strap. -
Page 5: Provided Accessories
AC Adapter AP-V11U or AP-V13U Audio/Video Cable (ø3.5 mini-plug to RCA plug) NOTE: In order to maintain optimum performance of the camcorder, provided cables may be equipped with one or more core filter. If a cable has only one core filter, the end that is closest to the filter should be connected to the camcorder. To protect the lens, attach the provided lens cap to the camcorder as shown in the illustration. -
Page 6: Automatic Demonstration
Automatic Demonstration takes place when “DEMO MODE” is set to “ON” (factory-preset). Automatic Demonstration starts when there is no operation for about 3 minutes after the Power Switch and no cassette is in the camcorder. Performing any operation during the demonstration stops the demonstration temporarily. -
Page 7: Getting Started
VU-V856 KIT : BN-V856U battery pack & AA-V80U AC Read the kit's instruction manual before using. Viewfinder on Also, by using the optional JVC VC-VBN856U DC 1 hr. 40 min. Cord, it will be possible to connect BN-V840U or BN-V856U battery packs to the camcorder and supply 3 hrs. -
Page 8: Grip Adjustment
Since the AC Adapter processes electricity internally, it becomes warm during use. Be sure to use it only in well-ventilated areas. The following operation stops charging: • Set the Power Switch to “PLAY”, “ • Disconnect the AC Adapter from the camcorder. •... -
Page 9: Shoulder Strap Attachment
Shoulder Strap Attachment Thread the strap through the eyelet back and thread it through the buckle. Repeat the procedure to attach the other end of the strap to the other eyelet located under the Grip Strap. Confirm the strap is not twisted. Tripod Mounting CAUTION When attaching the camcorder to a tripod, extend its... -
Page 10: Getting Started 7
It takes a few seconds for the cassette holder to open. Do not apply force. There may be a delay after you open the cassette holder cover until the cassette holder opens. Do not use force. If you wait a few seconds and the cassette holder does not open, close the cassette holder cover and try again. -
Page 11: Tape Recording & Playback
Basic Recording Perform the procedures listed below before continuing. Power ( pg. 7) Grip Adjustment ( pg. 8) Viewfinder Adjustment ( pg. 8) Load A Cassette ( pg. 9) Recording Mode Setting ( pg. 10) Remove the lens cap. Pull on bottom end of LCD monitor to open. -
Page 12: Zooming
Journalistic Shooting In some situations, different shooting angles may provide more dramatic results. Hold the camcorder in the desired position and tilt the LCD monitor in the most convenient direction. It can rotate 270° (90° downward, 180° upward). Self-Recording You can shoot yourself while viewing your own image in the LCD monitor. -
Page 13: Time Code
Time Code During recording, a time code is recorded on the tape. This code is to confirm the location of the recorded scene on the tape during playback. If recording starts from a blank portion, the time code begins counting from “00:00:00” (minute:second:frame). If recording starts from the end of a previously recorded scene, the time code continues from the last time code number. -
Page 14: Blank Search
NOTES: If Stop mode continues for 5 minutes when power is supplied from a battery, the camcorder shuts off automatically. To turn on again, set the Power Switch to “OFF (CHARGE)”, then to “PLAY”. The playback picture can be viewed in the LCD monitor, viewfinder or on a connected TV ( You can also view the playback picture on the LCD monitor with it flipped over and pushed against the... -
Page 15: Connections
Connections These are some basic types of connections. When making the connections, refer also to your VCR and TV instruction manuals. Make sure all units are turned off. Connect the camcorder to a TV or VCR as shown in the illustration. If using a VCR . -
Page 16: For Recording
Night-Alive Makes dark subjects or areas even brighter than they would be under good natural lighting. Although the recorded image is not grainy, it may look as if it is strobing due to the slow shutter speed. Set the Power Switch down the Lock Button located on the switch. -
Page 17: Fade/Wipe Effects
Fade/Wipe Effects These effects let you make pro-style scene transitions. Use them to spice up the transition from one scene to the next. Fade or Wipe works when tape recording is started or when you stop recording. Set the Power Switch to “... -
Page 18: Snapshot (For Tape Recording)
Snapshot (For Tape Recording) This feature lets you record still images that look like photographs onto a tape. SNAPSHOT MODE SELECTION Set the Power Switch down the Lock Button located on the switch. Open the LCD monitor fully or pull out the viewfinder fully. Press the MENU/VOLUME wheel Screen appears. -
Page 19: Manual Focus
Manual Focus To obtain correct focus. If you are using the viewfinder, you should already have made the necessary viewfinder adjustments pg. 8). Set the Power Switch to “ down the Lock Button located on the switch, then press FOCUS pgs. -
Page 20: Iris Lock
Iris Lock Use this function in the following situations: • When shooting a moving subject. • When the distance to the subject changes (so its size in the LCD monitor or the viewfinder changes), such as when the subject is backing away. •... -
Page 21: For Recording Menu
For Recording Menu This camcorder is equipped with an easy-to-use, on-screen menu system that simplifies many of the more detailed camcorder settings ( Set the Power Switch to “ down the Lock Button located on the switch. Open the LCD monitor fully or pull out the viewfinder fully. Press the MENU/VOLUME wheel Screen appears. -
Page 22: Using Menus For Detailed Adjustment
SNAP MODE Refer to “Snapshot (For Tape Recording)” ( GAIN UP OFF: Allows you to shoot dark scenes with no picture brightness adjustment. [AGC]: The overall appearance may be grainy, but the image is bright. AUTO : The shutter speed is automatically adjusted (1/30 —... - Page 23 SYSTEM “ SYSTEM” functions which are set when the Power Switch is set to “ ” are also applied when the Power Switch is set to “PLAY” ( – MELODY ALLY – EMOTE – EMO MODE – R I OR I TY –...
-
Page 24: For Playback Menu
TIME CODE [OFF]: Time code is not displayed. ON: Time code is displayed on the camcorder and on the connected TV. Frame numbers are not displayed during recording. CLOCK ADJ. Allows you to set the current date and time ( For Playback Menu Set the Power Switch to “PLAY”... - Page 25 Playback Sound During tape playback, the camcorder detects the sound mode in which the recording was made, and plays the sound back. Select the type of sound to accompany your playback picture. According to the menu access explanation on pg. 24, select “SOUND MODE” or “12bit MODE”...
-
Page 26: Dubbing
Dubbing To A VCR To Use This Camcorder As A Player Following the illustration, connect the camcorder and the VCR. Also refer to pg. 15. Set the camcorder’s Power Switch while pressing down the Lock Button switch, turn on the VCR’s power, and insert the appropriate cassettes in the camcorder and the VCR. -
Page 27: Dubbing To Or From A Video Unit Equipped With A Dv Connector (Digital Dubbing)
( If the remote control is used when both the player and recorder are JVC video units, both units will perform the same operation. To prevent this from happening, press the buttons on both units. -
Page 28: System Connections
When using a DV cable, be sure to use the optional JVC VC-VDV206U or VC-VDV204U DV cable depend- ing on the type of DV connector (4 or 6 pins) on the The system may not work properly depending on the PC or capture board you are using. - Page 29 Before consulting your JVC dealer, please check the following to see if you can correct the problem yourself. The camcorder is a microcomputer-controlled device. External noise and interference (from a TV, a radio, etc.) might prevent it from functioning properly. In such cases, first disconnect its power supply unit (battery pack, AC Adapter, etc.) and wait...
- Page 30 • When the LCD monitor's fluorescent light reaches the end of its service life, images on the LCD monitor become dark. Consult your nearest JVC dealer. = Adjust the brightness and angle of the LCD monitor pg. 11).
-
Page 31: Troubleshooting
If the indication remains even though you repeat the above two or three times, please consult your nearest JVC dealer. Do not eject the cassette. This will cause damage to the tape. An error indication (E03 or E04) appears. -
Page 32: Cautions
American National Standard C73 series type use an AC plug adapter, called a “Siemens Plug”, as shown. For this AC plug adapter, consult your nearest JVC dealer. Plug adapter If there is dust or dirt on the AC Adapter, wipe it clean before using. - Page 33 20 seconds, it stops automatically. Also refer to the cleaning cassette’s instructions. If, after using the cleaning cassette, the problems still exist, consult your nearest JVC dealer. Mechanical moving parts used to move the video heads and video tape tend to become dirty and worn out over time.
- Page 34 For Your Maintenance 1) After Use 1. Turn off the camcorder. 2. Slide and hold OPEN/EJECT of the arrow, then pull the cassette holder cover open until it locks. The cassette holder opens automatically. Remove the cassette. 3. Press “PUSH HERE” to close the cassette holder. •...
-
Page 35: Specifications
Camcorder General Power supply : DC 11.0 V DC 7.2 V Power consumption LCD monitor off, viewfinder on : Approx. 3.4 W LCD monitor on, viewfinder off : Approx. 4.7 W Dimensions (W x H x D) : 69 mm x 94 mm x 143 mm (2-3/4”... -
Page 36: Index
Viewfinder During Tape Recording 0 x W SOUND b i t 5 : 55 INDEX Controls, Connectors And Indicators LCD monitor Stereo microphone & ( CHARGE ) PLAY LCD Monitor/Viewfinder Indications 1h50m & 0 ’ Refer to this diagram while reading the instructions. 4 5 6 7 Speaker During Tape Playback... - Page 37 Camera Sensor Be careful not to cover this area, a sensor neces- sary for shooting is built-in here. Grip Strap ... Tally Lamp ... Stop Button [7] ... Rewind Button [1] ... Play/Pause Button [3/8] ... Fast-Forward Button [¡] ... NIGHT Button ...
- Page 38 Remove the power supply (battery, etc.) and wait a few minutes for the indication to clear. When it does, you can resume using the camcorder. If the indication remains, consult your nearest JVC dealer. pg. 9) E03 or E04 UNIT IN SAFEGUARD MODE EJECT...
-
Page 39: Terms
AC Adapter ... Auto Date ... Auto Focus ... Auto Shut off ... Backlight Compensation ... Battery Low ... Battery Pack ... Beep ... Blank Search ... Brighten The LCD Monitor ... Channels (Left/Right) ... Charge The Battery Pack ... Cinema ... - Page 40 Self-Recording ... Sepia ... Shuttle Search ... Shutter Speed ... Snapshot ... Snapshot Mode ... Snow ... Sound Mode ... Speaker Volume ... Specifications ... Sports ... Spotlight ... Squeeze ... Still Playback ... Strobe ... COPYRIGHT© 2003 VICTOR COMPANY OF JAPAN, LTD. pg.