Table of Contents
Advertisement
Advertisement
Table of Contents

Related Manuals for Yamaha Silent Brass Personal Studio ST5


Summary of Contents for Yamaha Silent Brass Personal Studio ST5
- Page 1 YAMAHA Silent Brass ST5 Personal Studio...
- Page 2 Precautions...
- Page 3 Precautions...
-
Page 4: Introduction
Also, the ST5 can be matched and used with the Yamaha Pickup Mic allowing the system to be used in live performance situations, etc. -
Page 5: Table Of Contents
Contents Introduction ............4 PHRASE TRAINER Mode ........ 26 I Recording Procedure ....... 26 Main Features ............ 6 I Playback ........... 27 Installing Batteries ..........7 G Low Battery Display ......7 I Re-recording ..........28 Controls and Connections ....... 8 Editing Effects .......... -
Page 6: Main Features
Main Features G Silent Brass System expands the sonic G AUX Key Function possibilities of brass instruments. This great practice aid transposes the sound received from The Silent Brass system consists of a mute, which pos- a CD/MD player, etc. connected to the AUX IN jack to a sesses excellent silencing capabilities, and the ST5 which different key. -
Page 7: Installing Batteries
Installing Batteries G Low Battery Display Remove the battery cover located on the back side of the device by sliding it in the direction indicated by the ar- When battery power is low, the low battery icon will ap- row. pear in the display. -
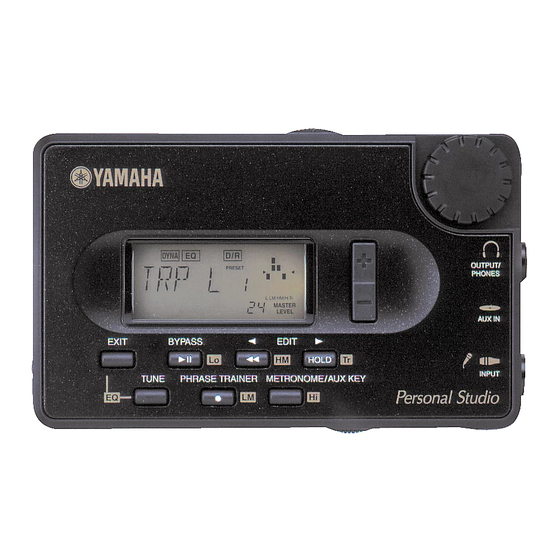
Page 8: Controls And Connections
Controls and Connections Power Switch (OFF/ON/ Backlight) This is the devices power switch. When set to the “ON” position, the Display (→ page ??) power is switched ON. When set to the “LCD” position, the display’s backlight will light. * When batteries are used, using the LCD backlight will shorten battery life. - Page 9 This is the device’s input jack. Con- to operate phrase trainer functions Press this button to return from the nect a Yamaha Pickup Mute or instru- (→ page ??). current mode back to the play mode. ment Pickup Mic, etc. to this jack.
-
Page 10: Display Screen
Display Screen Effect Block Indicates the current ON/OFF status of individual effect blocks such as Dynamic, Equalizer, Modulation, and Delay/Reverb. Program Number Display Indicates the information for the cur- rent program (preset/user, program number). TUNE Icon This icon will blink when in the Tuner mode Equalizer Display When in the Equalizer mode, or when... - Page 11 EQ (equalizer) Icon Low Battery Icon This icon will blink when in the Appears when the battery power Equalizer mode. level becomes low (→ page ??). Value Display Program Name/Effect Type Numerically indicates the master Display level or effector’s parameter value. Displays the program name or effect (When the master level is displayed type.
-
Page 12: Making Connections
Making Connections Make sure the power is switched OFF on the ST5 and all devices before any connections are made. Earphone/ Other Connected Devices Headphone *4 Amplifier Audio Device AC Adaptor *3 CD Player, etc.*2 Input Level Switch Pickup Mute (PM1-9) Pickup Mic (MC7) - Page 13 “Hi” setting be used with a pickup mic. • The INPUT jack also supplies power to the pickup device. Never use a pickup device other than a Yamaha Pickup Mute or Yamaha Pickup Mic.
-
Page 14: Using The St5
Using the ST5 I Getting Sound After you have finished making connections, set the power switch to its “ON” position. 1 Set the power switch to its “ON” position. The ST5 is capable of adding a wide variety of effects The current Effect Program Name and Program Num- to the pickup mute/mic signal received via the ST5’s ber will be appear in the display. -
Page 15: I Selecting Another Effect Program
I Selecting another Effect Program The +/- buttons can be assigned to adjust the Master Level also. (→ page ??) The ST5 provides a total of 50 preset programs and 50 * When the ST5 is shipped from the factory, User Program user programs. -
Page 16: I Editing An Effect Program
I Editing an Effect Program The ST5 offers a total of 32 internal effect types. These effects have been used in the units 50 preset programs with adjusted parameter values. You can change the settings in these programs to create original programs. Original programs can be saved in the user program area. - Page 17 DYNA Block D/R Block Assign one of the four effect types (Compressor, Limiter, Over- Assign one of the nine delay and reverb effect types (Room, drive and Distortion). Edit the parameters of the assigned ef- Hall, Church, etc). Edit the parameters of the assigned effect fect and adjust the amount of effect that is applied to the sound.
- Page 18 The display when The display when 3 Use the EDIT Q/W buttons to select the effect the effect is OFF. the effect is ON. block you want to edit. Blinks Blinks Every time one of the EDIT Q/W buttons is pressed, the next effect block according to the order shown in the illustration below will be selected and its icon will blink.
-
Page 19: I Saving An Original Program
Let’s edit a parameter in the D/R (Delay/Reverb) ef- 2 Use the +/- buttons to move the cursor (the cursor blinks), then use the Value Dial to fect block you selected in the previous operation. Us- ing the current (ROOM1) effect type, turn the Value select the character. -
Page 20: G Initializing (Factory Default)
G Initializing (Factory Default) 4 Press the BYPASS button to save the program. When the save operation is This operation restores all internal settings to their origi- complete, “COMPL” (complete) will appear in nal factory default conditions. All User Program data will the display for about one second. -
Page 21: I Assigning Functions To The Value Dial And +/- Buttons
I Assigning functions to the Value Dial • Value Dial: Program select +/- buttons: Master Level setting and +/- buttons The Value Dial and +/- buttons can be assigned to oper- ate in one of the following three different ways. •... -
Page 22: Tuner Mode
TUNER Mode This mode allows the ST5 to be used as an Auto Tuner. The device detects the pitch received from the instru- Blinks ment connected to the INPUT jack, displays the near- est note name and indicates the difference in that note’s pitch with the meter. -
Page 23: Metronome Mode
METRONOME Mode • Metronome Pattern: The Metronome produces patterns at the set tempo. Selects the pattern that is produced. There are two met- ronome sounds available, Click and Drums. (→ page 1 Press the METRONOME/AUX KEY once to enter the Metronome mode. Upon entering this mode, the selected pattern will start playing and the Metronome icon will blink. -
Page 24: Equalizer Mode
EQUALIZER Mode Use the Equalizer mode to shape the overall sound. Value Dial Editing individual EQ (equalizer) bands is simple. 1 While holding the EXIT button, press the Blinks TUNE button to enter the Equalizer mode. “EQ LO” and the Equalizer icon will both appear in •... -
Page 25: Aux Key Mode
AUX KEY Mode This mode takes the audio (music from a CD/MD) 2 Use the following buttons to set Key Transpose settings. from the audio source received via the AUX IN jack and shifts its pitch using the Key Transpose function. •... -
Page 26: Phrase Trainer Mode
PHRASE TRAINER Mode Record Mode This mode lets you record a phrase from the audio source (music from a CD/MD) received via the AUX IN jack, or a phrase that you play into the ST5 via the INPUT jack, and play it back repeatedly. Playback speed can be slowed down without changing the pitch. -
Page 27: I Playback
I Playback 3 After you have selected the Recording mode, press the [S] button to start recording. When recording is complete, repeated playback of the Play your instrument or start playback of the CD and phrase you just recorded will begin, and the following at the point where you wish to begin recording, press controls can be used. -
Page 28: I Re-Recording
I Re-recording G Pause/Playback Press the [L] button during playback to momentarily During playback, press the [L] button at the point from stop playback at that point. Press the [L] button once which you want to record and playback will be paused. again to resume playback from the same point. -
Page 29: Editing Effects
Editing Effects • DIST (Distortion): The ST5 is equipped with the six effect blocks describe Adds hard distortion to the sound. below. In the Edit mode (→ page ??) you can use the Use the Value Dial to adjust the amount of distortion. +/- buttons to select an effect type, then use the Value Dial to adjust the effect’s parameter values. -
Page 30: G Mod (Modulation)
• HIGH: • FLNGR (Flanger): Adjust the high frequency (around 5.00kHz) gain. This effect adds a swooshing sound like a jet taking Use the Value Dial to adjust high frequency gain. off. Use the Value Dial to adjust the depth of the effect. •... -
Page 31: G D/R (Delay And Reverb)
• PIT 1 (Pitch Shifter 1): increments from -24 to +24.d [detune]). Changes the pitch of the signal, which is then mixed G D/R (Delay and Reverb) with the original signal for output. In PIT 1, the original signal’s volume will be louder. Delay and reverb effects simulate the natural reverbera- Use the Value Dial to set the pitch shift (in 1/2 step tion found in acoustic environments giving the impres-... -
Page 32: G Nr (Noise Reduction)
G LEVEL • CHRC1 (Church 1) • CHRC2 (Church 2) Sets the volume for each program. Adds reverberation to the sound to give the impres- Use the Value Dial to adjust individual program levels. sion of playing in a church. CHRC2 is a larger space than CHRC1. -
Page 33: Troubleshooting
If the unit does not operate properly, please check the the AUX IN jack is too loud or too soft or following points first. If that does not resolve the prob- lem, contact your Yamaha dealer. cannot be heard. • Adjust the output level of the connected device. The I The power does not turn on. -
Page 34: Preset Program List
Preset Program List • Nos. 1-30 are specially equalized for specific pickup mutes. • Nos. 31-50 utilize individual effects. • Please select a sound that you like, you don’t necessarily have to stick to the same mute type that your instrument uses. -
Page 35: Preset Metronome Patterns
Preset Metronome Patterns Name Pattern Name Pattern 1/4 Time → Quarter Note 5/4 Time → Sixteenth Note 1/4-4 5/416 2/4 Time → Quarter Note 6/4 Time → Sixteenth Note 2/4-4 5/416 3/4 Time → Quarter Note 7/4 Time → Sixteenth Note 3/4-4 7/416 4/4 Time →... -
Page 36: Specifications
Specifications ST5 Main Unit G Power Supply: G Effects: 32 types (Maximum number of effects available si- AC Power Adaptor (PA-D09). Also Four AAA Alkaline Batteries multaneously: 6 types) Battery life is approximately 9 hours of continuous G Programs: use (using headphones, backlight OFF). Preset Program=50 types, User Program=50 G Dimensions (W x D x H): G Inputs:...