Table of Contents
Advertisement
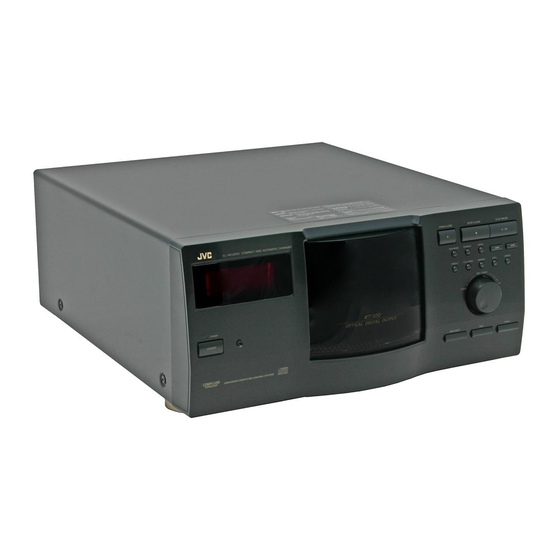
COMPACT COMPONENT SYSTEM
COMPACT DISC AUTOMATIC CHANGER
XL-MC2000BK
POWER
OPEN/
CONTINUE ONE DISC PROGRAM
CLOSE
EXCHANGE
RANDOM
INTRO
REPEAT
STANDBY
1
2
DISC
TRACK
3
4
5
6
POWER
7
8
9
0
CALL
CANCEL
MEMORY
ENHANCED COMPULINK CONTROL SYSTEM
–
+
1 DISC
1 DISC
RM-SXLMC2000JR REMOTE CONTROL
XL-MC2000 COMPACT DISC AUTOMATIC CHANGER
'
INSTRUCTIONS
OPEN/CLOSE
STOP/CLEAR
PLAY/PAUSE
EXCHANGE
RANDOM
INTRO
REPEAT
PLAY MODE
MEMORY
CALL
DISC/TRACK
DOWN
UP
DISC EJECT
DISC
For Customer Use:
Enter below the Model No. and Serial
Enter below the Model No. and Serial No.
No. which are located either on the rear,
which are located on the rear, bottom or
bottom or side of the cabinet. Retain this
side of the cabinet. Retain this information
information for future reference.
for future reference.
Model No.
Serial No.
LVT0359-001B
CANCEL
TRACK
'
[ J ]
Advertisement
Table of Contents

Related Manuals for JVC XL-MC2000BK


Summary of Contents for JVC XL-MC2000BK
- Page 1 COMPACT COMPONENT SYSTEM COMPACT DISC AUTOMATIC CHANGER XL-MC2000BK XL-MC2000 COMPACT DISC AUTOMATIC CHANGER POWER OPEN/ CONTINUE ONE DISC PROGRAM CLOSE EXCHANGE RANDOM INTRO REPEAT STANDBY DISC TRACK POWER CALL CANCEL MEMORY ENHANCED COMPULINK CONTROL SYSTEM – 1 DISC 1 DISC...
- Page 2 WARNING AND CAUTIONS CAUTION RISK OF ELECTRIC SHOCK DO NOT OPEN CAUTION: TO REDUCE THE RISK OF ELECTRIC SHOCK. DO NOT REMOVE COVER (OR BACK) NO USER SERVICEABLE PARTS INSIDE. REFER SERVICING TO QUALIFIED SERVICE PERSONNEL. The lightning flash with arrowhead symbol, within an equilateral triangle is intended to alert the user to the presence of uninsulated "dangerous voltage"...
-
Page 4: Table Of Contents
INTRODUCTION Thank you very much for purchasing the JVC product. We sincerely hope it proves its quality and performance to your full satisfaction. Please read the instructions contained in this manual in order to get the most of the product’s capability and performance. If there are any questions concerning the product, please consult your JVC dealer . -
Page 5: Precautions
If condensation ever ensues due to excessive humidity or sudden temperature change, leave the component turned on for a couple of hours to dry up — consult your JVC dealer if this does not correct the condition. -
Page 6: Setting Up
Place the caps in a safe place. System control connections If you are connecting the unit to a JVC audio component using the CompuLink-3 remote control system, connect the units with the accessory CompuLink cord. Either one of the COMPULINK-3 (SYNCHRO) jacks in the back of this unit can be used. -
Page 7: Installing Batteries In The Remote Control
Installing batteries in the remote control 1. Remove the rear cover of the remote control unit. 2. Install batteries. Be sure that the batteries are installed with correct polarity, (+) and (-). 3. Attach the rear cover. CAUTION • Install the batteries with their polarities correctly set. •... -
Page 8: Control Panel And Remote Control
CONTROL PANEL AND REMOTE CONTROL Control panel XL-MC2000 COMPACT DISC AUTOMATIC CHANGER STANDBY POWER ENHANCED COMPULINK CONTROL SYSTEM POWER button [ Turns the power on and off. The STANDBY indicator above lights when the power is turned off and the unit is in the standby state;... -
Page 9: Display
Display The information shown on the display of the control panel includes: current playback mode, function, disc (slot) and track numbers, program step number, track and total playing times, jog dial function, operation status, and track number table. The display with all elements shown is illustrated below: The track number table shows the tracks selected for the currently selected/displayed disc. -
Page 10: Basic Operation
BASIC OPERATION Turning the power on Check that the standby indicator on the control panel is lit. Then press the POWER button either on the control panel or remote control. STANDBY POWER To turn the power off, press the button again lighting the standby indicator. -
Page 11: Playing Discs
Playing discs 1 Selecting a playback mode There are three main playback modes, namely CONTINUE, ONE DISC, and PROGRAM; each has selective playback functions. (See the following pages for the description of the playback modes and functions.) Select the mode using the PLAY MODE button on the control panel, or the CONTINUE, ONE DISC, or PROGRAM button on the remote controller. -
Page 12: Continue Mode Playback
CONTINUE MODE PLAYBACK Every loaded disc can be played entirely in the numerical order in the CONTINUE mode. After the playback of the last disc ends, the playback begins again from the first disc. Discs and tracks can be selected randomly from all the loaded discs and played (RANDOM function). -
Page 13: One Disc Mode Playback
ONE DISC MODE PLAYBACK One disc can be selected and played entirely in the ONE DISC mode. The starting track may be specified. Every track of the disc can be played once in a random order (RANDOM function). The entire disc can be played repeatedly (REPEAT function) or one selected track can be played repeatedly (REPEAT-1 function) in the basic mode as well as when the RANDOM function is selected. -
Page 14: Program Mode Playback
PROGRAM MODE PLAYBACK Discs and tracks can be selectively specified in a program and played according to the program in the PROGRAM mode. The steps in the program can be played in a random order (RANDOM function). The entire program can be played repeatedly (REPEAT function) or one program step can be selected and played repeatedly (REPEAT-1 function) in the basic mode as well as when the RANDOM function is selected. -
Page 15: Playing The Program Repeatedly
Starting a linked component will automatically select the relevant source on the amplifier/receiver. Synchronized recording This function is effective when a JVC cassette deck or MD recorder is linked in the CompuLink system, allowing simple, synchronized recording. NOTE: Refer to the instruction manual of your cassette deck or MD recorder for the detail of the synchronized re- cording. -
Page 16: Handling And Taking Care Of Discs
HANDING AND TAKING CARE OF DISCS Handling compact discs Protect the disc from being scratched, warped, or damaged in any other way — the plastic disc can easily be damaged and the damaged disc disrupts sound reproduction and the player function. Keep every disc in its case Be sure to keep every disc in its case whenever it is taken out of the player. -
Page 17: Troubleshooting
TROUBLESHOOTING What appears to be a malfunction may not always be serious and can easily be corrected. The table below describes some typical problems and their remedies. Check them before calling your JVC dealer. Symptom The CD is not played. - Page 18 TO OUR VALUED CUSTOMER THANK YOU FOR PURCHASING THIS JVC PRODUCT. WE WANT TO HELP YOU ACHIEVE A PERFECT EXPERIENCE. NEED HELP ON HOW TO HOOK UP? NEED ASSISTANCE ON HOW TO OPERATE? NEED TO LOCATE A JVC SERVICE CENTER?
- Page 19 WHAT WE WILL DO: If this product is found to be defective within the warranty period, JVC will repair or replace defective parts with new or rebuilt equivalents at no charge to the original owner. Such repair and replacement services shall be rendered by JVC during normal business hours at JVC authorized service centers.
- Page 20 VICTOR COMPANY OF JAPAN, LIMITED © 1999 Victor Company of Japan, Limited 0806SKMSANJEIN...