Table of Contents
Advertisement
Advertisement
Chapters
Table of Contents

Related Manuals for Canon Canonet 1


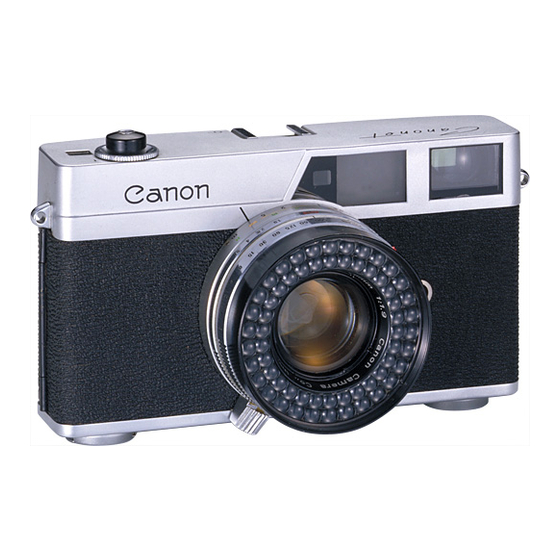
Summary of Contents for Canon Canonet 1
- Page 2 CANON REPAIR MANUAL...
-
Page 3: Table Of Contents
TABLE OF CONTENTS TOP COVER SHUTTER BUTTON BASE PLATE TRIGGER LEVER REWIND CRANK REWIND CLUTCH LEVER SOME BASIC PARTS FILM COUNTER RANGE-VIEWFINDER OPTICAL SYSTEM .2,3 EXPOSURE METER 2,6,8 BACK COVER TAKE-UP SPOOL & SPROCKET BODY CASE WINDING MECHANISM OBJECTIVE LENS. - Page 4 REF. NO. C-30208 EXPLODED VIEW CANONET...
-
Page 5: Shutter Button
REF. NO. C-30208 PARTS LIST TOP COVER (cf.p.7) REWIND CRANK C 9 2 9 0 - 1 0 Top Cover (B. P.) C 9 2 6 9 Rewind Crank (B. P.) C 4 1 6 2 Accessory Shoe C 4 0 5 8 Bearing 4 3 0 7 Liner... - Page 6 REF. NO. C-30208 EXPLODED VIEW CANONET SCALE 1-2.0 CANON CAMERA CO., INC. ©...
-
Page 7: Some Basic Parts
REF. NO. C-30208 PARTS LIST FILM COUNTER (cf.p.7) CU 067 Film Counter (Unit) C 9431 Film Counter Advancing Lever (B. P.) B 6107 Screw x2 S 6237 Screw x 2 W 1832 Washer x 2 RANGE-VIEWFINDER OPTICAL SYSTEM (cf.p.3) SM 0377 Range-Viewfinder Optical System (Unit) C 9427 Lever (B. - Page 8 REF. NO. C-30208 EXPLODED VIEW CANONET SM0377 SCALE 1-2.0 CANON CAMERA CO., INC. ©...
- Page 9 REF. NO. C-30208 PARTS LIST WasherxN 'W 5220^ RANGE-VIEWFINDER OPTICAL SYSTEM (cf.p. 2) W 5221 Range-Viewfinder Optical System(Unit) SM 0377 JW 5222- 9280-03 Lever (B.P. )' Retaining Washer YS 1131 9285-03 Lever (B. P.) 9288-04 Focusing Lever (B. P.) Lever (B. P.) 9340 9426 Base (B.
- Page 10 C 4 0 8 6 C 4 3 2 8 ^ N > C 4 2 8 3 C 4285 W2622 SI5I8. W2622 x2 " ^ • C 4 0 7 3 C407I 81413 <§> C4076 SCALE 1-2.0 CANON CAMERA CO., INC. ©...
-
Page 11: Back Cover
REF. NO. C-30208 PARTS LIST BACK COVER Back Cover (B. P.) C 9270 C 9271 Pressure Plate (B. P.) C 4078 Hinge Shaft of Hinge C 4079 Anti-Curl Roller C 4086 C 4117 Light Shield C 4275 Washer Screw x 3 S 4508 TAKE-UP SPOOL &... -
Page 12: Exploded View
W3I22 (B C9262-09 C 4 3 I 5 ^ ^ C 4 0 0 9 - 0 3 C 4 0 0 8 C 4 0 0 7 C4006 <^> C4005 • S 3787 SCALE 1-2.0 CANON CAMERA CO., INC. ©... - Page 13 REF. NO. C-30208 PARTS LIST WINDING MECHANISM (cf. p.4) W 5222 Washer xN YS 1371 Retaining Washer C 9262-09 Base Plate (B. P.) C 9263 Gear (B. P.) C 9264 Feeding Gear (B. P.) C 9265 Film Rewind Release Lever (B. P.) C 9266-11 Wind Device (B.
- Page 14 REF. NO. C-30208 EXPLODED VIEW CANONET C426I C4258 C9338 ES4003 C4262 S 3 7 8 7 C 9 2 8 r ^ Y9I35 CU087 SCALE 1-2.0 CANON CAMERA CO., INC. ©...
-
Page 15: Objective Lens
REF. NO. C-30208 PARTS LIST OBJECTIVE LENS CU 086 Front Lens (Unit) CU 087 Rear Lens (Unit) CU 110 Helicoid (Unit) CU 111 Front Panel (Unit) C 9278 Flash Socket (B. P.) C 9281 Lever (B. P.) C 9282 Contact (B. P.) C 9338 Lattice Window Frame (B. - Page 16 P£F. NO. C-30208 EXPLODED VIEW CANONET , C 4241-02 YSMOI Y S I I 3 I , , C4238 a> S3I77 SCALE 1-2.0 CANON CAMERA CO., INC. ©...
- Page 17 REF. NO. C-30208 PARTS LIST TOP COVER (cf. p. 1) C 4 2 4 0 Eyepiece Holder C 4241-02 Film Counter Window G 52^6 Eyepiece FILM COUNTER (cf. p. 2) C 4238 S 3177 Screw YS 1101 Retaining Washer YS 1131 Retaining Washer x 3...
- Page 18 C 4137-03 . ^ ^ r a C4298 ^ _ * YS 1131 YS 1131 4l2sWl R I 4 ^ ™ ^ C 4 l 5 7 B I 4 3 5 SCALE 1-2.0 CANON CAMERA CO., INC. ©...
-
Page 19: Parts List
REF. NO. C-30208 PARTS LIST EXPOSURE METER (cf.pp.2 & 6) CU 066 ure Meter (Unit) Expos Shutter Shaft (B. P.) 9272 9275-05 Drive Lever Unit (B. P.) 9277 Base (B. P.) 9286 Lever for Shutter Release (B. P.) 9289-04 EE-Calculator (B. P.) 9412 Moving Arm (B. - Page 20 REF. NO. C-30208 INDEX OF PART NUMBERS PART NO. PART NO. PAGE PART NO. PART NO. PAGE PAGE PAGE C 9431 C 4079 C 4205 CU 066 C 9487 C 4208 CU 067 C 4086 CU 086 C 9488 C 4090 C 4209 CU 087 C 9503...
- Page 21 REF. NO. C-30208 PART NO. PAGE PART NO C 4334 S 1167 C 4359 S 1218 C 4360 S 1518 C 4363 S 1777 S.3177 C 4364 S 3207 C 4366 S 3237 S 3287 S 3307 S 3507 S 3557 B 1011 S 3587 B 1077...
- Page 22 CANON REPAIR MANUAL SHUTTER for CANONET 1.2 (REF.NO. 1-30202) (REF.NO. 1-30206) CANON CAMERA CO., INC. TOKYO, JAPAN...
- Page 23 REF. 1-30202 EXPLODED VIEW REF. 1-30206 SHUTTER for CANONET 1.2 NO SCALE © CANON CAMERA CO., INC.
- Page 24 REF. NO. 1-30202 REF. NO. 1-30206 PARTS LIST Y13-5001 I n s u l a t o r Sheet Y13-5002 F l a s h L e a d W i r e I n s u l a t o r Bush Y13-5003 Y13-5004 S c r e w...
- Page 25 CANON REPAIR MANUAL SHUTTER for CANONET 3 (REFERENCE N O . 1 - 3 0 2 0 8 ) CANON CAMERA COMPANY INC. TOKYO, JAPAN...
- Page 26 REF. NO. 1-30208 EXPLODED VIEW SHUTTER for CANONET ...YI3-5035 JYI3-5036 B...YI3-5038 -.Y13-502I "• -"" YI3-5020 5045 »YI3-50I2 SCALE 1 - 1 . 5 CANON CAMERA CO., INC.
- Page 27 REF. NO. 1 - 3 0 2 0 8 PARTS LIST Y 1 3 - • 5044 L e a d W i r e I n s u l a t o r S h e e t Y 1 3 - 5 0 0 1 Y 1 3 - - 5 0 4 5 H o o d R i n g...
- Page 28 ^ - ^ £ ^ • 1 3 - 5 0 7 6 ^ < p Y I 3 - 5 0 7 2 >080 Y g V " 3-5077 >YI3-508I *~"~- £fYI3-5078 <(gYI3-5079 ~"*@YI3-5082 YI3-5087 YI3-5050 YI3-5049 SCALE 1 - 1 . 5 CANON CAMERA CO., INC. (C...
- Page 29 REF. NO. 1-30208 PARTS LIST Y l 3 - 5 0 4 8 S e c t o r Ring Y13-5049 W a s h e r x 5 Y13-5050 S c r e w x 3 Y13-5051 S c r e w x 2 Y13-5052 Spring Yl 3-5053...
- Page 30 REF. NO. 1-30208 INDEX OF PARTS NUMBER P A R T NO. PAGE P A R T NO. P A G E Y13-5001 Y13-5053 Y13-5002 Y13-5054 Y I 3 - 5 0 0 3 Y13-5055 Y13-5004 Y13-5056 Y13-5005 Y13-5057 Y13-5006 Y13-5058 Y13-5007 Y13-5059...
- Page 31 CANON REPAIR GUIDE CANONET (REFERENCE NO. C-30206) CANON CAMERA COMPANY, INC. TOKYO, JAPAN...
- Page 32 TABLE OF CONTENTS RANGE-VIEWFINDER When the double- image of the Range-Viewfinder does not align When the Viewfinder Mask does not move smoothly When the Aperture Scale Indicator inside the Range-Viewfinder out of order When the Red Mark does not appear normally EXPOSURE METER When the Exposure Meter does not work FILM COUNTER...
-
Page 33: Range-Viewfinder
RANGE-VIEWFINDER When the double-image of the Range-Viewfinder does not align, it should be adjusted in the following manner: Turn Screw C4221 when the deviation of the double-image is vertical. Turn the Eccentric Screw of Lever C9285 to right or l e f t when the deviation of the double-image is horizontal. -
Page 34: When The Red Mark Does Not Appear Normally
3. If Lever C9427 and Lever for Mask C4137 are out of place,adjustments should be made by bending C9427 upwards. See Repair M a n u a l pp.2&8. 4. If Lever C9427 and Arm C9428 are out of place the upward and downward play of both should be adjusted with a washer. -
Page 35: Exposure Meter
EXPOSURE METER When the Shutter is not released even after the Shutter Button is pressed down for automatic photography with the shutter speed set at 1/125 or 1/250 in the bright sunlight, it may be assumed that the Exposure Meter has developed some kind of trouble. -
Page 36: Film Counter
FILM COUNTER If for some reason the Winding Mechanism becomes faulty and the Film Counter does not move forward, adjustments should be made in the following manner: 1. Check the Spring for Film Counter CU067 and reattach if it has come loose. See Repair Manual p.2. -
Page 37: Winding Mechanism
WINDING MECHANISM When the camera shows the conditions described below, it may be assumed that the Winding Mechanism has become defective and so the following adjustments should be made: When the shutter is not charged even after the Trigger Lever is wound, the following adjustments should be made: Loosen Screw B1190. -
Page 38: When The Shutter Button Cannot Be Pressed Down
3. If the gap between Lever C4044 and Winding Device C9266-11 has become too wide because Lever C4044 has become worn out, adjustments should be made by turning the Hexagonal Eccentric Nut for Base Plate C9262-09 with Spann- er 2 for C 4 0 4 1 . If this is insufficient, C4044 should be replaced. See Repair Manual p. -
Page 39: Incorrect Focus
INCORRECT FOCUS When the Back Focus becomes out of focus due to some kind of shock, the following adjustments should be made with the use of 200mm T-Type Collimator: First, loosen only three of the S3787x4 Screws holding Focusing Ring C4256, determine the proper position by turning C4256, and when the proper position is found, loosen the remaining one S3787 Screw. - Page 40 CANON REPAIR GUIDE SHUTTER for CANONET (REF.NO. 1-30208) CANON CAMERA CO.,INC. TOKYO, JAPAN...
- Page 41 CONTENTS D i s a s s e m b l i n g Method B a r r e l Shutter B l a d e s D i a p h r a g m B l a d e s D i a p h r a g m Ring Adjusting Method R e l e a s e L e v e r...
-
Page 42: B A R R E L
B A R R E L DISASSEMBLING click leve b a r r e l s p e e d plate c a s e W o r k s Specifications Taking out B a r r e l F i t the nut to the s c r e w . Taking out nut. -
Page 43: Shutter B L A D E S
SHUTTER BLADES DISASSEMBLING s h u t t e r plate & b l a d e s D ®»- Works Specifications Taking out Set L e v e r Taking out set l e v e r . Taking out s c r e w . n. -
Page 44: D I A P H R A G M B L A D E S
DIAPHRAGM BLADES DISASSEMBLING W o r k s Specifications Taking out D i a p h r a g m Taking out s c r e w x 2 Taking out m i d d l e p l a t e A , B Taking out d i a p h r a g m b l a d e s (5 b l a d e s ) . - Page 45 D I A P H R A G M R I N G D I S A S S E M B L I N G d i a p h r a g m r i n g A 8> o m a r k B §...
- Page 46 R E L E A S E L E V E R A D J U S T M E N T Taking out M - G o v e r n o r D r i v e r How to D i s a s s e m b l e 1) Taking out s p r i n g 2) Taking out nut...
- Page 47 7 Check gearing of release Refer to the item how to replace and adjust tension. 8 Fixing B lever.
-
Page 48: M - G O V E R N O R
M-GOVERNOR A D J U S T M E N T Taking out B l e v e r . How to D i s a s s e m b l e s c r e w Taking out M - G o v e r n o r D r i v e r . - Page 49 SHUTTER BLADES A D J U S T M E N T Take out the s p r i n g f r o m s p r i n g h a n g e r . How to D i s a s s e m b l e s p r i n g s p r i n g h a n g e r Take out t e n s i o n l e v e r in the s t a t e that s h u t t e r is...
-
Page 50: Shutter B L A D E S
2) A s s e m b l i n g sub s h u t t e r b l a d e A s s e m b l e a s shown in the t e n s i o n shaft d i a g r a m ( a ) - ( d ) . - Page 51 3) P l a c i n g the c a s e and the plate in p a r a l l e l , a s s e m b l e in until the height of r e l e a s e p i n ' s top end b e c o m e s s a m e l e v e l as the oblique l i n e s p o r t i o n of the d i a g r a m .
-
Page 52: D I A P H R A G M B L A D E S
DIAPHRAGM BLADES A D J U S T M E N T Taking out p l a t e . How to D i s a s s e m b l e Refer to the i t e m how to r e p l a c e and adjust s h u t t e r b l a d e s . -
Page 53: Main Cocking L E V E R
MAIN COCKING L E V E R ADJUSTMENT How to D i s a s s e m b l e Taking out slow g o v e r n o r 1) Set the cocking l e v e r . 2) Take out t h r e e s c r e w s for the g o v e r n o r . - Page 54 Hang the s p r i n g hang tool to r i s e up p o r t i o n of t e n s i o n s p r i n g and hang it to p o r t i o n (a) of the m a i n cocking l e v e r pullying the s p r i n g .
- Page 55 G e a r i n g of r e l e a s e l e v e r and m a i n cocking l e v e r 1) Set the cocking l e v e r . 2) Letting the p i s t o n o p e r - p i s t o n...
-
Page 56: T R O U B L E , Cause & Remedy
T R O U B L E , CAUSE & REMEDY IT CANNOT BE R E L E A S E D . The b l a d e s do not m o v e . C l e a n . M e t a l c o l l a p s e R e p l a c e m e n t R e f e r to the i t e m of s h u t t e r b l a d e s a d j u s t m e n t . -
Page 57: It Cannot Be Charged
R u s t e d r e l e a s e l e v e r R e p l a c e m e n t Refer to the i t e m of r e l e a s e l e v e r a d j u s t m e n t . I n f e r i o r R e l e a s e Ring Rough s u r f a c e of r e l e a s e pin P o l i s h using oil stone and after that put a little... -
Page 58: Charge Is Heavy
CHARGE IS HEAVY. Rough Surface of Main L a c k of L u b r i c a t i o n Cocking L e v e r with L u b r i c a t e MOG-3 to the touching s u r f a c e . R e l e a s e L e v e r Rough s u r f a c e R e p l a c e m a i n cocking l e v e r and r e l e a s e l e v e r . -
Page 59: Diaphragm Blades Do Not Return Smoothly
At this t i m e c h e c k if the auto l e v e r m o v e s s m o o t h l y without any c a t c h i n g . Warping R e p l a c e m e n t R e f e r to the i t e m of d i a p h r a g m b l a d e s... -
Page 60: B Skips
R e p l a c e m e n t R e f e r to the i t e m of s h u t t e r b l a d e s a d j u s t m e n t . An o b s t a c l e h a s b e e n a b r i d g e d s t u c k . - Page 61 L o o s e n e d r e v e t t i n g of pinion g e a r R e p l a c e g o v e r n o r . C r e a k i n g of connection plate IT CANNOT BE R E L E A S E S E L F - T I M E R .
- Page 62 CANON SERVICE TOOL MANUAL CANONET (REFERENCE NO. C-30206) CANON CAMERA COMPANY, INC. TOKYO, JAPAN...
- Page 63 THE LENS SHUTTER TESTER THE INSPECTION DEVICE FOR CANON METER THE LOCATING JIG FOR THE EE-DRIVING SHAFT THE SPANNER-2 FOR C4041 LIST OF SPECIAL SCREWDRIVERS FOR CANONET Copyright 1962 by Canon Camera Co., Inc. Printed in Japan First Printing, June 1962...
- Page 64 (1) The Lens Projection Test Unit The Lens Projection Test Unit refers to the equipment for use in the test of the Canon Lens and Canon Cine Lens, which has already been supplied, with the exception of its attachment; so the Test Unit is not supplied with the recently-introduced Lens Projection Test Attachment-2.
- Page 65 6. H O W TO USE 6.1. The Lens Projection Test Unit without attachment shall be placed on a desk the surface of which is even, screen being set right ahead of the desk. In this case, the Test Unit shall be made to face just toward the screen with a space of about 1.5 m left.
- Page 66 HOW TO USE THE 200mm T TYPE COLLIMATOR 1. NAME OF THE TOOL 200mm T Type Collimator 2. PURPOSE In repairing the Canonet, when the front panel with objective lens has been removed from the body or when front panel with objective lens has been further dismantled, a 200mm T Type Collimator must be used to adjust helicoid so that the focal plane will be accurately maintained.
- Page 67 6. HOW TO USE 6. 1. Place the stand of the 200mm T Type Collimator on a flat table, set up the pole and attach the collimator to the pole. 6.2. Place the mirror on the bench of the stand. Next, turn the heliographical mirror and adjust so that the field of vision is brightest.
- Page 68 HOW TO USE THE LENS SHUTTER TESTER 1. NAME OF THE TOOL Lens Shutter Tester 2. PURPOSE The Lens Shutter Tester is used to test the performance of the shutter of the camera with the lens shutter. 3. TO BE USED FOR Canonet 4.
- Page 69 by turning the ZERO dial. Then, put the lever on MEASURE and, if the needle gets out of - 1 0 0 , adjust it by turning the BALANCE dial. 6. 7. Adjust the height of the camera stand of the Tester B so that the center of the shutter of the camera and that of the window of the Tester B come on the same point.
- Page 70 6.10. 10. When you want to read the quantity of the swing, measure it following the directions below. Set the SHUTTER SPEED dial at 1000. If - the needle of the meter swings f r o m - 1 0 0 to 0 when you press the shutter button, the time lag in this case is 1 m.
- Page 71 The quantity of the swing of the needle of the meter and the brightness of the light source are not related but the Testers cannot work correctly if the brightness of the light source is too much or if it is insufficient. 7.
- Page 72 PURPOSE The Inspection Device is the apparatus to be used as light source when the performance of Canon Meter and the pro- ducts which have Canon Meter(e.g. Canonet and Zoom 8) are inspected. It should be connected to power supply,either 100V-125V or 220V-240V, following each direction.
- Page 73 6. HOW TO USE 6. 1. Place the Inspection Device for Canon Meter on a flat table where no direct rays of the sun -fall intensely. 6. 2. Make sure that switches for the light source and for the fan are both OFF and the voltage control handle is turned full to the left.
- Page 74 7. 2. Use Canon Meter R which is correctly adjusted as the examining tool. 7.3. How to Examine 7. 3. 1. Choose one of the Canon i.,eier as the standard and check it as soon as the Inspection Device is delivered to you.
- Page 75 HOW TO USE THE LOCATING JIG FOR THE EE-DRIVING SHAFT 1. NAME OF THE TOOL Locating Jig for the EE-Driving Shaft. 2. PURPOSE Set up and adjust the Lever C9281 of the EE-Driving Shaft of Canonet following the directions below. The Locating Jig is necessary for these cases: when the Screw S3787 which attaches the Lever C9281 to the Driving Shaft is loo- sened, when the Lever C9281 is to be exchanged and when the front panel with objective lens is to be disassembled, repaired and again assembled.
- Page 76 LIST OF SPECIAL SCREWDRIVERS FOR CANONET For tightening Pin Face Nut C4021 See Repair Manual p. 5. T06A-C4021 For tightening Nut C 4 0 3 6 See Repair Manual p. 5. T06A-C4036 For tightening Pin Face Screw C 4 1 0 4 See Repair Manual p.
- Page 77 For tightening Front Lens CU086 Inner side pin face slot is used. See Repair Manual p. 6. T06A-C4263 For tightening Front Lens CU086 Outer side pin face slot is uesd. See Repair Manual p. 6. For tightening Rear Lens CU087 Outer side pin face slot is uesd.
- Page 78 CANON SERVICE MATERIALS MANUAL CANONET (REFERENCE NO. C-30206) CANON CAMERA COMPANY, INC. TOKYO, JAPAN...
- Page 79 Following service materials are provided for Canonet. Expressly for the use of the lubricating oil, charts which show the part for each oil to be used are attached. Adhesive Lubricant Diabond No. 1620 Grease Diabond No. 1640 Perma-Lube C-3-3 7 5 % Pliobond Perma-Lube3005 2 5 % Epoxy resin...
- Page 80 ATTACHED CHART ( H ) Repair Manual p. 4 Repak Manual jj.6 ( C 4 0 9 1 ) ( C 4 3 2 8 ) ( C U 0 8 6 ) ( C U 0 8 7 ) t = 7 MH-G3278A Liquid-Molybdenum...