Goodman GMH95 Installation Instructions Manual
Gas-fired warm air furnace
Hide thumbs
Also See for GMH95:
- Installation instructions manual (52 pages) ,
- Technical manual (17 pages) ,
- Product specifications (13 pages)
Table of Contents
Advertisement
Quick Links
G
AS
(Type FSP CATEGORY IV Direct or Non Direct Vent Air Furnace)
ATTENTION INSTALLING PERSONNEL
As a professional installer you have an obligation to know the product better than the customer. This includes all safety
Prior to actual installation, thoroughly familiarize yourself with this Instruction Manual. Pay special attention to all safety
warnings. Often during installation or repair it is possible to place yourself in a position which is more hazardous than
Remember, it is your responsibility to install the product safely and to know it well enough to be able to instruct a customer
Safety is a matter of common sense...a matter of thinking before acting. Most dealers have a list of specific good safety
The precautions listed in this Installation Manual are intended as supplemental to existing practices. However, if there is
a direct conflict between existing practices and the content of this manual, the precautions listed here take precedence.
IO-299A
GMH95 / GCH9
-F
W
IRED
I
NSTALLATION
Installer: Affix all manuals adjacent to the unit.
These furnaces comply with requirements
embodied in the American National Stan-
dard / National Standard of Canada ANSI
Z21.47·CSA-2.3 Gas Fired Central Fur-
naces.
RECOGNIZE THIS SYMBOL AS A SAFETY PRECAUTION.
precautions and related items.
when the unit is in operation.
practices...follow them.
NOTE: Please contact your distributor or our website
for the applicable product data book referred to in this manual.
Goodman Manufacturing Company, L.P.
2550 North Loop West, Suite 400, Houston, TX 77092
www.goodmanmfg.com
2006 Goodman Manufacturing Company, L.P.
©
A
F
ARM
IR
I
NSTRUCTIONS
in its safe use.
URNACE
®
C
US
8/06
Advertisement
Table of Contents
Troubleshooting

Related Manuals for Goodman GMH95


Summary of Contents for Goodman GMH95
- Page 1 NOTE: Please contact your distributor or our website for the applicable product data book referred to in this manual. Goodman Manufacturing Company, L.P. 2550 North Loop West, Suite 400, Houston, TX 77092 www.goodmanmfg.com IO-299A 2006 Goodman Manufacturing Company, L.P. 8/06 ©...
-
Page 2: Table Of Contents
Table of Contents I. Component Identification ............................... 5 II. Safety ....................................6 (ESD) P ....................6 LECTROSTATIC ISCHARGE RECAUTIONS III. Product Application ..............................6 IV. Location Requirements & Considerations ......................... 7 ................................. 7 ENERAL ........................... 8 LEARANCES AND CCESSIBILITY ............................8 URNACE USPENSION .......................... - Page 3 Table of Contents XIV. Startup Procedure & Adjustment ..........................27 ..........................27 NTICIPATOR ETTING ............................27 RAIN RIMING ............................27 URNACE OPERATION ......................27 UPPLY RESSURE EASUREMENT .................. 28 ANIFOLD RESSURE EASUREMENT AND DJUSTMENT ) ..................29 NPUT EASUREMENT ATURAL ............................
- Page 4 WNER WARNING It is important that you fill out the owner’s registration card and mail it today. This will assist us in contacting you should any service or F THE INFORMATION IN THESE INSTRUCTIONS IS NOT FOLLOWED EXACTLY, A warranty information change in the future. When filling in the regis- FIRE OR EXPLOSION MAY RESULT CAUSING PROPERTY DAMAGE, PERSONAL tration card, be sure to include the model, manufacturing, and serial INJURY OR LOSS OF LIFE.
-
Page 5: Component Identification
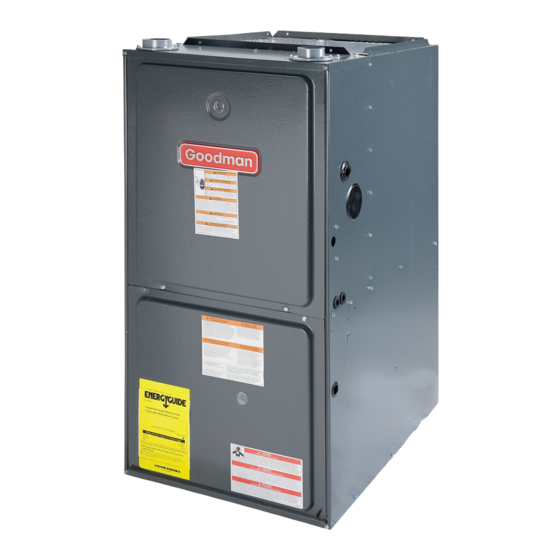
I. CO I. CO I. COMPO MPONENT ID NENT ID NENT ID NENT IDENTIFI ENTIFI ENTIFIC C C C C A A A A A TI ENTIFI TIO O O O O N N N N N I. CO I. CO NENT ID ENTIFI Upflow/Horizontal... -
Page 6: Ii. Safety
II. SAFETY II. SAFETY II. SAFETY II. SAFETY II. SAFETY 4. Discharge your body to ground before removing a new control from its container. Follow steps 1 through 3 if Please adhere to the following warnings and cautions when in- installing the control on a furnace. -
Page 7: Location Requirements & Considerations
NOTE: Do not connect the temporary duct directly to the IV. LOC . LOC . LOC . LOCA A A A A TI . LOC TIO O O O O N REQUIREMENTS & CO N REQUIREMENTS & CO N REQUIREMENTS & CO N REQUIREMENTS &... -
Page 8: Clearances And Accessibility
halogen type refrigerants URNACE USPENSION cleaning solutions (such as perchloroethylene) If suspending the furnace from rafters or joists, use 3/8" threaded printing inks rod and 2”x2”x1/8” angle iron as shown below. The length of rod paint removers will depend on the application and the clearances necessary. varnishes PROVIDE 8"... -
Page 9: Thermostat Location
Corrections must be in accordance with the latest edition of the Refer to the latest edition of the National Fuel Gas Code NFPA 54/ ANSI Z223.1 (Section 5.3), or CSA B149 Installation Codes (Sec- National Fuel Gas Code NFPA 54/ANSI Z223.1 and/or CSA B149 tions 7.2, 7.3, or 7.4), or applicable provisions of the local building Installation Codes. - Page 10 5.3.3 Equipment Located in Confined Spaces: Chimney or Gas Vent Ventilation louvers (a) All Air from Inside the Building: The confined space shall be pro- (each end of attic) vided with two permanent openings communicating directly with NOTE: The inlet and outlet air an additional room(s) of sufficient volume so that the combined openings must each have a free area of not less than one square...
-
Page 11: Installation Positions
5. When directly communicating with the outdoors, the single open- ing shall have a minimum free area of 1 square inch per 3,000 LOCATION BTU per hour of total input rating of all equipment in the enclo- sure. 5.3.4 Specially Engineered Installations: The requirements of 5.3.3 shall not necessarily govern when special engineering, approved by the authority having jurisdiction, provides an adequate supply of air for combustion, ventilation, and dilution of flue... -
Page 12: Alternate Electrical And Gas Line Connections
This furnace is shipped from the factory configured for natural gas ALTERNATE FLUE AND DISCHARGE Bottom COMBUSTION AIR PIPE ALTERNATE FLUE PIPE at standard altitude. Propane gas installations require an orifice Return LOCATIONS LOCATION Duct change to compensate for the energy content difference between Connection natural and propane gas. -
Page 13: Dual Certification : Non -Direct /Direct Vent
ERTIFICATION IRECT IRECT ERMINATION OCATIONS This furnace is dual certified and may be installed as a non-direct NOTES: Refer to Section IV, Location Requirements and vent (single pipe) or direct vent (dual pipe) appliance. A non-direct Considerations for combustion air contaminant restrictions. vent installation requires only a vent/flue pipe, while a direct vent installation requires both a vent/flue pipe and a combustion air The following bullets and diagram describe the restrictions con-... -
Page 14: Canadian Venting Requirements
OMBUSTION ANADIAN ENTING EQUIREMENTS IRECT NSTALLATIONS In Canada, venting must conform to the requirements of the cur- On upflow units secure the combustion air intake pipe directly to rent CAN/CSA-B149 Installation Code. Use only CSA listed two or the air intake coupling. On counterflow units secure the combus- three inch diameter PVC or ABS pipe, solvent cement, and fittings tion air intake pipe to the air intake coupling using the rubber cou- throughout. -
Page 15: Non -Direct Vent (Single Pipe ) Piping
Counterflow units. 8. Upflow and Counterflow units. 1. Remove and save the four screws securing the vent/flue For horizontal installations, externally secure the field- coupling to the furnace basepan. Also remove the three supplied vent/flue pipe directly to the vent/flue coupling using screws securing the furnace’s internal vent/flue piping to a PVC or ABS coupling or elbow. -
Page 16: Direct Vent (Dual Pipe ) Piping
Although non-direct vent installations do not require a combus- tion air intake pipe, a minimum of one 90° elbow should be at- tached to the furnace’s combustion air intake if: an upright instal- 12 " Min To lation uses the standard intake location. This elbow will guard Roof Or Highest Anticipated against inadvertent blockage of the air intake. - Page 17 For details concerning connection of pipes to the furnace, refer to Horizontal terminations should be as shown in the following fig- the Section IX, Vent/Flue Pipe and Combustion Pipe - Standard ure. Refer to Section IX, Vent/Flue Pipe and Combustion Pipe - Furnace Connections or Alternate Furnace Connections.
-
Page 18: Vent /Intake Terminations For Installation Of Multiple Direct Vent Furnaces
X. CO X. COND X. CO NDENSA ENSA ENSA ENSATE DRAIN LINES & DRAIN TRAP TE DRAIN LINES & DRAIN TRAP TE DRAIN LINES & DRAIN TRAP TE DRAIN LINES & DRAIN TRAP X. CO X. CO ENSA TE DRAIN LINES & DRAIN TRAP 90°... - Page 19 1. Remove the rubber plug from the front cover drain port (right Cabinet Width Models "X" Length to Cut From Long or left side, depending on the intended drain trap mounting). (inches) (kBTU_Tons) End of Hose B 2. Secure Hose A to front cover drain port with a red hose 045__30 17 1/2 7 inches...
-
Page 20: Horizontal Installations
For details concerning mounting of the drain trap, refer to Section PRIGHT RAIN OUNTING EFT OR IGHT ANEL X, Condensate Drain Lines and Drain Trap - Horizontal Drain Trap 1. Insert drain tubes into drain trap and position the drain trap Mounting (left or right side panel). -
Page 21: Xi. Electrical Connections
left side panel. The furnace is shipped configured for a left side ORIZONTAL RAIN OUNTING EFT OR IGHT ANEL (right side for counterflows) electrical connection with the junction 1. Position the drain trap against side panel with drain tubes box located inside the burner compartment. To make electrical inserted into trap. -
Page 22: Volt Thermostat Wiring
If it is necessary for the installer to supply additional line voltage 24 V HERMOSTAT IRING wiring to the inside of the furnace, the wiring must conform to all NOTE: Wire routing must not interfere with circulator blower local codes, and have a minimum temperature rating of 105°C. All operation, filter removal, or routine maintenance. -
Page 23: General
In some areas the gas supplier may artificially derate the gas in an Natural Gas Capacity of Pipe effort to compensate for the effects of altitude. If the gas is artifi- In Cubic Feet of Gas Per Hour (CFH) Length of Nominal Black Pipe Size cially derated, the appropriate orifice size must be determined Pipe in Feet... - Page 24 • • Connect the furnace to the building piping by one of the Use listed gas appliance connectors in accordance with following methods: their instructions. Connectors must be fully in the same room as the furnace. – Rigid metallic pipe and fittings. •...
-
Page 25: Propane Gas Tanks And Piping
A gas detecting warning system is the only reliable way to detect a CAUTION propane gas leak. Rust can reduce the level of odorant in propane gas. Do not rely on your sense of smell. Contact a local propane gas supplier about installing a gas detecting warning system. If DGES OF SHEET METAL HOLES MAY BE SHARP. -
Page 26: Circulating Air & Filters
Sizing Between Single or Second Stage Regulator and Appliance* CAUTION Maximum Propane Capacities Listed are Based on 1/2" W.C. pressure drop at 11" W.C. setting. Capacities in 1,000 BTU/hour. Pipe or Nominal Pipe Size Tubing Tubing Size, O.D. Type L Schedule 40 DGES OF SHEET METAL HOLES MAY BE SHARP. -
Page 27: Upright Installations
RAIN RIMING COOLING AIRFLOW REQUIREMENT (CFM) The drain trap must be primed prior to furnace startup. To prime, fill the drain trap with water. This ensures proper furnace drainage 1000 1200 1400 1600 2000 upon startup and prohibits the possibility of flue gases escaping 0453BXA 388* 388*... -
Page 28: Gas Manifold Pressure Measurement And Adjustment
If using the inlet pressure boss on the gas valve, 16. Using a leak detection solution or soap suds, check for then use the 36G Valve Pressure Check Kit, Goodman Part No. leaks at pressure boss screw. Bubbles forming indicate a 0151K00000S. -
Page 29: Gas Input Rate Measurement (Natural Gas Only )
HEAT EXCHANGER RADIATION "LINE OF SIGHT" Manifold Gas Pressure SUPPLY Rate Range Nominal Low Stage 1.7 to 2.3" w.c. 2.0" w.c. SUPPLY Natural High Stage 3.2 to 3.8" w.c. 3.5" w.c. Low Stage 5.7 to 6.3" w.c. 6.0" w.c. RISE = SUPPLY RETURN Propane... -
Page 30: Normal Sequence Of Operation
DIP S “2 STG” Circulator Blower Speeds WITCH IS SET TO POSITION The normal operational sequence in sequence is as follows: Medium Low Orange • R and W thermostat contacts close, initiating a call for heat. Medium Blue High Black •... -
Page 31: Cooling Mode
XVII. SAFETY CIRCUIT DESCRIPTION XVII. SAFETY CIRCUIT DESCRIPTION XVII. SAFETY CIRCUIT DESCRIPTION XVII. SAFETY CIRCUIT DESCRIPTION XVII. SAFETY CIRCUIT DESCRIPTION OOLING The normal operational sequence in cooling mode is as follows: ENERAL • R and Y thermostat contacts close, initiating a call for cool. A number of safety circuits are employed to ensure safe and proper •... -
Page 32: Xviii. Troubleshooting
XVIII. TROUBLESHOOTING XVIII. TROUBLESHOOTING XVIII. TROUBLESHOOTING XVIII. TROUBLESHOOTING XVIII. TROUBLESHOOTING 2. Manual power interruption. Interrupt 115 volt power to the furnace for 1 - 20 seconds. (ESD) P LECTROSTATIC ISCHARGE RECAUTIONS 3. Manual thermostat cycle. Lower the thermostat so that there is no longer a call for heat then reset to previous setting. -
Page 33: Burners
ILTER EMOVAL LAME ENSOR UALIFIED ERVICER Depending on the installation, differing filter arrangements can be Under some conditions, the fuel or air supply can create a nearly applied. Filters can be installed in either the central return register invisible coating on the flame sensor. This coating acts as an or a side panel external filter rack (upflow only). -
Page 34: Internal Filter Removal
X X X X X X. INTERNAL FIL X. INTERNAL FIL X. INTERNAL FIL TER REM TER REM X X X X X XI. BEFO XI. BEFO XI. BEFO RE LEA RE LEA G AN INST G AN INST ALLA A A A A TI TIO O O O O N N N N N X. -
Page 35: Troubleshooting
TROUBLESHOOTING CHART Associated Associated Symptoms of Abnormal Fault Description(s) Possible Causes Fault Description(s) Possible Causes Corrective Action Cautions and Notes Operation LED Code LED Code • Furnace fails to operate. NONE • No 115 volt power to • Manual disconnect switch •... - Page 36 TROUBLESHOOTING CHART Associated Symptoms of Abnormal Fault Description(s) Possible Causes Corrective Action Cautions and Notes Operation LED Code • Circulator blower runs • Primary or auxiliary • Check primary/ • Turn power OFF • Insufficient conditioned air continuously. No furnace limit circuit is open.
-
Page 37: Wiring Diagram
6. TO RECALL THE LAST 5 FAULT S, MOST RECENT TO LEAST RECENT, DEPRESS SWITCH FOR MORE THAN 2 SECO NDS WHILE IN STANDBY (NO THE RMOSTAT IN PUTS) Wiring is subject to change, always refer to the wiring diagram on the unit for the most up-to-date wiring. © 2006 Goodman Manufacturing Company, L.P.