Table of Contents
Advertisement
Available languages
Available languages
Advertisement
Table of Contents

Related Manuals for Bushnell 119437


Summary of Contents for Bushnell 119437
- Page 1 I N S T R U C T I O N M A N U A L N o t i c e D ’ u t i l i s a t i o n VIDEO Model/Modèle: 119437 / 119447 / 119476 / 119477 Lit# 98-2294 / 04-12 2012 TrophyCams 1280HD_119437C+119447C+119476C+119477C_2LIM for Canada_040412.indd 1...
- Page 2 Visit the Trophy Cam community website today, where you can: • see more information about the capabilities and applications of the Bushnell Trophy Cams • discuss your Trophy Cam experiences with other users, share tips, belong to this new worldwide community • discover animals from all over the world • access a free service to manage your Trophy Cam photos/videos online and host your photos (videos are hosted on YouTube) www.bushnell.com/trophycam Rejoignez la communauté Trophy Cam sur www.trophycam.fr pour : • Trouver des informations sur l’utilisation et les capacités de votre Trophy Cam...
- Page 3 TABLE OF CONTENTS / TABLE DES MATIÈRES PAGE ENGLISH 4-40 FRANçAIS 41-81 2012 TrophyCams 1280HD_119437C+119447C+119476C+119477C_2LIM for Canada_040412.indd 3 4/4/12 1:52 PM...
-
Page 4: Important Note
IMPORTANT NOTE Congratulations on your purchase of one of the best trail cameras on the market! Bushnell is very proud of this little unit and we are sure you will be pleased with it as well. We appreciate your business and want to earn your trust. Please refer to the notes below and the instructions in this manual to ensure that you are completely satisfied with this product. - Page 5 INTRODUCTION About the Trophy Cam The Bushnell Trophy Cam is a digital scouting camera. It can be triggered by any movement of game in a location, detected by a highly sensitive Passive Infra-Red (PIR) motion sensor, and then take high quality pictures (up to 8MP still photos), or video clips.
-
Page 6: Parts And Controls
enabled software to automatically show a map pinpointing each camera’s location when a group of photos are reviewed on a computer. Especially useful for those who setup multiple Trophy Cams to monitor large or widely separated areas. • Multi Flash Mode (LED Control)- prevents overexposed flash photos in close range applications And many more features such as HD Video with Audio, widescreen or fullscreen format still photos, imprintable camera name (user set) along with... -
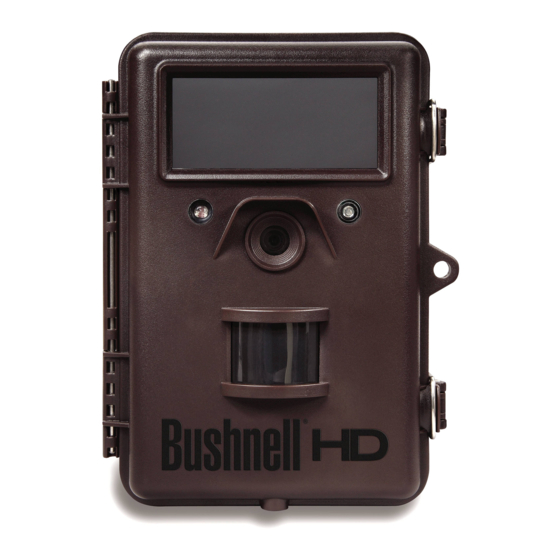
Page 7: Front View
Light FRONT VIEW Sensor Video Mic LED IR Flash Motion/ Low Battery Indicator DC in Lens Tripod Socket Cover Plug Lock Hole Fig. 1: Connections PIR Sensor Video Mic A/V Out USB Port Latch SD Card Slot DC In INSIDE VIEW Cable to Battery Compartment LCD Screen... -
Page 8: Installing The Batteries And Sd Card
Whether you use 4 or a full set, be sure to insert each battery with correct polarity (negative or “flat” end against the long spring of each battery slot). Bushnell recommends using a full set of new lithium AA (Energizer brand) or alkaline AA batteries. NiMh ®... -
Page 9: Inserting The Sd Card
If both an external power source is connected and batteries are installed, the Trophy Cam will be powered by the external power source. When the batteries become weak, the low-battery indicator LED will glow blue, indicating the batteries should be changed (pg 7, Front View). Inserting the SD Card The Trophy Cam has 32MB of internal memory, which can hold only about 20 photos (@ 5MP resolution). -
Page 10: Using The Trophy Cam
USING THE TROPHY CAM Once you’ve prepared your Trophy Cam by properly installing batteries and an SD card, you could simply take it outside, strap it to a tree, switch it on and leave-and you might get some great photos that are exactly what you wanted. -
Page 11: Setup Mode Shortcut Keys/Functions
videos automatically (according to its current parameter settings) when it is triggered by the PIR sensor’s detection of activity in the area it covers. You can either move the power switch directly from OFF to ON mode, or stop at the SETUP position first to change one or more settings, then move the switch to ON after you have finished doing so. -
Page 12: Video Mode
Fig. 3: SETUP Information Screen (standard display model shown) Camera (Still Photo) Mode SD Card Status Image Size (Resolution) Still Photo Mode Battery Level Date:Month-Day- Y ear Time Stamp Time Field Scan On Hour:Minute:Second # of Photos Taken Remaining Photo Capacity Video Mode Video Resolution Video Sound On... -
Page 13: Using The Setup Menu To Change Settings
USING THE SETUP MENU TO CHANGE SETTINGS The main purpose of the SETUP mode is to allow you to change the settings of the camera’s parameters (18 different ones are available!) so your Trophy Cam operates exactly the way you want it to. You will do this by entering the SETUP Menu and pressing the keys below the LCD display, which will show you each parameter and its setting. -
Page 14: Standard Display
setting. The checkmark will appear next to your new setting to confirm this (Fig. 4c). • On models with standard (non-color) display, only one setting is displayed at a time, starting with the current setting for the parameter when it is first selected (Fig. 4d). To change the setting, use the UP/ DOWN keys to display the new setting you want (Fig. -
Page 15: Examples-Changing The Settings Of Some Common Parameters
EXAMPLES-Changing the Settings of Some Common Parameters Following this page, you will find tables listing all of the parameters found in the SETUP Menu, along with their possible settings (or range of settings), and a detailed description of what the parameter controls and what the settings do. - Page 16 Field Scan 2x with Live Trigger Feature Field Scan is a revolutionary new feature for the Bushnell Trophy Cam, which allows you to monitor your food plots or field edges with time lapse images or video. When set to “On”, the Trophy Cam will take a photo (or...
- Page 17 5. After you finish setting the Stop minutes, press OK to confirm your settings for the first block of Field Scan recording. If desired, you can create a second block of time by pressing the DOWN key to select "B" (Step 4), then press OK and follow the same process to set Start and Stop times for Field Scan block "B"...
- Page 18 7:00 PM. No Field Scan recording would occur from 8AM to 5:30PM, or from 7PM to 6AM. Remember, Field Scan recording is independent of normal triggers due to animal activity–even if no animals enter the IR sensor coverage zone, an image or video will still be captured every 15 minutes during the block(s) of time.
-
Page 19: The Setup Menu - Parameters And Settings List
The SETUP Menu – Parameters and Settings List w/Descriptions Parameter Description Settings (Bold=default) Mode Camera or Selects whether still photos or Video video clips are captured when the camera is triggered. 3M Pixel, Selects resolution for still photos Image Size (only affects 5M Pixel, from 3 to 8 megapixels. - Page 20 Parameter Description Settings (Bold=default) Low, Medium, Controls how many LED lamps LED Control (Multi-Flash High fire when images are taken in low feature) light. “High”=all 32 LEDs fire, which is the default setting. Set to Medium or Low if you are getting overexposed flash photos or will place the camera at very close range to the subject you want to...
- Page 21 Parameter Description Settings (Bold=default) Sets length per captured video Video 10S (second) clip. Settings begin with 10 Length (only default, with second default when parameter is affects video 60S to5S first selected. After stepping down clips) possible range to 5S, video length settings start over at 60S.
- Page 22 Parameter Description Settings (Bold=default) Low, Normal, Selects the sensitivity of the PIR Sensor Level High, Auto sensor. The “High” setting will make the camera more sensitive to infrared (heat) and more easily triggered by motion, and the “Low” setting makes it less sensitive to heat and motion.
- Page 23 Parameter Description Settings (Bold=default) Execute Deletes (erases) all files stored Format (followed by an on a card to prepare it for reuse. additional No/Yes Always format a card that has step) been previously used in other devices. Caution! Make sure you have downloaded and backed up any files you want to preserve first! Press OK to...
- Page 24 Parameter Description Settings (Bold=default) (Set) Set Clock Press OK and use the UP/DOWN keys (to change the setting) and LEFT/RIGHT keys ( to move to the next field) to set the hour (24-hr format only, “00”=midnight, “12”=noon) and minute, and then (on the lower row), the year, month and date.
- Page 25 Parameter Description Settings (Bold=default) Off, On Allows the user to input latitude Coordinate Input and longitude coordinates for the See "Using the camera’s location. This data will Setup Menu be embedded in the files saved on Input Screens" the camera’s SD card (if “On” is selected).
- Page 26 USING THE SETUP MENU INPUT SCREENS Camera Name Input After selecting the Camera Name parameter (the only setting is "Input"), press OK. If necessary, delete the previous or default name by pressing the RIGHT key until the backspace symbol ( ) (located between letters "A"...
-
Page 27: Mounting And Positioning The Trophy Cam
MOUNTING AND POSITIONING THE TROPHY CAM Mounting After you’ve set up the camera’s parameters to your personal preferences at home or in your truck, you’re ready to take it outside and slide the power switch to “ON”. When setting up the Trophy Cam for scouting game or other outdoor applications, you must be sure to mount it in place correctly and securely. -
Page 28: Sensing Angle And Distance Test
(Model# 119654C for 119476C/119477C, or Model# 119653C for 119437C/119447C) and Deluxe Tree Bracket (Model# 119652C) are also available-please see your Bushnell dealer or website for more details. Sensing Angle and Distance Test To test whether the Trophy Cam can effectively monitor the area you choose, this test is recommended to check the sensing angle and monitoring distance of the Trophy Cam. -
Page 29: Playing Back/Deleting The Photos/ Videos
Before leaving the camera unattended, please check for the following: • Are the batteries or DC power supply inserted/connected with correct polarity and is the power level is sufficient? • Does the SD card have sufficient available space and is its write- protection (lock) switch off? •... -
Page 30: Reviewing Images On An External Video Monitor
to “On” in the Setup Menu, you should hear audio from the speaker during playback. • Push MENU to delete an image. Image delete mode works as described below. To exit image review mode, press the OK key. Reviewing Images on an External Video Monitor A TV monitor can also be used to play back pictures (or videos) from the device. -
Page 31: Deleting Photos Or Videos
The Trophy Cam supports 3 kinds of file system formats, FAT12, FAT16, and FAT32. The default value is FAT16 to save photos and videos. Here are some related notes: • You don’t need to be concerned about the file system format of the Trophy Cam unless your equipment has problems reading the SD card. -
Page 32: Downloading The Photos/Videos
DOWNLOADING THE PHOTOS/VIDEOS To download your photos/videos to a PC or Mac*, first make sure the Trophy Cam power switch is in the OFF position. Connect the supplied cable to the camera’s USB port, then directly to a main USB port on your computer-do not use front panel/keyboard USB ports or unpowered “hubs”. -
Page 33: Troubleshooting (Faq)
Typically, the Trophy Cam will be able to capture several thousand images before the batteries die. 2. Check to make sure you have used new alkaline or lithium batteries. Bushnell recommends using a full set of Energizer Lithium AA ®... - Page 34 #) in the battery compartment, starting at the top, filling battery spaces 1-4 with no “gaps”. Bushnell recommends using a full set of 8 or 12 Energizer ® Lithium AA batteries in your Trophy Cam (the max. capacity for your model).
-
Page 35: Photos Do Not Capture Subject Of Interest
If this is seen on a consistent basis, then the sensor may need servicing. Please contact Bushnell customer service. 7. Short video clips—not recording to the length set a. Check to make sure that the SD card is not full. - Page 36 2. Try to set your camera up in an area where there is not a heat source in the camera’s line of sight. 3. In some cases, setting the camera near water will make the camera take images with no subject in them. Try aiming the camera over ground. 4.
- Page 37 Moisture or Ants Inside Camera 1. To ensure humidity or rain is kept out of the camera, secure the DC In plug firmly in place. 2. Ants can be attracted by low level electronic vibrations, and enter through any gaps between the exterior and interior of the camera. Make sure the DC In plug is securely attached.
-
Page 38: Technical Specifications
Triggering Interval 1 sec. - 60 min. programmable Shooting Numbers 1— 3 programmable Video Length 5-60sec. programmable 8x (119437/119447) or 12x (119467/119477) AA Power Supply batteries recommended, 4xAA as emergency power Stand-by Current < 0.2mA (<7mAh/day) Power Consumption 250mA (+1300mA when all LEDs fire) -
Page 39: Two-Year Limited Warranty
TWO-YEAR LIMITED WARRANTY Your Bushnell® product is warranted to be free of defects in materials and workmanship for two years after the date of purchase. In the event of a defect under this warranty, we will, at our option, repair or replace the product, provided that you return the product postage prepaid. -
Page 40: Fcc Compliance Statement
The device does not contain any user-serviceable parts. Repairs should only be made by an Authorized Bushnell repair center. Unauthorized repairs or modifications could result in permanent damage to the equipment, and will void your warranty and your authority to operate this device under Part 15 regulations. - Page 41 ™ N O T I C E D ’ U T I L I S A T I O N www.trophycam.fr Nos de modèle: 119437 / 119447 / 119476 / 119477 FRANçAIS Lit No 98-2294 / 04-12 2012 TrophyCams 1280HD_119437C+119447C+119476C+119477C_2LIM for Canada_040412.indd 41...
-
Page 42: Remarques Importantes
REMARQUES IMPORTANTES Nous vous remercions pour votre achat de l’un des meilleurs appareils photos de surveillance sur le marché ! Bushnell est extrêmement fier de ce concentré de technologie et nous sommes certains qu’il vous satisfera également. Nous vous sommes très reconnaissants de votre choix et désirons gagner votre confiance. - Page 43 INTRODUCTION À propos du Trophy Cam Le Trophy Cam de Bushnell est un appareil photo de surveillance numérique. Il peut être déclenché par tout mouvement d'un animal ou d'un individu dans un endroit donné – repéré par un détecteur de mouvement ultra sensible à...
-
Page 44: Face Avant
• Fonction de géomarquage GPS :elle permet à l'utilisateur de saisir la latitude et la longitude de l'emplacement du Trophy Cam, qui seront ensuite intégrées à chaque fichier photo. Ce système permet à Google Earth, Picassa et à d'autres logiciels compatibles avec le géomarquage d'afficher automatiquement une carte indiquant les lieux / sites des prises de vue lors de leur visionnage sur un ordinateur. - Page 45 FACE INTERNE Câble de raccord au compartiment à piles Écran LCD HAUT/Vidéo BAS/Photo GAUCHE MENU OK/Lecture (REPLAY) MARCHE Marche (ON)/ CONFIGURATION Configuration DROITE/Déclencheur (SETUP)/ ARRÊT Manuel (SHOT) Arrêt (OFF) Fig. 2: Commutateur d’alimentation et interface de contrôle à six touches Applications Le Trophy Cam peut être utilisé...
-
Page 46: Installation Des Piles Et De La Carte Sd
à respecter la polarité de chaque pile (pôle négatif ou « plat » en contact avec le long ressort de chaque emplacement). Bushnell recommande d'utiliser un jeu complet de piles AA au lithium neuves (de la marque Energizer ®... - Page 47 Utilisation d’une source de courant externe (fournie par l’utilisateur) En option, vous pouvez branchez une source de courant externe de 6V à la prise "Alimentation externe" (fig.1) située sous le Trophy Cam. Il est recommandé d’utiliser une source d’électricité ayant une sortie de courant supérieure à...
- Page 48 vous assurez que le curseur de protection contre l’écriture situé sur la carte SD est sur « off » (c'est-à-dire PAS en position « Lock »). Ce qui suit décrit comment insérer et enlever la carte SD: • Insérez la carte SD dans l’emplacement pour carte, l’étiquette de la carte vers le haut (voir ci-dessus).
-
Page 49: Mode Configuration (Setup)
• Mode ARRÊT: Commutateur d’alimentation en position OFF. • Mode MARCHE: Commutateur d’alimentation en position ON (l’écran LCD est éteint). • Mode CONFIGURATION: Commutateur d’alimentation en position SETUP (l’écran LCD est allumé). Mode ARRÊT (OFF) Le mode ARRÊT est le mode de « sécurité » permettant toute une série d’actions, par exemple, remplacer la carte SD ou les piles, ou transporter l’appareil. - Page 50 Fig. 3 : Écran d’information du mode CONFIGURATION (SETUP) - modèle à affichage standard présenté. Mode vidéo Mode appareil photo (photos) Son vidéo activé Résolution Statut de la carte SD Mode Photo Mode vidéo Résolution vidéo Niveau de charge des piles Date: Mois-Jour- Impression de Année...
- Page 51 • Appuyez sur la touche DROITE pour déclencher une photo (ou une vidéo) manuellement. Ceci est utile pour tester l’appareil-veillez à être en mode CONFIGURATION (SETUP), appuyez sur la touche DROITE, et quelques secondes plus tard, une photo ou une séquence vidéo (selon le réglage de l’appareil) sera sauvegardée sur la carte SD (ou la mémoire interne si aucune carte n’est insérée).
- Page 52 avez choisi votre nouveau réglage pour un paramètre, appuyez sur la touche OK pour sauvegarder le nouveau réglage. Lorsque vous avez fini de changer les réglages d’un ou de plusieurs paramètres, appuyez sur MENU de nouveau pour sortir du menu CONFIGURATION (SETUP). Il est possible d’appuyer sur MENU chaque fois que vous désirez annuler un changement de réglage de paramètre après qu’un nouveau réglage ait été...
- Page 53 Fig. 4: Sélection des réglages des paramètres AFFICHAGE EN COULEUR AFFICHAGE STANDARD MoDèLE 119477 UNIqUEMENT Appuyez sur MENU (4d) (4a) Appuyez sur BAS (4b) (4e) Appuyez sur OK (4c) EXEMPLES - Changer les réglages de certains paramètres courants Dans les pages suivantes, vous trouverez des tableaux listant tous les paramètres existants du Menu CONFIGURATION (SETUP), ainsi que leurs réglages possibles (ou plage de réglages), une description détaillée de ce que contrôle le paramètre et le but des réglages.
- Page 54 Le balayage de champ est une nouvelle fonctionnalité des Trophy Cams Bushnell qui vous permet de surveiller des zones plus vastes, comme un champ ou une grande clairière, au moyen de photographies ou de vidéos prises à...
- Page 55 lorsque le déclenchement est produit par la détection d'un mouvement. C’est un superbe outil pour surveiller un champ entier avec une seule caméra. Si un animal ou une personne pénètre dans la zone couverte par le détecteur IR et provoque un déclenchement entre les intervalles que vous avez définis pour le Field Scan, la caméra prendra une photo ou enregistrera une vidéo comme elle le ferait normalement en fonction de vos autres réglages.
- Page 56 Dans ce cas, il n'y aura aucun enregistrement via balayage de champ entre 8h et 17h30 et entre 19h et 6h. Après avoir réglé les heures de démarrage/d'arrêt de la période "A" et/ou "B", appuyez sur OK puis sur les boutons BAS ou HAUT pour sélectionner "Interval"...
- Page 57 vidéo enregistrée, toutes les 15 minutes pendant la/les période(s) de temps déterminée(s). Si un animal (ou humain) déclenche la caméra entre les intervalles de 15 minutes , cela sera enregistré, exactement comme si l'option de balayage de champ était désactivée. Remarque : Des intervalles de balayage de champ courts et/ou des tranches horaires longues risquent de réduire la durée de vie de la batterie.
- Page 58 Liste des paramètres et réglages du Menu CONFIGURATION (SETUP) avec descriptions Paramètre Description Réglages (Gras=défaut) Sélectionne si des photos ou des Mode Camera (photos) vidéos sont prises lorsque l’appareil ou Video se déclenche. Image Size Sélectionne la résolution pour les 5M Pixel, photos de 3 à...
- Page 59 Paramètre Description Réglages (Gras=défaut) LED Control Faible, Moyen, Contrôle le nombre de LED qui Elevé flashent quand une photo est prise (Contrôle des LED) (Fonction par faible luminosité. "High" (élevé) Multi-Flash) = les 32 LED s'allument. C'est le réglage par défaut. Choisissez "Medium"...
- Page 60 Paramètre Description Réglages (Gras=défaut) Video Length 10S (seconde) Fixe la durée de chaque séquence (Durée vidéo) vidéo prise. La durée des vidéos par défaut, (concerne les est fixée à 10 secondes par défaut avec une plage séquences vidéo lorsque le paramètre est sélectionné possible de 5 s uniquement) pour la première fois.
- Page 61 Paramètre Description Réglages (Gras=défaut) Sensor Level Low (faible), Sélectionne la sensibilité du capteur (Sensibilité Normal, High infrarouge passif. Le réglage « High du Capteur (élevée), Auto » rendra l’appareil plus sensible (automatique) aux infrarouges (chaleur) et il sera infrarouge) plus facilement déclenché par les mouvements, et le réglage «...
- Page 62 Paramètre Description Réglages (Gras=défaut) Format Efface tous les fichiers sauvegardés Execute sur la carte pour la préparer (Formater) (Valider) pour sa réutilisation. Formatez (suivi d’une étape No/Yes toujours une carte qui a été (Non/oui) sur utilisée auparavant dans d’autres appareils. Avertissement ! Veillez les modèles à...
- Page 63 Paramètre Description Réglages (Gras=défaut) Set Clock Set (régler) Appuyez sur OK et utilisez les (Réglage touches HAUT/BAS (pour Horloge) changer le réglage) et les touches GAUCHE/DROITE (pour passer au champ suivant) pour régler les heures (format 24h uniquement, « 00 »=minuit, « 12 »=midi) et les minutes, puis (sur la rangée du bas), l’année, le mois et la date.
- Page 64 Paramètre Description Réglages (Gras=défaut) Permet à l'utilisateur de saisir Coordinate Off, On les coordonnées de latitude et Input (désactivé, de longitude correspondant à activé) Voir l'emplacement de l'appareil. Ces UTILISATION données seront intégrées aux DES ECRANS fichiers enregistrés sur la carte SD de l'appareil (si "On"...
- Page 65 UTILISATION DES ECRANS DE SAISIE DU MENU SETUP Saisie du nom de l'appareil Après avoir sélectionné le paramètre "Camera Name" (nom de la caméra, le seul réglage possible est "Input"), appuyez sur OK. Si nécessaire, effacez le nom précédent ou par défaut en appuyant sur le bouton DROITE jusqu'à ce que le symbole "effacer"...
-
Page 66: Montage
MONTAGE ET POSITIONNEMENT DU TROPHY CAM Montage Après avoir configuré les paramètres selon vos préférences, vous êtes prêt à mettre le commutateur sur la position "ON" (marche) et à installer le Trophy Cam sur le terrain. Lorsque vous configurez le Trophy Cam pour détecter le gibier ou pour toute autre application en extérieur, vous devez veiller à... -
Page 67: Allumer L'appareil
Deux accessoires de montage optionnels, un boîtier de sécurité en métal (Modèle n° 119654C pour les Trophy Cam 119476/119477, ou modèle n° 119653C pour les Trophy Cam 119437/119447) et un support pour montage sur arbre (modèle 119652C) sont également disponibles- veuillez consulter votre revendeur Bushnell ou notre site Internet pour de plus amples renseignements. - Page 68 nombre de photos, de la durée de la vidéo, de l’intervalle et de la sensibilité du capteur infrarouge. Veuillez noter que l’infrarouge passif est très sensible à la température ambiante. Plus la différence de température est élevée entre l’environnement et votre sujet, plus la distance de détection possible est grande.
- Page 69 • Si vous êtes en mode photo, vous verrez l'écran de visionnage des photos. Si vous êtes en mode vidéo, vous verrez l'écran de visionnage des vidéos. • Utilisez les touches HAUT/BAS pour faire défiler vos photos ou vidéos. Une fonction zoom est disponible pour les photos : appuyez d'abord sur la touche de GAUCHE, puis utilisez les touches HAUT/ BAS pour zoomer en avant ou en arrière.
- Page 70 • Appuyez sur la touche HAUT pour la photo ou la vidéo précédente et la touche BAS pour la suivante. Lorsque vous repasser des images, le nombre total de toutes les images de la carte SD et l’index de l’image affichée apparaissent respectivement au centre de l’écran LCD et au bas du moniteur vidéo.
- Page 71 pour le Trophy Cam dans votre ordinateur, vous devrez choisir le format de système de fichier FAT16. Normalement, FAT16 est recommandé, à moins que vous ayez une autre visionneuse d’images qui utilise le format FAT12 ou FAT32. Effacer des photos ou des vidéos Si vous désirez effacer une photo ou une vidéo, cela peut se faire facilement sans quitter le mode CONFIGURATION (SETUP): •...
- Page 72 les prises USB du panneau frontal/du clavier ou des « hubs » non-alimentés. Le Trophy Cam sera reconnu comme un dispositif de « stockage de masse USB » (ceci pourra prendre quelques secondes la première fois que vous le connecterez). Si vous préférez laisser votre appareil en place sur le terrain et simplement retirer sa carte SD, un lecteur de carte SD fonctionne comme il a été...
-
Page 73: Diagnostic/Questions Fréquemment Posées
3. Assurez-vous que le commutateur d’alimentation soit en position « ON » (Marche) et que l’appareil n’ait pas été laissé en mode « SETUP » (Configuration) sur le terrain. 4. Assurez-vous d’utiliser une marque de carte SD reconnue. Bushnell recommande les cartes SD SanDisk d’une capacité pouvant ®... - Page 74 à piles, en commençant par le haut et en remplissant les emplacements 1-4 sans laisser d’« espaces ». Bushnell vous recommande d'utiliser un jeu complet de 8 ou 12 piles AA au lithium Energizer avec votre Trophy Cam (la capacité...
- Page 75 Vous obtiendrez de meilleurs résultats si le sujet est à portée idéale du flash, soit à moins de 14 mètres de la caméra (ou 19 m pour les modèles 119437/119447). Les sujets pourront sembler trop sombres à des distances plus grandes.
- Page 76 Si cela se produit régulièrement, il se peut que le détecteur soit défectueux. Dans ce cas, veuillez contacter votre revendeur Bushnell. 7. Séquences vidéos courtes–n’enregistre pas pendant la durée fixée a. Vérifiez que la carte SD n’est pas pleine.
- Page 77 5. Débarrassez-vous de toutes les branches qui se trouvent directement devant l’objectif de l’appareil. La LED du capteur infrarouge passif (PIR) clignote/ ne clignote pas 1. Lorsque l’appareil est en mode SETUP (CONFIGURATION), une LED située sur la face avant du Trophy Cam clignote à chaque mouvement détecté.
- Page 78 Humidité ou fourmis à l'intérieur de la caméra 1. Afin d'empêcher toute infiltration d'eau dans le boîtier du Trophy Cam, veillez à ce que le cache de protection de l'alimentation externe soit bien en place. 2. Les fourmis peuvent être attirées par les faibles vibrations électriques émises par l'appareil, et ainsi chercher à...
-
Page 79: Caractéristiques Techniques
Programmable 1s - 60 mn déclenchement Nombres de prises de Programmable 1– 3 vue en rafale Durée des vidéos Programmable 5-60s 8xAA (119437/119447) ou 12xAA (119467/119477) Alimentation recommandées, 4xAA alimentation d’urgence Consommation en <0,2 mA (<7 mA/jour) stand-by (veille) Consommation 250 mA (+1300 mA lorsque LED-IR allumé) -
Page 80: Garantie Limitée De Deux Ans
Centre de Réparation agréé par Bushnell. Tout retour effectué dans le cadre de la présente garantie doit être accompagné des éléments ci-dessous :... - Page 81 Traitement des déchets d’équipements électriques et électroniques (En vigueur dans l’Union européenne et autres pays européens ayant des systèmes de collecte des déchets séparés) Cet équipement contient des composants électriques et/ou électroniques et par conséquent ne doit pas être éliminé en fin de vie avec les autres déchets ménagers.
- Page 82 2012 TrophyCams 1280HD_119437C+119447C+119476C+119477C_2LIM for Canada_040412.indd 82 4/4/12 1:52 PM...
- Page 83 2012 TrophyCams 1280HD_119437C+119447C+119476C+119477C_2LIM for Canada_040412.indd 83 4/4/12 1:52 PM...
- Page 84 For further questions or additional information please contact: Bushnell Outdoor Products 9200 Cody, Overland Park, Kansas 66214 (800) 423-3537 • www.bushnell.com Bushnell Canada: (800) 361-5702 ©2012 Bushnell Outdoor Products 2012 TrophyCams 1280HD_119437C+119447C+119476C+119477C_2LIM for Canada_040412.indd 84 4/4/12 1:52 PM...