Advertisement
Table of Contents
- 1 Protect Your Hearing
- 2 Installation Applications
- 3 Planning Your Installation
- 4 Product Description
- 5 Typical Installation Sequence
- 6 Power Connections
- 7 Fuse Requirements
- 8 Turn-On Lead
- 9 Input Section
- 10 Crossover Controls
- 11 Speaker Outputs
- 12 Bridging Considerations
- 13 Appendix C: Trouble Shooting
- 14 Installation Notes
- Download this manual
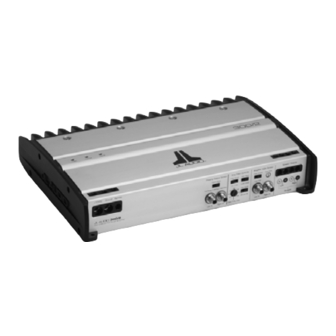
JL AUDIO 300/2
two-channel full-range amplifier
o w n e r ' s m a n u a l
Thank you for purchasing a JL Audio amplifier for
your automotive sound system.
Your amplifier has been designed and manufactured to exacting
standards in order to ensure years of musical enjoyment in your
vehicle. For maximum performance and extended warranty
coverage, we highly recommend that you have your new amplifier
installed by an authorized JL Audio dealer. Your authorized
dealer has the training, expertise and installation equipment to
ensure optimum performance from this product. Should you
decide to install the amplifier yourself, please take the time
to read this manual thoroughly so as to familiarize yourself
with its installation requirements and setup procedures.
If you have any questions regarding the instructions in this
manual or any aspect of your amplifier's operation, please contact
your authorized JL Audio dealer for assistance. If you need further
assistance, please call the JL Audio Technical Support Department at
(954) 443-1100 during business hours (Eastern Time Zone).
Advertisement
Table of Contents

Related Manuals for JL Audio 300/2


Summary of Contents for JL Audio 300/2
- Page 1 If you have any questions regarding the instructions in this manual or any aspect of your amplifier’s operation, please contact your authorized JL Audio dealer for assistance. If you need further assistance, please call the JL Audio Technical Support Department at...
-
Page 2: Protect Your Hearing
Cooling Efficiency Considerations: Your JL Audio amplifier employs an advanced type of heat management, called RealSink™.This feature takes advantage of convection and radiation effects to remove heat from the amplifier circuitry. -
Page 3: Product Description
2 AWG or 1/0 AWG power wire should terminate into a distribution block mounted as close to the amplifiers as possible and should connect to the 300/2 with 8 - 4 AWG power wire. Please note that smaller AWG numbers mean bigger wire and vice-versa (1/0 AWG is biggest, 2 AWG is smaller, then 4 AWG, then 8 AWG, etc.). -
Page 4: Fuse Requirements
Voltage” range has been selected, this control can be used to match the source unit's output voltage to the input stage of the 300/2 for maximum clean output. Rotating the control clockwise will result in higher sensitivity (louder for a given input voltage). -
Page 5: Crossover Controls
“Filter Freq.” and “Filter Slope” selected in the “Amplifier Filter” section. This mode can be useful for feeding a second satellite amplifier when the 300/2 is being used to drive the main speaker system. NOTE: The signal level of the “Preamp Output” is affected by the setting of the “Input Voltage Range”... -
Page 6: Bridging Considerations
“Right +” remain unused).When bridged, the wiring (this can be a short between the positive and 300/2 will deliver optimum power into a 3 - 8Ω negative speaker wires or between either speaker load. Operating a bridged 300/2 into a load lower wire and the vehicle chassis).This can be used to... - Page 7 6) Verify that you have disconnected the speakers before proceeding. Play a track with an appropriate sine wave (within the frequency range to be amplified by the 300/2) at 3/4 source unit volume. 7) Connect the AC voltmeter to the “Speaker Outputs”...
-
Page 8: Appendix C: Trouble Shooting
“MY AMPLIFIER’S OUTPUT FLUCTUATES WHEN I TAP ON IT OR HIT A BUMP” “HOW DO I PROPERLY SET THE INPUT SENSITIVITY ON MY AMPLIFIER” JL AUDIO 300/2 JL AUDIO 300/2 Check the input signal using an AC voltmeter to measure the... - Page 9 2-Channel, switch-selectable as pass-through type, tracking High-Pass, or tracking Low-Pass linked to Amplifier Filter. DIMENSIONS (LxWxH): 13.4" x 9.25" x 2.36" (340mm x 235mm x 60mm) Due to ongoing product development, all specifications are subject to change without notice. JL AUDIO 300/2 JL AUDIO 300/2...
-
Page 10: Installation Notes
INSTALLATION NOTES: Use this diagram to document your amplifier’s switch and control positions. JL AUDIO 300/2 JL AUDIO 300/2... - Page 11 LIMITED WARRANTY - AMPLIFIERS (USA) JL AUDIO warrants this product to be free of defects in materials and workmanship for a period of ninety (90) days from the original date of purchase. The warranty term is extended to two (2) years if installation is performed or approved by an authorized JL AUDIO dealer (proof of installation or approval required on purchase receipt).