Table of Contents
Advertisement
Quick Links
Advertisement
Table of Contents

Related Manuals for Audiovox VOD10A


Summary of Contents for Audiovox VOD10A
-
Page 1: Installation Guide
VOD10A " 1 OVERHEAD LCD MONITOR WITH DVD PLAYER Installation Guide... -
Page 2: Important Notice
If you have any questions regarding wire routing in a vehicle, please contact Audiovox Technical Support at 1-800-225-6074. When connecting power and ground in a mobile video installation ensure that the ACC wire is fused at the point where it is connected to the vehicle ACC wiring. -
Page 3: Materials Included In This Package
MATERIALS INCLUDED IN THIS PACKAGE: 1) 10.1” TFT LCD Overhead Monitor With DVD Player - (1 pc) 2) Hardware Package (P/N 150-1661) - (1 pc) - M3 x 8mm Phillips Screws (P/N 100-2427) - (5 pcs) - #4 x 5/16" Phillips Self Tapping Screws (P/N 100-2316) - (1 pc) - #4 x 7/16"... - Page 4 Installing the Snap On Covers Housing Snap On Cover Snap On Cover Pry Tool Screw Cap (Shroud) (Screen Back Cab) (L & R) 1 Pewter, 1 Shale 1 Pewter, 1 Shale 2 Pewter, 2 Shale Place the unit on a soft surface to avoid damaging the plastic. Installing the Shroud catch catch...
- Page 5 Removing the Snap On Cover (Shroud) from the Housing Work on a soft surface to avoid damaging the plastic. Insert the supplied pry tool between the Housing and Snap On Cover (Shroud), then press the pry tool to release the Snap On Cover (Shroud).
-
Page 6: Vehicle Preparation
2) The mounting method and location will vary from vehicle to vehicle, so this manual will only focus on the installation of the VOD10A and related console accessories. 3) Generally, the best location for the video monitor is where the vehicle's factory dome light is installed. -
Page 7: General System Configurations
VOD10A Drop Down Video Systems: The VOD10A has an option that allows the user to select from two IR transmit and receive codes (M1 or M2). This feature can be used when using two VOD10As in the same installation or if the vehicle has an RSA (Rear Seat Audio) that uses an “A”... -
Page 8: Trim Ring Installation
TRIM RING INSTALLATION: Note: This page only covers special installation considerations for thick trim ring installation. If the video monitor is to be installed in a vehicle with the thick trim ring, it may need to be trimmed to fit the contour of the vehicle Headliner. - Page 9 TRIM RING INSTALLATION: To install the Trim Ring to the unit, use the supplied screws listed below: #4 x 5/16 Phillips Self Tapping Screws (1 pc) #4 x 7/16 Phillips Self Tapping Screws (3 pcs) M3 x 8mm Phillips Screws (5 pcs) Please see the illustration below for screw locations.
-
Page 10: Wiring Diagram
WIRING DIAGRAM 2 Pin Power Harness (P/N 112-4152) Dome Light Extension Harness (P/N 112-3884) * Antenna for Wireless FM Mod. ** See Antenna Note 1) Make the connections to the vehicle for the 10 pin wiring harness. 2) Connect the 2 Pin Power Harness to the vehicle’s electrical system by tapping into an accessory hot line and a good ground. -
Page 11: Connecting The Dome Lights
CONNECTING THE DOME LIGHTS: The dome lights in the video monitor require three connections to the vehicle's wiring. There are two common types of dome light circuits: positive switched systems or negative switched systems. Positive switched systems supply voltage to the interior lights to turn on; negative switched systems apply ground to illuminate the bulbs. -
Page 12: Troubleshooting
Verify that the correct source is selected (i.e.: 1, 2, 3 or 4). Verify that the source is on and playing a known good media (such as a videotape). Verify the connections at both ends of the source component harness. © 2011 Audiovox Electronics Corp., Hauppauge, NY 11788 128-8932... - Page 13 VOD10A 10.1" OVERHEAD LCD MONITOR WITH DVD PLAYER OPERATION MANUAL 128-8931...
- Page 14 If you have any questions regarding wire routing in a vehicle, please contact Audiovox Technical Support at 1-800-225-6074. When connecting power and ground in a mobile video installation ensure that the ACC wire is fused at the point where it is connected to the vehicle ACC wiring.
-
Page 15: Safety Precaution
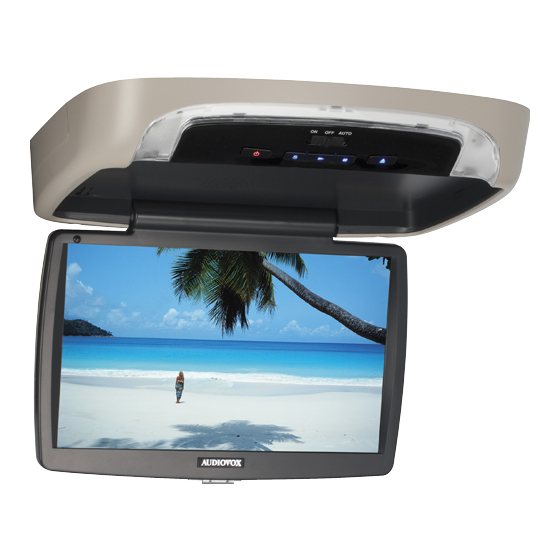
• 10.1” TFT (Thin Film Transistor) Active Matrix LCD (Liquid Crystal Display) Monitor with LED Backlight VOD10A DVD Player with drop-down video / monitor. The VOD10A has been designed to give you and your family • Built-in DVD Player many years of video entertainment in the mobile •... -
Page 16: Controls And Indicators Diagram (Front View)
CONTROLS AND INDICATORS DIAGRAM (FRONT VIEW) 4. PLAY ( ) Control This control is used to start playback of a disc. 5. STOP ( ) Control - Press STOP once : Stops playback, Pressing the PLAY button again will resume normal playback from where movie was stopped. -
Page 17: Side View
AND INDICATORS DIAGRAM SIDE VIEW he VOD10A has an option that allows the user to select from two IR transmit and receive codes (M1 or M2). This feature can be used when using two VOD10As in the same installation or if the vehicle has a RSA (Rear Seat Audio) that uses an “A”... -
Page 18: Remote Control Operation
REMOTE CONTROL OPERATION MAIN FUNCTION OPERATION Initial Use When purchased the remote control has a battery installed with a Pull Tab to prevent battery discharge. Remove the Pull Tab before POWER EJECT attempting to use the remote. SOURCE MUTE DVD SOURCE VOLUME SYSTEM MENU DISC MENU... -
Page 19: Monitor Select
Function control is available on the unit and the Remote Control. Function not available in this model. 1. POWER* Press this button to turn the unit ON and OFF. MONITOR SELECT M1 Button – Set the remote control code to allow control of the unit in M1 mode. M2 Button** –... - Page 20 9. ENTER Used to implement a selected setting or menu option. 10. DISPLAY Press to display the current disc information while the disc is playing. Press the cursor ( ) buttons to select the Title or Chapter. For Title/Chapter selection use the numeric buttons to enter the desired Title /Chapter selection. 11.
- Page 21 < 19. STOP ( )* Press to stop playback. (Playback will resume from the point it is stopped). Press twice at once to stop playback fully. (Playback will resume from the beginning of the disc). 20. SCAN FORWARD ( ) Press to search in a forward direction.
- Page 22 26. ZOOM Press this button to enlarge the picture when playing a DVD disc. Press ZOOM button DVD player perform Once Q1- Enlarge the picture 2 times of the original size Second Q2- Enlarge the picture 3 times of the original size Third Q3- Enlarge the picture 4 times of the original size Forth...
-
Page 23: Turning The Unit On Or Off
TURNING THE UNIT ON OR OFF 1. Push in the Screen Release button to unlock the LCD screen. The screen will drop down slightly. 2. Pivot the screen downward until a comfortable viewing angle is reached. The hinge friction will hold the screen in position while the system is in use. -
Page 24: System Menu Settings And Adjustments
SYSTEM MENU SETTINGS AND ADJUSTMENTS The System Menu contains features and options that let you customize your system. For example, you can change the screen mode display, OSD language, and source default. Using the System Menu Press the TV button and then the SYSTEM MENU button on the remote. The main page of the system menu will appear on screen. Use the cursor buttons to select the desired item in the main page and press the ENTER button to select. -
Page 25: Osd Language
FMM SELECT This function allows the user to listen to audio through the vehicle’s radio. FMM ON - Turns the wireless FM Modulator on if audio playback through your vehicle’s radio is preferred. FMM OFF - Turns the wireless FM Modulator off. FMM SELECT - Selects the wireless FM Modulator Frequency (CH1 88.1MHz, CH2 88.3MHz, CH3... - Page 26 SOURCE DEFAULT DVD This allows the user to set the system default source to DVD. Notes: • If source default is set to ON, every time the unit is turned off then on, the unit will power up and automatically switch the source to DVD. If source default is set to OFF and the unit is turned off then on, the unit will power up in whatever source was last selected.
-
Page 27: Dvd Setup Menu Settings And Adjustments
DVD SETUP MENU SETTINGS AND ADJUSTMENTS The DVD Setup Menu contains features and options that let you customize your DVD player. For example, you can set a language for the on-screen display or prevent children from viewing DVD playback of adult DVD Titles. Using the Setup Menu 1. -
Page 28: Dvd Subtitle Setup
DVD SUBTITLE SETUP Select "SUBTITLE" using the button, then press the button to enter the submenu. Language OSD Language English 2. Select the subtitle you desire using the button, then press “ENTER” to confirm the setting. French Video Subtitle Spanish 3. -
Page 29: Dvd Rating Setup
DVD RATING SETUP Parental This item allows you to limit the content of movie playback from G to Adult. The lower the value, the more strict the control. 1. G 2. PG 3. PG – 13 4. R 5. NC – 17 6. -
Page 30: Playing Dvds
Load Factory This option allows you to reset all options to factory settings. Language Load Factory Note: This function will not affect the Rating control settings. Load Factory Screen Saver Video Rating Misc Screen Saver This option allows you to set the Screen Saver mode. Language Load Factory ON - Screen saver will appear. -
Page 31: Playing Mp3 Discs
PLAYING MP3 DISCS MP3 is a format for storing digital audio. An audio CD-quality song can be compressed into the MP3 format with very little loss of quality, while taking up much less space. CD-R discs that have been encoded in MP3 format can be played on DVD player. The DVD player plays the songs in the order they were burned on to the disc. - Page 32 Repeat: play repetitively Repeat function has 4 options: Off, Single, Folder, All. Move cursor to Repeat function and press ENTER, 00:00:01 1/12 Each time ENTER is pressed the unit will cycle through the available options. Off/Single/Folder/All are Flat Mode Repeat : Off displayed in that order.
-
Page 33: Dvd Basics
00:00:01 Clear program 1/12 To clear the selected song files, press the STOP button twice during playback mode. Move the Edit mode Broser view cursor to the Edit mode function and press ENTER. After Edit mode is selected, move the cursor to the Clear program selected songs list and select the songs which you want to delete. - Page 34 Types of Discs your DVD Player will play Your system will play the following types of discs: • DVD* disc - DVD discs which contain video. • Audio disc - Audio CDs contain musical or sound content only. • MP3 disc - A disc that contains audio files (for example, a CD-R with downloaded MP3 files). *Note: This system is capable of playing most recordable DVD formats.
-
Page 35: Overhead Dome Lights
Note: If the monitor is set to M2 mode, the headphones supplied with this unit will not work, as these headphones are single channel. Only two-channel wireless headphones (Audiovox Model IR2CHS) will work with this unit when set to M2 mode. The only time it is necessary to set this unit to M2 mode is if there is an RSA (Rear Seat Audio) installed in the vehicle or if two of these monitors are installed in one vehicle. - Page 36 AV Out The unit provides an AV output for optional video monitor(s). This output will provide the AV signals that duplicate the picture/audio being processed by the unit to an additional monitor or video display. Please see your installer for more information. TROUBLESHOOTING PROBLEM SOLUTION...
- Page 37 PROBLEM SOLUTION Can’t advance through a movie It can’t advance through the opening credits and warning information that appear at the beginning of movies because the disc is programmed to prohibit that action. Not allowed at the moment The feature or action cannot be completed at this time because: 1.
-
Page 38: Replacement Parts
REPLACEMENT PARTS SPECIFICATIONS Remote Control 136-4840 LCD Backlighting Resolution 800(RGB) x 480 Pixels 1,152,000 Operation Temperature 32 ~131º F (0 ~ 55º C) Storage Temperature -4 ~ 158º F (-20 ~ 70º C) Back Light Life 10,000 Hours Video Display System NTSC / PAL Video Output 1.0 Vp-p @ 75 ohms... - Page 39 Applies to Audiovox Mobile Video Products AUDIOVOX ELECTRONICS CORP. (the Company) warrants to the original retail purchaser of this product that, should this product or any part thereof (except game controllers), under normal use and conditions, be proven defective in material or workmanship within 36 months from the date of original purchase, such defect(s) will be repaired or replaced with reconditioned product (at the Company's option) without charge for parts and repair labor.
- Page 40 © 2011 Audiovox Electronics Corp., 150 Marcus Blvd. Hauppauge, NY 11788 128-8931...