Table of Contents
Advertisement
www.kaz.com
The Honeywell trademark is used by Kaz, Inc. under licence from Honeywell Intellectual Properties, Inc.
HW-QUICK12E
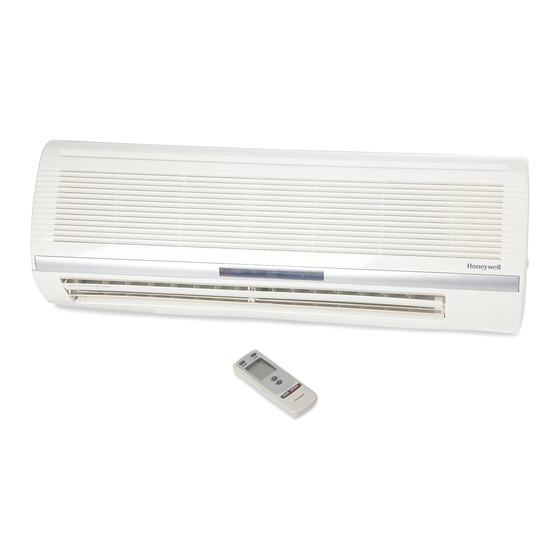
Wall-mounted
Air Conditioner
Wall-mounted Air Conditioner with Quick-Connection –
Heating and Cooling with only one unit
Comfortable room temperature without difficult
installation; our Quick-Connection makes it
possible
Easy and safe assembly + installation
Immediately applicable and ready to plug in
Convenient, selectable operating modes–
Cooling + Heating
Defrost function protects the outdoor unit
against freezing-up in the case of low
temperatures
Sleep mode
Suitable for rooms up to approx. 125 m³
Optimal air circulation due to an adjustable
air outflow grid
Infrared remote control for easy handling
Timer function
Pilot light
Environmentally friendly refrigerant R410a
- CFC-free
*1
To calculate the optimal cooling capacity the following rule can be taken
as basis: Usually the air-conditioning of 1 m² requires 60 to 100 Watt.
Slants of a roof, large glass/window surfaces, humidity and additional
factors can influence the unit´s performance capacity.
*1
Advertisement
Table of Contents

Related Manuals for Honeywell HW-QUICK12E


Summary of Contents for Honeywell HW-QUICK12E
-
Page 1: Air Conditioner
Usually the air-conditioning of 1 m² requires 60 to 100 Watt. Slants of a roof, large glass/window surfaces, humidity and additional factors can influence the unit´s performance capacity. www.kaz.com The Honeywell trademark is used by Kaz, Inc. under licence from Honeywell Intellectual Properties, Inc. - Page 2 KLIMAGERÄT ZUR SELBSTMONTAGE Gebrauchsanweisung CLIMATISATION À MONTER SOI-MÊME Mode d’emploi CLIMATIZADOR PARA AUTOMONTAJE Instrucciones de uso KLIMATANLÄGGNING FÖR SJÄLVMONTERING Bruksanvisning HW-QUICK12E KLIMAAPPARAT TIL SELVMONTAGE Betjeningsvejledning ITSEASENNETTAVA ILMASTOINTILAITE Käyttöohje KEND‹ KEND‹N‹ZE MONTE EDEB‹LECE⁄‹N‹Z KL‹MA C‹HAZI Kullan›m Talimatlar› KLIMATIZAČNÍ PŘÍSTROJ PRO VLASTNÍ MONTÁŽ...
-
Page 3: Table Of Contents
HW-QUICK12E_GB_OM.qxd 4/2/07 12:04 PM Page 2 ENGLISH In order to ensure correct installation and use, read through this instruction manual before installing and using. Keep this instruction manual in a safe place for further reference. As a condition of purchase, the purchaser assumes responsibility for the correct usage/care and installation of the air conditioner as detailed in this manual. -
Page 4: Construction Of The Wall-Mounted Split Air Conditioner
HW-QUICK12E_GB_OM.qxd 4/2/07 12:04 PM Page 3 ENGLISH CONSTRUCTION AND USAGE Construction of the wall-mounted split air conditioner Display Signal Receiver for Operating Remote Control Cooling Indicator Air Inflow Heating DeHumidifing Temperature INDOOR UNIT Only for models Standby light with heating glows green. -
Page 5: Precautionary And Safety Measures
HW-QUICK12E_GB_OM.qxd 4/2/07 12:04 PM Page 4 ENGLISH IMPORTANT SAFETY INSTRUCTIONS 1. As the power voltage should remain as steady as possible (between 212V and 264V) without big fluctuations, use correct power supply according to the existing data on the rating label. 2. -
Page 6: Specification Model And Technical Parameter
HW-QUICK12E_GB_OM.qxd 4/2/07 12:04 PM Page 5 ENGLISH SPECIFICATIONS AND TECHNICAL PARAMETERS Model HW-QUICK12E Function Cooling / Heat pump Cooling capacity (W) 3300 Heating capacity (W) 3800 Voltage—frequency (V—Hz) 230-240V—50Hz Rated current of cooling/heating (A) 5.3/6.0 Max. input current (A) Rated power of cooling/heating (W) -
Page 7: Remote Control Function Keys
HW-QUICK12E_GB_OM.qxd 4/2/07 12:04 PM Page 6 ENGLISH OPERATING INSTRUCTIONS A 1. Liquid crystal display Remote Control It shows all selected functions. B 2. SLEEP key Press this key to select SLEEP Mode. C 3. TIMER OFF key During operation press this key to select OFF TIME between 0 and 24 hours to stop ACL Key the unit automatically after selected delay. -
Page 8: Cool Mode
HW-QUICK12E_GB_OM.qxd 4/2/07 12:04 PM Page 7 ENGLISH Mode Selection DRY Mode If the room temperature is within +/- 2°C of the set temperature on the remote con- trol, the air conditioner operates in DRY Mode only. If the room temperature rises outside of this range, the unit will change to the COOL Mode until the room tem- perature is within the range of +/- 2°C again. - Page 9 HW-QUICK12E_GB_OM.qxd 4/2/07 12:04 PM Page 8 ENGLISH TIMER Mode SLEEP Mode During operation it is possible to select the OFF TIME between 0 and 24 hours to When using SLEEP Mode in combination with the COOL or DRY Mode, the set tem- stop the unit automatically after selected time period has elapsed.
-
Page 10: Operation Guide
HW-QUICK12E_GB_OM.qxd 4/2/07 12:04 PM Page 9 ENGLISH INSTALLATION ELECTRIC CONNECTION Select installation location for indoor and outdoor unit BEFORE INSTALLATION All the electric installations must be done according to the local law, regulation and this instruction. Make sure that the electrical installation is suitable to supply continuously current WARNING necessary for the air conditioner in addition to that already used by other electric 1. -
Page 11: Installation Of Indoor Unit
HW-QUICK12E_GB_OM.qxd 4/2/07 12:04 PM Page 10 ENGLISH Installation of indoor unit INDOOR UNIT The max. distance between the indoor unit and outdoor unit is 4 m. The height difference between indoor unit and floor should not be less than 2 m. Select the installation location 1. - Page 12 HW-QUICK12E_GB_OM.qxd 4/2/07 12:04 PM Page 11 ENGLISH Installing the rear panel Installing drainage hose 1. Choose the location of the rear panel according to the indoor unit location, piping 1. The drainage hose exists at the indoor unit and must be installed downwards. To direction and drainage hose direction.
-
Page 13: Installation Of Outdoor Unit
HW-QUICK12E_GB_OM.qxd 4/2/07 12:04 PM Page 12 ENGLISH (Fig. 4) (Fig. 5) (Fig. 6) Wrap Tape Connection Pipe Rear Panel Power Cord Tailing 2 Tailing 1 Drainage Hose Installation of Outdoor Unit Warning To avoid personal injuries use gloves for moving and installing the outdoor unit. Distance to the Ceiling Air Discharge Description of the quick connector system... -
Page 14: Connection Of The Quick Connector
HW-QUICK12E_GB_OM.qxd 4/2/07 12:04 PM Page 13 ENGLISH Connection of the Quick Connector 4. Open the tightening lever of the male part of the quick connector. The orientating pin must be at the lower side of the male part of the quick connector to install the 1. - Page 15 HW-QUICK12E_GB_OM.qxd 4/2/07 12:04 PM Page 14 ENGLISH 6. Insert the male part of the quick connector into the female part of the quick connector. Release the tightening sleeve and the tightening sleeve shifts back. Note: Orientating pin is downward. 7. Close the tightening lever and press it tight. Note: The tightening lever cannot be fixed in its correct position, if the tightening sleeve is not released completely.
-
Page 16: Trial Run
HW-QUICK12E_GB_OM.qxd 4/2/07 12:04 PM Page 15 ENGLISH Installing the drainage of condensation of the outdoor unit Trial run The outdoor unit may produce condensation. This condensation needs to be led 1. Preparation for trial run away by a drainage hose. Install the drainage hose as follows: 1. -
Page 17: Care And Maintenance
HW-QUICK12E_GB_OM.qxd 4/2/07 12:04 PM Page 16 ENGLISH CARE AND MAINTENANCE 2. Cleaning the plastic anti-dust air filters and active carbon filters Warning Clean the plastic anti-dust air filters and active carbon filters by shaking or vacuu- ming them. Use lukewarm water to wash the filters. Do not use water with more Before cleaning the air conditioner make sure that the plug has been disconnected than 45°C for cleaning to avoid fading or deformation of the filters. -
Page 18: Trouble Shooting
HW-QUICK12E_GB_OM.qxd 4/2/07 12:04 PM Page 17 ENGLISH TROUBLE SHOOTING Warning: Do not try to repair the unit by yourself as incorrect repair could cause electric shock or fire or personal injury. Contact the manufacturer to have the unit repaired by professional personnel. - Page 19 HW-QUICK12E_GB_OM.qxd 4/2/07 12:04 PM Page 18 ENGLISH Disposal This symbol on the product or its packaging indicates that the appliance cannot be treated as normal domestic trash, but must be handed in at a collection point for recycling electric and electronic appliances. Your contribution to the correct disposal of this product protects the environment and the health of your fellow men.
- Page 20 How to assemble the air conditioner: HW-QUICK12E Wall-mounted Air Conditioner Install rear panel Insert indoor unit Technical Information HW-QUICK12E Article No indoor unit UK plug 7.120.604 (Mastercode) Article No outdoor unit UK plug 7.120.605 EAN Code indoor unit UK plug...