Table of Contents
Advertisement
Advertisement
Table of Contents

Related Manuals for Hoover DYC 88132BXC


Summary of Contents for Hoover DYC 88132BXC
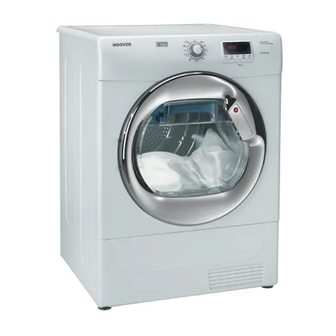
- Page 1 INSTRUCTION BOOK DYC 88132BXC Condenser Tumble Dryer English...
-
Page 2: Table Of Contents
INDEX Introduction Delivery Information Unpacking the Product Safety Reminders Installation The Laundry Environmental Issues Gias Service Installation Electrical Requirements Adjusting the Feet Ventilation Drain Hose : Fitting Instructions Preparing the Load Clothes Preparation Do Not Tumble Dry Energy Saving Sorting the Load Drying Guide Controls and Indicators Selecting the Programme... -
Page 3: Introduction
INTRODUCTION Please read and follow these instructions carefully and operate the machine accordingly. This booklet provides important guidelines for safe use, installation, maintenance and some useful advice for best results when using your machine. Keep all documentation in a safe place for future reference or for any future owners. Delivery Information UNPACKING THE PRODUCT Remove the machine from... -
Page 4: Installation
SAFETY REMINDERS Installation Environmental Issues ● Check that the product has no visible signs of ● All packaging materials used are damage before use. If damaged do not use and environmentally-friendly and recyclable. please call GIAS Service. Please help dispose of the packaging via environmentally-friendly means. -
Page 5: Installation
INSTALLATION Electrical Requirements VENTILATION Tumble dryers are supplied to operate at a Adequate ventilation must be provided in the voltage of 230V, 50 Hz single phase. Check that room where the tumble dryer is located to the supply circuit is rated to at least 13A prevent gases from appliances burning other fuels, including open fires, being drawn into the Electricity can be extremely dangerous. -
Page 6: Drain Hose : Fitting Instructions
DRAIN HOSE : FITTING INSTRUCTIONS 6 . P l a c e t h e t a p To avoid emptying the water container after supplied by the kit to each drying cycle, the water can be close the remaing discharged directly to a waste water drain pipe hose. -
Page 7: Preparing The Load
PREPARING THE LOAD Before using the tumble dryer for the first time: Maximum Drying Weight ● Cottons Max. 8 kg ● Please read this instruction book thoroughly. ● Synthetics Max. 4 kg ● Remove all items packed inside drum. ● Wipe the inside of the drum and door with a Do not overload the drum, large items damp cloth to remove any dust which may when wet can exceed the maximum admissible... -
Page 8: Controls And Indicators
CONTROLS AND INDICATORS Programme Filter Care Empty Water Program Start/Pause Selector Indicator Indicator Display Button Time Selection Delay Start Acrylic Synthetic Anti-Crease Button Button Button Button Control Panel and Indicator Lights Programme Selector – Select the required programme Time Selection Button – Allows the user to change duration of the programme selected by Programme Selector. -
Page 9: Selecting The Programme
SELECTING THE PROGRAMME DESCRIPTION PROGRAMME Bone Dry Select the degree of dryness that you require. This range from Store Dry for bath towels and bathrobes, through for items that will be put away without ironing, to the programme that leaves the laundry Hang Dry suitable for ironing. -
Page 10: Door And Filter
DOOR and FILTER Opening the Door WATER CONTAINER The water removed from the laundry during the drying cycle is collected in a container inside the Pull on handle to open door of the dryer. When the container is full the the door. -
Page 11: Condenser
CONDENSER Important: Always switch off and remove the OPERATION plug from the electricity supply before cleaning 1. Open the door and load the drum with the condenser. laundry. Ensure that garments do not hinder To maintain the efficiency of the dryer regularly closure of the door. -
Page 12: Delay Start Function
OPERATION Delay Start Function The Delay Start Function allows the user to delay the start of the drying cycle by 1 to 24 hours. When the function is first selected the display will show a delay of 1 hour, subsequent presses of the button will increase the delay with 1 hour steps. -
Page 13: Troubleshooting
● Is there a working electricity supply to the which is only available from GIAS Service or an dryer? Check using another appliance such as authorised Hoover Dealer. a table lamp. ● Is the plug properly connected to the mains... -
Page 14: Your Guarantee
Hoover guarantees all parts of this product for 5 years from the date of purchase. During that time Hoover will replace or repair all defective parts free of charge, except for parts subject to fair wear and tear such as belts. - Page 15 40006801...