Table of Contents
Advertisement
Advertisement
Table of Contents

Related Manuals for Baumatic BRB2617.5


Summary of Contents for Baumatic BRB2617.5
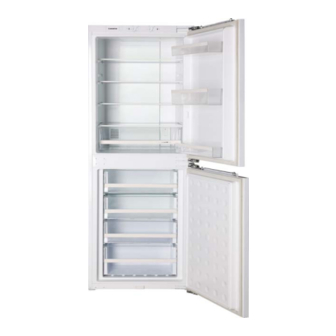
- Page 1 BRB2617.5 Built-in combi frost free fridge-freezer...
- Page 2 USER MANUAL FOR YOUR BAUMATIC BRB2617.5 Built-in combi frost free fridge-freezer NOTE : This User Instruction Manual contains important information, including safety & installation points, which will enable you to get the most out of your appliance. Please keep it in a safe place so that it is easily available for future reference, for you or any person not familiar with the operation of the appliance.
-
Page 3: Table Of Contents
5–6 Specifications of your combi fridge freezer Description of your appliance Control panel Description of the product features Using your Baumatic combi fridge freezer 10-11 Before switching on During first use Switching on the appliance and setting the thermostat Super Cool mode... -
Page 4: Environmental Note
Environmental note Note : Before discarding an old appliance, switch off and disconnect it from the power supply. Cut off and render any plug useless. Cut the cable off directly behind the appliance to prevent misuse. This should be undertaken by a competent person. Disable the door lock to make sure that children cannot get stuck inside the appliance. -
Page 5: Important Safety Information
Important safety information Your safety is of the utmost importance to Baumatic. Please make sure that you read this instruction booklet before attempting to install or use the appliance. If you are unsure of any of the information contained in this booklet, please contact the Baumatic Advice Line. - Page 6 Do not place electrical devices inside of the appliance, such as mixers and electric ice cream makers. Service You should not attempt to repair the appliance yourself, as this could cause injury or a more serious malfunction. If you require a service call then please contact the Baumatic Service Department.
-
Page 7: Specifications Of Your Combi Fridge Freezer
Specifications of your BRB2617.5 fridge freezer Dimensions of appliance Height: 1786 mm Width: 555 mm Depth: 540 mm Dimensions of aperture Height: 1788 mm (min) Width: 560 mm (min) Depth: 550 mm o Frost free fridge and freezer o Adjustable thermostat... -
Page 8: Description Of Your Appliance
The rating plate will indicate the ambient temperature range that your appliance will function correctly within. Description of the BRB2617.5 fridge freezer Control panel A) Power button. Press and hold for 3 seconds to turn appliance off/on. -
Page 9: Description Of The Product Features
Description of the product features Safety glass shelves o The shelves may be placed in any of the guide slots within the interior of the appliance. They are protected from sliding out. o To remove a shelf: Take off all of the items that are stored on the shelf that you want to remove. -
Page 10: Using Your Baumatic Combi Fridge Freezer
Using your Baumatic combi fridge freezer Before switching on o Make sure that it has been installed by a suitably qualified person, information contained Baumatic’s installation instructions. o After delivery, wait for eight hours before connecting the appliance to your mains supply. This will allow any refrigerant gasses that may have been disturbed during the transportation process to settle. -
Page 11: Switching On The Appliance And Setting The Thermostat
Switching on the appliance and setting the thermostat You switch on your appliance by connecting it to your mains supply and pressing the power button for 3 seconds. The thermostat dials are also located on the control panel, which can be found at the top of the fridge-freezer. -
Page 12: Super Cool Mode
The alarm is an audible buzzer which will sound 3 times every 0.5 seconds, every 30 seconds until the door is closed. o If the warning alarm stays on for a prolonged period after the door has been closed th en you should contact the Baumatic Customer Care Department. -
Page 13: Arranging And Storing Food In The Fridge Section
rranging and storing food in the fridge section o Warm food or evaporating liquids should not be stored in your refrigerator, as this will increase the humidity inside of the appliance. o All foods should be wrapped or covered, this is particularly important if the food has a strong flavour. -
Page 14: The Freezer Compartment
Milk bottles should have a cap on them and be stored on the bottle shelf that sits in the door. Garlic, potatoes, onions and bananas should only be stored in a refrigerator IF they are stored in airtight containers. freezer compartment The freezer compartment is suitable for storing and freezing food. -
Page 15: Tips On Freezing
o Fresh food should be packed into airtight containers or packaging. This will help to make sure that the food doesn’t d ry out or lose its flavour. It will also ensure that flavour does not transfer from other foods. o After 24 hours you should check that the fresh food is satisfac torily frozen. -
Page 16: Super Freeze Mode
Freezing using the Super Freeze setting This setting should be used if you are freezing fresh food, it will ensure that a powerful supply of cold air enters the freezer compartment, ensuring that the food is frozen quickly. o If you are freezing the maximum amount of fresh food that can be frozen in a 24 hour period (10Kg), then it should be switched on a few hours prior to freezing. - Page 17 Cleaning and Maintenance: o Occasionally clean the condenser coils (if present) at the back of the appliance to maintain a high performance level. o Clean the door gasket with warm water or a neutral detergent that leaves no residue. A tight-sealing door gasket is critical to the efficiency of your appliance.
-
Page 18: Cleaning And Maintenance
10,000 hours. Therefore, there is no need to change the light unless it is faulty or damaged. If the lights do need replacing, do not change the fuse or LED lamp on your own. Please call the Baumatic Customer Care Department arra engineer visit. -
Page 19: Defrosting The Freezer Compartment
Defrosting the freezer compartment Your appliance is frost free, so you will not need to manually defrost the freezer section. However if for example the door is left open for a prolonged period of time or the door gasket is not sealing correctly, then you could get ice building in the freezer section. -
Page 20: Installation
o Once the 24 hour period has elapsed, you should return the thermostat dial to its normal operating position. o Do not defrost the appliance with other electrical devices (e.g. hair dryer). Do not use sharp metal objects to remove the ice on the freezer, as this could cause damage to the refrigerant system. -
Page 21: Positioning
The blue wire must be connected to the terminal marked “N” (neutral), or coloured black. The green and yellow wire must be connected to the terminal marked “E” (earth), or by the earth symbol, or coloured green and yellow. o When the connection is completed, no stray strands or cut wire should be present. -
Page 22: Reversing The Doors Of Your Appliance
Reversing the door of your appliance This procedure MUST be completed before the furniture door is attached. Any parts that you remove from the appliance whilst reversing the door, should be retained for later use. Tools required:- o Phillips screwdriver o Flat bladed screwdriver Note: This diagram is for reference only. - Page 23 Insert the retaining screws (1) into the opposite side of the appliance from their original position. These screws should be partially tightened but not fully tightened. Remove the door retaining screws (2) and then reverse the position of the top and bottom hinge (as shown in the diagram on page 23).
-
Page 24: Aperture Dimensions And Ventilation Requirements
Installing your fridge-freezer o Below are aperture dimensions for your product. You need to ensure you leave the ventilation spaces indicated in the diagram. o Ensure there is a sufficient space behind the cooling coils at the back of your fridge to allow air to circulate. IMPORTANT: The appliance aperture MUST have a minimum of 200 cm²... - Page 25 Installation preparation o Start by attaching the top securing brackets (x2) to both sides of the top of appliance, using screws provided. o Attach décor strip to the top of the appliance, ensuring that prongs insert through the guide slots appliance.
- Page 26 o Remove the screw-h ole covers on the left side of the appliance. o Attach the side brac ket using the screws provided. o Attach the positioning bracket to the end of the side bracket. Attach the filler strip to each side of the appliance.
- Page 27 nstallation You can now move the appliance into position within the cabinet aperture, ensuring that the ventilation requirements are met. After removing the rear wall of the cabinet, push the appliance into the kitchen unit’s space. o Position the appliance so that the front edge of the cabinet re against the positioning bracket, as shown in the picture above.
- Page 28 Secure the top of the appliance to the cabinet ceiling using the screws provided. You can now push the top securing bracket back so that it is flush with the top of the appliance.
-
Page 29: Installing The Door-On-Door Fittings
Installing the upper cupboard door o Remove the plastic fix plate cover. o Remove the locking nuts on the upper fix plate, and remove the upper fix plate (see figure below). IMPORTANT: DO NOT REMOVE THE DOOR SENSOR WHEN REMOVING THE UPPER FIX PLATE. - Page 30 o Turn over the upper cupboard door and place it on a cushioned surface. o Draw a vertical line down the centre back cupboard door (as shown in the diagram opposite). o Position upper plate approximately 775mm from the bottom of the cupboard door and centre and secure the fixing plate using the screws provided.
- Page 31 Adjusting the cabinet door o The nuts and screws on the top of the fridge door that secure to the fixing plate (cabinet door) are adjustable. Once hanging, you can adjust the level and centre of the door. The bolts which the door/fixing plate hang on will adjust approximately 5mm.
- Page 32 Attaching the lower fixings o Loosen the bracket screws on the bottom of the fridge door and move them until they fit against the cupboard door. o There will be a gap of a few millimetres between the fridge door and the cupboard door, and it should be parallel with the appliance door from top to bottom.
- Page 33 Completion When you are satisfied that the doors and appliance are fitted without any malfunctions you can attach the bracket, hinge, fix plate and lower bracket covers. ...
-
Page 34: Troubleshooting
Troubleshooting IMPORTANT: If your fridge freezer appears not to be operating properly, before contacting the Baumatic Customer Care Department, please refer to the checklist below. My fridge freezer does not appear to be working/there is no power to my appliance. - Page 35 Or any installation other than the one specified by Baumatic Ltd. has been completed. Please refer to the conditions of guarantee that appear on the...
-
Page 36: Baumatic Consumables
BC005 Stainless Steel Cleaner and Protector (250 ml) o BC007 E-Cloth – General Purpose Cloth o BC008 Microwave Cover To order a Baumatic consumable product please call 0123 5437 244 and quote the product code. You can also order online from eshop.baumatic.co.uk... -
Page 37: Technical Data
Technical Data Manufacturer BAUMATIC LTD Model Number BRB2617.5 Product Category 7 – Refrigerator-Freezer Energy Efficiency Class (1) Annual Energy Consumption (2) 313 kWh Storage Volume of Fridge Compartment 148 litres Storage Volume of Freezer 84 litres Compartment Star Rating Frost Free Compartments... -
Page 39: Contact Details
United Kingdom Baumatic Ltd., Czech Republic Baumatic Buildings, Baumatic CR spol s.r.o. 6 Bennet Road, Lípovà 665 Reading, Berkshire 460 01 Liberec 4 RG2 0QX Czech Republic United Kingdom +420 483 577 200 Sales Telephone www.baumatic.cz (0118) 933 6900 Sales Fax...