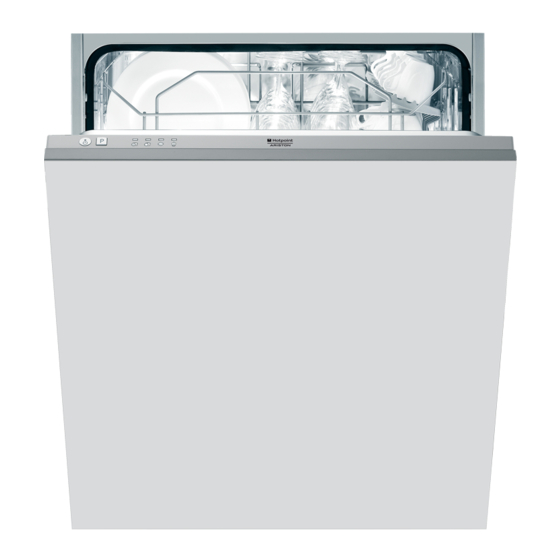
Hotpoint LFT 114 Instruction Booklet
Dishwasher
Hide thumbs
Also See for LFT 114:
- Instruction booklet (17 pages) ,
- Instruction booklet (16 pages) ,
- Instruction booklet (16 pages)
Table of Contents
Advertisement
Instruction booklet
EN
LFT 114
LFT 04
Contents
Installation, 2-5
Loading the detergent
Washing options
Wash cycles, 9
Loading the rinse aid
Loading the refined salt
Shutting off the water and electricity supplies
Cleaning the dishwasher
Preventing unpleasant odours
Cleaning the sprayer arms
Cleaning the water inlet filter
Leaving the machine unused for extended periods
Precautions and advice, 12-13
Troubleshooting, 14
After Sales Service
DISHWASHER
Advertisement
Table of Contents
Troubleshooting

Related Manuals for Hotpoint LFT 114


Summary of Contents for Hotpoint LFT 114
-
Page 1: Table Of Contents
Control panel Loading the racks, 7 Lower rack Cutlery basket Upper rack Start-up and use, 8 Starting the dishwasher LFT 114 Loading the detergent Washing options LFT 04 Wash cycles, 9 Wash cycle table Rinse aid and refined salt, 10... -
Page 2: Installation
Installation Advice regarding the first wash cycle Keep this instruction manual in a safe place for future reference. If the appliance is sold, given away After the appliance has been installed, immediately or moved, please ensure the manual is kept with the before running the first wash cycle, completely fill machine, so that the new owner may benefit from the the salt dispenser with water and add only then... -
Page 3: Electrical Connection
Description of the appliance); • the power supply voltage falls within the values indicated on the data plate on the inside of the A lead can be ordered from Hotpoint Service door; UK: 08709 066 066 or Republic of Ireland: 1850 302 220 •... -
Page 4: Connecting The Water Supply
Connecting the water supplies Ensure that the new hose supplied is connected and the old hose is disposed of safely. Connection to the water and electricity supplies Ensure the fill hose is only fitted to the cold should only be performed by a qualified technician. water supply. - Page 5 Sink Waste System To ensure floods do not occur, the dishwasher: - is provided with a special system which blocks the • before connecting the drain hose, remove any water supply in the event of anomalies or leaks from internal restrictions; this will prevent a build up of inside the appliance.
-
Page 6: Description Of The Appliance
Description of the appliance Overall view Upper rack Upper sprayer arm Tip-up compartments Rack height adjuster Lower rack Lower sprayer arm Cutlery basket Washing filter Salt dispenser Detergent and rinse aid dispensers Data plate Control panel Control panel ON/OFF WASH CYCLE indicator indicator lights light... -
Page 7: Loading The Racks
Loading the racks Before loading the racks, remove all food residues from the crockery and empty liquids from glasses and cups. In order to make it easier to arrange the crockery, the upper After loading the appliance, check that the sprayer arms rack may be moved to a higher or lower level. -
Page 8: Start-Up And Use
Start-up and use Starting the dishwasher Measuring out the detergent 1. Turn the water tap on. 2. Open the door and press the ON/OFF button: you will hear a short beep and the ON/OFF and wash cycle indicator lights switch on for a few seconds. 3. -
Page 9: Wash Cycles
Wash cycles Wash cycle table Wash cycle Detergent Wash cycle duration (A) = compartment A Wash Selection Drying (tolerance (B) = compartment B cycle instructions ±10%) Powder Liquid Tablets Hrs. Min. Extremely soiled dishes and pans (not to be 30 g (A) 30 ml (A) 1 (A) 2:15’... -
Page 10: Rinse Aid And Refined Salt
Rinse aid and refined salt number 3). - Press the P button repeatedly until the desired hardness level has been reached (1-2-3-4-5 see Water hardness table). E.g. Hardness level 1 (1st cycle indicator light flashing) Hardness level 2 (1st cycle indicator light ON, 2nd cycle indicator light flashing) If using a multi-functional product it is not necessary to add rinse aid;... -
Page 11: Care And Maintenance
Care and maintenance Clean the water inlet filter at the tap outlet regularly. - Turn off the water tap. - Unscrew the end of the water inlet hose, remove the filter and clean it carefully under running water. - Replace the filter and screw the water hose back into position. -
Page 12: Precautions And Advice
Precautions and advice Disposal of old electrical appliances The appliance was designed and manufactured in compliance with current international safety standards. The following information has been The European Directive 2002/96/EC on Waste provided for safety reasons and should therefore be Electrical and Electronic Equipment (WEEE), read carefully. -
Page 13: Disposal
Recycling & Disposal Information As part of Hotpoint's continued commitment to helping the environment, Hotpoint reserves the right to use quality recycled components to keep down customer costs and minimise material wastage. -
Page 14: Troubleshooting
Troubleshooting Whenever the appliance fails to work, check for a solution from the following list before calling for Assistance (see Assistance). Malfunction: Possible causes / Solutions: • The pl ug has not b een i nserted i nto t he el ectrical socket pr operly, or The dishwasher does not start. -
Page 15: After Sales Service
After Sales Service After Sales Service Appliance Registration We want to give you additional benefits of Hotpoint ownership. To activate your free 5 year parts guarantee you must register your appliance with us. UK: 0870 6092094 Essential Contact Information Republic of Ireland: 01 230 0800 www.hotpointservice.co.uk... -
Page 16: Hotpoint Guarantee
195062938.03 06/2008- Xerox Business Services Your appliance has the benefit of our manufacturer’s Hotpoint also offers you a free 5 year parts guarantee, which covers the cost of breakdown guarantee. This additional guarantee is conditional repairs for twelve months from the date of purchase.