Table of Contents
Advertisement
Available languages
Available languages
Quick Links
Advertisement
Table of Contents

Related Manuals for Whirlpool AKP 236


Summary of Contents for Whirlpool AKP 236
- Page 1 AKP 236 Manuel d’utilisation et d’entretien User and maintenance manual...
-
Page 3: Instructions Importantes Sur La Sécurité
INSTRUCTIONS IMPORTANTES SUR LA SÉCURITÉ VOTRE SÉCURITÉ AINSI QUE CELLE D’AUTRUI EST PARTICULIÈREMENT IMPORTANTE Le présent manuel contient d’importants messages relatifs à la sécurité, qui figurent également sur l’appareil. Nous vous invitons à les lire soigneusement et à les respecter en toute circonstance. Ceci est le symbole de danger relatif à... -
Page 4: Installation
Mise au rebut des appareils ménagers usagés Cet appareil est fabriqué à partir de matériaux recyclables ou pouvant être réutilisés. Mettez-le au rebut en vous conformant aux prescriptions locales en matière d’élimination des déchets. Avant de mettre votre appareil au rebut, rendez-le inutilisable en sectionnant le câble d’alimentation. -
Page 5: Déclaration De Conformité
• votre numéro de téléphone. Nous vous invitons à enregistrer votre four sur le site : www.whirlpool.fr, rubrique « enregistrez votre produit » afin d’être rapidement reconnu et renseigné par l service consommateur en cas de conseil ou de panne. -
Page 6: Entretien
Accessoires : • Faites tremper les accessoires dans du détergent à vaisselle après leur utilisation et après refroidissement. S’ils sont encore chauds, munissez-vous de gants pour les manipuler. • Utilisez une brosse ou une éponge pour détacher facilement les résidus d’aliments. Nettoyage de la paroi arrière et des panneaux catalytiques latéraux (s’ils sont fournis) : REMARQUE IMPORTANTE : ne nettoyez en aucun cas les panneaux catalytiques et la paroi arrière avec des produits abrasifs, des brosses dures, des éponges pour casseroles ou des bombes pour le nettoyage du four, car ils pourraient... -
Page 7: Remplacement De L'ampoule
REMPLACEMENT DE L’AMPOULE Pour remplacer l’ampoule arrière (si présente) : Débranchez le four. Dévissez le capot de l’ampoule (Fig. 6), remplacez l’ampoule brûlée par une ampoule neuve (voir Remarque pour connaître le type), puis revissez le capot de l’ampoule. Rebranchez le four. Pour remplacer l’ampoule latérale (si présente) : Débranchez le four. -
Page 8: Instructions Pour L'utilisation Du Four
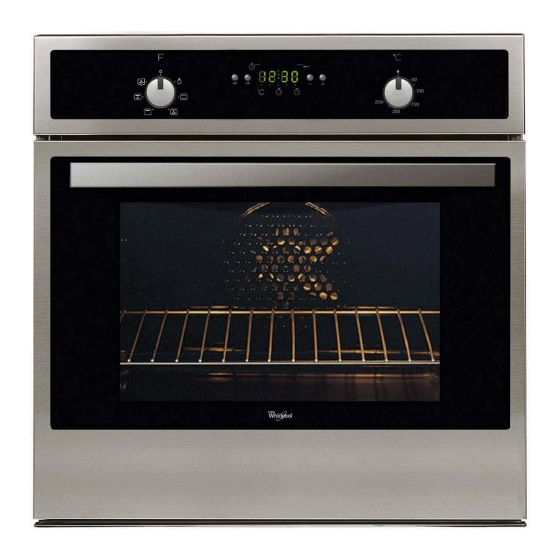
INSTRUCTIONS POUR L’UTILISATION DU FOUR POUR LE BRANCHEMENT ÉLECTRIQUE, CONSULTEZ LA PARTIE RELATIVE À L’INSTALLATION Bandeau de commande Résistance supérieure/gril Ventilateur (non visible) Plaque signalétique (à ne pas enlever) Éclairage Ventilateur Tournebroche (si présent) Résistance inférieure (non visible) Porte 10. Position des plaques (le nombre de gradins est indiqué sur la façade du four) 11. -
Page 9: Description Du Bandeau De Commande
INTRODUCTION DE GRILLES ET AUTRES ACCESSOIRES À L’INTÉRIEUR DU FOUR La grille et les autres accessoires sont équipés d’un système de blocage qui évite leur extraction involontaire. Fig. 1 Insérez la grille horizontalement, avec la partie rehaussée « A » orientée vers le haut (Fig. 1). Inclinez la grille à... -
Page 10: Utilisation Du Programmateur Électronique
UTILISATION DU PROGRAMMATEUR ÉLECTRONIQUE Description des fonctions Bouton de sélection des fonctions Touche de programmation : (« set ») Touche de confirmation (« ok ») Touches de modification des valeurs temps (« - » et « + ») Bouton de réglage de la température Affichage Minuteur Sécurité... - Page 11 Apparition de sur l’afficheur A la fin du temps programmé, l’indication apparaît sur l’afficheur et un signal sonore retentit. Le four s’éteindra automatiquement. Il est possible de modifier la durée de cuisson à l’aide des touches « - » et « + ». Retournez au point 3 du chapitre « Sélection de la durée de cuisson ».
- Page 12 TABLEAU DESCRIPTIF DES FONCTIONS DU FOUR BOUTON DES FONCTIONS Pour interrompre la cuisson et éteindre le four. LAMPE Pour allumer/éteindre l’éclairage à l’intérieur du four. Pour cuire n’importe quel type de plat sur un seul gradin. Utilisez le 2e gradin. Préchauffez le CONVECTION four à...
-
Page 13: Tableau De Cuisson
TABLEAU DE CUISSON Recette Fonction Préchauffage Gradin (en Température Durée Accessoires partant du bas) (°C) (min) 150-175 35-90 Moule à gâteau sur grille Gradin 4 : moule à gâteau sur grille Gâteaux levés (intervertir les gradins à mi-cuisson) 150-170 30-90 Gradin 2 : moule à... - Page 14 Recette Fonction Préchauffage Gradin (en Température Durée Accessoires partant du bas) (°C) (min) Lasagnes/Pâtes au four/Cannellonis/ 45-55 Plaque sur grille Flans Agneau / Veau / Bœuf 80-110 Lèchefrite ou plaque sur grille / Porc 1kg Poulet / Lapin / 50-100 Lèchefrite ou plaque sur grille Canard 1kg Dinde / Oie 3kg 80-130 Lèchefrite ou plaque sur grille...
-
Page 15: Conseils D'utilisation Et Suggestions
CONSEILS D’UTILISATION ET SUGGESTIONS Comment lire le tableau de cuisson Le tableau indique la meilleure fonction à utiliser pour un aliment donné, à cuire sur un ou plusieurs gradins simultanément. Les temps de cuisson commencent au moment de l’introduction du plat dans le four et ne tiennent pas compte du préchauffage (si nécessaire). -
Page 16: Important Safety Instructions
IMPORTANT SAFETY INSTRUCTIONS YOUR SAFETY AND THAT OF OTHERS IS PARAMOUNT This manual and the appliance itself provide important safety warnings, to be read and observed at all times. This is the danger symbol, pertaining to safety, which alerts users to potential risks to themselves and others. All safety warnings are preceded by the danger symbol and the following terms: Indicates a hazardous situation which, if not avoided, will cause serious injury. -
Page 17: Safeguarding The Environment
INSTALLATION After unpacking the oven, make sure that it has not been damaged during transport and that the oven door closes properly. In the event of problems, contact the dealer or your nearest After-sales Service. To prevent any damage, only remove the oven from its polystyrene foam base at the time of installation. -
Page 18: Troubleshooting Guide
TROUBLESHOOTING GUIDE The oven does not work: • Check for the presence of mains electrical power and if the oven is connected to the electrical supply. • Turn off the oven and restart it to see if the fault persists. AFTER-SALES SERVICE Before calling the After-Sales Service: See if you can solve the problem yourself with the help of the suggestions given in the “Troubleshooting guide“. -
Page 19: Maintenance
MAINTENANCE Use protective gloves. WARNING Ensure the oven is cold before carrying out the following operations. Disconnect the appliance from the power supply. REMOVING THE DOOR To remove the door: Open the door fully. Lift the catches and push them forwards as far as they will go (Fig. 1). Close the door as far as it will go (A), lift it up (B) and turn it (C) until it is released (D) (Fig. -
Page 20: Replacing The Oven Lamp
REPLACING THE OVEN LAMP To replace the rear lamp (if present): Disconnect the oven from the power supply. Unscrew the lamp cover (Fig. 6), replace the lamp (see note for lamp type) and screw the lamp cover back on. Reconnect the oven to the power supply. To replace the side lamp (if present): Disconnect the oven from the power supply. -
Page 21: Instructions For Oven Use
INSTRUCTIONS FOR OVEN USE FOR ELECTRICAL CONNECTION, SEE THE PARAGRAPH ON INSTALLATION Control panel Upper heating element/grill Cooling fan (not visible) Dataplate (not to be removed) Lamp Turnspit (if present) Lower heating element (not visible) Door 10. Position of shelves (the number of shelves is indicated on the front of the oven) 11. -
Page 22: Control Panel Description
INSERTING WIRE SHELVES AND OTHER ACCESSORIES IN THE OVEN The wire shelf and other accessories are provided with a locking mechanism to prevent their unintentional removal. Fig. 1 Insert the wire shelf horizontally, with the raised part “A” upwards (Fig. 1). Angle the wire shelf when it reaches the locking position “B”... -
Page 23: Description Of Functions
USING THE ELECTRONIC PROGRAMMER Description of Functions Function selector knob Programming button: (“set”) Confirmation button (“ok”) Buttons for changing time (“-” and “+”) Temperature selection knob Display detail Timer Key-lock Temperature indicator Cooking Time End of cooking time Starting the oven When the oven is connected to the power supply for the first time, or reconnected after a power failure, the display indicates “... - Page 24 appears on the display Once the set time has elapsed, an acoustic signal sounds and appears on the display. The oven will switch off automatically. To change the cooking time, use button “-” or “+”. Return to point 3 chapter “Selecting the cooking time”. Turn knob 1 back to “0”.
- Page 25 OVEN FUNCTION DESCRIPTION TABLE FUNCTIONS KNOB To stop cooking and switch off the oven. LAMP To switch the oven light on/off. To cook any kind of dish on one shelf only. Use the 2nd shelf. Preheat the oven to the required CONVENTIONAL temperature.
-
Page 26: Cooking Table
COOKING TABLE Recipe Function Preheating Shelf Temperature Time Accessories (from bottom) (°C) (min) 150-175 35-90 Cake tin on wire shelf Shelf 4: cake tin on wire shelf (switch Leavened cakes levels halfway through cooking) 150-170 30-90 Shelf 2: cake tin on wire shelf Drip tray/ baking tray or cake tin on 150-190 30-85... - Page 27 Recipe Function Preheating Shelf Temperature Time Accessories (from bottom) (°C) (min) Lasagne / Baked pasta / Cannelloni / 45-55 Oven tray on wire shelf Flans Lamb / Veal / Beef / 80-110 Drip tray or oven tray on wire shelf Pork 1 Kg Chicken / Rabbit / 50-100 Drip tray or oven tray on wire shelf...
-
Page 28: Recommended Use And Tips
RECOMMENDED USE AND TIPS How to read the cooking table The table indicates the best function to use for any given food, to be cooked on one or more shelves at the same time. Cooking times start from the moment food is placed in the oven, excluding pre-heating (where required). Cooking temperatures and times are purely for guidance and will depend on the amount of food and type of accessory used. - Page 30 Printed in Italy 07/2011 5019 310 01324...