Table of Contents
Advertisement
Available languages
Available languages
Quick Links
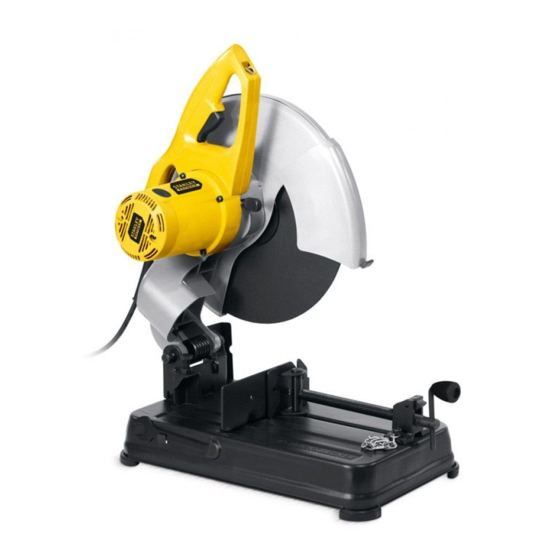
INSTRUCTION MANUAL
14 Inch (355mm)
Chop Saw
Scie fendeuse de
355 mm (14 po)
Serra Multi-Corte de
Metais de 14 pulg.
(355mm)
SAVE THIS INSTRUCTION MANUAL FOR FUTURE REFERENCE.
INSTRUCTIVO DE OPERACIÓN, CENTROS DE SERVICIO Y PÓLIZA DE GARANTÍA.
VEA EL ESPAÑOL EN LA CONTRAPORTADA.
ADVERTENCIA: LÉASE ESTE INSTRUCTIVO ANTES DE USAR EL PRODUCTO.
Catalog Number
FME700
Advertisement
Table of Contents

Related Manuals for Stanley FatMax FME700


Summary of Contents for Stanley FatMax FME700
-
Page 1: Instruction Manual
Serra Multi-Corte de Metais de 14 pulg. (355mm) Catalog Number FME700 SAVE THIS INSTRUCTION MANUAL FOR FUTURE REFERENCE. INSTRUCTIVO DE OPERACIÓN, CENTROS DE SERVICIO Y PÓLIZA DE GARANTÍA. VEA EL ESPAÑOL EN LA CONTRAPORTADA. ADVERTENCIA: LÉASE ESTE INSTRUCTIVO ANTES DE USAR EL PRODUCTO. -
Page 2: Safety Guidelines - Definitions
It is important for you to read and understand this manual. The information it SAFETY GUIDELINES - DEFINITIONS contains relates to protecting YOUR SAFETY and PREVENTING PROBLEMS. The symbols below are used to help you recognize this information. Indicates an imminently hazardous situation which, if not avoided, will result in death or serious injury. - Page 3 g) If devices are provided for the connection of dust extraction and collection facilities, gloves away from moving parts. Loose clothes, jewelry or long hair can be caught in moving parts. ensure these are connected and properly used. Use of dust collection can reduce dust- related hazards.
- Page 4 Wear appropriate hearing protection during use. Under some conditions and duration of use, noise from this product may contribute to hearing loss. CAUTION: Spark deflector will get hot. Avoid touching or adjusting while hot. Keep CAUTION: cordset and materials away from spark deflector. Some dust created by power sanding, sawing, grinding, drilling, and other construction activities contains chemicals known to the State of California to cause WARNING:...
-
Page 5: Power Supply
The label on your tool may include the following symbols. The symbols and their definitions are as follows: V....volts A ....amperes Hz....hertz W....watts min ....minutes ....alternating current n o ....no load speed ..direct current ....Class I Construction ....earthing terminal (grounded) ....safety alert symbol ....Class II Construction .../min or rpm..revolutions or reciprocation... -
Page 6: Standard Equipment
NOTE: Capacity shown on chart assumes no wheel wear and optimum fence position. MAXIMUM CUTTING CAPACITY Workpiece Shape: A X B 90° Cutting Angle A = 4-7/8 in A = 4-1/2 in 4 1/2 in x 5 1/8 in A = 4 1/2 in x 5 3/8 in (125mm) (115mm) (115mm x 130mm) (115mm x 137mm) - Page 7 • Angled material is best clamped and MATERIAL CLAMPING AND SUPPORTING (FIG. 2, 3) DIAMETER OF WORKPIECE Fig. 2 cut with both legs resting against DIAMÈTRE DE LA PIÈCE DE TRAVAIL base. DIÁMETRO DE LA PIEZA DE TRABAJO • A spacer block slightly narrower than the workpiece can be used to increase wheel utilization (Fig.
- Page 8 Fig. 5 FENCE OPERATION (FIG. 5, 6) CAUTION: To reduce the risk of injury, turn unit off and disconnect machine from power source before installing and removing accessories, before adjusting or changing set-ups or when making repairs. Be sure the trigger switch is in the OFF position.
-
Page 9: Maintenance
3. Make sure flange surfaces are clean and Fig. 8 flat. Install the new abrasive wheel by reversing the above steps. 4. Do not overtighten bolt. Check the work surface that the chop saw WARNING: Risk of personal injury. rests on when replacing with a new abrasive wheel. -
Page 10: Replacement Parts
We cannot guarantee repairs made or attempted by others. You can also write to us for information at Stanley Tools, 701 E. Joppa Road, Towson, Maryland 21286 - Attention: Product Service. Be sure to include all of the information shown on the nameplate of your tool (model number, type, serial number, etc.). -
Page 11: Troubleshooting Guide
2. Vise too loose 2. Tighten vise clamping. 3. Excessive cutting force. 3. Reduce cutting force. For assistance with your product, visit our website at www.stanleytools.com. for a list of service centers, or call the Stanley FatMax Customer Care Center at (800) 262-2161... -
Page 12: Manuel D'instructions
MANUEL D'INSTRUCTIONS Scie fendeuse de 355 mm (14 po) N° DE CATALOGUE FME700 CONSERVER CE MANUEL POUR UN USAGE ULTÉRIEUR. - Page 13 LIGNES DIRECTRICES EN MATIÈRE DE SÉCURITÉ - DÉFINITIONS Il est important que vous lisiez et compreniez ce mode dʼemploi. Les informations quʼil contient concernent VOTRE SÉCURITÉ et visent à ÉVITER TOUT PROBLÈME. Les symboles ci-dessous servent à vous aider à reconnaître cette information. Indique une situation dangereuse imminente qui, si elle nʼest pas évitée, causera la mort ou des graves blessures.
-
Page 14: Utilisation Et Entretien De L'outil
médicaments. Un moment dʼinattention, lorsque vous utilisez un outil électrique, peut êtes fatigué ou lorsque vous avez pris de la drogue, de l’alcool ou des se solder par des blessures sérieuses. • Habillez-vous en conséquence. Ne portez pas de vêtements amples ni de bijoux les cheveux, les vêtements et les gants à... - Page 15 dʼun défaut caché, il devrait éclater en moins dʼune minute. Ne jamais démarrer lʼoutil lorsque quelquʼun se tient directement devant le disque. y compris lʼutilisateur, • Pendant le fonctionnement, protéger le disque contre tout choc ou traitement brutal. Dans cette éventualité, arrêter lʼoutil et vérifier que le disque de tronçonnage ne comporte ni fissures ni défauts.
-
Page 16: Capacité De Coupe
Toujours utiliser un appareil respiratoire antipoussières approprié approuvé par le NIOSH ou lʼOSHA. Diriger les particules dans le sens opposé AVERTISSEMENT : du visage et du corps. Pour des raisons de commodités et de sécurité, les étiquettes suivantes sont apposées sur votre scie fendeuse à service intensif de 355mm (14 po.) POUR VOTRE SÉCURITÉ, LIRE LE MANUEL DE LʼUTILISATEUR. -
Page 17: Équipement Standard
A. Chaîne de retenue G. Clé plate CARACTÉRISTIQUES (FIG. 1, 4) M. Boulon et écrou de blocage B. Vis de pare-étincelles de la profondeur H. Manivelle C. Pare-étincelles N. Détente I. Levier dʼétau D. Base O. Orifice pour cadenas J. Meule E. - Page 18 les mains et les matériaux éloignés de la meule jusquʼà ce que cette dernière se soit arrêtée complètement. Pour éviter toute utilisation non permise de lʼoutil, poser un cadenas standard (non inclus) dans lʼorifice pour cadenas (O) situé dans la détente. •...
-
Page 19: Pièces De Rechange
Web de réparation à lʼadresse suivante : www.stanleytools.com. Il est également possible de commander des pièces auprès du centre de réparation en usine Stanley FatMax ou du centre de réparation sous garantie agréé Stanley FatMax le plus proche. Sinon, appeler notre service à... - Page 20 3. Réduire la force utilisée. Pour obtenir de lʼaide relativement au produit, consulter notre site Web à lʼadresse suivante : www.stanleytools.com pour obtenir une liste des centres de réparation ou appeler le centre de service à la clientèle de Stanley FatMax au 800 262-2161.
- Page 21 État ou dʼune province à lʼautre. En plus de la garantie, les outils Stanley FatMax sont couverts par notre : SERVICE DʼENTRETIEN GRATUIT DE 1 AN : Stanley FatMax entretiendra lʼoutil et remplacera gratuitement les pièces usées par une utilisation normale en tout temps...
- Page 22 MANUAL DE'INSTRUCCIONES Serra Multi-Corte de Metais de 14 pulg. (355mm) CATÁLOGO N° FME700 CONSERVE ESTE MANUAL PARA FUTURAS CONSULTAS.
-
Page 23: Pautas De Seguridad/Definiciones
PAUTAS DE SEGURIDAD/DEFINICIONES Es importante que lea y comprenda este manual. La información que contiene se relaciona con la protección de SU SEGURIDAD y la PREVENCIÓN DE PROBLEMAS. Los símbolos que siguen se utilizan para ayudarlo a reconocer esta información. indica una situación de peligro inminente que, si no se evita, provocará... - Page 24 • UTILICE LOS ACCESORIOS RECOMENDADOS. Consulte el manual de instrucciones para conocer los accesorios recomendados. El uso de accesorios no debidos puede producir un riesgo de lesiones corporales. • NUNCA SE PARE SOBRE LA HERRAMIENTA. Podría sufrir graves lesiones si la herramienta se cae a un lado o si se entra en contacto no intencionado con la herramienta de corte.
- Page 25 • NO OPERE ESTA HERRAMIENTA CERCA DE LÍQUIDOS, GASES O POLVOS INFLAMABLES. Las chispas o partículas calientes generadas del corte o las escobillas del motor podrían encender materiales combustibles. • No use el lado del disco abrasivo como pulidor de rebabas. Esto debilitará significativamente el disco y creará...
- Page 26 • USE EL ALARGADOR INDICADO. Cerciórese de que su alargador esté en buenas condiciones. Cuando use un alargador, asegúrese de que sea lo bastante resistente como para llevar la corriente que su producto requerirá. Un alargador de menor calibre causará una caída en el voltaje de la línea lo que resultará en pérdida de potencia y sobrecalentamiento.
-
Page 27: Alimentación Eléctrica
Compruebe que su suministro eléctrico concuerde con el indicado en la placa nominal. ALIMENTACIÓN ELÉCTRICA Una reducción de voltaje superior al 10% provocará pérdida de potencia y sobrecalentamiento. MAX. mm La amplitud de apertura de la prensa y la altura del punto de pivote proporcionan CAPACIDAD DE CORTE capacidad de corte para varias piezas grandes. - Page 28 de profundidad (M) y el perno inferior hasta la altura deseada y luego gire la tuerca de inmovilización (M) hacia la derecha hasta que se asiente firmemente sobre la pieza fundida. Ajuste firmemente el perno del tope de profundidad antes del uso. Cuando cambie el disco por uno nuevo, vuelva a ajustar el tope a la posición original para evitar que corte la superficie de apoyo.
-
Page 29: Mantenimiento
PIEZAS DE REPUESTO solicitar piezas, visite nuestro sitio Web en www.stanleytools.com. También puede solicitar piezas al Centro de mantenimiento de fábrica Stanley FatMax o al Centro de mantenimiento con garantía autorizado de Stanley FatMax más cercanos. O bien, puede llamar... - Page 30 3. Use menos fuerza para cortar. Para recibir ayuda con su producto, visite nuestro sitio Web en www.stanleytools.com para conocer una lista de centros de mantenimiento o llame al Centro de atención al cliente de Stanley FatMax al (800) 262 2161.
-
Page 31: Mantenimiento Y Reparaciones
ADVERTENCIA: Debido a que no se han probado con este producto otros accesorios que no sean los que ofrece Stanley FatMax, el uso de dichos accesorios con esta herramienta podría ser peligroso. Para reducir el riesgo de lesiones, con este producto deben usarse sólo los accesorios Stanley FatMax recomendados. -
Page 32: Especificaciones
Imported Mexico By: En Mexico importado por: Au Mexique, importeʼ par: Stanley-Bostitch, S.A. de C.V Av. de Los Angeles No. 303 Interior Local 1-C Col. San Martin Xochinahuac Delegacion Azcapotzalco Mexico, D.F, C.P. 02120 R.F.C SB0-861201-7z5...