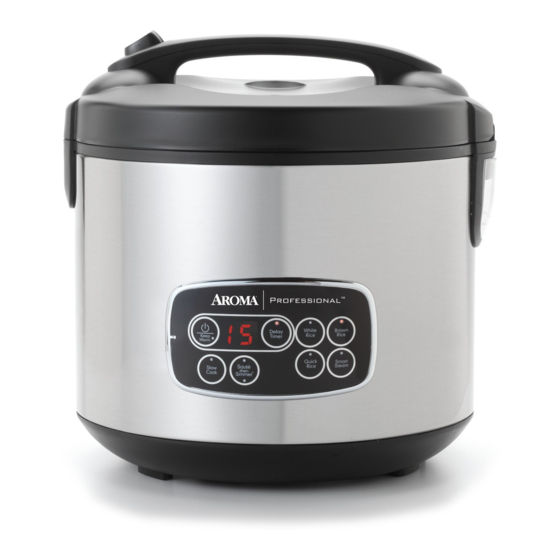
Aroma Professional ARC-3000SB Instruction Manual
20-cup digital rice cooker, food steamer and slow cooker
Hide thumbs
Also See for Professional ARC-3000SB:
- Recipe booklet (42 pages) ,
- Instruction manual (32 pages)
Table of Contents
Advertisement
Professional
Questions or concerns about your
rice cooker?
Before returning to the store...
Aroma's customer service experts are happy
to help. Call us toll-free at 1-800-276-6286.
Answers to many common questions and
even replacement parts can be found online.
Visit www.AromaCo.com/Support.
Download your free digital recipe book at
www.AromaCo.com/3000SBRecipes
Instruction Manual
Rice Cooker • Slow Cooker • Food Steamer
ARC-3000SB
Advertisement
Table of Contents

Related Manuals for Aroma Professional ARC-3000SB


Summary of Contents for Aroma Professional ARC-3000SB
- Page 1 Professional Questions or concerns about your rice cooker? Before returning to the store... Aroma’s customer service experts are happy to help. Call us toll-free at 1-800-276-6286. Answers to many common questions and even replacement parts can be found online. Visit www.AromaCo.com/Support.
- Page 2 Download your free digital recipe book at www.AromaCo.com/3000SBRecipes Congratulations on your purchase of the Aroma Professional 20-Cup Digital Rice Cooker, Food Steamer and Slow Cooker. In no time at all, you’ll be making fantastic, ® ™ restaurant-quality rice at the touch of a button! Whether long, medium or short grain, this cooker is specially calibrated to prepare all varieties of rice, including tough-to-cook whole grain brown rice, to fluffy perfection.
-
Page 3: Important Safeguards
® 8. The use of accessory attachments not recommended by Aroma 20. Rice should not be left in the inner cooking pot with the Keep-Warm function ®... -
Page 4: Short Cord Instructions
IMPORTANT SAFEGUARDS DO NOT DRAPE CORD! Short Cord Instructions 1. A short power-supply cord is provided to reduce the risks resulting from becoming entangled in or tripping over a longer cord. 2. Longer extension cords are available and may be used if care is exercised in their use. 3. -
Page 5: Parts Identification
Cook 4-quart programmable slow cooker. Set it to cook from 2 to 10 hours for all your slow cooked favorites! SAUTé-THEN-SIMMER™ Aroma’s patent-pending Sauté-Then-Simmer Technology is able ™ to sauté foods at a high heat and automatically switch over to... -
Page 6: Before First Use
BEFORE FIRST USE 1. Read all instructions and important safeguards. 2. Remove all packaging materials and check that all items have been received in good condition. 3. Tear up all plastic bags as they can pose a risk to children. 4. - Page 7 TO COOK RICE Using the provided measuring cup, Rinse rice to remove excess starch. Fill with water to the line which Place the inner cooking pot into the add rice to the inner cooking pot. Drain. matches the number of cups of rice rice cooker.
- Page 8 TO COOK RICE (CONT.) Press the POWER/KEEP WARM Press the WHITE RICE or BROWN The rice cooker will now begin The rice cooker will countdown the cooking. The cooking indicator light button to turn on the rice cooker. RICE button, depending upon the final 12 minutes of cook time.
- Page 9 RICE/WATER MEASUREMENT TABLE UNCOOKED RICE RICE WATER LINE INSIDE POT APPROX. COOKED RICE YIELD COOKING TIMES WHITE RICE: 30-35 Min. 2 Rice Cooker Cups* Line 2 4 Rice Cooker Cups* BROWN RICE: 65-70 Min. WHITE RICE: 33-38 Min. 3 Rice Cooker Cups* Line 3 6 Rice Cooker Cups* BROWN RICE: 75-80 Min.
- Page 10 TO USE QUICK RICE The rice produced by the Quick Rice function will not be to the same quality as rice made using the White Rice or Brown Rice settings, but it’s an excellent option for cooked rice in a pinch. To use the Quick Rice function, follow the steps for “To Cook Rice”...
- Page 11 TO USE THE DELAY TIMER Follow steps 1 to 7 of “To Cook Rice” beginning on page 5. Press the DELAY TIMER button. Once the needed time is selected, The digital display will countdown Once rice begins cooking, the Each press increases in one hour press the WHITE RICE or BROWN from the time selected.
- Page 12 TO USE THE DELAY TIMER (CONT.) The rice cooker will countdown the Once rice is finished, the rice cooker For better results, stir the rice with When finished serving rice, turn final 12 minutes of cook time. will beep and automatically switch to the serving spatula to distribute any the rice cooker off by pressing the Keep-Warm.
- Page 13 TO SLOW COOK Add food to be slow cooked to the Place the inner cooking pot into the Close the lid securely. Plug the power cord into an inner cooking pot. rice cooker. available outlet. • The Slow Cook function operates as a traditional “High” Slow Cook function.
- Page 14 TO SLOW COOK (CONT.) Each press of the SLOW COOK Once the needed cooking time is The rice cooker will begin to Once food is finished, the rice button will increase the slow cook selected, the rice cooker will beep to slow cook. The digital display will cooker will beep and automatically time by one hour, up to 10 hours.
- Page 15 TO USE SAUTé-THEN-SIMMER ™ Place the inner cooking pot into the Plug the power cord into an available Press the POWER/KEEP WARM Press the SAUTé-THEN-SIMMER ™ rice cooker and close the lid. outlet. button to turn on the rice cooker. button to begin sautéing and allow the cooker to preheat for 5 minutes.
- Page 16 TO USE SAUTé-THEN-SIMMER (CONT.) ™ Add ingredients to be sautéed/ Using a long-handled wooden Add other called for ingredients and Close the lid securely and allow the browned to the inner cooking pot. spoon, stir ingredients until sautéed/ liquid to the inner cooking pot. rice cooker to cook.
- Page 17 TO SAUTé ONLY Add ingredients to be sautéed/ Place the inner cooking pot into the Plug the power cord into an available Press the POWER/KEEP WARM browned to the inner cooking pot. rice cooker and close the lid. outlet. button to turn on the rice cooker. •...
- Page 18 TO SAUTé ONLY (CONT.) Press the SAUTé-THEN-SIMMER Using a long-handled wooden Press the POWER/KEEP WARM When finished sautéing, turn the rice ™ button to begin sautéing and allow spoon, stir ingredients until sautéed/ button to switch the rice cooker to cooker off by pressing the POWER/ the cooker to preheat for 5 minutes.
- Page 19 TO STEAM Using the provided measuring cup, Place the inner cooking pot into the Place food to be steamed onto the Place the steam tray into the rice add 3 rice cooker cups of water to rice cooker. steam tray. cooker.
- Page 20 TO STEAM (CONT.) Press the STEAM button. The digital Each press of the STEAM button Once the needed time is selected, the The cooking indicator light will will increase steaming time by one rice cooker will beep to indicate it is display will show a flashing 5 to illuminate to indicate it has begun minute, up to 30 minutes.
- Page 21 TO STEAM FOOD & SIMULTANEOUSLY COOK RICE Follow steps 1 to 9 of “To Cook Rice” beginning on page 5. Place food to be steamed onto the Using caution to avoid escaping Place steam tray into the rice Close the lid securely. steam tray.
- Page 22 TO STEAM FOOD & SIMULTANEOUSLY COOK RICE (CONT.) Using caution, open the lid to check If food is finished steaming, remove Allow the rice cooker to continue Once rice is finished, the rice cooker food for doneness. CAUTION: Steam steam tray using a hot pad or oven cooking rice. will beep and automatically switch to will be hot.
- Page 23 STEAMING TABLES When steaming, Aroma recommends using 3 rice cooker cups of water with the provided ® measuring cup. Meat Steaming Table Vegetable Steaming Table SAFE INTERNAL MEAT STEAMING TIME VEGETABLE STEAMING TIME TEMPERATURE Fish 25 Min. 140° Asparagus 9-11 Minutes...
- Page 24 TO COOK SOUPS, STEWS OR CHILIS Add ingredients to the inner cooking Place the inner cooking pot into the Close the lid securely. Plug the cord into an available pot. rice cooker. outlet. • The rice cooker will not switch to Keep-Warm until all liquid is boiled away. Follow the recipe carefully and do not leave the rice cooker unattended.
- Page 25 TO COOK SOUPS, STEWS AND CHILIS (CONT.) Press the POWER/KEEP WARM Press the WHITE RICE button to The cooking indicator light will Using caution to avoid escaping button to turn on the rice cooker. begin cooking. illuminate. steam, open the lid and stir occasionally with a long-handled wooden spoon.
- Page 26 • If washing in the dishwasher, a slight discoloration to the inner pot NOTE and accessories may occur. This is cosmetic only and will not affect performance. • Any other servicing should be performed by Aroma Housewares. ® Thoroughly dry rice cooker body and Reassemble for next use.
-
Page 27: Troubleshooting
TROUBLESHOOTING Because rice varieties may vary in their make-up, results may differ. Below are some troubleshooting tips to help you achieve the desired consistency. If your rice is dry or hard/chewy when the rice cooker switches to Keep-Warm, additional water and cooking time will soften the rice. -
Page 28: About Rice
There are many different varieties of rice available in the market. Your Aroma Rice Cooker can cook any type perfectly every time. The following are the commonly ®... - Page 29 ABOUT RICE Courtesy of the USA Rice Federation Did You Know? • Rice is the primary dietary staple for more than half of the world’s population. • U.S. grown rice is the standard for excellence and accounts for nearly 88% of the rice consumed in America. It is grown and harvested by local farmers in five south-central states and California.
- Page 30 RECIPES Sauté-Then-Simmer Risotto ™ Ingredients ¼ cup yellow onion, diced small Press the POWER/KEEP WARM button to turn on the rice cooker. Add onion, garlic 1 large garlic clove, chopped fine and olive oil to inner cooking pot. Press the SAUTé-THEN-SIMMER button.
- Page 31 RECIPES Green Chile Chicken and Rice Ingredients 1½ cups rice Press the POWER/KEEP WARM button to turn on the rice cooker. Place all ingredients 3 cups chicken broth in the inner cooking pot and stir. Place inner cooking pot into the rice cooker, cover and 2 tbsp diced minced onion press the WHITE RICE button.
-
Page 32: Limited Warranty
LIMITED WARRANTY SERVICE & SUPPORT Aroma Housewares Company warrants this product free from defects in In the event of a warranty claim, or if service is required for this product, please material and workmanship for five years from provable date of purchase in...