Roland G-70 Owner's Manual
Hide thumbs
Also See for G-70:
- Owner's manual (261 pages) ,
- Service notes (89 pages) ,
- Addendum (56 pages)
Table of Contents
Advertisement
Quick Links
Download this manual
See also:
Service Notes
Advertisement
Table of Contents

Related Manuals for Roland G-70


Summary of Contents for Roland G-70
- Page 1 r® Owner’s Manual...
-
Page 2: Important Safety Instructions
The wire which is coloured BROWN must be connected to the terminal which is marked with the letter L or coloured RED. Under no circumstances must either of the above wires be connected to the earth terminal of a three pin plug. The technology used in the G-70 is covered by patents pending in certain countries throughout the world. - Page 3 G-70. Be sure to keep this manual in a safe place for future reference. Copyright © 2004 ROLAND EUROPE. All rights reserved. No part of this publication may be reproduced in any form without the written permission of Roland Europe S.p.a.
-
Page 4: Features
New interface concept The G-70 provides two approaches for recording new The G-70 was designed from the ground up to put its song material: a Recorder function with a straightfor- massive array of functions at your fingertips. The full-... - Page 5 That is why we would like to ask you to read this manual from cover to cover. You’ll find that the G-70 is quite unlike any other instrument you know. Have fun!
- Page 6 Roland........................................• Do not force the G-70’s power cord to share an outlet with an unreasonable number of other devices. Be espe- • Make sure you always have the unit placed in such a way cially careful when using extension cords—the total...
- Page 7 Roland distributor, as listed on the “Informa- tion” page....................• The G-70 should be located so that its location or posi- tion does not interfere with its proper ventilation....................• This unit for use only with Roland keyboard stand KS-12.
-
Page 8: Table Of Contents
Switching parts on and off ......57 Switching off the G-70 ......21 Interactive demo of the G-70 . - Page 9 G-70 Music Workstation Contents Style Finder: quickly locating Styles....86 Saving your modified song or Style ... . 130 Quick location of the Style you need.
- Page 10 17. Archiving data using a computer (USB) ..210 Backing up all of the G-70’s data....212 18.
-
Page 11: Important Notes
• Do not place the unit near devices that produce a strong mag- netic field (e.g., loudspeakers). • Install the G-70 on a solid, level surface in an area free from vibra- tion. If the unit must be installed at an angle, be sure the installa- •... - Page 12 (you cannot save data) • At power-on, do not remove/insert a card while the G-70 is updat- • Disks containing important performance data for this instru- ing its internal data (wait until the messages “Song database ment should always be locked (have their write protect tab slid checking…”...
-
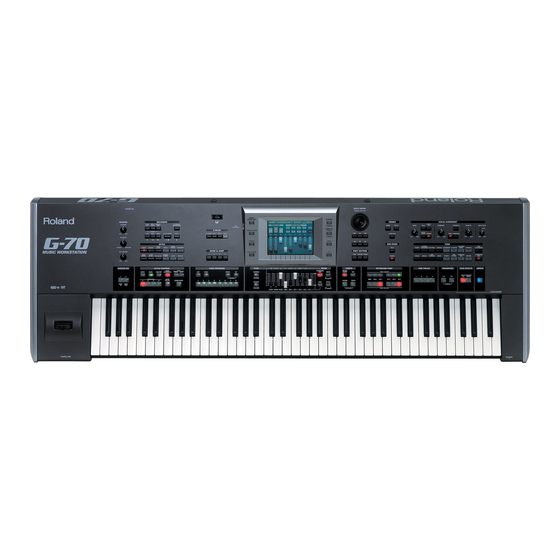
Page 13: Panel Descriptions
WORLD A MASTER VOLUME knob [16-TRACK¥SEQUENCER] button: Press this button to Use this knob to set the G-70’s global output volume access the G-70’s sequencer (MIDI recorder). This (all sections). The setting of this knob also determines sequencer goes way beyond anything you may know... - Page 14 This, however, is information that is rent song or Music Style, if the pre-programmed “extracted” (derived) in realtime by the G-70. This Cover settings do not provide what you’re looking function can even display the notes of the selected for.
- Page 15 W EASY SETTING section The dial can be used to set the value of the parameter This key pad allows you to reconfigure the G-70 by pressing just one button: [ARR] (use the Arranger in field that is currently highlighted. Turn it to scroll split mode), [ORGAN] (the name says it all) and through the available settings.
- Page 16 KEYBOARD PART section f V-LINK button The TONE ASSIGN buttons are used to specify the Press this button to take advantage of the G-70’s V- Keyboard part you wish to assign a different sound to LINK functionality for controlling video material via page 29.
- Page 17 Keyboard part notes you are playing. For Note: Do not remove the floppy disk while the G-70 accesses the HARMONIC BAR sounds and the sounds of the the disk (to load/save data, etc.). Doing so may damage both TONE [ORGAN] family, you can use the Modulation the floppy disk and the drive’s head.
-
Page 18: Rear Panel
INTERNAL MEMORY PROTECT A FC7 PEDAL socket Note: The MIDI functions can be accessed via the G-70’s Menu (page 213). Frequently used MIDI settings can be written and This is where you connect an optional FC-7 foot- recalled as “MIDI Sets”. - Page 19 Note: The INPUT socket is mono. N POWER ON button Press this button to switch the G-70 on and off. OUTPUT R & L sockets: If connected to a mixing con- sole, amplifier, etc., these sockets transmit the signal...
-
Page 20: Setting Up And Demo Songs
Setting up and demo songs Setting up and demo songs You must be dying to try out your new G-70 to see what it is capable of. We’ll get to that in a minute. But first we need to connect it. -
Page 21: Switching The G-70 On/Off
(2) Press the G-70’s [POWER¥ON] button located on the rear panel to switch it on. (3) If you connected the G-70 to a mixing console, switch it on now. (4) Switch on the amplifier, your active speakers or the keyboard amplifier(s). -
Page 22: Interactive Demo Of The G-70
Interactive demo of the G-70 Your G-70 contains an interactive demo that introduces all of its highlights. It might be a good idea to try it out now. The demo is self-explanatory, so we’ll just show you how to start and stop it. -
Page 23: The Main Page
The TRANSPOSE field H, finally, calls up the display When you leave Demo mode (or any other display page) or if you do not change any of the G-70’s settings, the page where you can transpose one, several or all sec-... -
Page 24: Quick Start
That’s how it’s called on the front panel, so we’ll stick to it. This section actually encompasses a 16-track Your G-70 is several instruments in one. There are sequencer, a straightforward MIDI recording function three main sections you can use for playing live. -
Page 25: Playing To An Automatic Accompaniment
Arranger: selected Music Style (called “Cool Live Band”). (1) Connect and switch on the G-70 (see pages 20 and The accompaniment pattern is sounded in the key 21). that corresponds to the note you played (C). The (2) Press the EASY SETTING [ARR] button. -
Page 26: Professional Transitions: Fill In
(2) Play a chord in the left half of the keyboard to notes. specify the key of the Intro pattern. The G-70 allows you to make such “announcements” in (3) Press the [INTRO] and the numeric button [1]~[4] the following way: that corresponds to the Intro pattern you want to (1) Start playback of the MAIN [1] pattern (see above). -
Page 27: Selecting Music Styles
G-70 Music Workstation Playing to an automatic accompaniment The indicator of that button lights and the display During Arranger playback, the [START÷STOP] button looks as follows: flashes red on the downbeat and green on the remaining beats of the bars to indicate the tempo. -
Page 28: Changing The Tempo
Using the Keyboard parts If the accompaniment is too fast (or too slow), here is how to change the Music Style tempo: Your G-70 provides six “parts” that allow you to play different sounds on the keyboard. These parts are FAST®... -
Page 29: Alternating Between Sounds
“normal” part. In SPLIT mode, it supplies a semi-auto- IChoosing sounds manually matic bass line to your left-hand notes if one of the The G-70 contains 1596 Tones (or sounds) and 48 Drum two LW parts is active. When neither LW button Sets divided over 16 families. - Page 30 The Roland engineers figured that you might feel overwhelmed by the number of Tones available in each TONE family. That is why the G-70 does not dis- play all the sounds it contains when you switch it on for the first time. This “restricted” display mode is called “BEST SELECTION”.
-
Page 31: Drumming On The Keyboard
Drum Sets that reside on the SRX-series Drumming on the keyboard expansion board you installed. The G-70 also allows you to play drums and percussion on the keyboard. If you have ever worked with an older Roland arranger instrument, you may remember that there used to be a part called “M.Drums”... -
Page 32: Selecting Sounds From An Srx Expansion Board
The display now responds with a list of Tones avail- able on the installed wave expansion board: The G-70 allows you to expand the number of sounds by installing an optional SRX-series wave expansion board. This allows you to use the same sounds as own- ers of a Fantom-X synthesizer. -
Page 33: Using The Harmonic Bars
Using the Harmonic Bars (6) Press the [EXIT] button to return to the main page. Using the Harmonic Bars The G-70 contains a virtual drawbar organ that is based on Roland’s Virtual ToneWheel technology found EXIT in organs like the VK-8, VK-88, VK-7, VK-8M, etc. This section can be assigned to three Keyboard parts: UP1, LW1 and MBS. -
Page 34: If You Like A Registration
Press PART ON/OFF [LW1] to switch off the LOWER 1 LW 1 part. Note: You could connect a PK-5A MIDI pedal to the G-70’s MIDI IN socket and use it to trigger the MBS (M. BASS) part. See page 213 for the G-70’s MIDI functions. -
Page 35: Using A "Beat Box" With The Organ
You can also push the BENDER/MODULA- TION lever towards the rear of the G-70 to change between the SLOW and FAST speeds of the Rotary effect. (Or press the lever icon to alternate between the SLOW and FAST rotation speeds.) -
Page 36: Working With The Music Assistant
Working with the Music Assistant the rhythm of the desired tempo. (7) To quickly return to the default tempo, hold down The G-70’s Music Assistant is also related to the [√¥SLOW] and simultaneously press [FAST¥®]. Arranger/Style section. It is a collection of registrations... -
Page 37: Using The Finder
Working with the Music Assistant • Press the [ARTIST] field to sort the Music Assistant • Press the [Find≈Only] field to have the G-70 search for entries alphabetically by artist name. This reshuffles names that contain the supplied information. (This the list. -
Page 38: Playing Back Songs (Standard Midi Files)
Index are displayed. ner. (6) Continue with step (3) to select the song you want The G-70 is shipped with a few example songs that to listen to. can be used here. This function is also available for... -
Page 39: Starting Playback
(“markers”) you can jump to right away. For songs that do not yet contain If the G-70 did find one or several matches, the them, you can program these markers yourself. You “FOUND” number will be smaller than the “GLOBAL”... - Page 40 Recorder may suddenly stop and the message “Song Scanning” may appear. This can be solved by reducing the playback tempo so that the G-70 has The display changes to: enough time to process all MIDI data contained in the song.
-
Page 41: Using The Song Cover Function
(page 130). the part fields [1]~[16] can be added, too. Note: The COVER information is part of the data only the G-70 understands. You can still play back the newly saved version of (4) To mute other parts “ad lib” (i.e. without taking... -
Page 42: Vocal Harmonist Function
(5) Press the [EXIT] button to return to the main page. The Vocal Harmonist is another highlight of your G-70. Your last preset selection (MELODY~USER) will be In fact, it doesn’t just produce harmonies: it can also used until you select another preset or until you transform your voice in various ways. - Page 43 SUSTAIN LEV: Use this parameter to specify how fast Compressor, Gate and effects the compressor stops working once the microphone Your G-70 provides a compressor effect you might level drops below the compressor’s threshold. This want to set up now. The compressor reduces volume should be set in such a way as to avoid unpleasant peaks and thus “levels out”...
-
Page 44: Adding Harmonies To Your Singing
“voicings” and voice at the Harmonist effect proper. characters for your choir. The G-70 provides two harmony types: “Small” (1 or 2 additional voices) and “Ensemble” (3 or 4 additional (9) To sing again without automatic harmonies, press the [SMALL] or [ENSEMBLE] button again (so that voices). -
Page 45: Voice-Fx
G-70 Music Workstation Vocal Harmonist function ing pitches. The Vocal Harmonist was fine-tuned to DELAY TIME: Allows you to set a delay between the blend in with Standard MIDI File playback and that’s moment you start singing and the moment the when it sounds most “real”. -
Page 46: Auto Pitch
G-70 Music Workstation Quick Start Auto Pitch (6) For more refined control over the Auto Pitch voice, press the [EDIT] field: Here’s another interesting effect that can either be used as gimmick or to ensure that even the flattest of renditions suddenly sounds in tune. -
Page 47: Using The Vocoder
Vocoder works. notes, while you speak (or sing) into the microphone. Note: If you use the Vocoder along with the G-70’s Arranger, Note: See page 134 for the [EDIT] parameters. you will probably have to play the melody yourself, because... -
Page 48: Automatic Transposition (Singer Key)
If you connected a microphone, a [CAPTURE] field appears. Press that field to confirm the note you want the G-70 to recognize. (This field does not appear if you enter the pitch via the keyboard.) If you have no microphone handy, you can also play this note on the keyboard. -
Page 49: Displaying Lyrics And Chord Information
Displaying Lyrics and chord information → Only available for Standard MIDI File playback Your G-70 also allows you to view the lyrics (if avail- able) –and even the notes– of the songs in the display. The Lyrics function was provided to allow you to read... - Page 50 That monitor (or screen) always displays the Lyrics is impossible to tell whether those are minor or major chords). (if available), even if you –or the G-70– select(s) other Note: You can also add Lyrics data to songs that do not yet display pages.
-
Page 51: Displaying Scores
• Select the track(s) whose notes should be displayed: If you don’t remember the notes of the song you are Press the (corresponding) [TRACK] field and use the about to play, you can ask the G-70 to display them on- [DATA÷ENTRY] dial to select the track. screen: “STAFF 1”... -
Page 52: Recording Your Music
This is the easy approach: you press the [REC¥∏] but- which Arranger playback and recording start. ton, you set the G-70 the way you want it to sound Note: See page 73 for setting the Count-In function. (with or without Arranger, for example) and you start (6) Play the Arranger chords with your left hand and playing. -
Page 53: Recording Without Accompaniment
G-70 Music Workstation Recording your music Recording without accompaniment Adding more parts Let us now look at how to start recording without Here is how to redo part of your recording (one part automatic accompaniment. You can nevertheless start you do not like) or to add additional parts to what has the Arranger at a later stage (after your ad lib introduc- already been recorded. - Page 54 G-70 Music Workstation Quick Start (8) Press the RECORDER [TOP¥|√] button. You have just selected the more detailed recording function (the “sequencer”). The display changes to: The sequencer returns to the beginning of the song (measure “1”). (9) Press the [PLAY÷STOP¥®÷ª] button.
-
Page 55: Saving Your Song
A song you save to becomes a Standard MIDI File that (4) Enter the name: can be played back with the G-70, but also with any • Move the cursor to the desired position using [ø] and other SMF-compatible sequencer. -
Page 56: About The Keyboard Modes
About the Keyboard modes About the Keyboard modes The KBD MODE setting is the singlemost important parameter of your G-70 because it determines which parts (or Tones) and sections are available. Though the EASY SETTING buttons set these parameters automatically, you should familiarize yourself with the KBD MODE concept. -
Page 57: Split And Whole Modes
G-70 Music Workstation Split and Whole modes The display now looks more or less as follows: Split and Whole modes Using the SPLIT Keyboard Mode Split means that the keyboard is divided into two halves. You can use the LW1, LW2 and MBS parts in the left half and the UP1, UP2, UP3 parts in the right. -
Page 58: Using The Performance Functions
The transposition interval is indicated on the main M.Bass). You can even use these effects simultaneously page: if you like. (1) Press the lever towards the rear of the G-70 to add a vibrato effect (“wobble”) to the notes you are playing. MODULATION... -
Page 59: Global Transpose
Tone, while UP2 plays one octave above or below UP1. Another use for this function is to provide access to the “noises” of the G-70’s new “V” Tones so as to be able to trigger the scraping, knocking, etc. -
Page 60: Key Touch (Velocity Sensitivity)
Key Touch (velocity sensitivity) selected part. This is probably only useful when Of course, the G-70’s keyboard is also velocity sensitive. applied to two Keyboard parts. Do not change these This allows you to control the timbre and volume of the values if you have no intention of using a “comple-... -
Page 61: Master Tune
BENDER/MODULATION lever: you can change the pitch, modify the volume, intensify the modulation, etc. In the G-70’s case, however, you can also control the The display changes to: Arranger and even the Vocal Harmonist. -
Page 62: Assign Sw Buttons
G-70 Music Workstation Using the performance functions G Filter Up—The cutoff frequency of the Tone assigned to G Fill Down—Triggers the Fill-In that takes you to the pre- the selected part can be raised (so that the sound vious Variation (i.e. from MAIN “2” to “1”). You can use becomes brighter). - Page 63 Another favorite position for “halved” bars is at the end of a chorus or the bridge. Your G-70 allows you to faithfully reproduce these “anomalies” using this function.
-
Page 64: Using The D Beam Controller
G-70 Music Workstation Using the performance functions D Beam functions Using the D Beam Controller The D Beam Controller has two sensors that detect motion (such as your hand or body movements) in The D Beam Controller allows you to control various front of it. - Page 65 (or stop) it again. G Fade OUT—Fade Outs are extremely popular in pop music and the G-70 allows you to end a song just like the original. To do so, move your hand inside the D Beam’s range. The volume then gradually decreases until it reaches zero.
- Page 66 G-70 Music Workstation Using the performance functions G Pitch Downº—By moving your hand over the D Beam, (4) Press the [EXIT] button to return to the main page. you can generate a value between “64” (no Pitch Bend) and “0” (maximum downward bend). As soon as you move your hand outside the D Beam’s reach, the value...
-
Page 67: Using Optional Footswitches
FC-7 footswitch) and use it to switch off the Arranger Hold function, so that the Arranger only plays the Note: The FC-7 assignments apply to the G-70 and are not writ- drum pattern of the selected Music Style. ten to individual User Programs. Selecting another User Program G Piano/Standard—You can alternate between Standard... -
Page 68: Hold Footswitch (Sustain)
UP1/2/3, LW1/2 and M.Bass, on condition that you G Punch In/Out—The footswitch can be used to activate select WHOLE keyboard mode. In SPLIT mode, the sus- and switch off punch in/out recording using the G-70’s tain pedal’s Hold function only works for the right- sequencer (page 156). -
Page 69: Foot Switch
G User Prg Up, User Prg Down—Allows you to select the next (“Up”) or previous (“Down”) User Program. G Punch In/Out—The footswitch can be used to activate and switch off punch in/out recording using the G-70’s sequencer (page 156). (3) Press the field that corresponds to the function G Portamento—Switches the Portamento function... -
Page 70: Expression (Foot Pedal)
G-70 Music Workstation Using the performance functions G Soft, Sostenuto, Hold—The footswitch can be used as a The display changes to: Soft, Sostenuto or Sustain (Hold pedal). Note that “Hold” can also be controlled using a dedicated (but optional) DP-2, DP-6, or BOSS FS-5U footswitch connected to the HOLD FOOTSWITCH socket. -
Page 71: Scale Tuning
Note: If you select “Expression”, the DOWN and UP values represent MIDI Expression (CC11) values. The G-70 contains three memories where you can store your favorite tunings. These are three global memories It is perfectly possible to set the DOWN value to “127”... - Page 72 (7) Press the [UP¥PARTS] and/or [LW¥PARTS] field to If you now returned to the main page, you would notice that the G-70 alerts you to the fact that the specify which Keyboard parts are affected by the Scale Tuning function has been switched on (“Off”, Scale Tune settings: “On”, “Mem 1~3”):...
-
Page 73: Metronome
Metronome settings nome’s volume using the LEVEL knob. This option The G-70 also allows you to specify when and how the may be useful as “click track” for a drummer. metronome should sound: (3) Press the [EXIT] button to return to the main page. -
Page 74: Additional Arranger/Style Functions
Arranger. The Arranger is a kind of sequencer that plays back the accompaniments you select. Those accompaniments are always related to a given musical genre (or “style”) and are therefore called “Styles”. The G-70’s accompaniments are a lot more than just one pattern that goes on playing until you stop it: they comprise several patterns (or divisions). -
Page 75: About Sync Start & Stop
There are three Fill-Ins for the upward direction (“Up”) and three for downward moves (“Dw”). Once you get to know the G-70 a little better, you will Note: You can also press [INTRO] in the middle of a performance. appreciate this function, though. -
Page 76: Melody Intelligence
(3) Press the field of the desired harmony type (TYPE). • Press the [DRUM] field if only the drum and percus- Selecting a Harmony Type also means that the G-70 sion instruments should change. automatically assigns a suitable sound to the MEL- •... -
Page 77: Saving A Style With A Cover Alteration
[SAVE] field to save the Style to the internal memory, a memory card or floppy disk (see p. 77). Note: The COVER information is part of the data only the G-70 understands. Note: You can also modify the COVER settings yourself (see p. -
Page 78: One Touch
IIf you select a One Touch memory while another one is already active The ONE TOUCH function makes the following auto- In that case, the G-70 immediately selects of the set- matic settings: tings of that memory and thus changes the registra-... -
Page 79: Programming Your Own One Touch Settings (Write)
(3) Press the [EXIT] button to return to the main page. More refined Arranger settings Chord recognition area (ZONE) Telling the G-70 that you want to use the Arranger is a EXIT matter of pressing the EASY SETTING [ARR] button. In that case, the key of the Style patterns is controlled by the chords you play in the left half of the keyboard. -
Page 80: Arranger Type (Chord Mode)
G-70 Music Workstation Additional Arranger/Style functions Arranger Type (chord mode) Intro & Ending Alteration Another important choice is how you want to transmit If the Intro and Ending patterns sound odd when you note information to the Arranger. start a song with a rather unusual chord (“Csus4”, for instance), switch off the ALTERATION function. -
Page 81: Tempo-Related Settings (Arranger Options)
A.BASS (the bass) and ACCOMP 1~6 (the melodic Options) accompaniment parts). (5) Set the desired value with the [DATA÷ENTRY] dial or The G-70 provides two parameters that allow you to the [DEC]/[INC] buttons. “play” with the Style tempo: You can specify positive and negative sensitivity val- (1) Press the [MENU] button. -
Page 82: Tempo Change (Ritard And Acceler)
G-70 Music Workstation Additional Arranger/Style functions IUsing the Ritardando/Accelerando functions [PRESET], [AUTO] and [LOCK] allow you to specify what happens when you select another Style: (4) For general applications (any Style division) pro- ceed as follows: If Arranger playback If the Arranger is run- •... -
Page 83: Working With 'External' Styles
Working with ‘external’ Styles [ARRANGER¥OPTIONS] field. Using the CUSTOM memories The G-70 provides 10 memories per family (i.e. 120 in all) that refer to Styles in the internal memory (“INTER- NAL MEMORY”) or on a memory card (“EXTERNAL MEMORY”). These memories behave exactly like the fac- tory memories. - Page 84 Its indicator lights and the display looks as follows: [1]~[4] system. (7) Press the [GET¥IT] field. The G-70 returns to the “STYLE” page. The name of the selected Style appears in the field you selected before pressing the [EDIT¥CUSTOM] button.
-
Page 85: Disk User
Note: If you do not want to use the Style after all, press [EXIT]. If the Style in question cannot be found, an error In that case, the G-70 keeps on using the last Style it did find. message appears and the G-70 goes on using the Disk User previously selected Style. -
Page 86: Style Finder: Quickly Locating Styles
Style Finder: quickly locating Styles not available and the display looks as follows: The G-70 allows you to have a great many Music Styles handy: in its internal memory, on a memory card and on floppy disks. For the internal memory and the mem- ory card in the PCMCIA slot, there is a powerful Finder function for quickly locating the Style you need. -
Page 87: Editing The Style Finder Information
Decide what you want to look for thing. • Press the [STYLE¥NAME] field if you want the G-70 to If the G-70 did find one or several matches, the look for Style names, then enter the name (or part of “FOUND”... - Page 88 Note: It is perfectly possible to use “older” Styles with the formatted, a message will be displayed that allows you to for- G-70. They are automatically converted to the new VARIATION mat it before the Styles are copied. [1]~[4] system.
- Page 89 G-70 Music Workstation Style Finder: quickly locating Styles You are asked whether it is OK to overwrite all files on the destination media (“TO”) that have the same file names as the files you are about to copy. (6) Press the [YES] field if it is OK to overwrite files with the same names on the destination media.
-
Page 90: Advanced Keyboard Part Functions
Note: This function is also available in WHOLE Keyboard Mode. The UPPER 3 SPLIT function can be cancelled in sev- In effect, the G-70 allows you to play at least three eral ways: sounds assigned to three separate keyboard areas. On •... -
Page 91: Portamento For Up1 And Up2
G-70 Music Workstation Portamento for UP1 and UP2 (1) Press the [MENU] button. Portamento for UP1 and UP2 Here are two functions that may come in handy for even more impressive solos involving the UP1 and UP2 MENU parts. Portamento Time (1) Press the [MENU] button. -
Page 92: Portamento Mode: Mono/Poly
(2) Press the [SPLIT&TOUCH] field, followed by the Portamento Mode: Mono/Poly [KEYBOARD¥OPTIONS] field. The G-70 also allows you to set the Upper1 and Upper2 parts to mono(phonic) mode. MONO means that you can only play one note at a time. You could select this mode to play a trumpet or woodwind part in a more natural way. -
Page 93: Tone Edit: Editing Keyboard Parts
Tone Edit: editing Keyboard parts the [DEC]/[INC] buttons. You can also use the assignable sliders below the display to directly edit Your G-70 allows you to edit certain parameters that the parameters above them. affect the way a Keyboard part sounds by adjusting... - Page 94 ITVF (filter) By modifying the filter settings, you can control the timbre (tone) of the sound. The G-70 uses Low-Pass Filters (LPF) that allow only frequencies below the specified frequency to pass. The frequency where the filter starts “cutting off”...
-
Page 95: Using The Mixer Functions & Effects
The MIXER environment does what its name suggests: Mixing Keyboard parts it allows you to balance the various Keyboard parts of your G-70. See page 124 and following for how to Here’s how to set the balance and other mix-related “mix” the Song and Style parts. -
Page 96: Volume And Status Of The Style Parts
G-70 Music Workstation Using the mixer functions & effects The D BEAM part refers to the sounds that are gener- Specify how much chorus should be applied to the ated when you use the D Beam controller after Keyboard parts. The effect parameters themselves selecting the DJ GEAR, SOUND EFX or INSTRUMENT can be edited on an Effect page (see below). -
Page 97: Editing The Keyboard Effects Processors
G SRV Room—This effect simulates the reverb characteris- G High Cut (160~12500Hz, Bypass)—Adjusts the fre- tics of a room. The name (“SRV”) refers to Roland’s quency above which the high-frequency content of the SRV-3030, a stand-alone reverb processor, which is also reverb will be reduced. -
Page 98: Chorus For Keyboard Parts
G Flanger—This is an effect that sounds somewhat like a you want to keep them. jet airplane taking off and landing. G GM2 Chorus—This Chorus effect is Roland’s standard type for GM2-compatible tone generators. G Delay—This is a full-fledged delay effect that can be used instead of a chorus or flanger. - Page 99 G-70 Music Workstation Editing the Keyboard effects processors • Press the field of the parameter you wish to change GM2 Chorus parameters (the number of fields and their functions depend on G Pre LPF (0~7)—Cuts the high frequency range of the the selected type).
-
Page 100: Using The Multi-Effects Processor (Multi-Fx)
Using the mixer functions & effects Selecting another MFX type and editing it Using the multi-effects processor The G-70 provides 84 different Multi-FX types, some of (Multi-FX) which are combinations of two effects for added flexi- bility. Here is how to select another Multi-FX type:... -
Page 101: Linking Multi-Fx Type Selection To The Upper1 Part (Upper 1 M-Fx Link)
Reverb for Style/Song parts (3) Press the [UPPER¥1¥M-FX¥LINK] field to switch it on or off. If it is on, the G-70 selects a suitable MFX type for each sound you assign to the UP1 part. (4) Press the [EXIT] button to return to the main page. -
Page 102: Chorus For Style/Song Parts
G-70 Music Workstation Using the mixer functions & effects G ROOM1, ROOM2, ROOM3—These types simulate the contrast, setting a CHORUS parameter on the mixer reverb characteristics of a room. The higher the number page for Music Styles to “0” means that only the (1, 2 or 3), the bigger the “room”... -
Page 103: Using The Individual Outputs And Audio Inputs
Except for the Vocal Harmonist and Audio In signals, all puts, you also need to change the following. of the G-70’s parts can be freely assigned to the desired Note: The Harmonic Bar signals cannot be assigned to the OUTPUT sockets. -
Page 104: Using The Audio Inputs
Using the audio inputs 11. Limiter 41. CHO/Flanger 71. Reverse DLY 12. Hexa-Chorus 42. Isolator 72. Shuffle DLY Your G-70 sports two EXTERNAL EXTERNAL SOURCE 13. Trem Chorus 43. Low Boost 73. 3D Delay SOURCE/AUDIO IN sockets to which you AUDIO IN 14. -
Page 105: Using The Mastering Tools
Tools”, because they allow you to perfect the signal mix 3. Pop output by the G-70 so as to adapt it to the sound sys- tem you are using. Though they are not meant to be The settings you make on this page can be saved to a changed for every song you intend to play, switching User memory and recalled as and when necessary. -
Page 106: Compressor
G-70 Music Workstation Using the mixer functions & effects G SPLIT 1 (200~800)/SPLIT 2 (2000~8000)—On other (8) Press the [Back] field if you want to set the com- devices, these parameters are sometimes called the pressor, or the [EXIT] button to return to the main “cross-over frequency”, i.e. -
Page 107: Mixing Vocal Harmonist Signals
[MUSIC¥MUTE] parameter. See page 47 for details. Your G-70 provides three knobs ([VOICE], [HARMONY] (3) Press the field of the parameter you wish to edit and [EFFECTS]) that you can use without even bother- and set the desired value with the [DATA÷ENTRY]... - Page 108 The following setting is remembered even after you switch off your G-70. (1) Press the [MENU] button. This takes you to the page of the selected Vocal Har- MENU monist function.
- Page 109 G-70 Music Workstation Mixing Vocal Harmonist signals Reverb Delay IReverb for VOICE EFFECT IDelay for VOICE EFFECT • Press the field of the Reverb type you wish to use. • Press the field of the delay type you wish to use.
- Page 110 G-70 Music Workstation Using the mixer functions & effects IDelay for HARMONY EFFECT Note: For certain parts, there is also an equalizer. See pages 132 and 135 for how to set them. The presets on this page are different, while there is...
-
Page 111: Working With User Programs
User Program Finder. The display changes to: To keep this massive amount of information manage- able, the G-70 works with User Program Set Lists (hence the [SET¥LIST] button). Such lists are what their name suggests: enumerations of User Program files stored in the same memory area as the list file itself. -
Page 112: Selecting User Programs
Note: Unless you specified a User Program for the Startup stored appears in the right corner. function (page 117), you can also load the Cancel settings by powering off your G-70 and turning it back on again. You cannot select a different Set List here. -
Page 113: Choosing User Programs Manually
[6]/P1 if you selected [7]/P1 before pressing this button). Note: If you press [UP] after selecting [8]/P18, the G-70 will call up [1]/P1. Likewise, if you press [DOWN] after selecting [1]/P1, your G-70 will select [8]/P18, and so on. -
Page 114: Quick Location Of The User Program You Need
(internal memory, card or floppy disk). above. This time, however, only the User Programs Note: The G-70 does not support User Programs of the Roland belonging to the selected Index are displayed. VA, E, KR or G series. -
Page 115: Selectively Loading User Program Settings (User Program Hold)
Press [ALL] to activate all button icons and [NONE] to switch them all off. If the G-70 did find one or several matches, the Pressing one of the above fields without selecting a “FOUND” number will be smaller than the “GLOBAL”... -
Page 116: Automatic Functions For User Programs
All you need to do, then, is hit the [PLAY÷STOP¥®÷ª] button to start playback of that song. Your G-70 only memorizes the song name. If, at the time you recall such a User Program, that song is not available, the display will respond with: Note: Songs that also contain lyrics information are flagged by means of an “... -
Page 117: User Program Recall
“Cancel” mode, i.e. no User Program (page 112). But USER PRG maybe you prefer to be operational right away. In that case, tell the G-70 which User Program it should recall whenever you switch it on: (1) Press the [MENU] button. -
Page 118: Editing The User Program Finder Information
USER PROGRAM buttons on the front panel. When you select a memory [1]~[8] on pages P1~18, the G-70 therefore loads the settings of the file in ques- tion. So here’s what may happen: • If you rename a User Program that is referenced by the currently active Set List, the Set List is updated (and therefore finds the User Program despite its new name). - Page 119 INT MEMORY: The G-70’s internal memory. selected User Program, which means that its registra- EXT MEMORY: The memory card in the G-70’s PCMCIA tion settings appear in the Music Assistant list (see slot. Do not forget to insert it before select- p.
-
Page 120: Editing An Index
IRename Editing an Index This function allows you to change the name of the All User Programs in the G-70’s internal memory are selected Index. already assigned to one of eight categories. You can change those assignments and even edit the Index •... -
Page 121: Music Assistant Functions
Music Assistant registrations must reside in the G-70’s internal memory. If necessary, first copy User (6) Press the [Back] field to return to the USER PRO- Programs from a memory card to the G-70’s internal GRAM LIST page. memory (see p. 119). -
Page 122: Editing Music Assistant Registrations
IDeleting Music Assistant entries Editing Music Assistant registrations The DELETE function allows you to dispose of the The G-70 also allows you to edit certain aspects of selected Music Assistant registration. Again, this is a existing Music Assistant registrations. virtual process, because the underlying User Program (1) Press the [MUSIC¥ASSISTANT] button. - Page 123 (4) Press the [EXECUTE] field to save the settings. If you are saving your Music Assistant registration under a new name, the operation is confirmed and the G-70 returns to the MUSIC ASSISTANT LIST page. (A new User Program is created along with your Music Assistant registration.)
-
Page 124: Song And Style Makeup Tools
G-70 Music Workstation Song and Style Makeup Tools Song and Style Makeup Tools Mixing Song or Style parts Though accessible via separate buttons, the Style and (2) If the icon of the instrument whose settings you Song mixers are in fact part of the MAKEUP TOOLS want to change is not displayed, press the MODE [SONG] or [STYLE] button again. -
Page 125: Using The Makeup Tools
MIDI Files)” on p. 38 for details about selecting (see pages 41 and 76) that allow you to change song or songs. Style playback by selecting presets, the G-70 also boasts a mode where you can customize playback of • Select the song by pressing its field. -
Page 126: General Procedure
SysEx data that alter the actual song data (with- edit and use the [DATA÷ENTRY] dial or the [DEC]/ out replacing them). Only the G-70 can read these [INC] buttons to set the desired value. data. Other SMF players (and the 16-track Sequencer) You can also press the [DATA÷ENTRY] dial and enter... -
Page 127: Palette
G-70 Music Workstation Using the Makeup Tools You can also press another field in the top row to SOUND EDIT for sounds change yet other parameters before saving your modified song or Style. Pressing the [SOUND¥EDIT] field on any of the... -
Page 128: Sound Edit For Drum Sets
G-70 Music Workstation Song and Style Makeup Tools Note: Some sounds already contain natural (sampled) vibrato DRUM INSTR EDIT whose depth or speed cannot be changed. G VB RATE—This parameter adjusts the speed of the pitch If the instrument icon to the left of the sound name modulation. -
Page 129: Common
G-70 Music Workstation Using the Makeup Tools G PITCH—Use this parameter to tune the selected drum G CHORUS TYPE—Chorus broadens the spatial image of instrument higher or lower. “0” means that the pitch is the sound and creates a stereo impression. You can left unchanged. -
Page 130: Saving Your Modified Song Or Style
(and only if you want to save the new version to the same memory area). The edits you have just performed can only be read by the G-70 and so are of little use to other SMF players or arranger instruments. -
Page 131: Editing The Vocal Harmonist Parts
G-70 Music Workstation Singer settings Editing the Vocal Harmonist parts Apart from the effect settings discussed earlier, there Singer settings are also other VOCAL HARMONIST settings that can be customized. All Vocal Harmonist parts except the TALK When the [SINGER] indicator lights, your solo singing is option provide additional parameters. -
Page 132: Voice-Fx Settings
G-70 Music Workstation Editing the Vocal Harmonist parts G Vibrato DEPTH—Allows you to set the vibrato intensity. Voice-FX settings Vibrato is an effect that changes (“modulates”) the pitch. The higher the DEPTH value, the more outspoken these When the [VOICE-FX] indicator lights, your original periodic pitch changes will be. -
Page 133: Auto Pitch Settings
G PITCH BEND—Press this field (so that it “lights”) if you want to influence the pitch of the voice effect using the G-70’s Pitch Bend lever. G Vibrato RATE, DEPTH, RISE TIME, DELAY TIME—These are the same parameters as for the Voice-FX part. See therefore page 133. -
Page 134: Vocoder Settings
G PANPOT—Allows you to set the placement of the corre- sponding part in the stereo sound image. This is only meaningful if you connect the G-70 to a stereo ampli- fier. “L64” corresponds to hard left, “0” to dead center and “R63”... -
Page 135: Small Settings
G PANPOT—Allows you to set the placement of the corre- sponding part in the stereo sound image. This is only Small settings meaningful if you connect the G-70 to a stereo ampli- fier. “L64” corresponds to hard left, “0” to dead center When the [SMALL] indicator lights, two-part harmonies and “R63”... -
Page 136: Ensemble Settings
Press and hold the [ENSEMBLE] button. G-70’s Pitch Bend lever. With the exception of the fact that up to four voices are generated, the parameters and fields on this page •... - Page 137 G-70 Music Workstation Ensemble settings If you press the [Common] field… …the display looks as follows: See the explanations under “Small settings”. • Press the [Back] field to leave this page. If you press the [EQUALIZER] field… …the display looks as follows:...
-
Page 138: More Refined Song Functions
G-70 Music Workstation More refined song functions More refined song functions Let us have a look at additional and more refined func- The display changes to: tions you can use for song playback. See page 159 for recording and editing sequencer songs. -
Page 139: Programming Mark & Jump Locations
The MARK JUMP infor- • Stop playback. Press the [DATA÷ENTRY] dial and use mation can only be read by the G-70 (or a the on-screen numeric keypad to enter the desired DisCover 5/5M) and is of little use to other sequenc- bar number. -
Page 140: Working With The Song Finder
G-70 Music Workstation More refined song functions IIf you press [INTERNAL¥MEMORY] or If you selected the memory area that contains the [EXTERNAL¥MEMORY]… original version, the following message is displayed: …the display changes to: • Press the [YES] field to overwrite the old version. -
Page 141: Editing The Song Finder Information
If the G-70 did find one or several matches, the “xx” plied information. (This would allow you to also number will be smaller than the “yy” number. - Page 142 G-70 Music Workstation More refined song functions IP&S Input (2) Press the [OPTIONS] field. You can also add a musical phrase to your songs if you wish to take advantage of the Play & Search facility. See page 38 for how to use that facility in a real-life situation.
-
Page 143: Editing An Index
INT MEMORY: The G-70’s internal memory. Press the [NO] field if files on the source (“FROM”) FLOPPY DISK: The floppy disk in the G-70’s drive. media that have the same name as existing files on EXT MEMORY: The memory card in the G-70’s PCMCIA the destination (“TO”) media should not be copied... - Page 144 G-70 Music Workstation More refined song functions IEdit If the [ALL] field is currently selected, the display looks as follows: This function allows you to assign the desired songs to the selected Index (or to remove existing song assignments). • After performing step (4) above, press the [EDIT] field.
-
Page 145: Play List Function
G-70 Music Workstation Play List function Press the [REPLACE] field if the assignments of the Play List function DESTINATION Index should be erased and replaced by the entries of the selected SOURCE field. The Play List function allows you to prepare play lists of Press [MERGE] if the song assignments of the all the songs you want to use during a performance. -
Page 146: Editing Play Lists
G-70 Music Workstation More refined song functions The display looks more or less as follows: Note: This only saves the Play List (i.e. the references to exist- ing song files). The songs themselves are not saved, because that is unnecessary. On the other hand, if you delete a song (see p. - Page 147 G-70 Music Workstation Play List function (3) Press the [EDIT] field or the [DATA÷ENTRY] dial. (8) Press the [SAVE] field to save your edited list. If the new Play List has the same name as an existing (4) Proceed as follows to edit your Play List:...
-
Page 148: Using Play Lists
G-70 Music Workstation More refined song functions Using Play Lists The two fields ([|√√][®®|]) that appear on the main page during list playback allow you to navigate in Here’s how Play Lists can be used for your perfor- your play list. The added display shows the name of... - Page 149 G-70 Music Workstation Play List function IRenaming a Play List To change the name of the selected Play List, press the [RENAME] field. Enter the desired characters (page 49) and press the [EXECUTE] field. After a brief confirmation, the dis- play returns to the Play List page.
-
Page 150: Editing Lyrics
Editing Lyrics Your G-70 contains functions that allow you to add Lyrics to Standard MIDI Files that do not contain them. It is also pos- sible to edit the Lyrics data of Standard MIDI Files that conform to the Tune 1000 format (as well as other Lyrics for- mats). - Page 151 G-70 Music Workstation Adding Lyrics to a song (8) Press the [EXECUTE] field to load the text file you (10) Press the RECORDER [REC¥∏] button (its indicator selected. flashes). Press [BWD] or [FWD], to go to another measure without causing the text to follow.
-
Page 152: Exporting Lyrics Data As Text File
See page 49. If necessary, you can also supply the required ARTIST and GENRE information for use with the SONG FINDER function. Note: The G-70 supports both upper- and lower-case letters for file names. Choose whichever is more convenient (or clearer). -
Page 153: Using The 16-Track Sequencer
About the sequencer’s main page Using the 16-track sequencer Your G-70 contains a powerful sequencer with a host Note: The MUTE function is not available while the SOLO func- tion is on. You can, however, select another track at that time, of edit functions. -
Page 154: Example 1: Recording A Song From Scratch
(2) Press the [INITIALIZE¥SONG] field. general SysEx data. The display changes to: (3) If you want the G-70 to set most parameters for you, press one of the TEMPLATES fields. Here is what the options mean: ORCHESTR Selects orchestral sounds suitable for classi- cal music and film scores. -
Page 155: Preparations
Track REC TYPE IUsing two drum tracks 1~3 GS (cannot be changed) The G-70 allows you to use as many drum tracks as UP1** you like: simply assign a Drum Set to the desired GS (cannot be changed) track and start recording. - Page 156 G-70 Music Workstation Using the 16-track sequencer (11) If you don’t want to start and stop recording man- Quantize corrects the timing of your notes by shift- ually, use the PUNCH fields: ing them to the nearest grid mark. Use the [DATA÷ENTRY] dial or the [DEC]/[INC] buttons to spec-...
-
Page 157: Example 2: Adding Tracks
(21) Press the RECORDER [PLAY÷STOP¥®÷ª] button to stop recording. Here’s how to add a track to a song in the G-70’s Song RAM memory. This is only meaningful after recording at least one part or after playing back an existing song. -
Page 158: Saving Your Song
Saving your song The 16-track sequencer uses a special portion of the G-70’s RAM memory where all editing takes place. To ensure that you do not forget to save your song after recording and/or editing it, you are given the opportu-... -
Page 159: Editing 16-Track Songs
You need to give your song two names: a SONG Editing 16-track songs NAME and a FILE NAME. The FILE NAME is the one that allows the G-70 to recognize your song. Easy editing and useful functions After recording a few tracks, you may want to do some touching up. - Page 160 “Clock Pulse Time”, the smallest unit used by (6) Select the track(s) you wish to modify. the G-70. (There are 120 CPTs to every beat of a 4/4 bar.) (7) Select the range (“FROM” and “TO”) for the edit Change this setting only if your edit operation should operation.
- Page 161 G CPT (1~119)—Refers to the starting CPT position. “CPT” is short for “Clock Pulse Time”, the smallest unit used by FROM NOTE: 72 (C5) [OUTSIDE] the G-70. (There are 120 CPTs to every beat of a 4/4 bar.) TO NOTE: 76 (E5) THAN NOTE: 72 (C5) [LOWER] &...
- Page 162 G-70 Music Workstation Using the 16-track sequencer IDATA TYPE [LOWER] Only notes or values below the selected one Allows you to select the data to be erased: will change. (The note/value can be set using All parameters listed below. the THAN NOTE/THAN CC field.)
- Page 163 “Clock Pulse Time”, the smallest unit used by G BEAT (1~[number of beats per bar])—Specifies the the G-70. (There are 120 CPTs to every beat of a 4/4 bar.) beat position. The number of available beats depends on Change this setting only if your edit operation should the time signature in the selected area.
- Page 164 (but basically have the same function). is short for “Clock Pulse Time”, the smallest unit used by the G-70. (There are 120 CPTs to every beat of a 4/4 bar.) Registered-parameter-number messages. They Change this setting only if your edit operation should work like NRPN messages, and are understood by start after the selected beat.
- Page 165 G CPT (1~119)—Refers to the starting CPT position. “CPT” is short for “Clock Pulse Time”, the smallest unit used by the G-70. (There are 120 CPTs to every beat of a 4/4 bar.) Change this setting only if your edit operation should start after the selected beat.
- Page 166 Press this field to confirm your settings and edit the data. is short for “Clock Pulse Time”, the smallest unit used by the G-70. (There are 120 CPTs to every beat of a 4/4 bar.) Change this setting only if your edit operation should start after the selected beat.
- Page 167 “Clock Pulse Time”, the smallest unit used by Use this parameter to specify the track that should contain the G-70. (There are 120 CPTs to every beat of a 4/4 bar.) a combination of its original data and those of the selected Change this setting only if your edit operation should source track.
- Page 168 • “Upgrading” older Standard MIDI Files to take advan- (–) a given value to/from the current Volume, Expression, tage of the G-70’s new sounds. Pan, Reverb Send or Chorus Send values. This may come • Global changes to the Reverb and/or Chorus Send...
- Page 169 G CPT (1~119)—Refers to the starting CPT position. “CPT” is short for “Clock Pulse Time”, the smallest unit used by the G-70. (There are 120 CPTs to every beat of a 4/4 bar.) Change this setting only if your edit operation should start after the selected beat.
- Page 170 Tempo: This is the “Tempo Change” value located at 1-01-000. It cannot be erased. The G-70’s sequencer uses one track called “MASTER” for each song. It is used for recording the time signa- Time signature: This is the “Beat Change” value located at ture, the tempo, as well as general SysEx messages that 1-01-000.
- Page 171 [ß][†] to change lines. • Set the value using the [DEC]/[INC] buttons. —or— “SysEx” refers to messages only the G-70 (or another • Press the [DATA÷ENTRY] dial and enter the value GS-compatible sound source) understands. Changing using the numeric pad that appears in the display.
- Page 172 G-70 Music Workstation Using the 16-track sequencer ICREATE EVENT Press [CLOSE] if you don’t want to use the SysEx mes- sage after all. Press this button icon to add a new event to the MASTER track. The following pop-up appears: By pressing [EXECUTE] or [CLOSE], you return to the MASTER TRACK EDIT page.
- Page 173 G-70 Music Workstation Editing 16-track songs IPLACE EVENT • Press the [MOVE¥EVENT] button icon. The following pop-up appears: This function is only available if the sequencer’s clip- board already contains events that you copied using COPY EVENT. For safety reasons, it would be a good idea to use this function immediately after copying events.
-
Page 174: Editing Song Data Using Microscope Edit
General notes about MICRO EDIT Editing song data using Microscope IPosition indications Edit The G-70’s sequencer translates all known musical Select this mode whenever you only need to change techniques and physical effects into MIDI messages small details of an otherwise perfect Standard MIDI to precisely reproduce the natural behavior of the File. - Page 175 (control change, aftertouch, pro- to the main Sequencer page and save your song. gram change, etc.), that value is buffered by the G-70’s tone generator, and used for the following note event The parameters you can change are: you play back.
-
Page 176: Editing Events
“0” to avoid unpleasant sur- prises. ICREATE EVENT The G-70’s keyboard does not generate Poly After- Press this button icon to add a new event to the touch messages, but its sound source understands selected track. - Page 177 G-70 Music Workstation Editing song data using Microscope Edit IERASE EVENT ICOPY EVENT • Use the [DATA÷ENTRY] dial or the [ß][†] buttons to This function allows you to copy one or several events. Use [PLACE¥EVENT] to insert a copy of those select the event you want to delete.
-
Page 178: Programming Styles (Style Composer)
In most cases, less means more, i.e. do not program six melodic accompa- niments just because the G-70 provides that facility. If you listen very carefully to a CD, you will discover that it is not the number of instruments you use that makes a song sound “big”... -
Page 179: Recording Styles From Scratch
Recording Styles from scratch Clearing the RAM memory (Initialize Style) Recording Styles from scratch The first thing we need to do is clear the G-70’s Style RAM memory, because it is not empty when you select Important remark the STYLE COMPOSER. -
Page 180: Getting Ready For The First Track
G-70 Music Workstation Programming Styles (Style Composer) • Press the second [BEAT] field (the denominator) and (g) Press the second [BEAT] field (the denominator) and enter the duration of each beat using the [DATA÷ENTRY] enter the duration of each beat using the dial or the [DEC]/[INC] buttons. - Page 181 Thus, with one recording, you will obtain 3 (Major, sitions of the selected Division. minor, 7th) x 4 (MAIN 1, 2, 3, 4)= 12 identical drum The G-70 allows you to record Styles in any key. But patterns! do set the KEY parameter to the right value before recording.
- Page 182 G-70 Music Workstation Programming Styles (Style Composer) (14) Press the [OCTAVE] field and use the [DATA÷ENTRY] Specifying the pattern length dial to transpose the keyboard up or down (–4~+4 octaves). Every Style pattern must have a set length. Setting the MEASURE LENGTH value now will help you avoid Tempo a lot of confusion once you start recording.
-
Page 183: Recording
G-70 Music Workstation Auditioning your Style and adding more tracks (2) Press the [MODE] field and use the [DATA÷ENTRY] Recording dial or the [DEC]/[INC] buttons to select “Major”, (20) Press the [START÷STOP] button. Depending on the “minor” or “7th”. count-in setting, the metronome now counts Only one mode can be selected for playback. -
Page 184: Saving Your Style
After programming a few tracks, you may find that cer- sible. After all, if someone decided to switch off your tain parts tend to confuse you. That is why the G-70 G-70 now, you would lose everything you have pro- allows you to mute tracks that you do not want to hear grammed so far. -
Page 185: Using Existing Styles
Note: If the Style RAM memory already contains new data, minor or seventh chord. Remember to set the Mode save it before copying. The G-70 has no Undo function. Saving parameter to “M= m=7” until you have come to grips a Style before copying allows you to revert to the previous ver- with the possibilities of the G-70’s Arranger. -
Page 186: Copying Individual Style Tracks
Note: If the Style RAM memory already contains new data, (4) Press the [TRACK] field and use the [DATA÷ENTRY] save it before copying. The G-70 has no Undo function. Saving dial or the [DEC]/[INC] buttons to select the track to a Style before copying allows you to revert to the previous ver- be copied. -
Page 187: Editing Styles On The Fly Via Additional Recordings
G-70 Music Workstation Editing Styles on the fly via additional recordings ISound/Drum Set selection (13) Repeat this operation with the [MODE] and [DIVISION] fields to select the Mode (Major, Minor, To select another sound or Drum Set for an existing... -
Page 188: Expression, Panpot, Reverb, Chorus
G-70 Music Workstation Programming Styles (Style Composer) IDrum Instrument & Pitch The display changes to: (3) Select the track by pressing its line in the table. After selecting the “AccDrums” track, you can change The name of that track appears on a yellow back- the pitch of certain sounds of the selected Drum Set. -
Page 189: Changing The Preset Tempo
Note: The last tempo value you record becomes the Style’s (1) Load the Style you want to edit (if it does not yet preset tempo. reside in the G-70’s Style RAM memory). (2) Press the [MENU] button, then the [STYLE¥COMPOSER] field. - Page 190 (9) Save your Style. is short for “Clock Pulse Time”, the smallest unit used by the G-70. (There are 120 CPTs to every beat of a 4/4 bar.) Change this setting only if your edit operation should start after the selected beat.
- Page 191 “Clock Pulse Time”, the smallest unit used by TION value is not applied (“0% correction”), while “100%” the G-70. (There are 120 CPTs to every beat of a 4/4 bar.) means that all notes are shifted to the mathematically cor- Change this setting only if your edit operation should rect positions.
- Page 192 G-70 Music Workstation Programming Styles (Style Composer) IDATA TYPE DELETE Allows you to select the data to be edited. ALL: All parameters listed below. Note: Only note messages. Modulat: CC01 messages usually used for adding vibrato (i.e. use of the BENDER/MODULATION lever).
- Page 193 “Clock Pulse Time”, the smallest unit used by the note range) to be modified within the specified FROM/ the G-70. (There are 120 CPTs to every beat of a 4/4 bar.) TO time range. Change this setting only if your edit operation should It is not displayed when you select EQUAL, UNEQUAL, start after the selected beat.
- Page 194 G-70 Music Workstation Programming Styles (Style Composer) IFROM NOTE/TO NOTE (0 C-~127 G9) CHANGE VELO FROM NOTE refers to the lower limit of the note range you want to change. TO NOTE represents the upper limit. See also “Fine-tuning the note range” on p. 191.
- Page 195 You can also use it to “upgrade” older Styles to ensure that they use the G-70’s new sounds. Be aware, however, that Style tracks can neither use HARMONIC BARS, nor SRX EXPANSION banks.
- Page 196 G-70 Music Workstation Programming Styles (Style Composer) TRACK LENGTH TIME SIGNAT The TRACK LENGTH function allows you to modify The TIME SIGNAT page allows you to check and set the length (number of bars, beats and clocks) of a the time signature of the patterns. The major, minor pattern after recording.
-
Page 197: Editing Individual Style Events (Style Micro Edit)
G-70 Music Workstation Editing individual Style events (Style Micro Edit) The display changes to: Editing individual Style events (Style Micro Edit) Select this mode if you need to change just one aspect of an otherwise perfect Style. In this section, we will use the word “event” for any kind of message. - Page 198 (first) value. ferent volume, a new stereo position… The G-70 recog- nizes (and allows you to edit) all control change numbers the Arranger uses (CC01, 10, 11, 91, 93) and displays their “official”...
-
Page 199: Editing Events
“Std”, which means that the When you select the Gate Time entry, pressing the G-70 decides automatically when extremely high (or low) [DATA÷ENTRY] dial calls up the following pop-up: notes need to be shifted down (or up) by one or several octaves. -
Page 200: Other Edit Operations
G-70 Music Workstation Programming Styles (Style Composer) IERASE EVENT Other edit operations • Use the [DATA÷ENTRY] dial or the [ß][†] buttons to The fields in the right half of the STYLE MICRO EDIT page allow you to reduce or expand the number of select the event you want to delete. - Page 201 G-70 Music Workstation Editing individual Style events (Style Micro Edit) IPLACE EVENT Note: For this function, you could take advantage of the VIEW filter to avoid selecting event types that should not be This function is only available if the Style Composer’s included in the copy.
-
Page 202: Disk/Media Functions
G-70 Music Workstation Disk/Media functions Disk/Media functions The G-70’s DISK & MEDIA functions allow you to save (6) Do one of the following (if necessary): edited data and settings to the internal memory, an • For [LOAD] operations, press the field that contains external memory card or floppy disk, to save and load the name of the file you wish to load. -
Page 203: Loading Data
Saving data Note: When saving files to floppy disk whose capacity is too small for the data you wish to save, the G-70 will display a “DISK ERROR” message. That does not necessarily mean that the disk is damaged. - Page 204 Note: The SONG MAKEUP/COVER and MARK JUMP settings Note: The G-70 supports both upper- and lower-case letters can only be read by the G-70 and are thus of no use to other for file names. So choose whichever is more convenient (or sequencers or SMF players.
-
Page 205: Rename Functions
ISave Style This page allows you to save the Style that is cur- rently in the G-70’s RAM memory. Even if it is not a newly recorded Style, there are other reasons why you may want to use this function: •... -
Page 206: Delete
So choose whichever is more convenient (or clear). Note: The G-70 allows you to use long file names, but some windows are relatively short, so that only part of the names can be displayed. We therefore suggest using short file names (maximum 18 characters) whenever possible. -
Page 207: Copy
Copy The display changes to: Copy The G-70 allows you to copy one, several or all files from one media to another. Files on the selected source media (FROM) cannot be copied onto the same desti- nation media (TO). Consider using the USB functionality (see p. -
Page 208: Format
Note: If the (remaining) storage capacity is smaller than the (5) On the display page that appears now, press the size of the files you wish to copy, the G-70 automatically stops [EXTERNAL¥MEMORY] or [FLOPPY¥DISK] field. the operation without displaying a message as soon as the This obviously depends on whether you inserted a media is full. - Page 209 G-70 Music Workstation Format (In the case of a floppy disk, the “External Memory” message will read “Floppy Disk”, of course.) (6) Press the [YES] field to format your disk/card. Press [NO] or [Back] to return to the FORMAT display page without formatting.
-
Page 210: Archiving Data Using A Computer (Usb)
Archiving data using a computer (USB) The G-70’s USB port can be used for exchanging files with a computer or for MIDI communication. Here, we will look at the archiving functions, which are often called “Data Storage”. See page 213 for the MIDI functions. - Page 211 G-70 Music Workstation Format Note: In this state, all of the G-70’s panel functions are While data are being transferred, the G-70’s display blocked. You can, however, keep playing the last Keyboard looks as follows and all buttons are locked: part(s) you selected.
-
Page 212: Backing Up All Of The G-70'S Data
(15) Press the [EXIT] button to return to the main page. Backing up all of the G-70’s data You can make a backup copy of all of the G-70’s inter- nal data (or the contents of a memory card) by pro- ceeding as follows: •... -
Page 213: Midi
When you play on the G-70’s keyboard or start song or Style playback, your instrument transmits MIDI data to its MIDI OUT socket (or to the USB port). If you connect that socket to the MIDI IN socket of another instrument, the external instrument may play the same notes as one of the G-70’s parts, select sounds, etc. -
Page 214: Working With Presets
Note: This field applies to both reception (RX) and transmission and set the desired value with the [DATA÷ENTRY] (TX). The G-70 indeed allows you to set separate TX and RX chan- dial or the [DEC]/[INC] buttons. nels for each part. -
Page 215: Editing Midi Parameters
(128) was no longer sufficient to access These two button icons allow you to specify whether all sounds of a given instrument. (The G-70 boasts over (lights) or not (dark) the part whose name appears in 1590 sounds.) the upper left corner should transmit (TX) or receive G PITCH BENDER—Pitch Bend messages. -
Page 216: Midi System Parameters
MIDI RX The following MIDI parameters usually apply to the ICHANNEL (1~16) G-70 as a whole, even though some of them are rather specific, as you will notice. Allows you to assign a MIDI receive channel to the selected part. The default settings usually work best, but you are Press the [SYSTEM] field and use PAGE [ø][˚] to select... - Page 217 [TX¥ON÷OFF] messages (without a program change) has no effect. field. Note: When you select another Style on your G-70, it trans- G PART SWITCH—Whenever you mute or un-mute a part mits a CC00-CC32-PC cluster on the Style channel, which you on the Mixer pages (Keyboard parts) or on the STYLE could record using an external sequencer.
- Page 218 MIDI messages: When you select “V-LINK” on the [SYSTEM] page, the Internal: A muted part can no longer be played via the G-70’s display changes to: keyboard or Arranger/Recorder but continues to send MIDI messages.
-
Page 219: Midi Sets
(4) Press the [EXIT] button to return to the main page. which MIDI Set should be loaded when you switch on the G-70 (see below). If you need to reset some or all MIDI parameters to their default values, select [Keyboard¥&¥Style¥Parts] and/or [Song¥Parts] rather... -
Page 220: Midi Set Selection At Power-On
Switch off this button icon if no MIDI Set should be recalled when the G-70 is switched on. Note: If the G-70 is also set to recall a User Program that con- tains a MIDI link, that selection is ignored if the MIDI SET [RECALL] button icon is on. -
Page 221: Miscellaneous
Note: You don’t need a UM-1 interface for a USB connection. steps that can be selected by pressing the Simply connect the G-70’s USB port to the DV-7PR’s USB port. lever several times: green, violet, blue, red, Then, switch on the OUTPUT [USB] field on the MIDI page (see original clip color. -
Page 222: General Settings
General settings depends on the function you assign to the D Beam controller): Here are several functions that apply to the G-70 as Vinyl RPM‰ Fade to black + playback speed a whole and haven’t been covered elsewhere in this Cutting‰... -
Page 223: Initializing The G-70 (Factory Reset)
The message “Operation Successful” informs you that the G-70 has been initialized. Note: This operation does not affect the data in the G-70’s internal memory: they are not erased – the G-70 just doesn’t use them anymore. -
Page 224: Specifications
G-70 Music Workstation Specifications Specifications I Keyboard: I Songs: 76-note synthesizer-action keys with aftertouch Real-time SMF player 4 programmable MARK & JUMP locations I Sound source: Song Cover 30 ALL Covers New WX sound engine 18 Drum Covers Max. polyphony... - Page 225 Styles, Songs (SMF), User Pro- Options grams, MIDI Sets, Play Lists, .txt PK-5A Dynamic MIDI Pedal, FC-7 Foot Controller, files MSA/MSD/MSE series floppy disks (Roland & third-party), RH-25/50/200 Headphones, I Other functions: DP-2 Pedal switch, DP-6 Pedal switch (piano type), Keyboard Modes...
-
Page 226: Appendix
• When circuit board installation is complete, double-check your you install the work. board. • Install only a circuit board of the Roland SRX series. Remove only the specified screws. Connector (4) Use the installation tool supplied with the wave expansion board to turn the holders in the LOCK direction, so the board will be fastened in place. -
Page 227: Accessing The 'Patches' Of Srx-Series Expansion Boards Via Midi
(b) the number of sounds it (1) Turn on the power, as described in “Switching the contains. G-70 on/off” on p. 21. The MIDI standard can only handle 128 program (2) Press the [MENU] button and the [UTILITY] field. -
Page 228: Mfx And Ifx Types And Parameters
G-70 Music Workstation Appendix | MFX and IFX types and parameters MFX and IFX types and parameters 5. Phaser Adds phase-shifted copy to the original sound and modulates 1. Thru G Phaser Manual (100~8000Hz)—Adjusts the basic fre- The effect processor is bypassed. - Page 229 G-70 Music Workstation Appendix | MFX and IFX types and parameters G Auto Wah Depth (0~127)—Modulation intensity. 11. Limiter G Auto Wah Sens (0~127)—Adjusts the sensitivity with Compresses signals that exceed the specified level, preventing which the filter is controlled.
- Page 230 G-70 Music Workstation Appendix | MFX and IFX types and parameters G Balance (D100:0W, D50:50W, D0:100W)—Volume bal- G Balance (D100:0W, D50:50W, D0:100W)—Volume bal- ance between the direct (D) and the effect sound (W). ance between the direct (D) and the effect sound (W).
- Page 231 G-70 Music Workstation Appendix | MFX and IFX types and parameters 19. Mod. Delay 21. 4 Tap Delay This effect adds modulation to the delayed sound, producing Delay with four repetition lines. G Delay 1~4 (200~1000ms, note)—Adjusts the time until an effect similar to a Flanger.
- Page 232 G-70 Music Workstation Appendix | MFX and IFX types and parameters G Pitch B Pre Delay (0.0~500.0ms)—Adjusts the time delay G Balance (D100:0W, D50:50W, D0:100W)—Volume bal- from when the direct sound begins until the Pitch Shift B ance between the direct (D) and the effect sound (W).
- Page 233 G-70 Music Workstation Appendix | MFX and IFX types and parameters 29. OD‰ Delay 32. DST‰ Delay This effect connects an overdrive and a delay in series. This effect connects distortion and a delay effect in series. G Overdrive Drive (0~127)—Degree of distortion. Also G Distortion Drive (0~127)—Degree of distortion.
- Page 234 G-70 Music Workstation Appendix | MFX and IFX types and parameters G Delay Feedback (–98%~0~98%)—Adjusts the amount of G Delay Balance (D100:0W, D50:50W, D0:100W)—Adjusts the delay sound that’s fed back into the effect. Negative (–) the volume balance between the sound that is sent settings invert the phase.
- Page 235 G-70 Music Workstation Appendix | MFX and IFX types and parameters 40. Flanger/DLY 42. Isolator This effect connects a flanger and a delay in parallel. This is an equalizer which cuts the volume greatly, allowing G Flanger Pre Delay (0.0~100.0ms)—Adjusts the delay time you to add a special effect to the sound by cutting the vol- ume in varying ranges.
- Page 236 G-70 Music Workstation Appendix | MFX and IFX types and parameters G Filter Gain (0~12 [dB])—Amount of boost for the filter G Rate [sync] (Hz, Note)—Use this parameter to specify output. whether (“Note”) or not (“Hz”) the rate should be synchro- G Modulation Sw (Off, On)—On/off switch for cyclic...
- Page 237 G-70 Music Workstation Appendix | MFX and IFX types and parameters G Resonance (0~127)—Amount of feedback. 48. Step Phaser G Mix Level (0~127)—Level of the phase-shifted sound. The phaser effect will be varied gradually. G Panpot (L64~0~63R)—Stereo location of the output G Phaser Mode (4-Stage, 8-Stage,12-Stage)—Number of...
- Page 238 G-70 Music Workstation Appendix | MFX and IFX types and parameters G Depth (0~127)—Depth to which the effect is applied. 52. Step Ring G EQ Low Gain (–15dB~0~15dB)—Gain of the low fre- This is a ring modulator that uses a 16-step sequence to vary quency range.
- Page 239 G-70 Music Workstation Appendix | MFX and IFX types and parameters G Shuffle (0~127)—Timing of volume changes in levels for G Rate [note] (musical notes)—Rate parameters can be set even-numbered steps (step 2, step 4, step 6…). The higher as a note-value of a tempo if you set the “Sync” parameter the value, the later the beat progresses.
- Page 240 G-70 Music Workstation Appendix | MFX and IFX types and parameters G Cutoff Frequency (200~8000Hz)—Basic frequency of the G Low Phase (0~180 deg)—Spaciousness of the low-range filter. chorus sound. G Pre Delay (0.0~100.0ms)—Adjusts the delay time from G High Pre Delay (0.0~100.0ms)—Delay time from when the...
- Page 241 G-70 Music Workstation Appendix | MFX and IFX types and parameters G High Depth (0~127)—Modulation depth for the high- G High Phase (0~180 deg)—Spaciousness of the high-range range flanger sound. flanger sound. G High Phase (0~180 deg)—Spaciousness of the high-range G High Feedback (–98%~0~+98%)—Proportion of the...
- Page 242 G-70 Music Workstation Appendix | MFX and IFX types and parameters G Pre Amp Bright (Off, On)—Turning this “On” produces a 68. Long Delay sharper and brighter sound. A delay that provides a long delay time. * This parameter applies to the “JC-120”, “Clean Twin”, and G Delay Time [sync] (msec, Note)—Use this parameter to...
- Page 243 G-70 Music Workstation Appendix | MFX and IFX types and parameters G Delay 2 Time [note] (musical notes)—Delay times can be 71. Reverse DLY set as a note-value of a tempo, if you set the “Sync” This is a reverse delay that adds a reversed and delayed sound parameter above to “Note”.
- Page 244 G-70 Music Workstation Appendix | MFX and IFX types and parameters G Delay Right Time [note] (musical notes)—Delay times can 72. Shuffle DLY be set as a note-value of a tempo, if you set the “Sync” Adds a shuffle to the delay sound, giving the sound a bouncy parameter above to “Note”.
- Page 245 A virtual tape echo that produces a realistic tape delay sound. quency range. G Balance (D100:0W, D50:50W, D0:100W)—Volume bal- This simulates the tape echo section of a Roland RE-201 Space Echo. ance between the direct (D) and the effect sound (W).
- Page 246 G-70 Music Workstation Appendix | MFX and IFX types and parameters G Balance (D100:0W, D50:50W, D0:100W)—Volume bal- G Fine (–100~100)—Pitch shift adjustment for all steps (2- ance between the direct (D) and the effect sound (W). cent units). G Level (0~127)—Output level.
- Page 247 G-70 Music Workstation Appendix | MFX and IFX types and parameters G EQ Mid Q (0.5, 1.0, 2.0, 4.0, 8.0)—Width of midrange 84. Center Canc (larger values make the region narrower). Removes the sounds that are localized at the center of the G EQ High Frequency (2000Hz, 4000Hz, 8000Hz)—Fre-...
-
Page 248: Midi Implementation Chart
G-70 Music Workstation Appendix | MIDI Implementation Chart MIDI Implementation Chart [Music Workstation] Date: November 2004 Model: G-70 Version: 1.00 Function... Transmitted Recognized Remarks 32 Parts Basic Default 1~16 1~16 3 Logical Parts (Basic Channel, Channel Changed 1~16, Off 1~16, Off... -
Page 249: Chord Intelligence
G-70 Music Workstation Appendix | Chord Intelligence Chord Intelligence C#M7 E M7 C#m7 E m7 CmM7 C#mM7 DmM7 E mM7 EmM7 FmM7 Cdim C#dim Ddim E dim Edim Fdim Cm7 ( 5 ) C#m7 ( 5 ) Dm7 ( 5 ) - Page 250 G-70 Music Workstation Appendix | Chord Intelligence F#M7 A M7 B M7 F#m7 A m7 B m7 F#mM7 GmM7 A mM7 AmM7 B mM7 BmM7 F#dim Gdim A dim Adim B dim Bdim F#m7 ( 5 ) Gm7 ( 5 )
-
Page 251: Index
G-70 Music Workstation Index Index Numerics Assign ......44, 47 Chorus ......127 SW . - Page 252 G-70 Music Workstation Index Cutoff ......66 Drums File Freq ......94 Two tracks .
- Page 253 G-70 Music Workstation Index Harmony..... . .76, 107 Key ....... 181 Male.
- Page 254 G-70 Music Workstation Index Monitor......50 OUTSIDE ....161, 162, 191 Quick Start .
- Page 255 G-70 Music Workstation Index Rotary ......66 Song ......38, 39 Style.
- Page 256 G-70 Music Workstation Index TO....... . 186 User Program..... . 111 Voice .
- Page 257 G-70 Music Workstation Index...
- Page 258 Information When you need repair service, call your nearest Roland Service Center or authorized Roland distributor in your country as shown below. PHILIPPINES COSTA RICA TRINIDAD ITALY ISRAEL AFRICA G.A. Yupangco & Co. Inc. JUAN Bansbach Instrumentos AMR Ltd Roland Italy S. p. A.
- Page 259 For EU Countries This product complies with the requirements of European Directives EMC 89/336/EEC and LVD 73/23/EEC. For the USA FEDERAL COMMUNICATIONS COMMISSION RADIO FREQUENCY INTERFERENCE STATEMENT This equipment has been tested and found to comply with the limits for a Class B digital device, pursuant to Part 15 of the FCC Rules.
- Page 260 R® 602.00.0055 RES 425-04 Printed in Italy 11-04 G-70 – OM/E...