iRobot Roomba 500 Series Owner's Manual
Hide thumbs
Also See for Roomba 500 Series:
- Owner's manual (175 pages) ,
- Servicing and repair manual (30 pages) ,
- Quick start manual (2 pages)
Table of Contents
Advertisement
Advertisement
Table of Contents

Related Manuals for iRobot Roomba 500 Series


Summary of Contents for iRobot Roomba 500 Series
- Page 1 Инструкция для iRobot Roomba 620 Перейти в карточку товара 8 800 775 98 98...
- Page 2 500/600 Series Owner's Manual...
- Page 4 We’d love to hear from you! On behalf of the entire team, thank you for choosing iRobot; we appreciate your business, feedback and loyalty. Here’s to robots that make a difference!
-
Page 5: Important Tips
To extend Roomba’s battery life and keep Roomba cleaning at peak performance: recharge Roomba can damage the battery. store in a cool, dry place. used. Roomba contains electronic parts. DO NOT submerge Roomba or spray it with water. Clean with a dry cloth only. iRobot Roomba 500 Series... -
Page 6: Table Of Contents
Remote Control .............19 Scheduling Roomba (selected models) ....20-21 Regular Maintenance ........... 22-24 (selected models) ....25 Troubleshooting ............ 26-27 Replaceable Modules ........... 28-32 Frequently Asked Questions ........33 Important Safety Instructions ........34 iRobot Customer Care ..........35 For more detailed information, visit: www.irobot.com... -
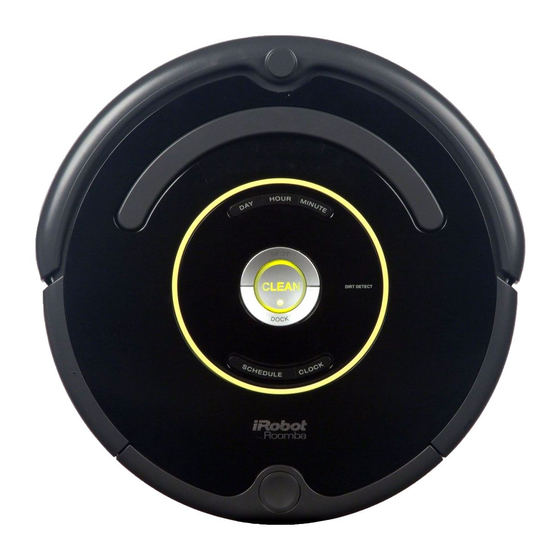
Page 7: Irobot Roomba Anatomy
Cliff Sensor Contact Points Flexible Openings for Home Base Brush (selected models) Edge-Cleaning Main Side Brush Removable Brush Caster Wheel End Caps Right Wheel Brush Module Module Guard ™ Dirt Detect Sensor Brush Guard Release Tabs iRobot Roomba 500 Series... -
Page 8: Cleaning Pattern
TIP: Roomba takes approximately 25 minutes to clean an average room and will pass over the same area of the floor multiple times to ensure total floor coverage. Wall to confine Roomba to one room. For more detailed information, visit: www.irobot.com... -
Page 9: Cleaning Modes
Cleaning Mode. When scheduled to clean, Roomba will occasionally flash its next cleaning time to remind you of its schedule. At the specified time, Roomba leaves its Home Base, cleans, and then returns to the Home Base to recharge when it’s done. iRobot Roomba 500 Series... -
Page 10: Cleaning System
Roomba won’t get stuck on cords, carpet fringe or tassels. When Roomba senses it has picked up a cord or tassel, it will automatically stop its main brushes or side brush and try to escape. Roomba may make a clicking noise when anti-tangle is activated. For more detailed information, visit: www.irobot.com... -
Page 11: Cleaning Bins
(optional accessory for all models) The high-capacity sweeper bin can hold more debris than the vacuum and dust, or when cleaning bigger pieces of debris. High-Capacity Sweeper Bin iRobot Roomba 500 Series... -
Page 12: Battery Storage And Charging
Roomba is powered by a rechargeable battery. Roomba’s battery can last for hundreds of cleaning cycles if cared for properly. To extend the battery life, iRobot recommends always storing Roomba plugged in. For more details on how to maintain Roomba’s battery life, visit www.irobot.com/support. - Page 13 TIP: When Roomba is on the Home Base, always make sure that the Home Base power light is on. this chart to determine the status of the battery. Battery status Solid red Battery empty Amber pulse Charging Solid green Fully charged Quick amber pulse 16-hour refresh charge Button iRobot Roomba 500 Series...
-
Page 14: Optional Accessories
A higher range will drain the battery faster. TIP: Point the iRobot logo towards the opening you would like to block. For more detailed information, visit: www.irobot.com... - Page 15 To save battery power, switch the Auto batteries should last approximately six months. like to block. To open the battery compartment, simply apply pressure on both iRobot separating the pieces. Two “C” Alkaline Batteries (not included)
- Page 16 Room 3 mode, Roomba will clean Room 1 for approximately 25 minutes, then clean Rooms 2 and 3 for 25 minutes each, and then return to the Home Base. room while it is cleaning. For more detailed information, visit: www.irobot.com...
- Page 17 ® ™ (continued) between two rooms with the iRobot logo facing forward. in the center of the door frame Roomba will not cross. It automatically turns off when Roomba turns off. the door frame. It blocks an opening up to seven feet or longer in three length of the barrier.
-
Page 18: Home Base
If Roomba is unable to dock on its first attempt, it will try again until it docks successfully. Home Base Chair Table Stairs Area Rug TIP: Do not place the Home Base within 4 feet of a stairwell. For more detailed information, visit: www.irobot.com... -
Page 19: Wiresless Command Center
Roomba will make a two-tone beep. When the Command Center is powered on from now on, the lights will flash in sequence from left to right until Roomba is under control. iRobot Roomba 500 Series... -
Page 20: Remote Control
TIP: Check that there is a direct line of sight from the Remote Control to Roomba and that the remote is pointed at Roomba. infrared beam. If they are all used in the same area, Roomba may see For more detailed information, visit: www.irobot.com... -
Page 21: Scheduling Roomba (Selected Models)
You must set the time before setting a schedule. To set a schedule: schedule. indicate that the schedule has been set. To view Roomba’s scheduled cleaning times: button to cycle through Roomba’s scheduled cleaning times. iRobot Roomba 500 Series... - Page 22 24 hour format. To toggle between the two views, press and hold the beeps and the clock briefly illuminates, indicating the clock format has been switched. Roomba’s clock will switch back to the default 12 hour (AM/PM) format when Roomba’s battery is disconnected or significantly discharged. For more detailed information, visit: www.irobot.com...
-
Page 23: Regular Maintenance
TIP: Bin emptying and brush cleaning should be done after every cleaning cycle. Regularly pull out and clean Roomba’s front wheel. TIP: If you notice Roomba picking up less debris from your floor, empty the bin and clean the brushes. iRobot Roomba 500 Series... - Page 24 Excessive build up of hair can permanently damage Roomba. Remove brushes and inspect brush bearings regularly. Do not attempt to run Roomba without the bearings. If you misplace Roomba’s brush bearings, contact iRobot Customer Care for replacement bearings. For more detailed information, visit: www.irobot.com...
- Page 25 Re-install the wheel into the housing, and the module into the robot. Front wheels clogged with hair and debris could result in floor damage. Clean Roomba’s cliff sensors Wipe all four cliff sensors with a clean, dry cloth. Cliff Sensor Openings iRobot Roomba 500 Series...
-
Page 26: (Selected Models)
(selected models) Roomba 500 Series can provide troubleshooting messages in English, French, German, Spanish, Italian, Dutch, Danish, Swedish, Norwegian, Finnish, Polish, Russian, Portuguese, Japanese, Korean and Chinese. Roomba’s default language is English. Turn OFF Roomba. (Press and hold and says the currently selected language. -
Page 27: Troubleshooting
The troubleshooting light will also blink. Refer to the chart below to resolve Roomba’s problem. If the problem is not resolved, visit www.irobot.com/support. Tip : To repeat Roomba's error message, press the "clean" button. -
Page 28: Charging Errors
Error 7. not cooling. charging again. TIP: To reset Roomba’s software, simultaneously hold down the two all scheduled cleaning times, reset the clock and may resolve some software issues. For more detailed information, visit: www.irobot.com... -
Page 29: Replaceable Modules
Side brush with screw Front caster wheel Caster housing Bottom cover Battery Cleaning head module Right side wheel module Side brush module Bin module Chassis Replaceable faceplate iRobot Roomba 500 Series... - Page 30 Faceplate Removal (models 500 and above) Follow these instructions to remove and install Roomba’s faceplate. Remove Roomba’s bin. Remove Roomba’s faceplate by pulling up from the bin. The faceplate is secured in several places. For more detailed information, visit: www.irobot.com...
- Page 31 Install Roomba’s faceplate by inserting the tabs into the appropriate slots, and then pushing down firmly on the inside and outsides edges of the faceplate. Reinsert Roomba’s bin. iRobot Roomba 500 Series...
-
Page 32: Battery Removal
Battery Removal (models 500 and above) Follow these instructions to remove and reinstall Roomba’s battery. Remove Roomba’s side brush screw. Remove Roomba’s side brush. For more detailed information, visit: www.irobot.com... - Page 33 Remove Roomba’s battery. Reinstall Roomba’s battery with the iRobot logo facing up. Replace Roomba’s bottom cover and the four screws. Replace Roomba’s side brush and the side brush screw. iRobot Roomba 500 Series...
-
Page 34: Frequently Asked Questions
Roomba may be less effective at sensing and slowing down for extremely dark or black surfaces, or for objects that are less than two inches wide. TIP: For additional assistance, visit www.irobot.com/support. For more detailed information, visit: www.irobot.com... -
Page 35: Important Safety Instructions
ROOMBA BATTERY AND CHARGING electrical storms. iRobot Roomba 500 Series... -
Page 36: Irobot Customer Care
If you have questions or comments about Roomba, please contact iRobot before contacting a retailer. Please visit our web site at for support tips, frequently asked questions, or information about accessories and other iRobot products. We would like to hear from you. - Page 37 Get iRobot accessories at: store.irobot.com © 2009-2010 iRobot Corporation, 8 Crosby Drive, Bedford, MA 01730. All rights reserved. 7,448,113. Additional patents pending.
- Page 38 Roomba 620 Описание Характеристики Вопросы и ответы...