Advertisement
Available languages
Available languages
Table of Contents
- 1 Box Contents
- 2 Connection Diagram
- 3 Rear Panel Overview
- 4 Top Panel Overview
- 5 Troubleshooting
- 6 Specifications
- 7 Vista del Panel Trasero
- 8 Vista del Panel Superior
- 9 Schema Dei Collegamenti
- 10 Panoramica Pannello Posteriore
- 11 Risoluzione DI Problemi
- 12 Specifiche Tecniche
- 13 MIDI Implementation Chart
- Download this manual
Advertisement
Table of Contents

Related Manuals for Alesis Q61


Summary of Contents for Alesis Q61
- Page 1 QUICKSTART GUIDE ENGLISH ( 2 - 5 ) GUÍA DE INICIO RÁPIDO ESPAÑOL ( 6 - 9 ) GUIDE D'UTILISATION RAPIDE FRANÇAIS ( 10 - 13 ) GUIDA RAPIDA ITALIANO ( 14 – 17 ) KURZANLEITUNG DEUTSCH ( 18 - 21 )
-
Page 2: Box Contents
USB cable into this outlet and into the USB port of your computer. The computer's USB port will provide power to the Q61. This connection is used to send and receive MIDI data to and from your computer and may also be used to send MIDI data from your computer to a device attached to the MIDI OUT port of the Q61. -
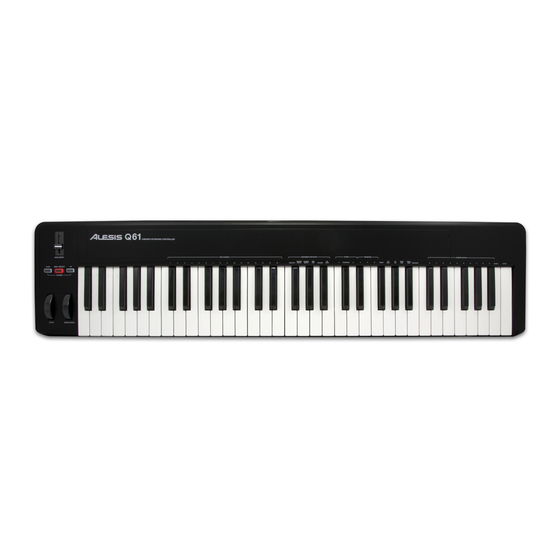
Page 3: Top Panel Overview
Press the Enter or Cancel key on the KEYBOARD to confirm or cancel your choice, respectively. MIDI CHANNELS – Selects the MIDI channel (1-16) over which the Q61 will transmit MIDI messages. The default is Channel ASSIGNMENT DATA ENTRY GROUP These parameters change the MIDI command sent by the Data Entry Slider. -
Page 4: Troubleshooting
OTHER SETTINGS AND COMMANDS These set various parameters and send MIDI messages. RESET – Press this key followed by the Enter key to send a reset message to all controllers and return the Q61 to its original settings. Note: This button does not reset the current octave range or transposition of the KEYBOARD. -
Page 5: Specifications
SPECIFICATIONS POWER: USB, 9V DC, 500mA, center-positive, 5.46mm barrel diameter (sold separately) KEYBOARD: 61 keys ACCESSORIES: Quickstart Guide, USB cable MIDI OUTPUTS: 1 5-pin jack USB: 1 slave connector (MIDI over USB) http://www.alesis.com/Q61... -
Page 6: Vista Del Panel Trasero
Este Manual de inicio rápido tiene la finalidad de brindarle una breve descripción general de la funcionalidad y las características del Q61. Encontrará en el mismo instrucciones sobre cómo conectar el Q61 y cómo usar sus características básicas. ¡Que lo disfrute! DIAGRAMA DE CONEXIÓN... -
Page 7: Vista Del Panel Superior
Pulse la tecla Enter o Cancel del TECLADO para confirmar o cancelar su elección, respectivamente. CANAL MIDI – Selecciona el canal MIDI (1 a 16) por el cual el Q61 transmite los mensajes MIDI. El valor predeterminado es el Canal 1. - Page 8 Nota: Estos valores no se envían hasta que usted introduzca un número de programa y pulse la tecla Enter. Nota: Después de introducir un CC#, el Q61 recuerda el número. En cambio, si desea enviar un mensaje de CC o cambio de programa, debe introducir el valor con las teclas PROGRAMA –...
- Page 9 ESPECIFICACIONES TÉCNICAS ALIMENTACIÓN: USB, 9 V CC, 500 mA, centro positive, diámetro 5.46mm (vendido por separado) TECLADO: 61 teclas ACCESORIOS: Guía de inicio rápido, cable USB SALIDAS MIDI: 1 jack a 5 pines USB: 1 conector esclavo (MIDI por USB) http://www.alesis.com/Q61...
- Page 10 MIDI de votre ordinateur et peut être utilisée pour envoyer des données MIDI de votre ordinateur à un appareil externe branché à la sortie (MIDI OUT) du Q61. SORTIE MIDI - Vous pouvez brancher un câble MIDI à cinq broches (vendu séparément) à cette sortie et à...
- Page 11 Appuyez sur la touche Enter ou Cancel du clavier afin de confirmer ou d’annuler votre sélection. MIDI CHANNELS – Ces touches permettent de sélectionner le canal MIDI (1 à 16) sur lequel le Q61 transmettra les messages MIDI. Le canal 1 est celui par défaut.
- Page 12 (MSB - Most Significant Byte) : Remarque : Celles-ci sont utilisées pour envoyer des Remarque : Lorsque vous entrez un numéro CC, le Q61 le messages de changement de programme. sauvegarde. Cependant, si vous désirez envoyer un message CC ou de changement de programme, vous devez entrer la valeur à...
- Page 13 USB, 9 V c.c., 500 mA, à centre positif, diamètre 5,46mm (vendu séparément) CLAVIER : 61 touches ACCESSOIRES : Guide d’utilisation simplifié, câble USB SORTIES MIDI : 1 entrée à cinq broches USB : 1 connecteur esclave (MIDI sur USB) http://www.alesis.com/Q61...
-
Page 14: Schema Dei Collegamenti
MIDI da e verso il computer e può anche essere utilizzato per l’invio di dati MIDI dal computer ad un dispositivo collegato alla porta MIDI OUT del Q61. USCITA MIDI – Servirsi di un cavo MIDI a cinque poli (venduto separatamente) per collegare questo jack all’ingresso MIDI di un dispositivo esterno. - Page 15 Premere i tasti Enter o Cancel sulla TASTIERA per confermare o annullare la scelta, rispettivamente. CANALI MIDI – Seleziona il canale MIDI (1-16) sul quale il Q61 trasmetterà i messaggi MIDI. Quello predefinito è il Canale 1. ASSEGNAZIONE GRUPPO DI INSERIMENTO DATI Questi parametri modificano il comando MIDI inviato dal CURSORE DI INSERIMENTO DATI.
- Page 16 Nota bene: dopo aver inserito un numero di CC, questo verrà non si inserisce un numero di Programma e non si memorizzato dal Q61. Tuttavia, se si desidera inviare un CC o un preme il tasto Enter. messaggio Program Change occorre inserire il valore servendosi dei tasti numerati sulla TASTIERA ogni volta prima di premere Enter.
-
Page 17: Risoluzione Di Problemi
Il Q61 non è stato collegato correttamente. Se si controlla un modulo hardware esterno, assicurarsi che il cavo MIDI sia collegato dal Q61 alla porta MIDI IN del dispositivo. Il Q61 è stato collegato in Riavviare l’applicazione software con il controller seguito al lancio inserito. - Page 18 Diese Verbindung dient zum Senden und Empfangen von MIDI-Daten zwischen Dem Computer und dem Q61 und kann auch dazu verwendet werden, MIDI-Daten vom Computer an ein Gerät, welches an den Ausgang MIDI OUT des Q61 angeschlossen ist, zu senden. MIDI AUS – Diesen Anschluss über ein fünfpoliges MIDI-Kabel (separat erhältlich) mit dem Anschluss MIDI IN eines externen Geräts verbinden.
- Page 19 Mit den numerierten Tasten des KEYBOARDS einen Wert eingeben. Mit Enter bestätigen oder mit Cancel löschen. MIDI-KANÄLE – Damit kann der MIDI-Kanal (1-16) gewählt werden, über welchen das Q61 MIDI-Mitteilungen sendet. Ab Werk ist hier immer Kanal 1 eingestellt. EINGABEGRUPPE FÜR DIE DATENZUWEISUNG Diese Parameter ändern den MIDI-Befehl, der über den DATENSCHIEBEREGLER gesendet wurde.
- Page 20 RESET – Durch Drücken dieser Taste und einer Bestätigung mit ENTER wird ein Rücksetzbefehl an alle Steuerungseinheiten gesendet und das Q61 stellt wieder die ab Werk eingegebenen Werte ein. Hinweis: Diese Taste ändert den augenblicklichen Oktavenbereich oder die Notenverlagerung des KEYBOARDS nicht.
- Page 21 Programm erneut starten. gestartet wurde. Kein Sound vom Zielgerät. Problem wird von einem Q61 aus dem USB-Hub ausstecken und direkt an den USB-Hub verursacht. Computer anschließen. Überprüfen, dass das Q61 oder ein USB MIDI-Gerät Programmeinstellungen als aktive MIDI-Quelle im Programm erscheinen. Auf gestatten keinen Empfang die MIDI-Einstellungen kann für gewöhnlich über das...
-
Page 22: Midi Implementation Chart
MIDI IMPLEMENTATION CHART Transmit/Export Recognize/Import Remarks 1. Basic Information MIDI channels 1-16 Default = 1 Note numbers 12-108 With Octave +/- buttons Program change 1-128 Bank Select response 0-127 Modes supported: Mode 1: Omni-On, Poly Mode 2: Omni-On, Mono Mode 3: Omni-Off, Poly Mode 4: Omni-Off, Mono Multi Mode Note-On Velocity... - Page 24 7-51-0376-A...