Kyocera TASKalfa 181 Operation Manual
Hide thumbs
Also See for TASKalfa 181:
- Service manual (356 pages) ,
- Operation manual (276 pages) ,
- User manual (93 pages)
Table of Contents
Advertisement
Advertisement
Table of Contents

Related Manuals for Kyocera TASKalfa 181


Summary of Contents for Kyocera TASKalfa 181
- Page 1 OPERATION GUIDE FS-1100 TASKalfa 181/221 FS-1300D...
- Page 2 We will not be liable for any damage caused by the use of third party supplies in this machine. In this Operation Guide, TASKalfa 181 is referred to as '18-ppm model'; and TASKalfa 221 as '22-ppm model', respectively.
-
Page 3: Table Of Contents
CONTENTS Names of Parts ....................1-1 Main Body ..........................1-1 Operation Panel ........................1-4 Preparations ....................2-1 Loading Paper ..........................2-1 Note for Adding Paper ......................2-1 Loading Paper into the Cassette ..................2-2 Setting Paper in the Multi Purp+ ..................2-4 ose Tray ..........................2-4 Loading postcards or envelopes in the MP tray ...............2-6 Multi PurposeTray Settings ....................2-7 Connecting Cables ........................2-9 Connecting the Network Cable ...................2-9... - Page 4 Fax Kit ........................... 4-10 Network Scanner Kit ......................4-10 Network Interface Card (IB-23) ....................4-10 Additional Memory ........................4-11 Optional Equipment ....................... 4-12 Maintenance ....................5-1 Cleaning the Machine ......................5-1 Replacing the Toner Container and the Waste Toner Box ............5-5 Troubleshooting .....................
- Page 5 Kyocera Mita Corporation is prohibited. Any copies made of all or part of this guide, any copyrightable subject must contain the same copyright notice as the material from which the copying is done.
- Page 6 Energy Saving Contol Function The device comes equipped with a Low Power Mode where energy consumption is reduced after a certain amount of time elapses since the device was last used, as well as a Sleep Mode where printer and fax functions remain in a waiting state but power consumption is still reduced to a minimum when there is no activity with the device within a set amount of time.
- Page 7 Please read this Operation Guide before using this machine. Keep it close to the machine for easy reference. Please read this Operation Guide before using this machine. Keep it close to the machine for easy reference. The sections of this guide and parts of the machine marked with symbols are safety warnings meant to protect the user, other individuals and surrounding objects, and ensure correct and safe usage of the machine.
- Page 8 symbol indicates that the related section includes information on actions which must be performed. Specifics of the required action are indicated inside the symbol..[Alert of required action] ..[Remove the power plug from the outlet] ..[Always connect the machine to an outlet with a ground connection] Please contact your service representative to order a replacement if the safety warnings in this Operation Guide are illegible or if the guide itself is missing.
-
Page 9: Caution Labels
IMPORTANT! PLEASE READ FIRST. CAUTION LABELS Caution labels have been attached to the machine at the following locations for safety purposes. Be sufficiently careful to avoid fire or electric shock when removing a paper jam or when replacing toner. Label 2 Label 3 High temperature inside. -
Page 10: Installation Precautions
INSTALLATION PRECAUTIONS Environment Caution Avoid placing the machine on or in locations which are unstable or not level. Such locations may cause the machine to fall down or fall over. This type of situation presents a danger of personal injury or damage to the machine. Avoid locations with humidity or dust and dirt. -
Page 11: Precautions For Use
If the floor is delicate, when this product is moved after installation, the floor material may be damaged. During copying, some ozone is released, but the amount does not cause any ill effect to one's health. If, however, the machine is used over a long period of time in a poorly ventilated room or when making an extremely large number of copies, the smell may become unpleasant. -
Page 12: Other Precautions
Do not damage, break or attempt to repair the power cord. Do not place heavy objects on the cord, pull it, bend it unnecessarily or cause any other type of damage. These types of situations present a danger of fire or electrical shock. Never attempt to repair or disassemble the machine or its parts as there is a danger of fire, electrical shock or damage to the laser. -
Page 13: Cautions When Handling Consumables
Do not touch electrical parts, such as connectors or printed circuit boards. They could be damaged by static electricity. Do not attempt to perform any operations not explained in this handbook. Caution: Use of controls or adjustments or performance of procedures other than those specified herein may result in hazardous radiation exposure. -
Page 14: Safety Of Laser Beam
SAFETY OF LASER BEAM 1. Safety of laser beam This machine has been certified by the manufacturer to Class 1 level under the radiation performance standards established by the U.S.DHHS (Department of Health and Human Services) in 1968. This indicates that the product is safe to use during normal operation and maintenance. -
Page 15: Radio Tag Technology
Safety Instructions Regarding the Disconnection of Power Caution: The power plug is the main isolation device! Other switches on the equipment are only functional switches and are not suitable for isolating the equipment from the power source. Attention: Le débranchement de la fiche secteur est le seul moyen de mettre l’appareil hors tension. Les interrupteurs sur l’appareil ne sont que des interrupteurs de fonctionnement: ils ne mettent pas l’appareil hors tension. - Page 16 DECLARATION OF CONFORMITY 2004/108/EEC, 2006/95EEC, 93/68/EEC, 1999/5/EC We declare under our sole responsibility that the product to which this declaration relates is in conformity with the following specifications. EN55024 EN55022 Class B EN61000-3-2 EN61000-3-3 EN60950 EN60825-1 EN300 330-1 EN300 330-2...
- Page 17 Guide to this Operation Guide This operation guide has the following chapters. The content of these chapters is summarized below to be used as a reference. 1 Names of Parts This chapter contains explanations on the names and functions of the parts of the machine and its operation panel.
-
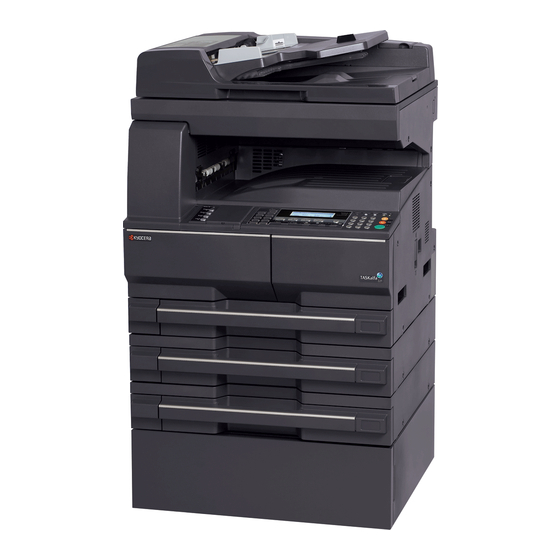
Page 18: Names Of Parts
Names of Parts Main Body Original cover — Open/close this cover when setting the original on the platen. Output tray — Finished copies or printouts are stored on this tray. The output tray has a storage capacity of 250 sheets of standard paper (80 g/m²). Operation panel —... - Page 19 Names of Parts 11 Platen — Set an original here for copying. Be sure to lay the original face-down and align the edge of the original flush up against the left rear corner of the platen. 12 Original size indicator plates — Be sure to set an original along these plates when setting it on the platen.
- Page 20 Names of Parts 19 Main power switch — Turn this switch on ( | ) before using this machine. 20 Main power switch cover — Open to operate the main power switch. 21 Handles for transport — Hold the four recessed portions at the right and left when transporting this machine.
-
Page 21: Operation Panel
Names of Parts Operation Panel 12 13 Ready to copy . Auto Auto 100% 9 10 17 18 System Menu/Counter key and indicator — Press this key to set the job accounting function, adjust the default settings or set the machine. (For details, refer to Chapter 3 and Chapter 4 in Advanced Operation Guide.) Copy key and indicator —... - Page 22 Names of Parts Collate key and indicator — Press this key to perform sort copying. The Collate indicator will light up. (See page 3-9.) 15 Staple key and indicator — Press this key to perform staple copying. The Staple indicator will light up.
-
Page 23: Auto Clear Function
Names of Parts 35 Stop/Clear key — Press this key to stop copying or to change the number of copies. Also press this key to return to the previous screen from a setting screen for copier functions or the like. 36 Start key and indicator —... -
Page 24: Message Display
Names of Parts Message Display The message display on this machine indicates the operation status of the machine. Copier Basic Screen Ready to copy . Auto Auto 100% This screen is displayed when the Copy key is pressed. Reference Meaning number Indicates the current status of the machine and displays the message for required operation. - Page 25 Names of Parts Note The following procedure can also be used for changing the default settings of the printer functions. Press the System Menu/Counter key. Press the key or the key to select Printer System Menu / Counter: default. Copy default Press the Enter key.
-
Page 26: Preparations
Preparations Loading Paper Paper can be loaded into either the cassette or the multi-purpose tray. For details on paper that can be used, refer to Appendix in Advanced Operation Guide, Paper. Note for Adding Paper After taking new paper out of its packaging, be sure to fan through the paper a few times to separate the sheets before loading that paper into the cassette or the multi-purpose tray. -
Page 27: Loading Paper Into The Cassette
Preparations Loading Paper into the Cassette Standard paper, recycled paper, and colored paper can be loaded into the cassette. Up to 300 sheets of standard paper (80 g/m²) or 100 sheets of thick paper (90 to 105 g/m²) can be set. Paper sizes that can be loaded are: A3, B4, A4, A4R, B5, B5R, A5R, Folio, 11 ×... - Page 28 Preparations Grasp the paper length adjusting tab and adjust the length guide to the paper size. Important! • Make sure that the length guide is flush against the paper. If there is space between the guide and the paper, set the length guide again. •...
-
Page 29: Setting Paper In The Multi Purp
Preparations Affix the label supplied so that the paper size set in the cassette can be identified from the front of the cassette. Gently push in the cassette. Important! When the machine will not be used for a long period of time, remove the paper from the cassette, put it in a storage bag, and seal the bag in order to protect the paper from moisture. - Page 30 Preparations Note Pull out the multipurpose tray extension to match the paper size. Adjust the sliders to the width of the paper to be set. Set the paper along the sliders and put it in until it stops. Important! • Always straighten out postcards and other types of thick paper that are curled before using them.
-
Page 31: Loading Postcards Or Envelopes In The Mp Tray
Preparations Loading postcards or envelopes in the MP tray When loading a postcard or envelope, open the paper stopper shown in the figure. For landscape envelopes, close the flap. Insert the envelope all the way along the width guides, keeping the printing side face-down and the edge with the flap facing towards you. -
Page 32: Multi Purposetray Settings
Preparations Multi PurposeTray Settings Set the following items for feeding paper from the multi purpose tray. Paper Size Set the size of paper to be used in the multi purpose tray. If the paper size is unknown or no particular paper size setting is required, select Universal Size. Selecting a Regular Size Sizes that can be selected: A3, B4, A4R, A4, B5R, B5, A5R, B6R, A6R, 8 ×... -
Page 33: Paper Type
Preparations Press the Enter key. The Bypass Paper type screen is displayed. Proceed to Paper Type described below. Entering a Paper Size Press the System Menu/Counter key. Press the key or the key to select MP Tray System Menu / Counter : setting. -
Page 34: Connecting Cables
Preparations Connecting Cables This machine can be connected either to a network or directly to a single computer. This section describes the procedures to make both types of connection. Connecting the Network Cable To connect this machine to a network, use an Ethernet cable (10Base-T or 100Base-TX). Open the main power switch cover located on the right side of the machine, turn the main power switch off ( ), and remove the power cord from the outlet. -
Page 35: Connecting The Power Cord
Preparations Connecting the Power Cord Connect the power cord to this machine. Connect the power cord to the power cord connector located at the right side of the machine. Connect the other end of the power cord to a power outlet. 2-10... -
Page 36: Turning Power On
Preparations Turning Power On To turn machine power on: Open the main power switch cover located on the right side of the machine and turn the main power switch on ( | ). The machine starts to warm up. Once warm-up is completed, the Start indicator lights up green. 2-11... -
Page 37: Network (Tcp/Ip) Settings
Preparations Network (TCP/IP) Settings Register the IP address of this machine. Notes • To obtain the IP address to enter, check with your network administrator before performing this setting. • Before entering the IP address by following the instructions below, be sure to turn the DHCP setting Off and the TCP/IP setting On. - Page 38 Preparations Press the # key. Enter the next block of 3 digits of the address in the IP Address highlighted area. Continue the same procedure for the other 2 blocks. Press the Enter key. Next, set the subnet mask. Registering Subnet Mask To register the subnet mask, continue the procedure from step 18 above.
-
Page 39: Setting Date And Time
Preparations Setting Date and Time Set the current date and time, time difference from the Greenwich Mean Time (GMT), and summer time. Press the System Menu/Counter key. Press the key or the key to select Machine System Menu / Counter: default. - Page 40 Preparations Setting Daylight Saving Time [DST] Press the key or the key to select DST. Date/Time: Time 06:33 Press the < key or the > key to turn Daylight Saving Time On or Off. Next, set the date. Setting Date Press the key or the key to select Year.
-
Page 41: User Interface Language
Preparations User Interface language You can select the language that is used in the message display. The following languages are available: English, French (Français), German (Deutsch), Italian (Italiano), Nederlands (Nederlands), Spanish (Español), , Russian (Русский), and Português (Português). 2-16... -
Page 42: Basic Operation
Basic Operation This chapter explains the following operations. For other functions, refer to the Advanced Operation Guide. • Basic Copying Procedure • Zoom Copying • Duplex Copying • Collated Copying • Combined Copying • Interrupt Mode • Low Power Mode •... - Page 43 Basic Operation To change the paper size, press the Paper Selection key to select the desired paper source. Press the image quality mode select key to light up the desired image quality mode indicator. See the table below for image quality to choose. Image quality mode Description Text + Photo...
- Page 44 Basic Operation Note The capacity of the output tray is 250 sheets of standard paper (80 g/m²). The capacity varies depending of the paper that is used. If the optional fax kit is not installed: Caution If the machine will not be used for a short period of time (overnight, etc.), turn the main power switch off ( ).
-
Page 45: Zoom Copying
Basic Operation Zoom Copying Copied images can be reduced or enlarged by zooming. The following modes are available for zoom copying. Mode Description Auto zoom ratio selection Original images are reduced or enlarged according to the selected mode paper size. Zoom mode The zoom ratio can be changed from 25 % to 400 % in 1 % increments. -
Page 46: Zoom Mode
Basic Operation Zoom Mode With this mode, the zoom ratio can be set between 25 % 25 % and 400 % in 1 % increments. 400 % Set the original. Press the Zoom key. Use the numeric keys to input the zoom ratio. The Zoom: zoom ratio is displayed on the message display. -
Page 47: Duplex Copying
Basic Operation Duplex Copying Duplex (two-sided) copies can be made from a variety of originals including double-page spread or two-sided originals. Original Copy Note The optional duplex unit must be installed. The following modes are available for duplex copying: Mode Description One-sided originals are copied onto the front and back sides of the 1-sided->2-sided... - Page 48 Basic Operation Mode Description Front and back sides of originals are copied in the same way onto 2 sided->2 sided (2-sided copying from 2-sided both sides of copy paper. originals) Original Copy Note The paper sizes that can be used are A3 to A5R, Folio, 11 × 17" (Ledger), 8 ×...
- Page 49 Basic Operation Set the original. Press the Duplex key. Press the key or the key to select the desired Duplex/Split Page: duplex copy mode. 1 sided 2 sided 2 sided 2 sided Book 2-sided Press the Enter key. If you have selected 1 sided->2 sided, proceed to the next step. If you have selected 2 sided->2 sided or Book->2-sided, proceed to step 7.
-
Page 50: Collated Copying
Basic Operation Collated Copying A number of collated copy sets can be produced. Original Copy Note If the optional document processor is installed, you can select whether or not to turn on the sort mode at a default setting. Set the original. Press the Collate key. -
Page 51: Combined Copying
Basic Operation Combined Copying Two or four originals are reduced and copied onto a single sheet. Also, borderlines of each original can be marked with solid or dotted lines. Original Copy Note Both the original size and the copy paper size must be standard size. The following modes are available for combine copying. -
Page 52: In-1
Basic Operation 2-in-1 The orientations of the originals and the finished copy are shown below. Using the platen: Original Copy Original Copy Using the document processor: Original Copy Original Copy 3-11... -
Page 53: 4-In-1 (Horizontal)
Basic Operation 4-in-1 (horizontal) The orientations of the originals and the finished copy are shown below. Using the platen: Original Copy Original Copy Using the document processor: Original Copy Original Copy 3-12... -
Page 54: 4-In-1 (Vertical)
Basic Operation 4-in-1 (vertical) The orientations of the originals and the finished copy are shown below. Using the platen: Original Copy Original Copy Using the document processor: Original Copy Original Copy 3-13... -
Page 55: Interrupt Mode
Basic Operation Interrupt Mode The interrupt mode temporarily stops the output of copy jobs, etc. and allows the output of urgent copy-, print- or received fax data. After the urgent interrupt job is finished, the interrupted job will be automatically resumed. - Page 56 Basic Operation Interrupting Printing Press the Interrupt key during a print job.Select Interrupt mode is displayed. Note If the machine has neither print data nor received fax data, Interrupt mode OK Interrupt mode is displayed. Proceed to step 4. The example at the right shows the machine has both Select Interrupt mode.
-
Page 57: Low Power Mode
Basic Operation Low Power Mode Pressing the Energy Saver key puts the machine into a resting state (low power mode) even when the main power switch is on. Only the Energy Saver indicator, Power indicator, and main power indicator will light up and the other indicators will go out on the operation panel. Press the Energy Saver key again to resume copying operations. -
Page 58: Sleep Mode
Basic Operation Sleep Mode Pressing the Power key puts the machine into a resting state (sleep mode) even when the main power switch is on. Only the main power indicator lights up and all other indicators are turned off on the operation panel. -
Page 59: Basic Printing Procedure
Basic Operation Basic Printing Procedure Make sure that the machine’s printer or network cable and the power cord are properly connected before using this machine as a printer. Installing the Printer Driver To print a document from a Windows software, you must first install the printer driver software for the machine, which is contained in the CD-ROM supplied. -
Page 60: Optional Equipment
Optional Equipment The following options are available for this machine. • Document Processor • Paper Feeder • Duplex Unit • Finisher • Job Separator • Key Counter • Fax Kit • Network Scanner Kit • Network Interface Card (IB-23) • Additional Memory Document Processor This equipment automatically feeds and scans multiple-sheet originals one by one. -
Page 61: Notes On Use
Optional Equipment Notes on Use Be sure not to use the following as originals in the document processor. In addition, originals with punched holes or perforations should be set so that the edge of the paper with the holes or perforations is facing away from the direction of insertion into the document processor. - Page 62 Optional Equipment Notes • Before setting originals, make sure that there are no originals remaining on the original eject table. Originals left on the eject table may cause other originals to jam. • When setting multiple originals at one time, be sure to use originals of the same size.
-
Page 63: Setting Originals On The Platen
Optional Equipment Setting Originals on the Platen When copying from an original which cannot be set in the document processor, open the document processor and set the original directly on the platen. Notes • Before opening the document processor, make sure that there are no originals remaining on the original table or on the original eject table. -
Page 64: Paper Feeder
Optional Equipment Paper Feeder In addition to the cassette(s) provided with the main body, a paper feeder (with cassettes that can hold 300 sheets each) can be used. • The number of sheets that can be accommodated: 300 sheets (standard paper, 64 to 105 g/m²). •... -
Page 65: Finisher
Optional Equipment Finisher The finisher stores a large quantity of copies and can sort multiple copy sets by shifting the position of ejection for each one. It can also staple collated copy sets. The number of sheets that can be stored in the finisher and the specifications of stapling are shown below. -
Page 66: Adding Staples
Optional Equipment • The paper sizes are marked on the finisher tray extension. Open paper output guide 1 or 2 according to the paper size. • When stapling large paper such as A3, B4, 11 × 17" (Ledger), and 8 ×... -
Page 67: Clearing Staple Jam
Optional Equipment While holding the staple holder with one hand and the new staple cartridge with the other hand, insert the cartridge into the holder with care about the direction. Note The arrow on the staple cartridge indicates the insertion direction. Push the staple cartridge all the way into the holder and remove the paper tape around the staple cartridge by pulling it. -
Page 68: Job Separator
Optional Equipment Remove the staple jammed at the end (side on which staples are set). Lower the face plate of the staple holder to its original position. Insert the staple holder into the insertion slot as it was. Insert it completely until it clicks. Close the stapler front cover. -
Page 69: Key Counter
Optional Equipment Key Counter The key counter is used to confirm the amount of usage of the copier functions. It is useful in managing copier usage for each department, section, etc. as well as in the company overall. Setting the Key Counter Set the key counter securely in the key counter slot. -
Page 70: Additional Memory
Optional Equipment Additional Memory A memory can be added for the copier functions and the printer functions respectively. Adding a memory will increase the maximum number of originals that can be scanned at one time. Also complicated data can be printed. An additional memory of 64 MB or 128 MB is effective for originals containing photos with a low compression ratio. -
Page 71: Optional Equipment
Optional Equipment Optional Equipment The locations for attaching options are shown below. Available Options The following options are available for this machine. Additional Memory Hard Disk Document Processor Key Counter Fax Kit Duplex Unit Network Scanner Kit Finisher Network Interface Card Paper Feeder Job Separator Memory Card... -
Page 72: Maintenance
Maintenance Cleaning the Machine Caution For safety purposes, always remove the power plug from the outlet when performing cleaning operations. Cleaning the Original Cover Open the original cover and wipe the back side of the cover with a soft cloth dampened with alcohol or mild neutral detergent. -
Page 73: Cleaning The Slit Glasses
Maintenance Cleaning the Slit Glasses If copies appear soiled, such as black lines appearing on the copy image while using the optional document processor, the slit glasses A and B are dirty. Wipe the slit glasses with a dry soft cloth. Important! Never use water, thinner, organic solvents or alcohol. -
Page 74: Cleaning The Transfer Roller
Maintenance Move the brush from the left side to the right side along the separation needle as shown in the illustration to remove any dirt or dust. Close the left cover. Cleaning the Transfer Roller Open the front cover. Remove the cleaning brush. Pull the left cover handle up to open the cover. - Page 75 Maintenance While turning the left transfer roller gear to turn the roller as shown in the illustration, move the brush from the left side to the right side along the roller to remove any dirt or dust. Close the left cover.
-
Page 76: Replacing The Toner Container And The Waste Toner Box
Maintenance Replacing the Toner Container and the Waste Toner Box When message Unable to copy. Please Add Unable to copy. Toner [Cannot copy. Add toner, resume Please Add Toner copying.] is displayed on the message display and Auto the machine stops, add toner. Replace the toner 100% container together with the waste toner box. - Page 77 Maintenance Warning High voltage is present in the charger section. Take sufficient care when working in this area, as there is a danger of electrical shock. Use the cap attached to the center of the old waste toner box to cover the opening. Turn the toner container release lever A up to pull out the toner container.
- Page 78 Maintenance Place the old toner container in the plastic bag provided for disposal. While holding the charger cleaner rod, gently pull it out as far as it will go and push it in again. Repeat this operation two or three times. Note Do not use excessive force to pull the rod or attempt to pull it out completely.
- Page 79 Maintenance When the electrical charge section is pulled out approximately 5 cm (2 inches), remove the grid cleaner and then push back the electrical charge section all the way into the main body. Important! After you use the grid cleaner to clean the electrical charge section, the machine can be used again after more than 5 minutes have elapsed.
- Page 80 Maintenance Install the new waste toner box. Close the front cover. After use, always dispose of the toner container and the waste toner box in accordance with Federal, State and Local rules and regulations.
- Page 81 Maintenance 5-10...
-
Page 82: Troubleshooting
Troubleshooting If Trouble Occurs If trouble occurs with this machine, carry out the items indicated below. If the trouble persists, contact your service representative. Symptom Items to check Corrective procedure Reference page Nothing is displayed on the Is the power plug connected to an AC Connect the plug to an AC outlet. - Page 83 Troubleshooting Symptom Items to check Corrective procedure Reference page A moire pattern (the Is the original a printed photograph? Set the image quality mode to Photo. phenomenon where the dots do not appear to be lined up properly but seem to be grouped together in patterns) appears on the copies.
- Page 84 Troubleshooting Symptom Items to check Corrective procedure Reference page Printing cannot be Is the power plug connected to an AC Connect the plug to an AC outlet. 2-10 performed. outlet? Is the main power switch turned on? Turn the main power switch on ( | ). —...
-
Page 85: Displayed Messages
Troubleshooting Displayed Messages When any of the following message appear on the message display, take the indicated action. Message Procedure Reference page The indicated cover is open. — Close ## cover. Close all the covers securely. Paper has run out. Add paper in cassette. - Page 86 Troubleshooting Message Procedure Reference page Open the front cover once and close it. If the message is displayed — Call for service. again, check C and the number. Turn the main power switch off ( ) and contact your service representative or authorized service center. Periodic maintenance is required to keep this machine in good —...
- Page 87 Troubleshooting Message Procedure Reference page The output tray capacity is exceeded during copying. — Remove paper from Top tray. Press START key. • There are already 250 sheets of paper stored in the output tray. • There are already 150 sheets of paper stored in the output tray when the optional job separator is installed.
- Page 88 Troubleshooting Message Procedure Reference page This message is displayed when a malfunction due to noise or the — System error. like or a communication error during printer processing has occurred. Main switch off / on. Follow the procedure below. Turn the main power switch off ( ). If printer output is being performed, cancel printing on the computer.
- Page 89 Troubleshooting Message Procedure Reference page The toner container is not tapped or shaked properly. Tap and shake Shake the toner the new toner container without spilling the toner and install it again. container.
-
Page 90: Paper Jams
Troubleshooting Paper Jams If a paper jam occurs, copying or printing stops. At this Paper misfeed in time, jam location indicators are displayed as well as cassette 1. an error message indicating a paper jam. Leave the Remove paper. main power switch on ( | ) and refer to Removal JAM11 Procedures on page 6-10 to remove the jammed paper. -
Page 91: Notes
Troubleshooting Notes Warning High voltage is present in the charger section. Take sufficient care when working in this area, as there is a danger of electrical shock. Caution The fixing unit is extremely hot. Take sufficient care when working in this area, as there is a danger of getting burned. -
Page 92: Paper Jam Inside Cassettes 2 To
Troubleshooting Notes • Check to see if paper is out of position in the cassette. If the paper is out of position, set the paper properly. • If JAM21 is displayed, remove the jammed paper referring to Paper Jam in the Left Cover on page 6-13. - Page 93 Troubleshooting Pull out the cassette. Remove any jammed paper without tearing it. Note If the paper does happen to tear, remove any loose scraps from inside the machine. Push the cassette back in firmly. Paper Jam in the Multi-Purpose Tray (JAM10) If Paper misfeed in stack bypass.
-
Page 94: Paper Jam In The Left Cover
Troubleshooting Paper Jam in the Multi-Purpose Tray (except JAM10) Important! • If JAM20 is displayed, remove the jammed paper referring to Paper Jam in the Left Cover. • If JAM40 is displayed, remove the jammed paper referring to Paper Jam in the Left Cover. •... -
Page 95: Paper Jam In The Paper Output Slot
Troubleshooting If the optional duplex unit is installed, raise the duplex unit and remove any paper. Note If the paper does happen to tear, remove any loose scraps from inside the machine. Close the left cover. Paper Jam in the Paper Output Slot If Paper misfeed in Eject section Remove Paper misfeed in paper appears and the jam location indicator shown in... - Page 96 Troubleshooting Remove any jammed paper without tearing it. Note If the paper does happen to tear, remove any loose scraps from inside the machine. Close the left cover. Paper Jam in the Optional Document Processor If Misfeed in DP. Remove original(s) appears Misfeed in DP.
- Page 97 Troubleshooting Raise the paper feed unit A. Remove any jammed originals without tearing them. Note If the original does happen to tear, remove any loose scraps from inside the document processor. Turn the dial as shown in the illustration to remove the jammed original.
- Page 98 Troubleshooting Remove any paper. Raise the process tray. Remove the finisher tray. Pull the left cover handle up to open the left cover. Remove any jammed paper. Note If the paper does happen to tear, remove any loose scraps from inside the machine. 6-17...
- Page 99 Troubleshooting Close the left cover. Reattach the finisher tray. Lower the process tray temporarily and return it. The error message disappears. Paper Jam in the Optional Job Separator If Paper misfeed at Job separator. Remove Paper misfeed at paper appears and the jam location indicator shown in Job separator.
- Page 100 Troubleshooting Remove any jammed paper without tearing it. Note If the paper does happen to tear, remove any loose scraps from inside the machine. Close the left cover. 6-19...
- Page 101 Troubleshooting 6-20...
-
Page 102: Appendix
Appendix Specifications Note Specifications are subject to change without notice to reflect improvements in performance. Main Body Copying system Indirect electrostatic system Original types Sheets, books, and 3-dimensional objects (maximum original size: accommodated A3/11 × 17") Copy sizes Cassette A3, B4, A4, A4R, B5, B5R, A5R, Folio, 11 × 17" (Ledger), 8 ×... -
Page 103: Copier Functions
Appendix Dimensions (main unit only) 18-ppm model × 23 × 19 " 25/64 31/32 (W) × (D) × (H) 568 × 594 × 507 mm 22-ppm model × 23 × 23 " 25/64 29/32 568 × 594 × 607 mm Weight 18-ppm model Approx. -
Page 104: Document Processor (Optional)
Appendix Document Processor (optional) Original feed system Automatic feeding Acceptable originals Sheets of paper Original sizes Max.: A3/11 × 17" Min.: A5R/5 × 8 " Original paper weight 45 g/m² to 160 g/m² Acceptable number of 50 sheets (50 g/m² to 80 g/m²) originals Mixed original sizes (auto select) 30 sheets (50 to 80 g/m²) maximum Mixed original sizes (auto... -
Page 105: Finisher (Optional)
Appendix Finisher (optional) Number of trays Paper sizes A3, B4, A4, A4R, B5, Folio, 11 × 17" (Ledger), 8 × 14" (Legal), 11 × 8 ", 8 × 11" (Letter), 8 × 13" (Oficio II) Acceptable paper Weight: 60 to 105 g/m² Types: Standard paper, recycled paper, color paper, thin paper, thick paper, and letterhead Dimensions... - Page 106 Index Index Numerics 2 in 1 ............................3-11 4 in 1 (horizontal arrangement) ..................... 3-12 4 in 1 (vertical arrangement) ....................3-13 Additional memory ........................4-11 Application software ........................ 3-18 Auto clear function ........................1-6 Auto low power function ......................3-16 Auto sleep function .........................
- Page 107 Index Grounding the machine ......................ii-ix If trouble occurs .........................6-1 Image quality mode ........................3-2 Initial mode ..........................1-6 Interrupt mode .........................3-14 IP address ..........................2-12 Jam location indicators ......................6-9 Job separator ......................4-9, Appendix-4 Key counter ..........................4-10 Language setting ........................2-16 Left cover ............................1-2 Loading paper ..........................2-1 Loading paper into the cassette ....................2-2...
- Page 108 Index Paper jam in the left cover ..................... 6-13 Paper jam in the multi-bypass tray ..................6-12 Paper jam in the paper output slot ..................6-14 Paper jam inside cassette 1 ....................6-10 Paper jam inside cassettes 2 to 4 ..................
-
Page 109: Index
Index Index-4... - Page 110 MEMO...
- Page 111 MEMO...
- Page 112 MEMO...
- Page 113 For best print results and machine performance, we recommend that you use only KYOCERA original supplies for your KYOCERA products.
- Page 115 First Edition 2009.6...