Table of Contents
Advertisement
do wnlo ad.le no vo .co m
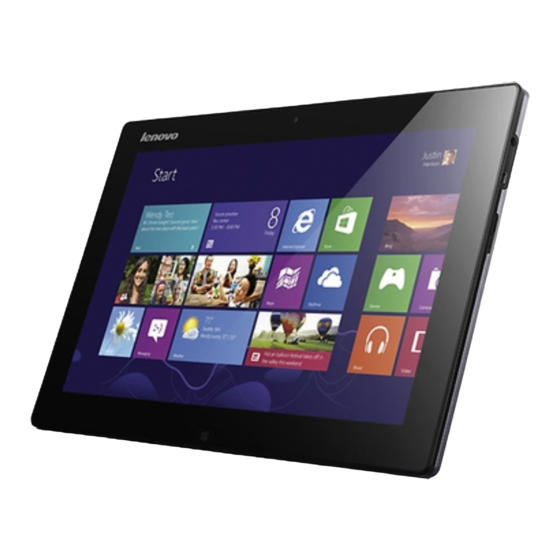
Lenovo IdeaTab K3011W
User Guide v1.0
Re a d t he s a f e t y no t ice s a nd im po rt a nt t ips in t he
include d m a nua ls be f o re us ing yo ur co m put e r.
Not es
Bef ore using the product, be sure to read Important Safety and Handling
Information f irst.
Some instructions in this guide may assume that you are using Windows
another Windows operating system, some operations may be slightly dif f erent. If you are using
another operating system, some operations may not apply to you.
T he f eatures described in this guide are common to most models. Some f eatures may not be
available on your computer or your computer may include f eatures that are not described in this
user guide.
T he illustrations in this manual may dif f er f rom the actual product. Please ref er to the actual product.
Regulat ory Not ice
T he Regulatory Notice provides inf ormation about the radio f requency and saf ety standards. Be sure to
read it bef ore using wireless devices on your computer.
To ref er to it, go to
First Edition (July 2012)
© Copyright Lenovo 2012.
LIMIT ED AND REST RICT ED RIGHT S NOT ICE: If data or sof tware is delivered pursuant a General Services
Administration "GSA" contract, use, reproduction, or disclosure is subject to restrictions set f orth in Contract
No. GS-35F-05925.
Chapter 1
Getting to know your computer
Tablet f ront view
http://do wnlo ad.leno vo .co m/co nsumer/mo biles_pub/idea_tab_k3011w_ug/data/EN/index.html
http://support.lenovo.com/
and click Guides & Manuals.
®
8. If you are using
Advertisement
Table of Contents

Related Manuals for Lenovo IdeaTab K3011W


Summary of Contents for Lenovo IdeaTab K3011W
-
Page 1: Front View
.co m http://do wnlo ad.leno vo .co m/co nsumer/mo biles_pub/idea_tab_k3011w_ug/data/EN/index.html Lenovo IdeaTab K3011W User Guide v1.0 Re a d t he s a f e t y no t ice s a nd im po rt a nt t ips in t he include d m a nua ls be f o re us ing yo ur co m put e r. -
Page 2: Multi-Touch Screen
Note: T he dashed areas indicate parts that are not visible externally. Integrated camera Use the camera f or video communication and taking photos. Wireless LAN antennas Connect to the wireless LAN adapter to send and receive wireless radio. Multi-touch screen Functions as both the visual display as well as one of the two primary input methods. -
Page 3: Side Views
Toggle between the current view and the Start screen. -or- Wake up the computer f rom sleep mode. BACK T O T OP Tablet lef t -side view Screen rotation lock button Keeps the screen locked in portrait or landscape orientation. Volume button Increases/Decreases volume level. -
Page 4: Power Button
Micro HDMI port Connects to devices with HDMI inputs such as a T V or an external display. Combo audio jack Connects to headsets. Notes: T he combo audio jack does not support conventional microphones. T he recording f unction may not be supported if third-party headphones or headsets are connected, due to dif f erent industry standards. -
Page 5: Using Micro Secure Digital Card
Insert a micro SD card (not supplied) here. Note: For details, see “Using a micro Secure Digital (SD) card (not supplied)”. Built-in microphone Captures sound which can be used f or video conf erencing, voice narration, or audio recording. Using a micro Secure Digit al (SD) card (not supplied) Your computer supports micro Secure Digital (SD) cards. - Page 6 4 Use the micro SD prying pin to pull out the micro SD card. 5 Close the slot cover. Note: Bef ore removing the micro SD card, disable it by using the Windows saf ely remove hardware and eject media utility to avoid data corruption. BACK T O T OP Tablet bot t om view...
-
Page 7: Multi-Function Connector
Tablet-docking latch Connects the tablet to the dock and keeps the tablet secured in place. Note: For details, see “Combination of tablet and dock”. Multi-function connector Connects to the AC power adapter, the USB cable or the dock. BACK T O T OP Dock Front view... - Page 8 Tablet-docking latch Attaches the tablet to the dock keeping the tablet secured in place. Note: For details, see “Combination of tablet and dock”. Tablet connector Connects the tablet to the dock. Note: For details, see “Combination of tablet and dock”. Tablet release button (spring loaded) Press and hold the spring-loaded button to release the tablet and detach it f rom the dock.
- Page 9 Keypad T he keypad f unctions as a conventional keyboard. Touchpad T he touchpad f unctions as a conventional mouse. Touchpad: To move the pointer on the screen, slide your f ingertip over the pad in the direction in which you want the pointer to move.
- Page 10 Closes the currently active Displays the Settings charm. window. Ref reshes the desktop or the Displays the Search charm. currently active window. Turns on/of f the backlight of the Displays all currently active apps. LCD screen. Enables/disables wireless Displays all apps with the Search f unction.
- Page 11 Windows Displays the desktop. key + D Windows Opens Windows Explorer. key + E Windows Opens Files within the Search charm. (press Windows key + F + Ctrl to f ind computers on a key + F network) Windows Cycles through desktop gadgets. key + G Windows Displays the Share charm.
- Page 12 key + Esc Windows Hides/restores any inactive desktop windows. key + PgUp Windows Moves the Start screen to its rightmost position along the horizontal scrollbar. key + PgDn Windows Snaps the currently active desktop window to a position f illing half of the desktop on either key + →...
-
Page 13: Connecting Usb Devices
On (solid amber) T he dock is charging. Blinking (white T he dock is connected to the AC adapter, but the charging process has and amber been paused. T here may be a problem with the battery or battery alternately) connection. -
Page 14: Combination Of Tablet And Dock
Combinat ion of t ablet and dock Lenovo IdeaTab K3011W is not only a tablet. It can also be combined with a dock to be used together as a notebook computer. Tablet Mode Not ebook Mode... - Page 15 At t aching t he t ablet To connect the tablet to the dock, insert it into the tablet slot in the direction shown by arrow 1 until it clicks into place.
-
Page 16: Detaching Tablet
Det aching t he t ablet To remove the tablet f rom the dock, press and hold the spring-loaded tablet relase button 1 , while caref ully lif ting the tablet in the direction shown by the arrow 2. -
Page 17: Screen Orientation
Note: Be caref ul not to damage the connector when attaching or detaching the tablet. Screen orient at ion You can rotate the display panel to your pref erred orientation. T he orientation of the display automatically changes (alternating between portrait and landscape modes) depending upon how you hold the tablet. -
Page 18: Chapter 2 Starting To Use Windows 8
To prevent automatic orientation, press the screen rotation lock button. It is located on the lef t edge of the tablet. (See below illustration). BACK T O T OP Chapter 2 Starting to use Windows 8 Conf iguring t he operat ing syst em f or t he f irst t ime You may need to conf igure the operating system when it is f irst used. -
Page 19: Start Screen
Windows 8 comes with two main user interf aces: the Start screen and the Windows desktop. To switch f rom the Start screen to the Windows desktop, do one of the f ollowing: Select the Windows desktop tile on the Start screen. Press the Windows button. -
Page 20: The Charms
The Charms T he f ive Charms provide new and f aster ways to perf orm many basic tasks, and are always available regardless of which app you are currently in. To display the Charms, do one of the f ollowing: Move the pointer to the upper-right or lower-right corner until the Charms bar is displayed. - Page 21 Share charm T he Share charm lets you send links, photos, and more to your f riends and social networks without leaving the app you are in. St art charm T he Start charm is a f ast way to go to the Start screen. Devices charm T he Devices charm allows you to connect or send f iles to any external devices, such as digital cameras, T Vs, or printers.
-
Page 22: Touch Screen Operation
BACK T O T OP Put t ing t he comput er t o sleep or shut t ing it down When you have f inished working with your computer, you can put it to sleep or shut it down. Put t ing your comput er t o sleep If you will be away f rom your computer f or a short time, put the computer to sleep. -
Page 23: Press And Hold
traditional notebook computer, using the keyboard and touchpad. Mult i-t ouch gest ures You can touch the screen with one or more f ingertips to perf orm a variety of tasks. Frequently used gestures Tasks performed Perf orms an action, such as starting an app, opening a link, or perf orming a command. - Page 24 Rot at e Turns an object. (Note: Not all items can be rotated, depending upon the app.) Place two or more f ingers on an item and then turn your hand. Slide Pans or scrolls through lists and pages. Can also move an object or be used to draw or write, depending upon app.
-
Page 25: Connecting To Wireless Lan
Swiping in f rom the lef t edge can: Bring in and open an app currently running in the background. If there is more than one currently open app, you can: Swipe in f rom the lef t to bring in an app and, without lif ting your f inger, push that app back of f the lef t edge of the screen quickly. -
Page 26: Recovery System
BACK T O T OP Recovery syst em Int roduct ion Push-button Reset is a built-in recovery tool that allows users to restore their operating system to its original state while preserving their data and important customizations, without the need to back up their data in advance. -
Page 27: Help And Support
Settings charm: (Notebook mode only) 1Select Power. 2Press and hold the Shif t key while selecting Restart. 3Select Troubleshoot f rom the Choose an option window. Follow the on-screen instructions and restart the system f or the changes to take ef f ect. For more inst ruct ions, see t he Windows Help and Support f ile on your comput er. -
Page 28: Chapter 4 Troubleshooting
Charge status Mode Charge logic Charging (when connected Tablet only Charges the tablet. to the AC adapter and an Dock only Charges the dock. electrical power source) Tablet-dock Charges the tablet f irst. When tablet's battery pack has been combination f ully charged, it will then begin to charge the dock. - Page 29 Where are t he inst allat ion discs f or Lenovo preinst alled (deskt op) sof t ware? Your computer did not come with any installation discs f or Lenovo preinstalled sof tware. If you need to reinstall any preinstalled sof tware, you can download the installation program f rom the Windows store.
- Page 30 My screen goes blank Your power management is enabled. Do one of the f ollowing to while the computer is on. resume f rom sleep mode: - Press the power button. - Press the Windows button. (Tablet mode only) Sleep problems T he critical low-battery T he battery power is getting low.
-
Page 31: Battery Problems
- T he screen resolution and color quality are correctly set. - T he monitor type is correct. Incorrect characters appear Are the operating system or programs installed correctly? If they are on the screen. installed and conf igured correctly, have the computer serviced. Sound problems No sound can be heard f rom Make sure that:... - Page 32 BACK T O T OP EU contact: Lenovo, Einsteinova 21, 851 01 Bratislava, Slovakia Trademarks T he f ollowing terms are trademarks or registered trademarks of Lenovo in the United States, other countries, or both. Lenovo IdeaTab Microsof t and Windows are trademarks of Microsof t Corporation in the United States, other countries, or both.