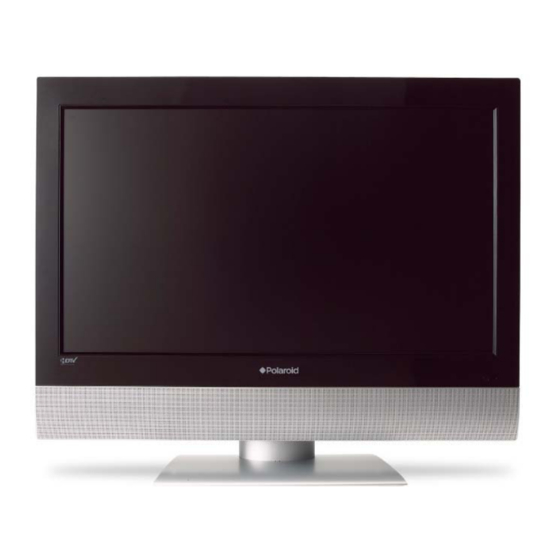
Polaroid FLM-2632 Service Manual
Lcd television with ntsc/atsc tuner
Hide thumbs
Also See for FLM-2632:
- Owner's manual (59 pages) ,
- Service manual (52 pages) ,
- User manual (75 pages)

Related Manuals for Polaroid FLM-2632


Summary of Contents for Polaroid FLM-2632
-
Page 1: Service Manual
LCD Television with NTSC/ATSC Tuner FLM-2632, FLM-2632M, FLM-2634B, FLM-3232, FLM-3232M, FLM-323B, FLM-3234B, FLM-3732, FLM-373B, FLM-3734B, FLM-3732M SERVICE MANUAL 20060418... - Page 2 20060321...
- Page 3 Precautions and Safety Notices...
- Page 4 Prior to using this service manual, please ensure that you have carefully followed all the procedures outlined in the user's manual for this product. (1) Read all of these instructions. (2) Save these instructions. (3) Follow all warnings and instructions marked on the product. (4) Unplug this product from the wall outlet before cleaning.
-
Page 5: Table Of Contents
TABLE OF CONTENTS 1 . S p e c i f i c a t i o n s · · · · · · · · · · · · · · · · · · · · · · · · · · · · · · · · · · · · · · · · · · · · · · · · · 6 2. -
Page 6: Specifications
1. Specifications FLM-2632/FLM-2632M/FLM-2634B panel specifications: Item Specifications Panel Name Display pixels 1366 (H) x 768 (V) pixels ( 1 pixel = 1 RGB cells ) Display Area 596.259mm (H) x 335.232mm (V) Pixel Pitch 0.1455mm (H) x 0.4365mm (V) Display Colors 16.7M... - Page 7 FLM-3732/FLM-373B/FLM-3732M/FLM-3734B panel specifications: Item Specifications Panel Name Display pixels 1366 (H) x 768 (V) pixels ( 1 pixel = 1 RGB cells ) Display Area 819.36mm (H) x 460.89mm (V) Pixel Pitch 0.6mm Display Colors 16.7M Pixel Arrangement R+G+B vertical stripe Brightness 500cd/m typical...
- Page 8 INPUT Source: Inputs & Connector types Signals Video Format Outputs Analog TV NTSC F Type TV (CABLE/AIR) Digital TV 8VSB F Type HDTV (CABLE/AIR) VIDEO1 Video + L/R Audio + CVBS VIDEO1 (SIDE) Earphone Out VIDEO2 Video + L/R Audio CVBS VIDEO2 (REAR) S-VIDEO...
- Page 9 Note: A. HMDI connector is a type A receptacle for video/audio mode. 1. TMDS Data 2+ 9. TMDS Data 0- 17. CEC/GND 2. TMDS Data 2 shield 10. Clock + 18. +5V Power 3. TMDS Data 2- 11. Clock shield 19.
- Page 10 HDMI Format DVI 1.0 Level/Impedance 0.5~3.0Vp-p/100 Ohm (Differential),50 Ohm (Single ending) TMDS Mode Single Link Frequency Fh = 31~80 kHz Fv = 56~76 Hz Maximum Pixel Clock 135 MHz DDC 1/2B Compliant with Revision 1.0 Connector HDMI x 1 Analog HD15 PC Signal (RGB) Format R, G, B Analog Level/Impedance...
- Page 11 RGB PC Timing V FREQ H FREQ STANDARD RESOLUTION 640x480 31.47 25.16 640x480 37.5 31.5 SVGA 800x600 37.88 SVGA 800x600 46.9 49.5 1024x768 48.36 65.0 1024x768 60.02 78.75 SXGA 1280x1024 SXGA 1280x1024 640x480 30.24 Non-VESA 720x400 31.5 Video & S-Video AV Timing V FREQ H FREQ STANDARD...
- Page 12 Power Source AC100 – 240 V, 60/50 Hz Sound Output 10W X2, 8 Ohm. Signal Connector Pin Assignment Assignment Assignment Pin Assignment Red Ground 11. Ground Green Green Gro und 12. SDA Blue Blue Ground 13. Horizontal Sy Vertical Ground Not Connected Sync.
-
Page 13: Front Panel Function Control Description
2. Front Panel Function Control Description Operation, Adjust and Programming... - Page 17 The operation of each OSD controls is described as following table: Menu Options Sub-Options Function and Description VIDEO Picture Mode Vivid →Hi-Bright Press repeatedly for different picture modes: Vivid →Hi-Bright →Cinema→Sport →Cinema →Sport→User. →User. Contrast 0…100 (75) Fine tune the contrast. Brightness 0…100 (50) Fine tune the Bright...
- Page 18 Display On/Off Set the timer alarm on/off. Auto Sleep 30,60,90,120 Min Preset the auto sleep time. The TV will auto go into standby state when the preset time is up. Set auto sleep function off. Closed Caption C1,C2,C3,C4,T1,T2, Set the closed caption mode. TT4,and Off V-chip Input Password...
-
Page 19: T R O U B L E S H O O T I N G F L O W C H A R
3. Troubleshooting Flow Chart STEP 1. No Display ( Black ) Change AC Check AC LED ON Socket Fuse Socket ? Check LCD TV Video& Push the power Audio switch ON/OFF Function Check the D-SUB 37Pin board CN3- LED Color Pin7 change ? Make sure the... - Page 20 STEP 1 Continued. CN3-PIN5 Check the connection Replace Control Active low (See cable Signal Box Assembly Panel SPEC.)? Change the LCD Display ? Panel Replace Control Check Video& Display ? Box Assembly Audio Function Replace Control Check Video& Box Assembly Audio Function...
- Page 21 STEP 2. Check Video& Audio Function No TV,VIDEO and VGA Check Picture Video& Audio Function Replace Control Box Assembly STEP 3. No Audio Check Check D-SUB Video& Check 37pin Audio Speaker Function CON4 Change Speaker Replace Control Box Assembly...
-
Page 22: Display Cell Defect Specification
4. Display Cell Defect Specification In some cases, a panel may have defective cells that cannot be controlled. These defective cells can be categorized into two types; (1) Non-lighting or dark cell defect: defect in which the cell is always off (2) Non-extinguishing or bright cell defect: defect in which the cell is always on The display cell defect specifications define the allowed limits for display cell defects and are used as the criteria in determining whether a panel is replaced. -
Page 23: D I S A S S E M B L Y P R O C E D U R
5. Disassembly Procedure Procedures: 1. Lay flat on workbench 2. Remove screws in the sequence indicated (PIC1) Procedures: 1. Remove back cover screws (PIC1 item 1, 2) 2. Remove back cover scews (PIC1 item 3) 3. Remove back cover- Slide toward bottom of TV and lift 4. - Page 24 Procedures: 1. Lift up the control box from the A/V connector side (PIC1). There are cables underneath that are connected. Be careful. 2. Tear off the Aluminum foil covering the LVDS connector. Remove the LVDS wiring from Panel module (PIC2). 3.
- Page 25 Procedures: 1. Remove screws (PIC1) in the sequence of 1, A. 2. Remove screws (PIC1) in sequence of 2, 3, 4, B, C, D 3. Proceed to next step Procedures: 1. Remove screws which fasten rear cabinet to front frame (PIC1) in the following sequence: A B C D E F then 1 2 3 4 5 2.
- Page 26 Procedures: 1. Remove screws from TV stand support frame (PIC1) 2. Proceed to next step TV stand support frame...
- Page 27 Procedures: 1. Remove screws from TV stand support frame (PIC1) 2. Remove the TV stand support frame 3. Proceed to next step...
- Page 28 Procedures: 1. Remove the EMI Aluminum Foil Sheilding Tape from the Panel (PIC1, 2) 2. EMI Aluminum Foil Sheilding Tape must be replaced during assembly. 3. Proceed to next step Remove the EMI Aluminum Foil Sheilding Tape which secures the KEYBOARD wiring to the panel.
- Page 29 Procedures: 1. Remove from the D-sub board Speaker wire, Front/Side Control Button wire, and A/V wire connectors (PIC1) 2. Remove the black tape from the Speaker wire and Ceramic ring (PIC2) 3. Replace black tape during assembly. 4. Proceed to next step Front/Side Control Button wire...
- Page 30 Procedures: 1. Take off the sponge from PANEL and remove the A/V wire under the frame (PIC1) 2. Save sponge and place in position during assembly. 3. Remove the A/V subassembly from the bezel (PIC2) 4. Proceed to next step Remove AV Subassembly...
- Page 31 Procedures: 1. Remove screws (PIC1) in the sequence: 1-2 2. Disconnect the PANEL cable from the D-SUB board (PIC1) 3. Proceed to next step...
-
Page 32: Exploded Diagram And Spare Parts List
Procedures: 1. Remove screws that secure the panel to the bezel (PIC1, PIC2) 2. TWO MEN REQUIRED!! Lift Panel from the bezel 3. Replace panel. 4. The front bezel can now be replaced if needed. 7. Exploded Diagram and Spare Parts List... - Page 33 6. A/V Board and Front/Side Control Button Disassembly A/V Board Removal and Replacement 1. Disassemble rear cabinet and remove A/V assembly. 2. Using a small pair of wire cutters grip the side locking tab and pivot back towards the A/V cable connector (PIC1).
- Page 34 IR Board Removal and Replacement 1. Disassemble rear cabinet. 2. Remove screws 1 and 2 and replace IR board (PIC1). PIC1 Front/Side Control Buttons Removal and Replacement 1. The control button board is attached with glue. Use alcohol to soften the glue and remove the control button board (PIC1).
- Page 35 7. Spare Part Lists by Model Number...
- Page 36 7. Spare Part Lists by Model Number (Continued)
- Page 37 8. Exploded Diagram and Spare Parts List Model Number: FLM-2632, FLM-2632M, FLM-2634B...
- Page 38 8. Exploded Diagram and Spare Parts List Model Number: FLM-3232, FLM-323B, FLM-3232M, FLM-3234B...
- Page 39 8. Exploded Diagram and Spare Parts List Model Number: FLM-3732, FLM-373B, FLM-3732M, FLM-3734B...
-
Page 40: Block Diagram
9. Block Diagram... -
Page 41: Schematic Diagram
10. Schematic Diagram IR/LED Board 0.1uF IR-OUT LED_O LED_G IR-SENSOR 10uF-0805 CON5 Hous5P-1.0h LED_O MMBT3904 MMBT3904 DIP LED-D3 Proview Electronics (Taiwan) Co., LTD. 6F, NO.1, Pau-Sheng Rd., Yung-Ho City, LED_G Taipei County, Taiwan R.O.C. Tel: 886-2-2231-6789 Fax: 886-2-2232-4613 MMBT3904 Title IR SENSOR PCB Size Document Number... -
Page 42: Keypad Board
Keypad Board 0.1uF 4.7K 4.7K 4.7K 4.7K 4.7K 4.7K 4.7K POWER-ON SOERCE MENU POWER-ON CH-UP CH-DOWN VOL-UP VOL-DOWN SOURCE MENU CON9 Hous 9P-1.0 CH-UP CH-DOWN VOL-UP VOL-DOWN 5.6V 5.6V 5.6V 5.6V 5.6V 5.6V 5.6V Proview Electronics (Taiwan) Co., LTD. 6F, NO.1, Pau-Sheng Rd., Yung-Ho City, Taipei County, Taiwan R.O.C. - Page 43 AV AUX Board...
- Page 44 D-SUB 37 PIN Board...
-
Page 46: Pcb Layout Diagram
11. PCB Layout Diagram Keypad Board (Component Side Top) Keypad Board (Component Side Bottom) IR/LED Board (Component Side Top) IR/LED Board (Component Side Bottom) - Page 47 AUX AV Board (Component Side Top)
- Page 48 AUX AV Board (Component Side Bottom) D-SUB 37 Pin Board (Component Side Top)
- Page 49 D-SUB 37 Pin Board (Component Side Bottom)