Table of Contents
Advertisement
180º
CONTENTS
Unpacking Instructions ........... 2
Package Contents .................. 2
Product Registration ............... 2
Features & Benefits: Sensor ..... 2
Features & Benefits: Alarm ...... 3
Setup .................................... 5
Sensor Setup ......................... 5
Alarm Setup .......................... 6
Setup Preferences .................. 7
Intelli-Time Clock .................... 7
Questions?
(877) 221-1252 or visit www.AcuRite.com.
SAVE THIS MANUAL FOR FUTURE REFERENCE.
Projection Alarm Clock
Placement Guidelines ............. 8
Using the Alarm Clock ............ 9
USB Charging ........................ 9
Using the Projector ................10
Backlight Settings ..................10
Troubleshooting .................... 11
Care & Maintenance .............12
Specifications ........................13
FCC Information ...................13
Customer Support .................14
Warranty..............................14
Contact Customer Support at
Instruction Manual
model 13020 / 13026
Advertisement
Table of Contents

Summary of Contents for AcuRite 13020
-
Page 1: Table Of Contents
Instruction Manual Projection Alarm Clock model 13020 / 13026 180º CONTENTS Placement Guidelines ..... 8 Unpacking Instructions ... 2 Using the Alarm Clock .... 9 Package Contents ....2 USB Charging ......9 Product Registration ....2 Using the Projector ....10 Features &... -
Page 2: Unpacking Instructions
Congratulations on your new AcuRite product. To ensure the best possible product performance, please read this manual in its entirety and retain it for future reference. Unpacking Instructions Remove the protective film that is applied to the LCD screen prior to using this product. -
Page 3: Features & Benefits: Alarm
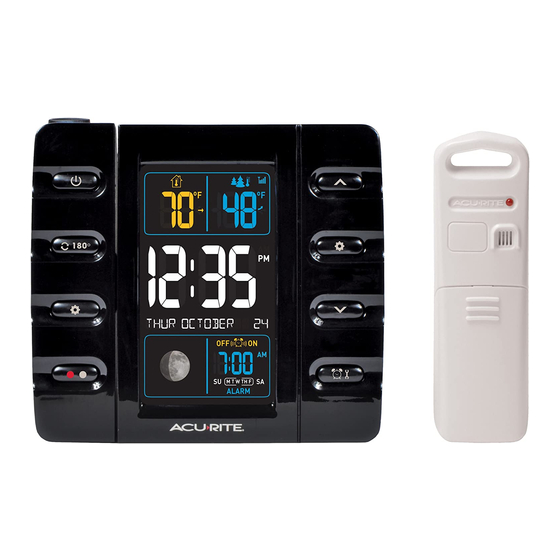
Features & Benefits 180º CHARGE DC 5 v USB DEVICE 11 12 FRONT OF ALARM ˚ ˚ F Switch 6. Projector Power On/Off Select degrees Celsius or degrees ˚ Fahrenheit temperature units. Flip Projection 180 for versatile viewing angles. 16. Zone Button Set time zone preference. - Page 4 Features & Benefits 1. Current Indoor Temperature 4. Intelli-Time Date ® Arrow icon indicates direction Pre-programmed to the correct date. temperature is trending. 5. Moon Phase 2. Current Outdoor Temperature 6. Alarm On/Off Arrow icon indicates direction 7. Alarm Set Time temperature is trending.
-
Page 5: Setup
A-B-C switch setting inside the battery compartment for Install or Replace Batteries display unit setup. AcuRite recommends high quality 2. Insert 2 x AA batteries into alkaline or lithium batteries for the the battery compartment, as best product performance. Heavy shown. -
Page 6: Alarm Setup
Alarm Clock Setup Set the A-B-C Switch Install or Replace Backup Batteries Locate the A-B-C switch inside the battery compartment. Set 1. Remove the battery the A-B-C switch to A, B or C. compartment cover. You must select the same letter 2. -
Page 7: Setup Preferences
Intelli-Time Clock ® Intelli-Time clock and calendar are pre-programmed to the correct time and date, and update automatically for Daylight Saving Time. All you need to do is select your time zone using the “ZONE” button. Set the Time, Date & Language Press and hold the “... -
Page 8: Placement Guidelines
Placement for Maximum Accuracy AcuRite sensors are sensitive to surrounding environmental conditions. Proper placement of both the display unit and outdoor sensor are critical to the accuracy and performance of this product. Alarm Clock Placement Place alarm clock in a dry area free of dirt and dust. To help ensure an accurate indoor temperature measurement, be sure to place the display away from heat sources or vents. -
Page 9: Using The Alarm Clock
OPERATION Using the Alarm Clock Set Alarm Time Press and release the “ ” button to enter ALARM SET MODE. To adjust the currently selected (flashing) item, press and release the “ ” or “ “ buttons (press and HOLD to fast adjust). To save your adjustments, press and release the “... -
Page 10: Using The Projector
Using The Projector The projector can be rotated to project the time, indoor temperature, or outdoor temperature on a wall or on the ceiling. Press the projector power button “ ” to turn the projector ON/OFF. Press the “ ” button to flip the projection image 180º for use on a ceiling or wall. -
Page 11: Troubleshooting
5. Let the units sit within a couple feet of each other for about 20 minutes to gain a strong connection. If your AcuRite product does not operate properly after trying the troubleshooting steps, visit www.AcuRite.com or call (877) 221-1252 for assistance. -
Page 12: Care & Maintenance
Care & Maintenance Display Unit Care Clean with a soft, damp cloth. Do not use caustic cleaners or abrasives. Keep away from dust, dirt and moisture. Clean ventilation ports regularly with a gentle puff of air. Outdoor Sensor Care Clean with a soft damp cloth. Do not use caustic cleaners or abrasives. Replace Intelli-Time Clock Battery Intelli-Time technology is powered by a pre-installed... -
Page 13: Specifications
Specifications Outdoor: -40ºF to 158ºF; -40ºC to 70ºC TEMPERATURE RANGE Indoor: 32ºF to 99ºF; 0ºC to 37ºC 330 ft / 100 m WIRELESS RANGE depending on home construction materials 433 MHz OPERATING FREQUENCY Display: 5v power adapter POWER 3 x AA alkaline batteries (optional) Sensor: 2 x AA alkaline or lithium batteries Outdoor data: 16 second updates... -
Page 14: Customer Support
Customer Support AcuRite customer support is committed to providing you with best-in- class service. For assistance, please have the model number of this product available and contact us in any of the following ways: (877) 221-1252 info@chaney-inst.com AcuRite 24/7 support at www. - Page 16 Plan your day with confidence ™ www.AcuRite.com ©Chaney Instrument Co. All rights reserved. AcuRite is a registered trademark of the Chaney Instrument Co., Lake Geneva, WI 53147. All other trademarks and copy- rights are the property of their respective owners. AcuRite uses patented technology.


