Table of Contents
Advertisement
Advertisement
Table of Contents

Related Manuals for Blanco BOSE610PX


Summary of Contents for Blanco BOSE610PX
- Page 1 Instruction Manual for Pyrolytic Oven BOSE610PX...
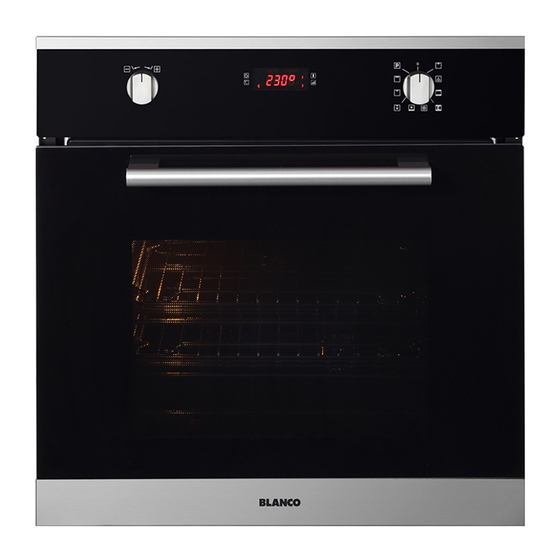
- Page 2 You will find that the clean lines and modern look of your Blanco oven blends in perfectly with your kitchen décor. It is easy to use and performs to a high standard.
-
Page 3: Table Of Contents
Table of Contents Safety Instructions Warning Maintenance and cleaning Installation of the Oven Electrical Installation Oven Racks Accessories Cooking functions Electronic control Door Locking System Cleaning and Maintenance Oven door removal Replacement of the oven light Guidance Temperature and Time Temperature for Cooking Cooking Recipes... -
Page 4: Safety Instructions
Safety Instructions Important - When you receive the appliance, unpack it or have it unpacked immediately. - Give it an overall inspection. Make note of any concerns or reservations on the delivery slip and make sure to keep a copy of this form. Keep this user guide with your appliance. - If the appliance is ever sold or transferred to another person, ensure that the new owner receives the user guide. -
Page 5: Maintenance And Cleaning
- Do not place heavy weights on the open oven door, and make sure that children are able neither to climb nor sit on it. - Do not use your oven as a larder or to store any items after use. - After using your oven, make sure that all the controls are in their stop position. -
Page 6: Installation Of The Oven
Installation of your oven To install the oven into the kitchen a cutout should be made in accordance with the dimensions shown below. Please allow for 3/ 4mm of a difference in the dimensions provided below. Please measure the original product to ensure that the cut out details are correct. The apparatus is to be fastened to the top by means of the two screws provided in the kit through the holes made on the oven uprights. -
Page 8: Electrical Installation
Electrical Installation BOSE610PX is 15 Amp with cable supplied. There is no plug supplied. It requires hard wiring by a qualified electrician. WARNING This apparatus must be earthed. The oven is only for domestic use. The feed voltage and the absorbed power are as indicated on the data plate attached to the left-hand side upright, which can be seen when the oven door is open. -
Page 9: Oven Racks
Oven Racks WARNING Never use aluminum foil to cover the oven racks or to line the oven. It can cause damage to the oven liner if heat is trapped under the foil. WARNING Make sure you do not force it to avoid damage to the enamel. The oven is moulded cavity with 4 levels. - Page 10 To replace an oven rack i n t h e o v e n ( s e e f i g . 5 ) : 1 Place rear of rack between rack level guides. 2 While lifting front of rack, slide rack in all the way while lowering the front. Fig.
- Page 11 To remove extendable rack from the oven (see Fig. 6): 1 Lift of rack slightly and push it until the stop releases 2 Raise back of rack until frame and stop clear rack guide. 3 Pull rack down and out. Fig.
-
Page 12: Accessories
Accessories Accessories which are provided with this oven are as follows: 2 x safety anti tip shelves 1x grill pan 1 x grill pan insert 1 x grill handle 1 x rotisserie kit and shelf... -
Page 13: Cooking Functions
Cooking Functions There are 10 different functions in this oven. A system can be selected by bringing the pointer of knob to the relating symbol. The Fig. 8 shows the controls available on the different oven models. Symbol Description Light Defrost. - Page 14 Half grill. The half grill mode uses Ideal for preparing toast, browning and grilling. The rotisserie also works on this element. intense heat radiated from the upper (top) heating element. Full grill The full grill mode uses the upper elements to radiate intense heat to ensure optimum grilling.
-
Page 15: Electronic Control
Electronic control Control panel description The oven control panel is made with one display and two knobs. Please note that the below panel drawings are not the final panel these are simply an indication of how the panel works. - Time & Temperature display - Time &... - Page 16 - Turn the selector left/right, the hours flash. - Modify the flashing hours value turning the selector left/right. - Push the Temp & Time selector to switch back and forth between hours and minutes. - Modify the flashing minutes turning left/right. - After a few seconds the whole time of day value starts flashing: wait until the new time of day is steady.
- Page 17 appear in light and defrost position). Turn the Temp & Time selector and set the desired oven temperature. The control offers a PRESET temperature per every cooking mode or a full range between MIN and MAX to be adjusted by hand. Check the value on the display after having selected the temperature. The temperature appears on the clock display for about 5 seconds when the Time &...
- Page 18 cooking time below this value. In order to set the actually desired end of cooking time in a 24 hours range: - Turn the knob left/right, the hours flash. - Modify the flashing hours value turning the knob left/right. - Push the knob to switch back and forth between hours and minutes or wait a few seconds until the minutes flash.
- Page 19 The maximum allowed clean time is 3 hours, the minimum 1 hour. The standard time is 1h: 30min, the clock display shows P1:30. At the end of the self-cleaning activity the display shows P--- steady and flashing. The writing on the display disappears when the mode selector is placed in the ZERO position.
- Page 20 Commands lock for children safety (non pyro) This is an additional safety functions available only in non pyrolityc ovens. Hold the Time & Temp knob for about 3 seconds to lock the control panel commands and prevent children from turning on the oven freely. Both knobs are disabled. Buzzer volume The buzzer volume can be set turning the Time &...
- Page 21 Cooking mode table with preset, minimum, maximum temperatures (°C) and nominal power (Watt) HEATING PRESET NAME N° ELEMENTS (°C) MIN(°C) MAX(°C) ZERO LIGHT KEEP WARM 2200 BAKE 2200 ECO-BAKE 1200 LOWER BAKE DEFROST LOWER 1200 CONVECTION BAKE CONVECTION 2200 ROAST CONVECTION 2300 BAKE...
- Page 22 GRILL + 2000 TURNSPIT 3000 SUPER GRILL PYRO 2400 (THERMAL) 2400 PYRO...
-
Page 23: Door Locking System
Door Locking System Automatic door locking during pyrolytic cycle For safety reasons, the door is locked automatically as soon as self-clean mode is selected (both standard, both eco clean). The door is also unlocked automatically when the clean time has expired but only after the temperature has fallen below the safety threshold. -
Page 24: Cleaning And Maintenance
Cleaning and Maintenance Prior to taking any action for cleaning, make sure the apparatus is cut-out from the mains. It is recommended that the oven interior be frequently cleaned. In particular, it should be cleaned every time the grill is used to prevent excessive fouling of the oven interior that may generate fumes or odours during subsequent cooking. -
Page 25: Oven Door Removal
Oven Door Removal WARNING The oven is cool and power to the oven has been turned off before r e m o v i n g the door. Failure t o do so could result in electrical shock or burns. The oven door is heavy and fragile. -
Page 26: Replacement Of The Oven Light
Replacement of the oven light WARNING The oven and lights are cool and power to the oven has been turned off before replacing the light bulb(s). Failure to do so could result in electrical shock or burns. The lenses must be in place when using the oven. The lenses serve to protect the light bulb from breaking. -
Page 27: Guidance Temperature And Time Temperature For Cooking
Guidance Temperature and time schedule for cooking Traditional cooking system Hot-air cooking system Rack position FOOD Mode Cooking time Cooking time in (from the bottom) Temperature °C Temperature °C in minutes minutes Pork, calf (roast) etc. 200 ÷ 225 100 ÷ 150 175 ÷... -
Page 28: Cooking Recipes
Cooking Recipes Beef Wellington Preheat oven to 180-190°C on Fan Assist or 200ºC on Fan Forced Ingredients: 2 tablespoons extra virgin olive oil 4 pieces of beef fillet (150g each) 2 tablespoons brandy 150g mushrooms, finely chopped 2 tablespoons chopped spring onion 4 sheets puff pastry 4 tablespoons fresh breadcrumbs 50g chicken liver pate- Optional... - Page 29 Berry and Ricotta Tart Preheat oven 170-180 ‘C on Bottom Element and Fan. Ingredients: Pastry Filling 125g butter, chilled and cubed 200g fresh ricotta 1 egg lightly beaten ½ cup cream 1/3 cup icing sugar 2 eggs ½ cup group almonds 2/3 cup castor sugar 1 ½...
- Page 30 Mediterranean Pizza Preheat oven to 180’ C on Fan Forced. Method: Bake for 15-20 min Ingredients: 1 uncooked Pizza Base Marinated artichokes 2 tablespoons of pasta sauce Kalamata olives Chargrilled eggplant Sundried tomatoes Chargrilled capsicum Zucchini diced 1 cup pizza cheese Mushrooms sliced 2 tablespoons parmesan cheese Onion diced...
- Page 31 Spinach, Ricotta and Goats Cheese Muffins Pre heat oven to 170°C on fan forced. Ingredients: 30g butter 1 cup milk 70g baby spinach 1 ½ cups plain flour 1 tablespoon baking powder 1 tablespoon chopped rosemary 1 tablespoon chopped chives 1 garlic clove crushed 2 tablespoons parmesan cheese (finely grated) 150g goats cheese fetta...
- Page 32 We appreciate your feedback. Please review our products on www. blanco-australia.com...