Honeywell RTH2510 Series Operating Manual
Honeywell rth2510/rth2410 series programmable thermostat
Hide thumbs
Also See for RTH2510 Series:
- User manual ,
- Quick installation manual (60 pages) ,
- Operating manual (48 pages)

Related Manuals for Honeywell RTH2510 Series


Summary of Contents for Honeywell RTH2510 Series
- Page 1 Operating Manual RTH2510/RTH2410 Series Programmable Thermostat 69-2725ES-02 69-2725ES_A.indd 1 5/4/12 11:03 AM...
- Page 2 For assistance with this product please visit http://yourhome.honeywell.com or call Honeywell Customer Care toll-free at 1-800-468-1502 Read and save these instructions. ® U.S. Registered Trademark. Patents pending. Copyright © 2012 Honeywell International Inc. All rights reserved. 69-2725ES_A.indd 2 5/4/12 11:03 AM...
-
Page 3: Table Of Contents
RTH2510/RTH2410 Table of contents About your new thermostat Appendices Thermostat features ........2 Battery replacement ........18 Thermostat is preset, ready to go ....3 Customer assistance ........ 19 Quick reference to controls ......4 In case of difficulty ......20–21 Quick reference to display ...... -
Page 4: About Your New Thermostat
Operating Manual About your new thermostat Your new Honeywell thermostat has been designed to give you many years of reliable service and easy-to-use, push-button climate control. Features • Backlit display is easy to read • Displays ambient (measured) temperature at all times • One-touch access to setpoint temperature • Preset program settings • Temporary and permanent override of schedule • Early start ensures the right temperature at the right time • Built-in compressor protection 69-2725ES—02... -
Page 5: Thermostat Is Preset, Ready To Go
RTH2510/RTH2410 This thermostat is ready to go! Your new thermostat is pre-programmed and ready to go. All you have to do is set the time and day. Then check the settings below and change if needed: Set time and day (required for proper operation) ......See page 6 Select system setting: Preset to Off ........To change, see page 7 Select fan setting: Preset to Auto ........To change, see page 8 Program schedules: Preset to energy-saving levels... -
Page 6: Quick Reference To Controls
Operating Manual Quick reference to controls Set: Press to set time/ Screen Lit for 12 seconds when you press any button. day/schedule. Hold: Press to override programmed tempera- Temperature ture control. adjustment (see Run: Press to resume page 13-14) Hold program schedule. -
Page 7: Quick Reference To Display
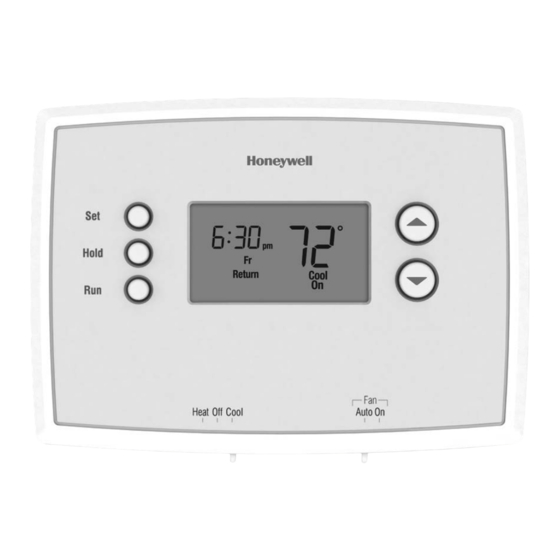
RTH2510/RTH2410 Quick reference to display screen Setpoint indicator Low battery warning Appears when the (see page 18) setpoint temperature Batt 6 : 30 is displayed. Current day/time Temperature (see page 6) The ambient (measured) temperature is normally Heat Wake Current program period displayed. -
Page 8: Set Time And Day
Operating Manual Set the time and day Press SET, then adjust time. 1. Press the SET button, then press to set the clock time. Set Time 6 : 30 2. Press the SET button, then press to select the day of the week. Hold 3. -
Page 9: Select System Setting
RTH2510/RTH2410 Select the system setting The SYSTEM switch can be set to control your heating or cooling system, depending on the season. • Cool: Cooling system control. Hold • Off: All systems are off. • Heat: Heating system control. Heat Off Cool Auto On Heat Off Cool Auto On... -
Page 10: Select Fan Setting
Operating Manual Select the fan setting Set the FAN switch to Auto or On. In “Auto” mode (the most commonly used setting), the fan runs only when the heating or cooling system is on. Hold If set to “On,” the fan runs continuously. Heat Off Cool Auto On Heat Off Cool Auto On M33612... -
Page 11: Using Program Schedules
RTH2510/RTH2410 Save money by setting program schedules It’s easy to program your system for maximum energy savings. You can program four time periods each day, with different settings for weekdays and weekends. WAKE Set to the time you awaken and the temperature you want 6:00 am during the morning, until you leave for the day. -
Page 12: Energy Saving Settings For Maximum Savings
Operating Manual About your new thermostat Energy saving settings for maximum cost savings This thermostat is pre-set to use energy saving program settings. We recommend these settings, since they can reduce your heating/cooling expenses by as much as 33%. (See next page to adjust times and temperatures of each time period.) Heat (Mon-Fri) Cool (Mon-Fri) -
Page 13: Adjust Program Schedule (Rth2510)
RTH2510/RTH2410 To adjust program schedules (RTH2510) Press SET 3 times, then adjust time. 1. Press SET until Set Schedule is displayed. 2. Press to set your Wake time for the day displayed, then press SET. 3. Press to set the temperature for this 6 : 30 time period, then press SET. -
Page 14: Adjust Program Schedule (Rth2410)
Operating Manual To adjust program schedules (RTH2410) Press SET 3 times, then adjust time. 1. Press SET until Set Schedule is displayed. 2. Press to set your weekday Wake time (Mo-Fr), then press SET. 3. Press to set the temperature for this 6 : 30 time period, then press SET. -
Page 15: Program Schedule Overrides
RTH2510/RTH2410 About your new thermostat Program schedule override (temporary) Press to temporarily adjust temperature. Press to immediately adjust the temperature. This will temporarily override Temporary the temperature setting for the current time 6 : 30 period. Hold “Temporary” will appear on the display. The new temperature will be maintained M33602 Press to cancel temporary setting and... -
Page 16: Program Schedule Overrides
Operating Manual About your new thermostat Program schedule override (permanent) Press to permanently adjust temperature. Press HOLD to permanently adjust the temperature. This will override the 6 : 30 temperature settings for all time periods. Hold Hold The “Hold” feature turns off the program schedule and allows you to adjust the thermostat manually, as needed. -
Page 17: Compressor Protection
RTH2510/RTH2410 About your new thermostat Built-in compressor protection This feature helps prevent damage to the com- pressor in your air conditioning or heat pump 6 : 30 system. Damage can occur if the compressor is restarted too soon after shutdown. This feature forces the Cool Wake compressor to wait 5 minutes before restarting. During the wait time, the display will flash the M32711 message Cool On (or Heat On if you have... -
Page 18: Early Start
Operating Manual About your new thermostat Early Start This feature allows the heating or Early Start: cooling to turn on before the program start 6 : 30 time, so the temperature is reached at the time you set. For example: Set the Wake time to 6 am, and the temperature to 70°. -
Page 19: Change Filter
RTH2510/RTH2410 Change Filter If the filter reminder is turned on during Change Filter – Press & Hold Run to Reset 6 : 30 installation, the words Change Filter will flash on the screen when the filter needs to be Hold replaced. -
Page 20: Battery Replacement
Operating Manual About your new thermostat Battery replacement Pull at bottom to Install two fresh AAA batteries when remove thermostat Lo Batt flashes on the screen. Lo Batt from wallplate. appears for 60 days before the batter- ies are depleted. Used Replace batteries once a year, or when Turn thermostat over,... -
Page 21: Customer Assistance
RTH2510/RTH2410 About your new thermostat Customer assistance Pull at bottom to For assistance with this product, please visit remove thermostat http://yourhome.honeywell.com. from wallplate. Or call Honeywell Customer Care toll-free at 1-800-468-1502. Used To save time, please note your model num- ber and date code before calling. -
Page 22: In Case Of Difficulty
Operating Manual In case of difficulty If you have difficulty with your thermostat, please try the following suggestions. Most problems can be corrected quickly and easily. Display is blank • Make sure furnace door is closed securely. • Make sure fresh AAA alkaline batteries are correctly installed (see page 18). Heating or cooling • Set system switch to Heat (see page 7). Make sure the temperature is system does not set higher than the Inside temperature. -
Page 23: In Case Of Difficulty
RTH2510/RTH2410 In case of difficulty Temperature Make sure heating and cooling temperatures are set to acceptable ranges: settings do not • Heat: 40° to 90°F (4.5° to 32°C). change • Cool: 50° to 99°F (10° to 37°C). “Cool On” or • Compressor protection feature is engaged. Wait 5 minutes for the system to “Heat On”... -
Page 24: Limited Warranty
This warranty does not cover removal or reinstallation costs. This warranty shall not apply if it is shown by Honeywell that the defect or malfunction was caused by damage which occurred while the product was in the possession of a consumer. - Page 25 69-2725ES_A.indd 23 5/4/12 11:03 AM...
- Page 26 Automation and Control Solutions Honeywell International Inc. 1985 Douglas Drive North Golden Valley, MN 55422 http://yourhome.honeywell.com ® U.S. Registered Trademark © 2012 Honeywell International Inc. 69-2725ES—02 M.S. 05-12 Printed in Mexico 69-2725ES_A.indd 24 5/4/12 11:03 AM...
- Page 27 Manual de funcionamiento Serie RTH2510/RTH2410 Termostato programable 69-2725ES-02 69-2725ES_A.indd 1 5/4/12 11:03 AM...
- Page 28 Para obtener asistencia relacionada con este producto, visite http://yourhome.honeywell.com o comuníquese con el número gratuito del servicio de atención al cliente de Honeywell, llamando 1-800-468-1502 Lea y guarde estas instrucciones. ® Marca registrada de los EE. UU. Patentes en trámite.
- Page 29 RTH2510/RTH2410 Acerca de su nuevo termostato Índice Acerca de su nuevo termostato Arranque anticipado ........16 Características del termostato....2 Cambio del filtro ........17 El termostato está preconfigurado Apéndices y listo para funcionar ........3 Reemplazo de la batería ......18 Rápida referencia de los controles .....
-
Page 30: Acerca De Su Nuevo Termostato
Manual de funcionamiento Acerca de su nuevo termostato Su nuevo termostato Honeywell ha sido diseñado para brindarle muchos años de funcio- namiento confiable y para brindarle un control climático fácil de usar y con sólo apretar un botón. Características • Pantalla con luz de fondo de lectura fácil. -
Page 31: El Termostato Está Preconfigurado Y Listo Para Funcionar
RTH2510/RTH2410 ¡Este termostato está listo para funcionar! Su nuevo termostato está preprogramado y listo para funcionar. Todo lo que tiene que hacer es configurar el día y la hora. Luego, revise las configuraciones de abajo y cámbielas si es necesario: Configure la hora y el día (necesario para un mejor funcionamiento) ................ -
Page 32: Rápida Referencia De Los Controles
Manual de funcionamiento Acerca de su nuevo termostato Rápida referencia de los controles Pantalla Se ilumina durante 12 segundos “Set” (configuración): cuando se presiona cualquier botón. Presione este botón para configurar la hora, el día o Ajuste de la temperatura el cronograma. -
Page 33: Rápida Referencia De La Pantalla
RTH2510/RTH2410 Acerca de su nuevo termostato Rápida referencia de la pantalla Indicador de punto de ajuste Aviso de batería baja Aparece cuando se visualiza (vea la página 18) el punto de ajuste de Batt Temperatura 6 : 30 la temperatura. Indica normalmente la Hora y día actuales temperatura ambiente... -
Page 34: Configuración De La Hora Y El Día
Manual de funcionamiento Acerca de su nuevo termostato Configuración de la hora y el día 1. Presione el botón “SET”, luego presione Presione “SET”, luego ajuste la hora. para configurar la hora del reloj. Set Time 6 : 30 2. Presione el botón “SET”, luego presione Hold para seleccionar el día de la semana. -
Page 35: Seleccione La Configuración Del Sistema
RTH2510/RTH2410 Acerca de su nuevo termostato Seleccione la configuración del sistema El interruptor “SYSTEM” puede configurarse para controlar su sistema de calefacción o refrigeración, según la temporada. • “Cool” (frío): Controla el sistema de Hold refrigeración. • “Off” (apagado): Apaga todos los sistemas. • “Heat”... -
Page 36: Seleccione La Configuración Del Ventilador
Manual de funcionamiento Acerca de su nuevo termostato Seleccione la configuración del ventilador Mueva el interruptor “FAN” hasta la posición “Auto” u “On”. En el modo “Auto”, la configuración usada comúnmente, el ventilador funciona sola- Hold mente cuando la calefacción o el sistema de refrigeración están encendidos. -
Page 37: Utilización De Los Cronogramas Del Programa
RTH2510/RTH2410 Acerca de su nuevo termostato Ahorre dinero configurando los cronogramas del programa Es fácil programar su sistema que permite un ahorro máximo de energía. Usted puede pro- gramar cuatro períodos por día, con diferentes configuraciones para los días de semana y los fines de semana. - Page 38 Manual de funcionamiento Acerca de su nuevo termostato Configuraciones de ahorro de energía para máximo ahorro de costos Este termostato viene predeterminado con configuraciones para un programa de ahorro de energía.Recomendamos estas configuraciones debido a que reducen los gastos de calefacción y refrigeración hasta en un 33%. (Vea la siguiente página para ajustar las horas y las temperaturas de cada período).
-
Page 39: Ajuste El Cronograma Del Programa (Rth2510)
RTH2510/RTH2410 Acerca de su nuevo termostato Para ajustar los cronogramas del programa (RTH2510) 1. Presione SET (configurar) hasta que Set Schedule Presione “SET” 3 veces y luego ajuste la hora. (configurar el cronograma) se muestre en la pantalla. 2. Presione para configurar la hora para despertarse para el día que se muestra y luego 6 : 30... -
Page 40: Ajuste El Cronograma Del Programa (Rth2410)
Manual de funcionamiento Para ajustar los cronogramas del programa (RTH2410) 1. Presione SET (configurar) hasta que Set Schedule Presione “SET” 3 veces y luego ajuste la hora. (configurar el cronograma) se muestre en la pantalla. 2. Presione para configurar la hora en que se despierta los días de la semana (de lunes a viernes) y luego presione SET. -
Page 41: Anulaciones Del Cronograma Del Programa
RTH2510/RTH2410 Acerca de su nuevo termostato Anulación del cronograma del programa (temporal) Presione para ajustar temporalmente la temperatura. Presione s o t para ajustar inmediatamente la temperatura. Esto anulará temporalmente la configuración Temporary 6 : 30 de la temperatura para el período actual. Hold La palabra “Temporary”... - Page 42 Manual de funcionamiento Acerca de su nuevo termostato Anulación del cronograma del programa (permanente) Presione para ajustar permanentemente la temperatura. Presione “HOLD” para ajustar permanentemente la temperatura. Esto anulará las configuraciones de la 6 : 30 Hold temperatura para todos los períodos. Hold La función “Hold”...
-
Page 43: Protección Del Compresor
RTH2510/RTH2410 Acerca de su nuevo termostato Protección del compresor incorporada Esta función ayuda a prevenir el daño del 6 : 30 compresor en su acondicionador de aire o en su sistema de bomba de calor. El compresor puede dañarse si se vuelve a iniciar inmediatamente después de ser apaga- Cool Wake... -
Page 44: Arranque Anticipado
Manual de funcionamiento Acerca de su nuevo termostato Arranque anticipado esta característica permite Arranque anticipado: que se active la calefacción o refrigeración 6 : 30 antes de la hora de inicio del programa, para que alcance la temperatura a la hora que usted configuró. -
Page 45: Cambio Del Filtro
RTH2510/RTH2410 Cambio del filtro Si el recordatorio de cambio del filtro se activa Change Filter – Press & Hold Run to Reset 6 : 30 durante la instalación, las palabras Change Filter (cambie el filtro) destellarán en la Hold pantalla cuando deba cambiar el filtro. Después de que reemplace el filtro de aire, M33632 presione y sostenga presionado el botón RUN... -
Page 46: Reemplazo De La Batería
Manual de funcionamiento Acerca de su nuevo termostato Reemplazo de la batería Instale dos pilas AAA nuevas cuando Lo Hale de la parte inferior para quitar Batt parpadee en la pantalla. El icono el termostato de la aparecerá 60 días antes de que las pilas placa para pared. -
Page 47: Asistencia Al Cliente
Acerca de su nuevo termostato Asistencia al cliente Hale de la parte Para obtener asistencia relacionada con este inferior para quitar producto, visite el termostato http://yourhome.honeywell.com. de la placa para pared. O comuníquese con el número gratuito del Used servicio de atención al cliente, llamando al 1-800-468-1502. -
Page 48: En Caso De Inconvenientes
Manual de funcionamiento Acerca de su nuevo termostato En caso de inconvenientes Si tiene dificultades con el termostato, intente seguir las sugerencias que se indican a continuación. La mayoría de los problemas pueden corregirse rápida y fácilmente. La pantalla está • Asegúrese de que la puerta del sistema de calefacción esté bien cerrada. - Page 49 RTH2510/RTH2410 Acerca de su nuevo termostato En caso de inconvenientes Las con- Asegúrese de que las temperaturas de calor y frío estén configuradas en rangos aceptables: figuraciones de la temperatura no • “Heat”: De 40 °F a 90 °F (de 4,5 °C a 32 °C). cambian • “Cool”: De 50 °F a 99 °F (de 10 °C a 37 °C). El mensaje • La función de la protección del compresor está funcionando. Espere 5 “Cool On” o “Heat minutos para que el sistema se vuelva a iniciar de forma segura, sin dañar el On”...
-
Page 50: Garantía Limitada
Esta garantía no cubre los costos de extracción o reinstalación. Esta garantía no se aplicará si Honeywell demuestra que el defecto o mal funcionamiento estaba causado por daños ocurridos mientras el producto estaba en posesión de un consumidor. - Page 51 69-2725ES_A.indd 23 5/4/12 11:03 AM...
- Page 52 Automatización y control desenlace Honeywell International Inc. 1985 Douglas Drive North Golden Valley, MN 55422 http://yourhome.honeywell.com ® Marca Registrada en los EE. UU. © 2012 Honeywell International Inc. 69-2725ES—02 M.S. 05-12 Impreso en México 69-2725ES_A.indd 24 5/4/12 11:03 AM...