Table of Contents
Advertisement
Available languages
Available languages
Advertisement
Chapters
Table of Contents

Related Manuals for Studiologic Numa Organ


Summary of Contents for Studiologic Numa Organ
- Page 1 Operation Manual Bedienungsanleitung Manuale di Istruzione Version 1.2...
- Page 3 ENGLISH Operation Manual NUMA Organ by Studiologic®...
-
Page 4: Important Safety Instructions
Mains Before connecting the unit to the main power supply, please check if the power supply is suitable for the NUMA Organ. The unit can be powered with 100 – 240VAC. The unit is secured by a 250V 500mA F type fuse. -
Page 5: Table Of Contents
Fatar dynamic TOUCH Preset recall / store External Rotary Speaker Cabinet System Update MIDI MIDI connection Keyboard extension Control the NUMA Organ via MIDI Use the NUMA Organ as MIDI masterkeyboard Record of adjustments Troubleshooting Declarations CE / RoHS WEEE Copyright Appendix... -
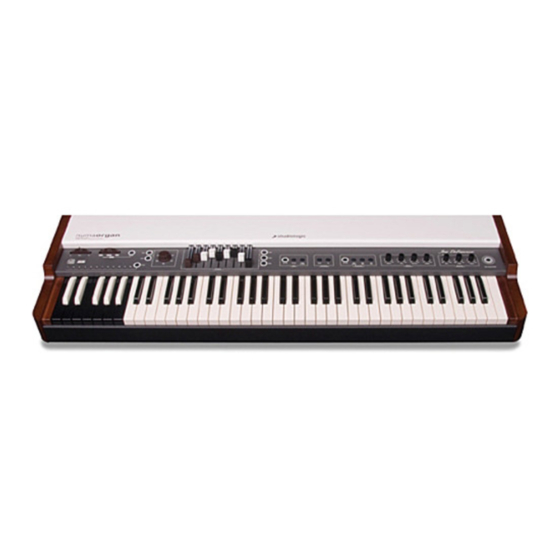
Page 6: Your New Numa Organ
Get inspired by the new NUMA Organ! Its Physical Modelling synthesis is the most authentic revival of the sound of an electromechanical tone wheel organ. But the NUMA Organ is much more. We re- commend that you read the entire manual carefully to take full advantage of all the functions of your new NUMA Organ. -
Page 7: What's Behind Numa Organ
With Leakage you can control from your NUMA Organ what we might call the parameter “cross-talk of physically close together tone wheels“. -
Page 8: Connection / Back View
You can plug in external audio devices, such as mp3-players for playback or MIDI sound modules, at the audio input. The Level knob near the jack on the back of the NUMA Organ is for adjusting the input level. USB 1 For MIDI data transmission via USB, connect the NUMA Organ to your computer with a USB cable. -
Page 9: Control Panel
How functions are shown in this (eg Leakage). manual In classic organs, the keyboard is called a manual. We will use that term for the NUMA Organ too. The NUMA Organ can be played with three manuals: Upper manual (Upper) Lower manual (Lower) -
Page 10: Operation / Drawbars
• Upper • Lower • Pedal You use the drawbars to set the timbre of the NUMA Organ. A sound can comprise up to nine sine frequencies. Each drawbar represents a harmonic of the harmonic scale related to the 8‘ stop of a pipe organ or respectively the drawbar 3, which is also called “native pitch“. -
Page 11: Aside: How The Manual And Drawbars Are Related
To do this you may connect another MIDI keyboard and manuals / keyboards a MIDI pedal board to the NUMA Organ (refer to page 17), or split the manual of the NUMA Organ into two zones (refer to Split on page 13). -
Page 12: Operation
Note: You can attach a second keyboard and an additional bass pedal board to the NUMA Organ, or use the Split function, to play two manuals at the same time with the NUMA Organ keyboard. Please refer to pages 33 and 37 respectively. -
Page 13: Split
F major). To transpose in steps of a semi-tone, press Transpose+/-. If any transposition is accessed either Transpose+ or Transpose- will light The Transposition setting will be kept until NUMA Organ‘s power is switched off. Tune You can tune your NUMA Organ to other instruments. Values from -99 to +99 cents (hundredths of a semi-tone) are available. -
Page 14: Percussion
Luckily you can decide yourself how old your NUMA Organ should sound. Leakage You can also add nostalgic “dirt“ to the sound of the NUMA Organ by using Leakage. This parameter simulates the “cross-talk between proximate tone wheels“. -
Page 15: Fatar Dynamic Touch
By pressing Fatar dynamic TOUCH a third time, the button will turn off. You play the internal sound of the NUMA Organ with the key- board and no MIDI data are sent via MIDI or USB (Local on / MIDI off ). -
Page 16: External Rotary Speaker Cabinet
Rotary wheel and the Sustain pedal. This is identical to the internal Rotary Speaker simulation (page 10). Connect the 11-pin socket on the back of the NUMA Organ with the Rotary Speaker cabinet by using a suitable cable. You can then... -
Page 17: Midi Connection
Incoming data arriving at the MIDI In are duplicated at the MIDI Thru socket. The NUMA Organ sends MIDI data on the MIDI Out and at the same time via the USB port. MIDI data are received via MIDI In. -
Page 18: Control The Numa Organ Via Midi
0 - 127 Please note: All MIDI data sent over MIDI channel 1 to the NUMA Organ affect general parameters or settings for the Upper manual. All data sent via MIDI channel 2 control the Lower manual. With MIDI channel 3 you can control all parameters related to the bass pedal board. -
Page 19: Use The Numa Organ As Midi Masterkeyboard
NUMA Organ the Sustain pedal always controls the Rotary speed! The NUMA Organ sends on MIDI channels 1 to 3 all parameters and Record of adjustments adjustments you make. That way you can, for example,record the dynamic change of the Drawbars in a MIDI sequencer. -
Page 20: Troubleshooting
Troubleshooting Troubleshooting Problem Possible cause Solution NUMA Organ does not No power is supplied. Please make sure that turn on. Defective power power is available and cable. Fuse is blown switched on. Check inside the NUMA the power cable and Organ. -
Page 21: Declarations
Please help to keep our environment clean. To ensure maximum quality all Studiologic by Fatar devices are always engi- State of the art neered to be state-of-the-art products, therefore updates, modifications and improvements are made without prior notice. - Page 23 DEUTSCH Bedienungsanleitung NUMA Organ by Studiologic®...
-
Page 24: Wichtige Sicherheitshinweise
Verwenden Sie keine scharfen Reinigungsmittel. Am besten eignet sich ein Mikrofasertuch, das Sie bei Bedarf leicht anfeuchten. Hinweis zur Verpackung Bitte bewahren Sie die Verpackung des Gerätes auf. Damit ist Ihr Gerät beim Transport, z.B. im Service-Fall, geschützt. NUMA Organ by Studiologic®... - Page 25 Inhaltsverzeichnis Wichtige Sicherheitshinweise Ihre neue NUMA Organ Was hinter der NUMA Organ steckt Die Funktionsweise einer Tone Wheel Orgel Die Klangerzeugung der NUMA Organ Anschlüsse / Rückseite Bedienelemente Lautstärke einstellen Hinweise zur Anleitung Bedienung / Drawbars Drawbars (Zugriegel) Exkurs: Das Zusammenspiel von Tasten und Drawbars...
-
Page 26: Ihre Neue Numa Organ
Ihre neue NUMA Organ Herzlichen Glückwunsch zu Ihrer neuen NUMA Organ! Damit haben Sie sich für ein erstklassiges Instrument des renommierten Herstellers Studiologic by Fatar entschieden. Die NUMA Organ wird Sie begeistern! Mit ihrer Physical Modeling Synthese lässt sie ihr elektro- mechanisches Vorbild aus den 1950er naturgetreu auferstehen. -
Page 27: Was Hinter Der Numa Organ Steckt
Was hinter der NUMA Organ steckt Bei der Tone-Wheel-Orgel, die der NUMA Organ als Vorbild diente, Die Funktionsweise einer Tone-Wheel-Orgel rotieren 91 Stahlräder mit wellenförmigen Nocken - die Tone- Wheels - vor Tonabnehmern, die aus einem Permanentmagneten und einer Spule bestehen. -
Page 28: Anschlüsse / Rückseite
Stromnetz an. Das Gerät schalten Sie über den daneben befindlichen Kippschalter ein und aus. Hold / Expression Schließen Sie das optionale Studiologic FP-50 oder VP 25 Volume- / Expression- Pedal an den Pedaleingang mit der Bezeichnung Expression an. -
Page 29: Bedienelemente
Alle Bedienelemente werden in dieser Bedienungsanleitung fett Hinweise zur Anleitung kursiv hervorgehoben (z.B. Leakage). Im Orgelbau wird die Tastatur als Manual bezeichnet. Diesen Begriff verwenden wir analog dazu auch für die NUMA Organ. Die NUMA Organ kann dreimanualig betrieben werden: Obermanual (Upper) Untermanual (Lower) Bass-Pedal (Pedal) Weiterführende Tipps und Anmerkungen sind mit dem Studiologic-Logo... -
Page 30: Bedienung / Drawbars
Drawbars Die Zugriegel (engl. Drawbars) sind das prägnanteste Erscheinungs- merkmal einer Tone-Wheel-Orgel. Deswegen widmen wir uns ihnen gleich zu Anfang. Im Text werden die Zugriegel der NUMA Organ mit besonders her- vorgehobenen Ziffern dargestellt: • Upper (Obermanual) • Lower (Untermanual) •... -
Page 31: Exkurs: Das Zusammenspiel Von Tasten Und Drawbars
Sie entweder über MIDI zusätzlich ein zweites Keyboard bzw. ein Bass-Pedal an (siehe Seite 37), oder teilen die Tastatur der NUMA Organ in zwei Bereiche auf (siehe Split auf Seite 33). Drücken Sie Upper, Lower oder Pedal, um die Zuordnung der Zugriegel zu selektieren. -
Page 32: Bedienung
Anmerkung: Bei der NUMA Organ können Sie die Tastatur in zwei Bereiche teilen oder ein zweites Manual bzw. Bass-Pedal anschließen. Upper steht dabei für das Manual der NUMA Organ, oder im Split-Modus für den oberen Tastatur-Bereich, Lower für ein zweites Manual bzw. den unteren Tastatur-Bereich im Split-Modus (siehe Seiten 33 und 37). -
Page 33: Split
Drücken Sie Split, um in den Split-Modus zu gelangen. Die Split- Split Taste leuchtet. Das Manual der NUMA Organ ist nun in zwei Zonen Beim Split werden zwei Klänge in geteilt. Drücken Sie den Upper in der Drawbar-Sektion, um die unterschiedlichen Tastaturbereichen (Zonen) gespielt. -
Page 34: Percussion
Mit dem Drive Regler steuern Sie die intensität des simulierten Röh- renverstärkers. Drive wirkt sich unmittelbar auf die Lautstärke der NUMA Organ aus. Je höher Sie den Drive regeln, um so mehr har- monische Verzerrungen erhalten Sie. Dieser typische Röhrensound kann bis zu einem ekstatischen „schreienden“... -
Page 35: Eq / Volume
Die Lautstärke aller Audio- und Kopfhörer-Ausgänge stellen Sie gemeinsam über den Volume-Regler ein. Beachten Sie bitte die Hinweise auf Seite 29. Damit Sie Ihre NUMA Organ auch als Masterkeyboard mit voller Fatar dynamic TOUCH Anschlagsdynamik für andere Klangerzeuger nutzen können, drücken Sie Fatar dynamic TOUCH. -
Page 36: Externes Rotary Speaker Kabinett
über das Rotary- Wheel oder dem Sustain Pedal bedienbar, wie bei der internen Rotary Speaker Simulation (Seite 30). Schließen Sie an der Rückseite der NUMA Organ das Rotary Speaker Kabinett mit einem geeigneten Kabel an. Parallel zum 11-Pin- Ausgang stehen weiterhin die Stereo-Analog-, Direkt- und Kopf- hörer-Ausgänge der NUMA Organ zur Verfügung. -
Page 37: Midi
Ein MIDI Out wird mit dem MIDI In eines anderen Gerätes ver- bunden. Über MIDI Thru werden die am MIDI In ankommenden Daten unverändert ausgegeben. Die NUMA Organ sendet MIDI-Daten über den MIDI Out und gleich- zeitig über USB 1. Der Empfang von MIDI-Daten erfolgt über MIDI. Keyboard-Erweiterung Erweitern Sie die Tastatur Ihrer NUMA Organ mit einem zweiten Keyboard und/oder einem MIDI-Bass-Pedalboard. -
Page 38: Die Numa Organ Über Midi Ansteuern
Trebble 0 - 127 Bitte beachten Sie: Alle Daten, die Sie über MIDI Kanal 1 an die NUMA Organ senden, betreffen allgemeine Parameter, oder Einstellungen für Upper (Obermanual). Über MIDI Kanal 2 gesendete Daten steuern Lower (Untermanual). Mit MIDI Kanal 3 steuern Sie die Parameter von Pedal (Bass-Pedal). -
Page 39: Die Numa Organ Als Midi-Masterkeyboard
TOUCH den Sustain- bzw. Haltebefehl (MIDI CC 64). Für die interne Klangerzeugung steuert das Sustain-Pedal aber immer die Rotary-Geschwindigkeit (MIDI CC 68)! Wenn Fatar dynamic TOUCH aktiviert ist, sendet NUMA Organ auf Änderungen aufzeichnen den MIDI Kanälen 1 bis 3 die Änderungen die Sie vornehmen. So können Sie z.B. -
Page 40: Fehlerbehebung
Fehlerbehebung Fehlerbehebung Problem mögliche Ursache Lösung Die NUMA Organ lässt Kein Strom vorhan- Überprüfen Sie, ob sich nicht anschalten. den. Strom vorhanden ist. Defektes Netzkabel. Prüfen und tauschen Interne Sicherung ist Sie das Netzkabel bzw. durchgebrannt. lassen Sie die interne Sicherung überprüfen... -
Page 41: Rechtliches
Rechtliches Jedes Gerät von Studiologic® by Fatar wird einzeln geprüft und einer vollstän- arantie digen Funktionskontrolle unterzogen. Die Verwendung ausschließlich hochwertigster Bauteile erlaubt die Gewährung von zwei Jahren Garantie. Als Garantienachweis dient der Kaufbeleg / Quittung. Schäden, die durch unsachgemäßen Einbau oder unsachgemäße Behandlung entstanden sind, unterliegen nicht der Garantie und sind daher bei Beseitigung kostenpflich- tig. - Page 43 ITALIANO Manuale di Istruzione NUMA Organ by Studiologic®...
-
Page 44: Importanti Informazioni Di Sicurezza
Informazioni principali Prima di connettere lo strumento all‘alimentazione di rete, verificare l‘impostazione del voltaggio del NUMA Organ. Lo strumento può es- sere alimentato con un voltaggio da 100 a 240 VAC. L‘unità è protetta da un fusibile di tipo F da 250V - 500mA che può essere sostituito solo da un nuovo fusibile dello stesso tipo e con gli stessi valori. - Page 45 Memorizzazione e richiamo Preset Rotary Speaker Esterno Aggiornamento di sistema MIDI Connessioni MIDI Estendere la tastiera Controllare il NUMA Organ via MIDI Usare il NUMA Organ come masterkeyboard MIDI Registrazione delle regolazioni Risoluzione problemi Dichiarazioni CE / RoHS WEEE Copyright...
-
Page 46: Il Tuo Nuovo Numa Organ
Il tuo nuovo NUMA Organ Grazie per aver scelto NUMA Organ. Hai scelto uno strumento allo stato dell‘arte, costruito da un rinomato produttore: Studiologic by Fatar. Prendi l‘ispirazione dal nuovo Numa Organ! La sua sintesi per modelli fisici è la rivisitazione più autentica dell‘organo elettromagnetico a ruote foniche. -
Page 47: Cosa C'è Dietro Numa Organ
In un organo originale a ruote foniche, il modello di riferimento per Come funziona un organo a il NUMA Organ, 91 ruote d‘acciaio con lobi ruotano di fronte a dei ruote foniche pick-up costituiti da una barra magnetica con una bobina. -
Page 48: Connessioni / Vista Posteriore
Pagina 57 Pagine 4, 48 Connessione alimentazione Usa il cavo di alimentazione in dotazione con NUMA Organ per con- nettere lo strumento alla presa di corrente. Accendi lo strumento con il pulsante posto vicino la connessione di alimentazione. Pedali Sustain / Expression Connetti il pedale opzionale volume/espressione FP-50 o VP-25 all‘ingresso con l‘etichetta Expression. -
Page 49: Pannello Di Controllo
La regolazione del Volume ha effetto sia sulle uscite audio che sulle cuffie. AVVERTENZA: Per prevenire danni all‘udito, evita di usare NUMA ORGAN (e tutti gli altri strumenti) a volume sostenuto per lungo tempo. In questo manuale, tutti i pulsanti operativi sono indicati in Indicazione delle funzioni nel grassetto e corsivo (es Leakage). -
Page 50: Operatività / Drawbars
• Upper • Lower • Pedal Usa i drawbar per impostare il timbro del NUMA Organ. Un suono può comprendere fino a 9 onde sinusoidali. Ogni drawbar rappresenta una armonica della scala degli armonici relativa all‘8 piedi di una canna d‘organo o rispettivamente il drawbar 3, chiamato anche “native pitch“. -
Page 51: Excursus: Come Sono Relazionati Manuale E Drawbars
Per far questo puoi collegare una tastiera ed una pedaliera manuali / tastiere MIDI (cfr. pagina 57), o dividere il manuale del NUMA Organ in due zone (vedi Split a pagina 53). Usa i pulsanti Upper, Lower e Pedal per assegnare i drawbar. Il pulsante attivo sarà... -
Page 52: Operatività
Nota: Puoi collegare una seconda tastiera o una pedaliera MIDI al NUMA Organ, o usare la funzione Split per suonare due manuali contemporanea- mente con la tastiera del NUMA Organ. Fai riferimento rispettivamente alle pagine 53 e 57. NUMA Organ by Studiologic®... -
Page 53: Split
0 a +99 centesimi. Premi di nuovo Transpose+ o Transpose- per mantenere la rego- lazione ed uscire dal modo tuning. L‘impostazione del tuning è mantenuta attiva fino a che il NUMA Organ non viene spento. NUMA Organ by Studiologic®... -
Page 54: Percussion
Effects Reverb Perfino i vecchi organi a ruote foniche avevano il loro riverbero. Questo è simulato dal NUMA Organ. Usa il cursore Reverb per rego- lare l‘intensità del riverbero e aggiungi profondità alla tua musica. Drive Con il cursore Drive puoi controllare l‘intensità di un amplificatore a valvole simulato. -
Page 55: Fatar Dynamic Touch
MIDI out o USB (Local-on, MIDI-off ). Memorizzazione e richiamo Dopo aver acceso il NUMA Organ, il preset 12 è attivo di default. Preset All‘interno di questo preset puoi regolare tutti i settaggi. -
Page 56: Rotary Speaker Esterno
Rotary ed il pedale Sustain. Il funziona- mento è identico al simulatore Rotary Speaker interno (pagina 52). Connetti la spina ad 11 pin sul retro del NUMA Organ con il Rotary Speaker tramite il suo cavo. Puoi usare tutte le uscite contem- poraneamente: il Rotary Speaker esterno, le uscite analogiche con la simulazione del Rotary Speaker, le uscite dirette, così... -
Page 57: Midi
MIDI In di un‘altra. I dati che arrivano al MIDI In vengono duplicati e trasmessi dalla porta MIDI Thru. Il NUMA Organ invia i dati MIDI data al MIDI Out e contemporanea- mente alla porta USB 1. I dati MIDI vengono ricevuti al MIDI In. -
Page 58: Controllare Il Numa Organ Via Midi
0 - 127 Nota: Tutti i dati MIDI inviati al canale MIDI 1 del NUMA Organ agiscono sui parametri generali o sui settaggi del manuale Upper. I dati inviati al canale MIDI 2 controllano il manuale Lower. Con il canale MIDI 3 si controllano tutti i parametri della pedaliera. -
Page 59: Usare Il Numa Organ Come Masterkeyboard Midi
MIDI di sustain (CC 64) alle porte esterne, ma al modulo interno continuerà a controllare il Rotary Speaker. Il NUMA Organ invia ai canali MIDI 1 2 e 3 tutti i parametri e le rego- Registrazione delle regolazioni lazioni fatte. -
Page 60: Risoluzione Problemi
Risoluzione del problemi Risoluzione dei problemi Problema Possibili cause Soluzioni Il NUMA Organ non si Non c‘è alimentazio- Assicurati che ci sia accende. ne. Cavo di alimenta- corrente. Controla il zione difettoso. cavo di alimentazione Fusibile bruciato nel ed il fusibile (sostituis- NUMA Organ. -
Page 61: Dichiarazioni
(WEEE). Aiutaci a mantenere il mondo pulito. Stato dell‘arte Per garantire il massimo della qualità, i prodotti Studiologic by Fatar sono sempre progettati allo „stato dell‘arte“, per questo sono consenti- ti, senza preavviso: modifiche, migliorie variazioni. Specifiche tecniche e di aspetto possono essere diverse da quanto indicato in questo ma- nuale. -
Page 63: Appendix
Appendix Appendix NUMA Organ by Studiologic®... -
Page 64: Midi Implementation Chart
General Purpose 5 yes General Purpose 6 yes Undefined Undefined Effects 1 depth Effects 3 depth Effects 5 depth Undefined Undefined All notes off Please note: MIDI messages not listed above are not supported by the NUMA Organ. NUMA Organ by Studiologic®... -
Page 65: Specifications
Dimensions W x D x H 111 x 35 x 11,5 cm • NUMA Organ Delivery includes Lieferumfang • Power chord / Netzkabel / Cavo di alimentazione • Operation manual / Bedienungsanleitung / Manuale Dotazione operativo NUMA Organ by Studiologic®... - Page 68 Ub • 11.2010...