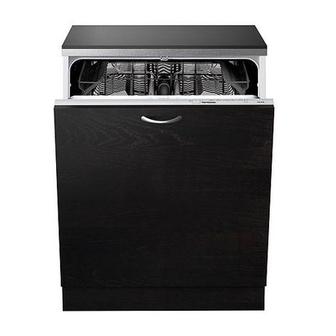
IKEA RENLIG DW60 User Manual
Dishwasher
Hide thumbs
Also See for RENLIG DW60:
- User manual (28 pages) ,
- User manual (24 pages) ,
- Setup manual (16 pages)
Table of Contents
Advertisement
Advertisement
Table of Contents

Related Manuals for IKEA RENLIG DW60


Summary of Contents for IKEA RENLIG DW60
- Page 1 RENLIG DW60...
- Page 3 ENGLISH...
-
Page 4: Table Of Contents
Product description Cleaning and maintenance Control panel What to do if ... Washing programmes Environmental concerns Daily check IKEA warranty Daily use Safety Information Before using the appliance for the first time systems, the appliance may be carefully read this quick reference guide and connected to the hot water mains up to the assembly instruction! a maximum temperature of 60°C. - Page 5 ENGLISH • The open dishwasher door can only kink-free and are not crushed. support the weight of the loaded rack • Fix the drain hose to the siphon with when pulled out. Do not rest objects on a clamp to prevent it from coming off the open door or sit or stand on it.
-
Page 6: Product Description
ENGLISH Service or your local dealer. the water drain away. Make sure there is at • Before carrying out any cleaning or least 1 kg of dissolved regeneration salt in maintenance operations, unplug the the salt reservoir, to protect the appliance appliance and turn off the water tap. -
Page 7: Control Panel
ENGLISH Control panel PROGRAM SELECTION BUTTON START/RESUME BUTTON Push “Programs“ button (repeatedly) Push this button to start the selected until the indicator of the required program: the indicator lights up and program lights up (see “washing goes off at the end of the program. programmes”). -
Page 8: Washing Programmes
ENGLISH Washing programmes Table of programs Drying Detergent phase Available Programs Loading instructions options Delay Crockery to be washed later. – Pre-Wash cold Lightly soiled crockery, with no Delay Quickwash 40°C dried-on food. Delay Normally soiled crockery. Antibacterial Full Eco 40°C Energy-saving program. -
Page 9: Daily Check
ENGLISH Daily check Adding rinse aid (not necessary when you Using a coin or similar object, turn the arrow use tablets). to the desired setting. After adjusting the rinse aid setting, shut the How to adjust the rinse aid dosage cover again. regulator Rinse aid indicator on the control panel Check the rinse aid indicator to check The indicator lamp lights up when RINSE the level into the dispenser AID NEEDS TO BE ADDED. -
Page 10: Daily Use
ENGLISH Daily use Adding detergent - Use only detergent Insert detergent: Tablet / powder / liquid specifically for dishwashers in accordance into the big chamber. with the supplier’s recommendations. Only fill the detergent dispenser prior to Open the cover B (press the dedicated starting a wash programme. button). Use only one tablet per one cycle, only placed in detergent dispenser. - Page 11 ENGLISH How to remove the upper rack (if Arrange crockery so that water does available) not collect in cavities, ensuring that the It could be useful to remove the upper rack spray arms turn freely. Only use to load bulky items in the lower rack. dishwasher-proof crockery and dishes. - Open the two retainers (D) to take off the Do not use the dishwasher for washing upper rack (when the upper rack is in place...
- Page 12 ENGLISH To change the program in progress: Open the door, press the CANCEL/Off button to cancel the running program and close the door. (Water drains for up to 1 minute then the appliance switches off). Open the door and press any button except CANCEL/Off button to switch on the appliance.
-
Page 13: Cleaning And Maintenance
ENGLISH Cleaning and maintenance Spray arms Filters Remove blockages/deposits. Check and clean if necessary. Unscrew and remove upper arm (A-B). Unscrew microfilter, remove it (E) and remove fine sieve (F). Unscrew and remove lower arm (C-D). Rinse under running water and insert again. Clean spray nozzles under running water (use toothpicks if necessary). -
Page 14: What To Do If
ENGLISH What to do if ... If a fault occurs, before contacting the After-sales Service, make the following checks to try and remedy the problem. Most faults can be remedied by taking the following courses of action, quickly restoring normal appliance operation. The appliance... Possible causes... Solutions... - The appliance must be - Check the household circuit fuse switched on. if there is no power supply. - The dishwasher door - Check if the dishwasher’s door doesn’t close is closed. - Page 15 ENGLISH After taking the above course of action, the fault message must be reset. In the majority of cases the fault is thus eliminated. RESET: ª Press the CANCEL/Off button. ª Close the door. ª Water drains automatically for up to 1 minute. ª The appliance is now ready to be restarted. Crockery and cutlery... Possible causes... Solutions... - Too little space between - Arrange crockery so that dishes ( Incorrect items do not touch each other.
- Page 16 ENGLISH Crockery and cutlery... Possible causes... Solutions... - Plastic containers dry - Synthetic materials do not dry badly. well; if wet at end of cycle, wipe dry. - Clean dishes left in - In this situation, the presence of dishwasher for a drops of water on dishes and long time after end of on the sides of the dishwasher cycle (e.g.
- Page 17 ENGLISH Crockery and cutlery... Possible causes... Solutions... - Rainbow effect. - This phenomenon is irreversible. We recommend in future: • Be careful – follow ...permanent deposits on recommended detergent glasses dosage, • For combined action tablets see detergent producer’s recommendations..tea cups darken and dirt - Not known. - This phenomenon is inevitable. Theine alters colours does not disappear after permanently.
-
Page 18: Environmental Concerns
ENGLISH Environmental concerns EC Declaration of conformity 1. Packing • This appliance has been designed, The packaging materials are 100% constructed and distributed in compliance recyclable and marked with the recycling with the safety requirements of EC symbol. Directives: 2. Disposal The appliance is manufactured using recyclable materials. -
Page 19: Ikea Warranty
If the authorized service agent requests appliance at IKEA, unless the appliance is you to deliver the product directly to them, named LAGAN in which case two (2) years please ensure that the appliance is suitably of guarantee apply. - Page 20 Area of validity • Transportation damages. If a customer The IKEA guarantee applies only to transports the product to his home or products purchased and installed in another address, IKEA is not liable for AUSTRALIA .
- Page 21 IKEA appliance in the dedicated IKEA service number placed on the rating plate kitchen furniture; of your appliance. • ask for clarification on functions of IKEA appliances. SAVE THE SALES RECEIPT! • Call our authorized service network Kindly keep all these details and partner Whirlpool on 1300 363 344 original invoice of purchase handy (Australia).
- Page 24 © Inter IKEA Systems B.V. 201 1 AA-578251-1...