Table of Contents
Advertisement
WARNING:
If the information in this
manual is not followed exactly, a fire or
explosion may result causing property damage,
personal injury or loss of life.
-- This water heater MUST NOT be installed in
any location where gasoline or flammable vapors
are likely to be present.
-- WHAT TO DO IF YOU SMELL GAS
• Do not try to light any appliance.
• Do not touch any electric switch; do not use any
phone in your building.
• Immediately call your gas supplier from a near by
phone. Follow the gas supplier's instructions.
• If you cannot reach your gas supplier, call the fire
department.
• Installation and service must be performed by a
qualified installer, service agency, or the gas
supplier.
Installation & Operation
Manual
Models: 150 - 800
This manual must only be used by a
WARNING
qualified heating installer / service
technician. Read all instructions,
including this manual and the
Armor
Manual, before installing. Perform
steps in the order given. Failure to
comply could result in severe
personal injury, death, or substantial
property damage.
Save this manual for future reference.
AW-I-O Rev K
Water
Heater
Service
Advertisement
Table of Contents

Related Manuals for Lochinvar Armor AWN150PM


Summary of Contents for Lochinvar Armor AWN150PM
- Page 1 This manual must only be used by a WARNING qualified heating installer / service technician. Read all instructions, including this manual and the Armor Water Heater Service Manual, before installing. Perform steps in the order given. Failure to comply could result in severe personal injury, death, or substantial property damage.
-
Page 2: Table Of Contents
Vent/Air Termination - Sidewall ....24-27 Armor Water Heater Control Module ....61 Determine Location . -
Page 3: Please Read Before Proceeding
Please read before proceeding Installer – Read all instructions, including When servicing the water heater – WARNING this manual and the Armor Water Heater • To avoid electric shock, disconnect electrical supply Service Manual, before installing. Perform before performing maintenance. -
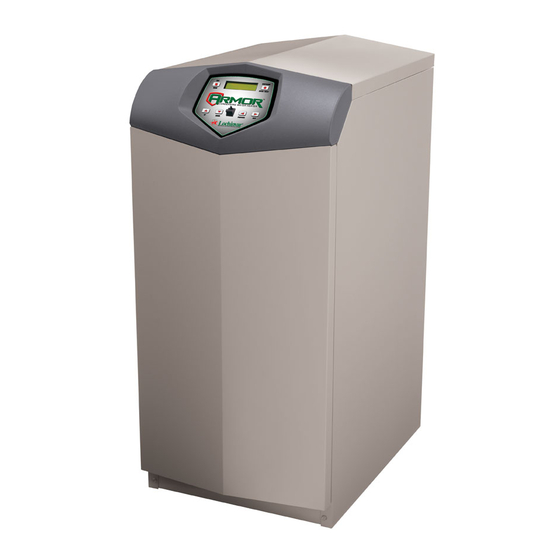
Page 4: The Armor Water Heater - How It Works
Installation & Operation Manual The Armor Water Heater - How it works... Stainless steel heat exchanger 17. Automatic air vent Allows water flow through specially designed Designed to remove trapped air from the heat exchanger coils maximum heat transfer, while providing coils. - Page 5 Installation & Operation Manual The Armor Water Heater - How it works... (continued) Models 150 - 199 Left Side (inside unit) - Models 150 - 199 Rear View - Models 150 - 199 Rear View - Model 285 Left Side (inside unit) - Model 285...
- Page 6 Installation & Operation Manual The Armor Water Heater - How it works... Models 399 - 500 Rear View - Models 399 - 500 Left Side (inside unit) - Models 399 - 500 Models 600 - 800 Left Side (inside unit) - Models 600 - 800...
-
Page 7: Ratings
Maximum allowed working pressure is located on the rating plate. NOTICE Notes: 1. Armor water heaters require special gas venting. Use only the vent materials and methods specified in the Armor Installation and Operation Manual. 2. Standard Armor water heaters are equipped to operate UNIT EQUIPPED FOR from sea level to 4,500 feet only with no adjustments. -
Page 8: Determine Water Heater Location
Clearances from combustible materials 1. Hot water pipes—at least 1" from combustible materials. 4. The Armor water heater must be installed so that gas control 2. Vent pipe – at least 1" from combustible materials. system components are protected from dripping or spraying 3. - Page 9 Installation & Operation Manual Determine water heater location (continued) Figure 1-1 Closet Installation - Minimum Required Clearances For closet installations, CPVC WARNING material MUST BE used in a closet structure elevated temperatures. Failure to follow this warning could result in fire, personal injury, or death.
-
Page 10: Provide Air Openings To Room
Do not install the water heater on carpeting WARNING even if foundation is used. Fire can result, Install air inlet piping for the Armor water heater as described in causing severe personal injury, death, or this manual. Do not terminate vent/air in locations that can substantial property damage. -
Page 11: Corrosive Contaminants And Sources
Installation & Operation Manual Determine water heater location (continued) Table 1A Corrosive Contaminants and Sources When using an existing vent system to install a new water heater: Products to avoid: Failure to follow all instructions can result WARNING in flue gas spillage and carbon monoxide Spray cans containing chloro/fluorocarbons emissions, causing severe personal injury Permanent wave solutions... -
Page 12: Removing A Water Heater From Existing Common Vent
Determine water heater location When removing a water heater from existing common vent system: Do not install the Armor water heater into g. Any improper operation of the common venting system DANGER should be corrected so the installation conforms with the a common vent with any other appliance. -
Page 13: Prepare Water Heater
For Models 150 - 399 you must install a propane orifice to operate the Armor water heater on propane gas. Verify when installing that the orifice size marking matches water heater size (Models 150 –... - Page 14 Failure to check and verify combustion could result in severe personal injury, death, or substantial property damage. Armor 399: Inspect the O-ring when the DANGER blower is disassembled. The O-ring must be in good condition and must be installed.
-
Page 15: Leveling The Water Heater
Installation & Operation Manual Prepare water heater (continued) Models 600 - 800 Leveling the water heater Set the water heater in place and check level. 1. Remove the top access cover from the unit (no tools a) Adjust legs if necessary to level the water heater, required for removal). -
Page 16: General Venting
Installation & Operation Manual General venting Direct venting options - Sidewall Vent Figure 3-1 PVC/CPVC Two-Pipe Sidewall Termination) Figure Stainless Steel Two-Pipe Sidewall - See page 25 for more details Termination - See page 25 for more details Figure 3-3 PVC/CPVC Concentric Sidewall Termination (Models 150 - 600 Only) - See page 28 for more details... - Page 17 Installation & Operation Manual General venting (continued) Direct venting options - Vertical Vent Figure 3-4 PVC/CPVC Two-Pipe Figure 3-6 PVC/CPVC Concentric Figure 3-5 Stainless Steel Two- Vertical Termination - See page 31 for more Vertical Termination (Models 150 - Pipe Vertical Termination - See details 600 Only) - See page 33 for more page 31 for more details...
-
Page 18: Install Vent And Combustion Air Piping
Vent) and the 3" Concentric Vent Kit available from IPEX WARNING (pg. 19) for vent pipe, and fittings. Failure are both approved for use on the Armor water heater. to comply could result in severe personal Both kits are listed to the ULC-S636 standard for use in injury, death, or substantial property Canada. -
Page 19: Pvc/Cpvc Air Intake/Vent Connections
Installation & Operation Manual General venting (continued) Priming and Cementing: While primer is still wet, apply an even coat of Handle fittings and pipes carefully to prevent approved cement to the fitting socket. contamination of surfaces. Apply a second coat of cement to the pipe. Apply a liberal even coat of primer to the fitting h. -
Page 20: Air Inlet Pipe Materials
Installation & Operation Manual General venting Secure all joints with a minimum of three sheet metal Figure 3-11 Near Water Heater PVC/CPVC Venting screws or pop rivets. Apply Aluminum Foil Duct Tape or Models 700 - 800 silicone sealant to all screws or rivets installed in the vent VENT pipe. -
Page 21: Stainless Steel Air Intake/Vent Connections
Installation & Operation Manual General venting (continued) Table 3B Approved Stainless Steel Terminations and Adapters ProTech Heat Fab Z Flex FasNSeal Saf-T Vent Z-Vent Model Intake Intake Flue Intermediate Flue Flue Intake Air Adapter Adapter Adapter Termination Adapter Termination Termination Termination Termination Termination... -
Page 22: Min./Max. Combustion Air & Vent Piping Lengths
Table 3D below. You may use any of the vent/air piping methods covered in this Table 3D Air Intake/Vent Piping Sizes manual. Do not attempt to install the Armor water heater using any other means. Model... -
Page 23: Optional Room Air
Installation & Operation Manual General venting (continued) Vent, air piping and termination: Table 3F Optional Room Air Kit The Armor water heater vent and air piping can be installed Model Kit Number Description through the roof or through a sidewall. Follow the procedures in this manual for the method chosen. -
Page 24: Sidewall Direct Venting
Installation & Operation Manual Sidewall direct venting Figure 4-1A Sidewall Termination of Air and Vent Vent/air termination – sidewall TO BOILER Follow instructions below when determining INTAKE AIR WARNING CONNECTION vent location to avoid possibility of severe personal injury, death, or substantial FROM BOILER property damage. - Page 25 Installation & Operation Manual Sidewall direct venting (continued) Vent/air termination – sidewall Figure 4-2B Alternate Stainless Steel Sidewall Termination Models 700 - 800 w/Field Supplied Fittings Figure 4-1C Alternate Stainless Steel Vent Termination - Typical Stainless Steel Sidewall Termination of Air and Vent Models 285 - 600 w/Field Supplied Fittings, Utilizing FasNSeal’s Hood Intake.
-
Page 26: Prepare Wall Penetrations
Installation & Operation Manual Sidewall direct venting Prepare wall penetrations Figure 4-3B Alternate Clearance to Gravity Air Inlets Use the factory supplied wall plate as a template to locate w/Field Supplied Fittings the vent and air intake holes and mounting holes. Air pipe penetration: Cut a hole for the air pipe. -
Page 27: Termination And Fittings
• 7½ inch hole (191 mm) hole for 6 inch (152 mm) Installation Code. vent pipe 3. The air inlet of a Armor water heater is part of a direct vent Insert a galvanized metal thimble in the vent pipe connection. It is not classified as a forced air intake with hole as shown in FIG. - Page 28 Installation & Operation Manual Sidewall direct venting Sidewall termination – optional concentric vent: Models 150 - 600 Prevailing winds could cause freezing Description and usage condensate and water/ice buildup where flue Lochinvar offers optional concentric combustion air and vent products impinge on building surfaces or plants. pipe termination kits (Factory Kit #CVK3003 for 3"...
-
Page 29: Sidewall Termination - Optional Concentric Vent
Installation & Operation Manual Sidewall direct venting (continued) Sidewall termination – optional concentric vent: Models 150 - 600 Figure 4-9 Concentric Vent Dimensional Drawing - Figure 4-10 Concentric Vent Dimensional Drawing - Models 150 - 199 Models 285 - 500 "A"... - Page 30 Installation & Operation Manual Sidewall direct venting Sidewall termination – optional concentric vent: Models 150 - 600 Figure 4-12 Concentric Vent Sidewall Attachment Note: CVK3003 shown for illustration purposes. Multiventing sidewall terminations DO NOT use field-supplied couplings to CAUTION extend pipes. Airflow restriction will When two (2) or more direct vent appliances are vented near occur and may cause intermittent...
-
Page 31: Vertical Direct Venting
Installation & Operation Manual Vertical direct venting Vent/air termination – vertical Follow instructions below when WARNING Rooftop vent and air inlet terminations WARNING determining vent location to avoid must terminate in the same pressure zone, possibility of severe personal injury, death unless vertical vent sidewall air is set up as or substantial property damage. -
Page 32: Prepare Roof Penetrations
CSA B149.1 Installation Code. hole. 3. The air inlet of an Armor water heater is part of a direct vent 3. Space the air and vent holes to provide the minimum connection. It is not classified as a forced air intake with spacing shown in FIG. -
Page 33: Vertical Termination - Optional Concentric Vent
Installation & Operation Manual Vertical direct venting (continued) Vertical termination – optional concentric vent: Models 150 - 600 Description and usage Lochinvar offers an optional concentric combustion air and 2. Cut one (1) hole (5 inch diameter for #CVK3003 vent pipe termination kit. Both combustion air and vent installations or 7 inch diameter for #CVK3007 installations) into the structure to install the termination kit. - Page 34 Installation & Operation Manual Vertical direct venting Vertical termination – optional concentric vent: Models 150 - 600 Do not operate the appliance with the rain DO NOT use field-supplied couplings to CAUTION WARNING removed recirculation extend pipes. Airflow restriction will combustion products may occur.
-
Page 35: System Piping
Installation & Operation Manual System piping Scalding Water with a hardness of less than 5 grains per gallon will usually This water heater can deliver scalding temperature water at any have a pH which can be aggressive and corrosive causing non- faucet in the system. -
Page 36: System Water Piping Methods
SENSITIVITY SCREW MODEL PADDLE SIZE ADJUSTMENT See the *piping illustrations included in this section, FIG.’s 6-4 thru 6-8 for suggested guidelines in piping the Armor Note: Paddles are included with the flow switch. 9 turns water heater. 6 turns *Please note that these illustrations are meant NOTICE 8¾... - Page 37 Installation & Operation Manual System piping (continued) Figure 6-4 Single Heater - Single Tank (2 Temperature) 180° HOT WATER FLOW CHECK VALVE (TYPICAL) SUPPLY HIGH TEMPERATURE THERMOMETER 140° HOT (TYPICAL) BUILDING RETURN STORAGE WATER TANK SUPPLY BALL VALVE MIXING (TYPICAL) TEMPERATURE VALVE &...
- Page 38 Installation & Operation Manual System piping Figure 6-5 Single Heater - Single Tank FLOW CHECK COLD WATER VALVE (TYPICAL) SUPPLY EXPANSION TANK MIXING VALVE THERMOMETER BUILDING RETURN BALL VALVE (TYPICAL) HOT WATER WATER HEATER SUPPLY CIRCULATOR UNION (TYPICAL) TEMPERATURE & PRESSURE RELIEF VALVE (TYPICAL) WATER...
- Page 39 Installation & Operation Manual System piping (continued) Figure 6-6 Single Heater - Double Tank COLD WATER FLOW CHECK SUPPLY VALVE (TYPICAL) EXPANSION TANK MIXING VALVE THERMOMETER WATER HEATER CIRCULATOR FLOW SWITCH HOT WATER SUPPLY UNION (TYPICAL) TEMPERATURE & PRESSURE RELIEF VALVE (TYPICAL) WATER HEATER...
- Page 40 Installation & Operation Manual System piping Figure 6-7 Double Heater - Single Tank Number of Units Model Required Pipe Sizes in NPT 1 1/2" 2" 2" 2" 2 1/2" 3" 3" 1 1/2" 2" 2 1/2" 2 1/2" 3" 3" 4"...
- Page 41 Installation & Operation Manual System piping (continued) Figure 6-8 Double Heater - Double Tank Number of Units Model Required Pipe Sizes in NPT 1 1/2" 2" 2" 2" 2 1/2" 3" 3" 1 1/2" 2" 2 1/2" 2 1/2" 3" 3"...
-
Page 42: Gas Connections
Installation & Operation Manual Gas connections Connecting gas supply piping Figure 7-3 Gas Supply Piping - Model 500 1. Remove the top access panel and refer to FIG.’s 7-1 thru 7-4 to pipe gas to the water heater. Install ground joint union for servicing, when required. -
Page 43: Natural Gas
MUST BE made. Failure to Propane gas: comply could result in severe personal injury, death, or substantial property WARNING Armor water heaters are typically shipped damage. ready to fire on natural gas. Check water heater rating plate to determine which fuel... -
Page 44: Check Inlet Gas Supply
5130 4720 Armor water heaters are typically shipped ready to fire on natural gas. Check the water heater rating plate to WARNING determine which fuel the water heater is set for. If set to natural gas, it may be converted to LP by installing an orifice or by making a gas valve adjustment (see pages 13 thru 15). -
Page 45: Gas Pressure
(dynamic) mode. If an in-line regulator is used, it must be a PRESSURE TAP minimum of 10 feet from the Armor water heater. It is very important that the gas line is properly purged by the gas supplier or utility company. Failure to properly purge the lines or improper line sizing, will result in ignition failure. -
Page 46: Field Wiring
Electrical Code ANSI/NFPA 70 – latest FIG. 8-1). edition. 3. The DHW (water heater) pump is shipped loose on all Armor models. Wire the water heater pump as shown in Label all wires prior to disconnection CAUTION FIG. 8-1. when servicing controls. Wiring errors can cause improper and dangerous 4. -
Page 47: Low Voltage Connections
Installation & Operation Manual Field wiring (continued) Low voltage connections High gas pressure switch 1. Route all low voltage wires through the knockouts in the 1. If a switch is provided to detect excessive gas pressure, rear of the water heater, as shown in FIG. 8-2. remove the jumper wire from the terminals on the connection board, and then connect them to its normally 2. -
Page 48: Runtime Contacts
Installation & Operation Manual Field wiring Runtime contacts The SMART SYSTEM control closes a set of dry contacts whenever the burner is running. This is typically used by Building Management Systems to verify that the water heater is responding to a call for heat. Alarm contacts The SMART SYSTEM control closes another set of contacts whenever the water heater is locked out or the power is... - Page 49 Installation & Operation Manual Field wiring (continued) Figure 8-3 Low Voltage Field Wiring Connections...
-
Page 50: Condensate Disposal
Condensate from the Armor water heater will be slightly required and tubing size may need to acidic (typically with a pH from 3 to 5). Install a increase to 1 inch. -
Page 51: Startup
Installation & Operation Manual Start-up Chlorine concentration less than 200 ppm Propane water heaters only – Your propane WARNING supplier mixes an odorant with the propane 1. Do not fill the water heater or operate with water to make its presence detectable. In some containing chlorine in excess of 200 ppm. - Page 52 Check vent piping and air piping heater 1. Check for gastight seal at every connection, seam of air Read the Armor Water Heater Service Manual to piping, and vent piping. familiarize yourself with SMART SYSTEM control Venting system must be sealed gastight to WARNING module operation.
- Page 53 Installation & Operation Manual Start-up (continued) Figure 10-2 Operating Instructions - Models 150 - 285...
- Page 54 Installation & Operation Manual Start-up Figure 10-3 Operating Instructions - Models 399 - 800...
- Page 55 MENU key for 6. Insert the probe from a combustion analyzer into the hole at least 5 seconds (see the Armor Service Manual for a detailed left by the removal of the flue temperature sensor.
- Page 56 Use the following procedure to set the clock: Input the Installer code as described in the Armor Water Heater Service Manual. Once the control parameters have been Press and hold the MENU key for at least 5 seconds.
-
Page 57: Operating Information
25°F (Models 150 - 500) or 30°F (Models 600 - 800) and the minimum off time has expired. Modulation The Armor water heater is capable of modulating its firing rate Freeze protection from a minimum of 20% to a maximum of 100%. The firing DO NOT install the water heater in a room likely to freeze. -
Page 58: Cascade
- differential, then the control will initiate a call for service reminder notification can be reset by the installer. heat on the Cascade (see the Armor Water Heater Service Manual for an explanation of the differential). The Leader will Error logging energize the lead water heater on the Cascade. - Page 59 Most parameters are available only to the installer, accessible sequence will be changed every hour. After that the sequence only by entering the installer access code, see the Armor Water will be changed once every 24 hours. The switching on/off Heater Service Manual.
-
Page 60: Sequence Of Operation
Installation & Operation Manual Operating information Sequence of operation OPERATION DISPLAY WHR: Standby 1. Upon a call for heat, the control turns on the water heater pump. OUT: 123.8F(129) 2. The control connects 120 VAC to the blower. The blower does not run at this time. -
Page 61: Armor Water Heater Control Module
Installation & Operation Manual Operating information (continued) Armor water heater control module Use the control panel (FIG. 11-1) to set temperatures, operating conditions, and monitor water heater operation. Figure 11-1 Control Panel... -
Page 62: Status Display Screens
Installation & Operation Manual Operating information Status display screens Status Display Screens By using the Previous/Next ( , ) arrow keys on the SMART SYSTEM display panel, you can navigate through the six (6) display screens. Each screen will contain two (2) viewable items. The following is a description of the individual items and what they can display: Screen Display shows:... - Page 63 Installation & Operation Manual Operating information (continued) Status Display Screens (cont’d) By using the Previous/Next ( , ) arrow keys on the SMART SYSTEM display panel, you can navigate through the six (6) display screens. Each screen will contain two (2) viewable items. The following is a description of the individual items and what they can display: Screen Display shows:...
- Page 64 Installation & Operation Manual Operating information Status Display Screens (cont’d) Operation of the cascade The water heater designated as the Leader will have two additional display screens that can be viewed. These screens will provide information regarding the operation of the Cascade. Each screen will contain two viewable items. The following is a description of the individual items and what they can display: Screen Display shows:...
-
Page 65: Maintenance
Installation & Operation Manual Maintenance Maintenance and annual startup Table 12A Service and Maintenance Schedules Service technician Owner maintenance (see the following pages for instructions) General: • Address reported problems • Inspect interior; clean and vacuum if necessary; Daily • Check water heater area •... -
Page 66: Address Reported Problems
CONDENSATE FROM TO FLOOR HEAT EXCHANGER DRAIN this manual and the Armor Water Heater Service Manual. The condensate trap must be filled with WARNING water during all times of water heater... -
Page 67: Check Water System
Armor Service Manual. Adjust settings if necessary. See – not by the owner. Failure to re-inspect Section 1 of the Armor Service Manual for adjustment the water heater relief valve as directed procedures. could result in unsafe pressure buildup, 2. -
Page 68: Cleaning Heat Exchanger
Review with owner Oiled bearing circulators 1. Emphasize the need to perform the maintenance schedule 1. The circulator shipped with the Armor water heater is water- specified in this manual. lubricated. No oiling is required. 2. Remind the owner of the need to call a licensed contractor should the water heater or system exhibit any 2. -
Page 69: Diagrams
Installation & Operation Manual Diagrams Figure 13-1 Ladder Diagram 120VAC 120VAC NEUTRAL NEUTRAL JUNCTION BOX GROUND TERMINAL STRIP TERMINAL STRIP 120V SUPPLY "L" 120V SUPPLY "N" PUMP "L" PUMP "N" DHW PUMP RELAY PUMP TERMINAL TERMINAL STRIP STRIP INTEGRATED CONTROL ON / OFF SWITCH X1-6... -
Page 70: Wiring Diagram
Installation & Operation Manual Diagrams Figure 13-2 Wiring Diagram LOW VOLTAGE DISPLAY 120 VAC HIGH VOLTAGE BOX DEPICTS INTEGRATED CONTROL OPTIONAL ITEMS JUNCTION INTERFACE CONNECTION BOARD PUMP AUX. X1-5 DEVICE PILOT SUPPLY X1-4 CN4-8 X6-8 PUMP AUX. RELAY DEVICE X1-3 PROVING CN4-2 X6-10... - Page 71 Notes...
-
Page 72: Revision Notes
Revision Notes: Revision B (AW-I&O-Rev B) reflects the addition of the Dungs information to the manual. Revision C (AW-I&O-Rev C) reflects changes made to pages 30 and 31 (piping diagrams). Revision D (AW-I&O-Rev D) reflects changes made to Model 199 orifice.