Pioneer GEX-XMP3 User Manual
Xmp3 radio
Hide thumbs
Also See for GEX-XMP3:
- User manual (78 pages) ,
- User manual (3 pages) ,
- User manual (78 pages)
Table of Contents
Advertisement
Quick Links
Advertisement
Table of Contents

Related Manuals for Pioneer GEX-XMP3

Summary of Contents for Pioneer GEX-XMP3
- Page 1 User Guide...
-
Page 2: Quick Start
Quick Start Quick Start Charge the battery (page 13). Set up your XMp3 radio (page 21). Activate your XM subscription online or by calling 1-866-535-MY XM (1-866-535-6996) (page 25). Press the menu button. You should see this screen:... -
Page 3: Table Of Contents
Table of Contents Introduction . . . . . . . . . . . . . . . . . 4 Setup and Installation....44 My Music.. - Page 4 • • •...
-
Page 5: Introduction
Introduction Features The XMp3: record what you love, listen when you want • Live or recorded XM content at your fingertips. Spin the wheel to quickly tune to your favorite XM channels. • Have to step away for a few minutes? Pause and replay up to 30 minutes of XM programming. -
Page 6: About Xm
Introduction About XM XM is America’s number one satellite radio company. Broadcasting live daily from studios in Washington, DC, New York City, Chicago, the Country Music Hall of Fame in Nashville, Toronto, and Montreal, XM’s 2008 lineup includes more than 170 digital channels of choice from coast to coast: commercial-free music, premier sports, news, talk radio, comedy, children’s and entertainment programming;... -
Page 7: Safety Instructions
Safety Instructions IMPORTANT! Always read and understand all the instructions to avoid injury to yourself and/ or damage to your device. XM Satellite Radio claims no responsibility for damage from data loss due to breakdown, repair or other causes. DO NOT: •... -
Page 8: Environmental Information
Introduction • Insert the power adapter plug all the way into the outlet. Be careful not to overload the outlet with too many electrical devices, and keep metallic objects away from the power plugs. • Stay aware of your surroundings when enjoying your XMp3 radio. If you’re a pedestrian, keep your eyes and ears open. - Page 9 Protect Your Ears and Yourself • Always follow traffic safety directions. Do not use earbuds or headphones while operating a bicycle, automobile, or motorcycle. Not only is it dangerous, it may be illegal. • Make sure the earbud or headphone cable does not get in the way of your arms or other surrounding objects while you’re walking or exercising.
-
Page 10: Important Battery Information
(For reference, a garbage disposal or loud shouting at 3 feet are about 80 decibels; a food blender or gas lawn blower at 3 feet are around 90 decibels.) Pioneer disclaims all liability for hearing loss, bodily injury, or property damage as a result of use or misuse of this product. - Page 11 To prevent injuring yourself or your XMp3 radio, do not disassemble, crush, or puncture the battery. Never allow metal to touch the battery terminals. Your XMp3 radio’s rechargeable battery should be disposed of properly and may need to be recycled. Contact your local recycler for details. Never dispose of batteries in a fire or in water as they may explode.
-
Page 12: What's In The Box
Introduction What’s in the Box? XMp3 Radio Remote Control Earbuds RCA Audio Cable Home Stand XM Home Antenna USB Cable Also Included: User Guide and Getting the Most From your XM Radio Battery AC Power Adapter Guide... -
Page 13: Charge The Battery
Charging the Battery The battery comes from the factory with a small amount of charge. Charge the battery for at least 8 hours before using XMp3 radio for the first time, or if you have not used it for several months. -
Page 14: Xmp3 Radio Controls
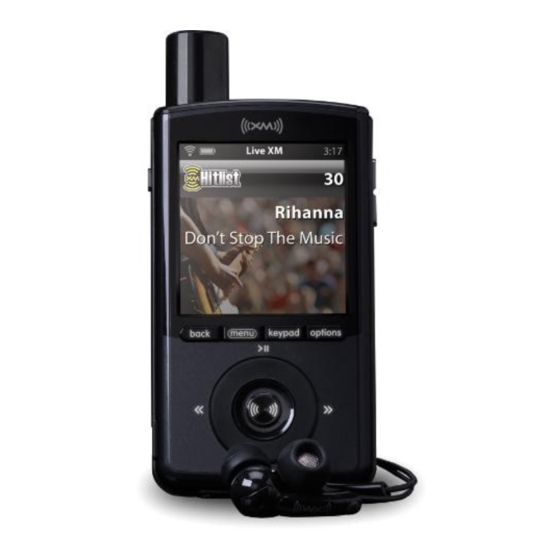
Introduction XMp3 Radio Controls Headphone Jack and microSD Card Slot Power/Hold Switch Slide down to turn on Volume or off, slide up to lock controls. Menu Go to My Music Library, access advanced features Keypad and configuration options Enter channel numbers. or info extras information. -
Page 15: Display
The functions of the controls may change depending on what you’re doing at the time. In general, remember that: • Turning the wheel highlights different icons or moves up or down a list. Press the XM button to select the highlighted item. •... - Page 16 Introduction Additional symbols Live XM My Music Library Auto Recordings Settings Battery Charging Battery Charged (green) Battery Low (red) Hold - controls locked. To unlock, slide the power switch down to the middle position Mute – to unmute, press both volume up and volume down buttons at the same time Repeat Shuffle...
- Page 17 MP3 or WMA song loaded onto microSD card Song included on a playlist MP3 or WMA song loaded onto microSD card that has been added to a playlist TuneSelect set to alert on artist’s name TuneSelect set to alert on song title XM signal strength MicroSD card is being read.
-
Page 18: Remote Control Functions
Introduction Remote Control Functions Power Button 30-Minute Replay Buttons Arrow Buttons Pause and replay up to 30 Select menu entries, change channels. minutes of live XM content. Record Record a song or channel. Select/XM Button Press to confirms selections. Options TuneSelect, bookmarks, add channel to favorites, set Menu... -
Page 19: Microsd Memory Card
MicroSD Memory Card Turn your XMp3 radio off before inserting or removing the microSD memory card (sold separately). To insert the card press it down until it clicks into place. To remove it, press down and it will eject. Do not remove the card if you see this symbol in red on the display. -
Page 21: Setup
Setup Setup for Home or Office Insert your XMp3 radio into the home stand. Connect the power adapter, audio cable, and XM home antenna. Connect your XMp3 radio to your home or office audio system. lin e ou t an te nn antenna The XM home antenna plugs into the jack labeled antenna. - Page 22 Setup Place the XM home antenna in or near a south facing window for optimal indoor reception. South To optimize signal reception, you may mount the XM home antenna outdoors, facing south.
-
Page 23: While Traveling
Outdoors Outdoors While Traveling If you’re traveling, you can connect the power adapter directly to your XMp3 radio. -
Page 25: Activation
Activation Subscribing to XM Before you can listen to any of XM’s more than 170 channels, you must first activate your XMp3 radio. Make sure your XMp3 radio is properly installed and receiving the XM signal in live mode so that you can hear the audio on Channel 1. Make a note of your XM Radio ID. -
Page 27: Using Your Xmp3 Radio
Using your XMp3 Radio Live XM NOTE! Be sure to listen to live XM for at least 8 hours in a 30-day period. This authenticates your XM subscription and ensures that you continue to enjoy your live and recorded XM programs. Selecting Channels Turn on your XMp3 radio. - Page 28 Using your XMp3 Radio Turn the wheel to highlight a digit corresponding to the channel number that you want to listen to. Press the XM button to select that digit. Repeat for all the digits of that channel number. When you’ve entered a valid channel number, your XMp3 radio will tune to that channel within 2 seconds.
- Page 29 Categories XM channels are organized into channel categories, or genres, such as “Rock,” “Jazz,” or “News.” To find a channel by category: menu → Live XM → All Categories. Select You’ll see a list of all the XM categories. Turn the wheel to highlight a category, then press the XM button to select it.
-
Page 30: Pause And Replay
Using your XMp3 Radio Highlight and select Favorite Channels. You should see a list of your favorite channels. Turn the wheel to highlight the desired channel then press the XM button to select it. To remove a channel from your “Favorites” list: Tune to that channel. -
Page 31: Recording Xm
Recording XM Your XMp3 radio gives you more ways to record up to 100 hours of of your favorite XM content. Push a button to immediately record the song or channel that you’re currently listening to. Or schedule a recording session by setting the date, time, and channel. You can also schedule recording sessions using the XM2go Music Manager application. -
Page 32: Auto Recording
Using your XMp3 Radio Select OK when done. You can use the same method to edit or delete an existing recording session. You can also use the XM2go Music Manager to create, edit, and delete recording sessions. Your XMp3 radio can record up to 5 separate channels at the same time. Auto Recording Your XMp3 learns your listening habits and automatically records up to 30 hours of XM programming from the five channels you listen to most frequently. -
Page 33: Listening To Recorded Content
Listening to Recorded Content Recorded XM, MP3 and WMA files, audiobooks – they’re all in one place. menu → My Music Library. Select Recorded XM, MP3s and WMAs, or My Books. Choose If you choose Recorded XM, you’ll see this screen: You can view all songs in your library of recorded XM content, or sort by artist, category, channel name, and so on. - Page 34 Using your XMp3 Radio As you listen to recorded music or audiobooks, try pressing options. Depending on the type of content, you will find options to add the songs or artist to your TuneSelect list (XM content only), repeat songs, shuffle songs, add them to playlists, or see more information about the track (if available).
-
Page 35: Program Guide
Program Guide To see what will be playing on a particular channel: While listening to live XM, select options → View Programs. You will see a list of programs that will be playing on that channel. If you then highlight a program and select it, you can see information about that program, schedule to record it, or set an alert that will notify you when the program starts. -
Page 36: Playlists
Using your XMp3 Radio Playlists You can create one or more custom lists, called playlists. A playlist is simply a collection of recorded tracks that play in a certain order. Create a “morning commute” playlist, a “workout” playlist, a “best of” playlist, and more. And yes, the same song can appear on more than one playlist. - Page 37 To delete a playlist: menu → My Music Library → Recorded XM or menu → My Select Music Library → MP3s and WMAs. Playlists. Select options → Delete. Highlight a playlist name and select To remove songs from a playlist: menu →...
-
Page 38: Tuneselect And Gameselect
Using your XMp3 Radio TuneSelect and GameSelect TuneSelect finds your favorite artists or songs and alerts you whenever they are being played on any XM channel. You can save up to 30 songs or artists. options → When you hear one of your favorite songs or artists, select TuneSelect Song or options →... - Page 39 To change the type of alert, highlight that entry and press the XM button. Toggle between Alert On Artist or Alert on Song, choose Do Not Alert or Delete. back to exit the screen. When you’re done, press TuneSelect alerts you when it finds this artist name.
-
Page 40: Info Extras
Using your XMp3 Radio Info Extras XM broadcasts Information such as sports scores and stock quotes. This information can be displayed at the bottom of your XMp3 radio’s screen. To choose a sport or team: menu → Settings → Info Extras → Sports. Select You’ll see a list of sports. - Page 41 Choosing a stock is a similar process: menu → Settings → Info Extras → Stocks. Select Add Stocks. Select To add the symbol for XM Satellite Radio, “XMSR, ” turn the wheel until “X” appears in the first letter position. Press the XM button to confirm. Turn the wheel until “M”...
-
Page 43: System Requirements
Using your XMp3 Radio with a PC The XM2go Music Manager runs on Windows-based personal computers and allows you to: • Manage your music: create and customize playlists of XM recordings or your personal MP3 or WMA files. • Schedule recordings. •... -
Page 44: Setup And Installation
Using your XMp3 Radio with a PC • Windows Media Player 11 (loaded at time of installation if not present) PCs running Microsoft® Windows® Vista must meet the following requirements: • CPU: 800 MHz or higher for Vista Home; 1 GHz or higher for other Vista editions •... -
Page 45: My Music
My Music The XM2go Music Manager helps you organize recorded XM content and your MP3s. • View your XM recordings, including the artist name, song title, the channel it was recorded from and song length. • View your personal music (MP3s and WMA files) collection, including the artist name, song title, album and song length. -
Page 46: Record Xm
Using your XMp3 Radio with a PC Record XM Schedule Recordings of XM content directly from your XMp3 radio, or with the XM2go Music Manager. • Save time by recording up to five channels at the same time. • View all scheduled recordings, including the duration. •... -
Page 47: Bookmarks
Bookmarks Bookmarks are an easy way to flag your favorite songs while listening to your XMp3 radio. • View songs you have bookmarked on your XMp3 radio and link to Napster.com to purchase them. • Add your music library to the XMp3 radio with a standard or high capacity microSD card. -
Page 48: Napster.com
Using your XMp3 Radio with a PC napster.com Napster enables you to purchase and own songs you heard and bookmarked on your XMp3 radio. • Easy access to a library of millions of songs. • Add your music library to the XMp3 radio with a standard or high capacity microSD card. -
Page 49: Books
Books View the authors, titles, and length of audible books saved on your XMp3 radio. • Link to audible.com/xm to see available audible books. • View XM’s Online Programming Guide to see what’s playing on X... -
Page 50: Audible.com/Xm
Using your XMp3 Radio with a PC audible.com/xm Audible is your source for the internet’s largest selection of premium digital audio. • Choose from over 40,000 downloadable audiobooks, including the latest best sellers and timeless classics. • Download content to your XMp3 radio or other compatible devices and listen at the gym, on your commute, anywhere, anytime. -
Page 51: Info
Info View Information about your XMp3 radio such as model and radio ID. • Personalize the name of your XMp3 radio. • View the amount of XM content storage used/available and personal music storage used/available on your XMp3 radio. • View the amount of personal music storage/used on your microSD card. -
Page 52: Disconnecting Xmp3 From A Pc
Using your XMp3 Radio with a PC Disconnecting XMp3 from a PC To disconnect your XMp3 from your PC, you must follow these steps: Click on “Eject” on the lower left-hand corner of the Music Manager screen. Music Manager will sync with XMp3, then inform you that you can disconnect XMp3. -
Page 54: Settings
Settings You can manage XMp3 radio settings by selecting menu → Settings. The list of settings will vary depending on whether you’re using XMp3 radio in a portable mode, docked into a vehicle cradle, in a home kit, or in a sound system. Aiming the Antenna For best reception, your XM antenna should have an unobstructed view of the XM satellites in the southern sky. -
Page 55: Audio Tone
Audio Tone Change the tone by selecting menu → Settings → EQ Settings. By pressing the XM button, you can choose between “Flat,” “Max Boost,” “Pop,” “Rock,” “Classical,” and more. The EQ setting is not available when listening to XM through your vehicle’s FM radio. To change the audio quality, use the tone or EQ controls of the FM radio. -
Page 56: Display
Settings Display Control the display appearance by selecting menu → Settings → Change Display. You have the following options: Brightness • : select between high, medium, or low screen brightness. Backlight Timer • : determines how long the screen remains list. Choose between Always On, 1 minute, 30 seconds, or 15 seconds. -
Page 57: Channel Access
You should see options that let you choose to be alerted on an artist name or song title. You can also turn off or delete the alert for an individual song or artist. In a similar manner, you can can enable or disable GameSelect alerts. Channel Access Direct Tune Normally, as you scroll through live XM channels using the wheel, XMp3 radio displays the... - Page 58 Settings Skipping a Channel If you don’t want to scroll through all XM channels to get to the ones you want, you can easily remove channels from the list that displayed on the screen. To remove channels from the channel list: menu →...
-
Page 59: Clock And Sleep Timer
Clock and Sleep Timer menu → Settings → • The time is automatically set using the XM signal. Select Set Time → Time Zone to set the proper time zone for your location. • Your XMp3 radio can automatically adjust for Daylight Saving Time. To turn this feature on, select menu →... -
Page 60: Restoring Factory Defaults
Settings Restoring Factory Defaults To restore all your XMp3 radio settings and preferences to a “factory fresh” state: menu → Settings → Restore Defaults. Select Restore Setting to reset all options to factory defaults Choose without erasing any stored content. - OR - Choose Restore and Erase to reset all options to factory defaults AND erase all stored content. -
Page 62: Troubleshooting
Troubleshooting XMp3 has been designed and built to be trouble-free but if you experience a problem, try this: • Check that all connections are firm and secure. • Remove its battery, wait at least 30 seconds, then re-insert it. If you see this on the screen: Try this: No signal Make sure the XM antenna is not obstructed. - Page 63 If you see this on the screen: Try this: Updating XM is updating your XMp3 radio with the latest encryption code. Wait until the update is done. You may be trying to tune to a channel that is blocked or unavailable.
- Page 64 Troubleshooting If this happens: Try this: XMp3 radio shuts off unexpectedly. Check whether you’ve set the sleep timer, and set it to “Off, ” if desired. If you’re in a car, check whether “Vehicle Mode/Delayed Power Off” is set, and set it to “Off, ” if desired. There is no power or XMp3 radio shuts Check the battery level;...
- Page 65 If this happens: Try this: XM Instant Traffic and Weather Do nothing. These channels use a different audio technology channels sound different from other than the other XM channels. channels. Battery level meter does not match Fully charge the battery, then use your XMp3 radio until the the expected charge or playback time.
-
Page 67: Other Information
Other Information Product Registration Visit us at the following site: http://www.pioneerelectronics.com Register your product. We will keep the details of your purchase on file to help you refer to this information in the event of an insurance claim such as loss or theft. -
Page 68: Product Specifications
Other Information Product Specifications XMp3 Radio Dimensions 51 mm (W) X 92 mm (H) X 14 mm (D) 2 in (W) X 3.6 in (H) X 0.5 in (D) Weight 69g without battery / 88g with battery Storage Capacity Internal: 2GB Removable memory: Type: microSD™... - Page 69 40 mm (W) X 119 mm (H) X 14 mm (D) 1.5 in (W) X 4.7 in (H) X 0.55 in (D Weight 85 g 3 oz CR2032 Battery Type: Voltage: 3 Model Numbers XMp3 Radio GEX-XMP3 XMp3 Car Kit CD-XMPCAR1 XMp3 Home Car Kit CD-XMHOME1...
-
Page 70: Patent Information
Other Information Patent Information It is prohibited to, and you agree that you will not, copy, decompile, disassemble, reverse engineer, hack, manipulate, or otherwise access and/or make available any technology incorporated in receivers compatible with the XM Satellite Radio system. Furthermore, the AMBE®... -
Page 71: Fcc Statement
FCC Statement The user is cautioned that changes or modifications not expressly approved by XM Satellite Radio Inc. can void the user’s authority to operate this device. This device has been designed to operate with the antenna provided in the original packaging. Use of antenna other than the antenna provided will result in improper operation, and is strictly prohibited per regulations of Industry Canada. -
Page 72: Limited Warranty
WARRANTY VALID ONLY IN COUNTRY OF PRODUCT PURCHASE WARRANTY Pioneer Electronics (USA) Inc. (PUSA), and Pioneer Electronics of Canada, Inc. (POC), warrants that products distributed by PUSA in the U.S.A., and by POC in Canada that fail to function properly under normal use due to a manufacturing defect when installed and operated according to the owner’s manual enclosed with the unit will be repaired or replaced with a... - Page 73 WARRANTIES, EXPRESS OR IMPLIED, INCLUDING THE IMPLIED WARRANTY OF MERCHANTABILITY AND THE IMPLIED WARRANTY OF FITNESS FOR A PARTICULAR PURPOSE AND THIS PRODUCT IS SOLD STRICTLY “AS IS” AND “WITH ALL FAULTS”. PIONEER SHALL NOT BE LIABLE FOR ANY CONSEQUENTIAL AND/OR INCIDENTAL DAMAGES. PIONEER DOES NOT WARRANT ANY PRODUCT LISTED ABOVE WHEN IT IS USED IN A TRADE OR BUSINESS OR IN ANY INDUSTRIAL OR COMMERCIAL APPLICATION.
- Page 74 NUMBERS VOID THIS ENTIRE WARRANTY. NO OTHER WARRANTIES IN THE U.S.A. - PIONEER LIMITS ITS OBLIGATIONS UNDER ANY IMPLIED WARRANTIES INCLUDING, BUT NOT LIMITED TO, THE IMPLIED WARRANTIES OF MERCHANTABILITY AND FITNESS FOR A PARTICULAR PURPOSE, TO A PERIOD NOT TO EXCEED THE WARRANTY PERIOD.
- Page 75 Pioneer will investigate the dispute and will either: (1) respond to your complaint in writing informing you what action Pioneer will take, and in what time period, to resolve the dispute; or (2) respond to your complaint in writing informing you why it will not take any action.
- Page 76 Other Information PIONEER ELECTRONICS SERVICE, INC. P.O. BOX 1760 LONG BEACH, CALIFORNIA 90810 1-800-421-1404 http://www.pioneerelectronics.com...
- Page 77 NOTES:...
- Page 78 Other Information NOTES:...
- Page 79 P.O. Box 1760 Long Beach, California 90810 1 800 421 1404 http://www.pioneerelectronics.com XM, XMp3, and related logos are trademarks of XM Satellite Radio Inc. Other trademarks are the property of their respective owners. ©2008 Pioneer Electronics Service, Inc. All rights reserved.