
Related Manuals for Philips DCD132


Summary of Contents for Philips DCD132
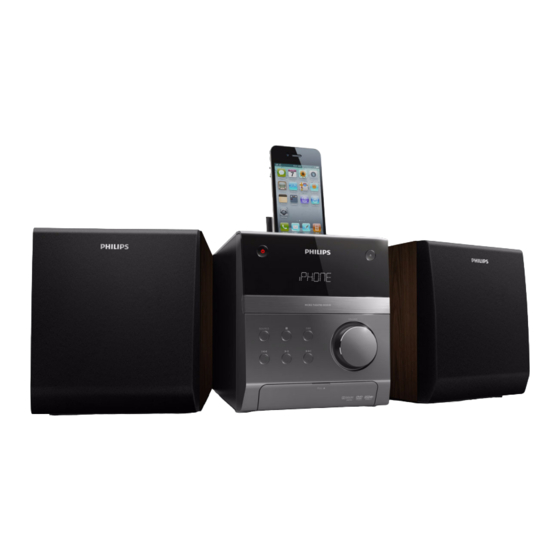
- Page 1 Register your product and get support at www.philips.com/welcome DCD132 User manual คู ่ ม ื อ ผู ้ ใ ช้...
-
Page 2: Table Of Contents
Contents 7 Other features 1 Important Play iPhone/iPod Know these safety symbols Listen to FM radio Hearing safety Play audio from an external device Others Listen through headphone Turn on/off automatically 2 Congratulations Feature introduction 8 Setup What’s in the box Interface for setup menu Overview of the main unit Change a setting... -
Page 3: Important
1 Important offered for those that may have already experienced some hearing loss. • Sound can be deceiving. Over time your hearing ‘comfort level’ adapts to higher Know these safety symbols volumes of sound. So after prolonged listening, what sounds ‘normal’ can actually be loud and harmful to your hearing. -
Page 4: Others
because correct disposal helps to prevent Others negative consequences for the environmental and human health. Any changes or modifications made to this Environmental information device that are not expressly approved by All unnecessary packaging has been omitted. Philips Consumer Lifestyle may void the user’s We have tried to make the packaging easy to authority to operate the equipment. -
Page 5: Congratulations
2 Congratulations Region codes You can play discs with the following region codes. Congratulations on your purchase, and DVD region code Countries welcome to Philips! To fully benefit from the support that Philips offers, register your product Asia Pacific, Taiwan, Korea at www.philips.com/welcome. -
Page 6: Overview Of The Main Unit
Overview of the main unit a DOCK for iPhone/iPod (Dock for h MP3 LINK iPhone/iPod) • Connect an MP3 link cable (3.5 mm plug). • Eject or close the disc compartment. • Socket for headphones. c IR sensor d VFD display •... -
Page 7: Before Use
m SOURCE 3 Before use • Select a media source (disc, USB storage device, iPhone/iPod, FM tuner, or external device connected Place the player through MP3 link cable). n DBB • Enable or disable the DBB (Dynamic Note Bass Boost) feature. •... -
Page 8: Install/Replace The Battery Of Remote Control
4 Connect Install/replace the battery of remote control Connect speakers Note • Risk of explosion! Keep batteries away from Note heat, sunshine or fire. Never discard batteries in fire. • For the best sound quality, use the supplied • Remove the battery if the remote control is speakers only. -
Page 9: Connect Tv
Connect TV Connect a USB storage device Connect the audio and video cables to Note the output sockets on the player and the corresponding input sockets on your TV. • For the best data transmission, use the Select the best video connection that your TV supplied USB cable only. -
Page 10: Get Started
5 Get started Find the correct video input channel Turn on Turn on the player. Press DISC to select the disc source. Press • Turn on the TV and switch to the » The player switches to the last selected correct video-in channel. -
Page 11: Play
6 Play Play recored files You can play DivX/MP3/WMA/JPEG files that are copied onto a CD-R/RW, recordable DVD, Caution or USB storage device. • Risk of damage to the player! During play, Note never move the unit. • Never put any object other than a disc into the •... - Page 12 Access a category Play slideshow and music simultaneously Press ) repeatedly until a category icon is highlighted. Note • If there is no file under a certain category, the category icon can not • Make sure that the USB storage device or the be highlighted.
-
Page 13: Control The Play
Control the play Follow the instructions to control the play. Media Function Action Return to the disc menu Press DISC MENU repeatedly. Enable/disable the PBC (playback Press DISC MENU repeatedly. control) feature • Enable PBC to display the PBC menu, and then use the numeric buttons to enter your choice. -
Page 14: Search By Time Or Title/Chapter/Track Number
7 Other features Search by time or title/ chapter/track number Play iPhone/iPod During play, press GOTO. Press to highlight the title You can enjoy audio from iPhone/iPod through number, chapter number, track number, this player. or time field. Use the numeric buttons to enter the Note number or time digits. -
Page 15: Listen To Fm Radio
Listen to the iPhone/iPod Program radio stations manually Load your iPhone/iPod. Press TUNER. » The player switches to the iPhone/ Press repeatedly to tune to a iPod input automatically. radio station. Play the selected track on your iPhone/ Press ANGLE/PROG. »... -
Page 16: Listen Through Headphone
Press SLEEP/TIMER to activate the timer. Listen through headphone » is displayed. » The player turns on/off at the set time. Plug a headphone into the socket. • To deactivate the timer, press SLEEP/ TIMER again. Turn on/off automatically Use the sleep timer You can set a time for automatic power on and The player can also turn off automatically off. -
Page 17: Setup
8 Setup Press OK to confirm. • To exit the menu, press SETUP. Interface for setup menu System setup After you press SETUP, the interface for setup [SCREEN SAVER] menu is displayed as follows. Protect the TV screen from damage due to over exposure to static image. -
Page 18: Language Setup
These discs must be recorded with rating Video setup levels. [TV SYSTEM] [DEFAULT] Select a TV system that matches your TV. Reset all settings to factory default, except for the settings of [PASSWORD] and [RATING]. [TV TYPE] Select a display ratio that matches your TV screen. -
Page 19: Product Information
9 Product Tuner (FM) Tuning Range 87.5 - 108MHz information Tuning grid 50KHz Sensitivity - Mono, 26dB <22 dBf S/N Ratio Sensitivity - Stereo, 46dB <43 dBf Note S/N Ratio • Product information is subject to change Search Selectivity >28dBf without prior notice. -
Page 20: Supported Disc Formats
Supported disc formats USB playability information • Digital Video Discs (DVDs) Compatible USB devices: • Video CDs (VCDs) • USB flash memory (USB 2.0 or USB1.1) • Super Video CDs (SVCDs) • USB flash players (USB 2.0 or USB1.1) • Digital Video Discs + Rewritable •... -
Page 21: Troubleshooting
10 Troubleshooting • A distorted picture may appear during progressive scan setup. The aspect ratio of the TV screen cannot be changed even though you have set the TV Caution display format. • The aspect ratio is fixed on the loaded •... - Page 22 DivX video files cannot be played. • Make sure that the DivX video file is complete. • Make sure that the file extension is correct. • Due to Digital Rights issue, the DRM- protected video files stored on a USB storage device cannot be played through an analog video connection (e.g.
-
Page 23: Notice
® ® 11 Notice DivX , DivX Certified and associated logos are trademarks of DivX, Inc. and are used under license. ® DivX Certified to play DivX video, including Copyright notice premium content. Compatibility notice This item incorporates copy protection technology that is protected by U.S. - Page 24 © 2010 Koninklijke Philips Electronics N.V. All rights reserved. DCD132_98_UM_V1.0...