Table of Contents
Advertisement
Quick Links
Advertisement
Table of Contents

Related Manuals for KTM 950 ADVENTURE 2006


Summary of Contents for KTM 950 ADVENTURE 2006
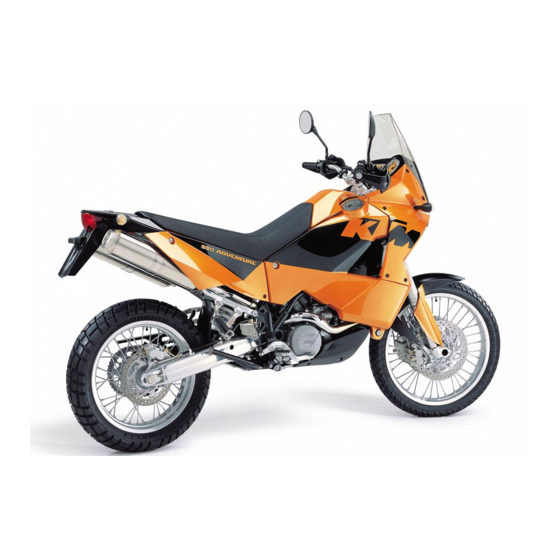
- Page 1 OWNER’S MANUAL 2006 950 ADVENTURE 950 ADVENTURE S ART. NR. 3.211.128 EN...
- Page 2 KTM may stop manufacturing cer- tain models without previous notice. KTM shall not be held liable for any deviations of availability and/or ability to deliver, illustrations, descriptions, printing and/or other errors. The illustrated models partly con- tain extra equipment, which is not applied to standard models.
- Page 3 KTM should be performed by a qualified KTM dealer. The designations "left, right, front, rear“ always refer to the direction of travel. For your own safety, use KTM-approved parts and accessories only. KTM is not liable for damage that arises in connection with the use of other products.
-
Page 4: Important Limited Warranty And Limited Guarantee Information
» IMPORTANT LIMITED WARRANTY AND LIMITED GUARANTEE INFORMATION The KTM 950 Adventure models are designed to withstand normal use on roads and easy terrain (unpaved roads). The service, care and operating instructions for the engine and chassis specified in the owner's manual must be observed to ensure that the bike runs smoothly and to avoid premature wear. -
Page 5: Table Of Contents
Hand brake lever ......5 General informations about KTM disc brakes ..27 Multi-functional digital speedometer . -
Page 6: Serial Number Locations
» SERIAL NUMBER LOCATIONS Chassis number The chassis number is located on the right side of the steering head tube and on the type label. Write this number into the relevant area on page 1. Engine number, engine type The engine number and engine type are embossed in the engine case near the shift lever. -
Page 7: Multi-Functional Digital Speedometer
» OPERATION INSTRUMENTS Multi-functional digital speedometer The universal instrument is divided into 3 parts. Use the MODE and SET [1] button to change the display and the basic set- tings in the display. Display [2] shows all of the information that may be of interest to you. 5 display modes can be selected with the MODE button. -
Page 8: Setting Options In The Display
» OPERATION INSTRUMENTS Setting options in the display 10 sec KILOMETERS OR MILES. You can have the speed and distance shown in kilometers or miles in the dis- play. The display can be adapted to the respective country on long-distance trips. -
Page 9: Cooling Liquid Temperature Display
» OPERATION INSTRUMENTS Cooling liquid temperature display The temperature display [1] is shown in 7 bars. The more bars that light up, 120°C (248°F) the hotter the cooling liquid. When the lowest bar lights up, the cooling liq- 110°C (230°F) uid has reached a temperature of approx. -
Page 10: Ignition Lock
» OPERATION INSTRUMENTS Ignition lock The ignition lock [1] has 3 switching positions. Ignition off, (engine can't be started) Ignition on, (engine can be started) Ignition off, handlebar blocked To switch the ignition to position turn the ignition key to position and firmly press it into the lock. -
Page 11: Storage Compartment
» OPERATION INSTRUMENTS Storage compartment A storage compartment is located under the seat to hold small, frequently used items. To open, turn the quick release [1] approx. 180° in a counterclockwise direc- tion and lift the cover. To lock, close the cover, insert the quick release in the dolly and turn 180°... -
Page 12: Shift Lever
» OPERATION INSTRUMENTS Shift lever The shift lever is mounted on the left side of the engine. The position of the gears is shown in the illustration. Neutral, or the idle speed, is located between first and second gear. 2,3,4,5,6 Side stand Fold the side stand [1] forward to the stop with your foot and put the weight of the motorcycle on the stand. -
Page 13: Rebound Damping Of Fork
» OPERATION INSTRUMENTS Rebound damping of fork The fork's damping action during rebound travel (rebound damping) can also be adjusted. This allows you adjust the damping behavior to match your driv- ing style and the payload. The adjusting screws [1] are located on the upper end of the fork legs. More information is provided in the chapter "Adjusting the fork and shock absorber.“... -
Page 14: Shock Absorber's Preload Adjuster
» OPERATION INSTRUMENTS Shock absorber's preload adjuster The shock absorber's preload adjuster is infinitely variable by means of the hand wheel [1]. This allows the shock absorber to be adapted to match your body weight and the payload. The hand wheel can be swung out to make adjustments. Baggage carrier plate The base plate for your choice of case system can be attached to the baggage carrier plate [2]. -
Page 15: General Tips And Warnings For Starting The Motorcycle
– THE TIRES MUST BE DESIGNED FOR A MAXIMUM SPEED OF 240 formed by your authorized KTM workshop. The DELIVERY CER- KPH (SPEED SYMBOL V) AND MUST BE AUTHORIZED BY KTM. TIFICATE and SERVICE MANUAL will be handed over when you –... -
Page 16: Driving Instructions
If the level of brake fluid falls below the minimum value, this indicates a leak in the braking system or completely worn out brake pads. Arrange for the braking system to be checked by a KTM specialist, as com- plete failure of the braking system can be avoided. -
Page 17: Starting When The Engine Is Cold
ENGINE IS RUNNING, IMMEDIATELY SWITCH OFF THE ENGINE. IF THE ENGINE IS NOT SWITCHED OFF, ENGINE DAMAGE WILL OCCUR WITHIN A SHORT PERIOD OF TIME. CHECK THE ENGINE OIL LEVEL OR CONTACT A KTM WORK- SHOP. – MAXIMUM PERIOD FOR CONTINUOUS STARTING: 5 SECONDS. WAIT AT LEAST 5 SECONDS BEFORE TRYING AGAIN. -
Page 18: Braking
STRAIGHTEN THE HANDLEBAR BECAUSE THIS WILL CAUSE IT TO RIDE YOUR MOTORCYCLE ANYMORE WITHOUT FIRST HAVING THE LOSE ITS STABILITY. BRAKE SYSTEM LOOKED OVER BY A KTM DEALER. Stopping and parking – HIGH RPM RATES WHEN THE ENGINE IS COLD HAVE AN ADVERSE Apply the brakes fully and put the engine into neutral. - Page 19 » DRIVING INSTRUCTIONS INFORMATION ABOUT THE SIDE STAND Use your foot to push the side stand forward as far as possible, and lean your motorcycle to the side. Make sure that your motorcycle is standing safely on solid ground. Just in case, you can also put in a gear. THE SIDE STAND IS DIMENSIONED FOR THE WEIGHT OF THE MOTORCYCLE ONLY.
-
Page 20: Fuel
» DRIVING INSTRUCTIONS Fuel In the condition at delivery, the LC8 engine requires unleaded fuel with at least RON 95 (USA = Premium PON 91). If using lower octane fuel, it is easy to change over to the pre-programmed ignition curve for 80 - 94 octane (RON) (see activating the ignition curve for low-octane fuel). -
Page 21: Periodic Maintenance Schedule
IF MOTORCYCLE IS USED FOR COMPETITION 7500 KM SERVICE SHOULD BE CARRIED OUT AFTER EVERY RACE! SERVICE INTERVALLS SHOULD NEVER BE EXCEEDED BY MORE THAN 500 KM. MAINTENANCE WORK DONE BY KTM AUTORIZED WORKSHOPS IS NOT A SUBSTITUTE OF CARE AND CHECKS DONE BY THE RIDER! - Page 22 » PERIODIC MAINTENANCE SCHEDULE IMPORTANT RECOMENDED MAINTENANCE PROCEDURES TO BE PERFORMED BASED ON A SEPARATE SUPPLEMENT ORDER at least every 2 years once a year or 15000 km Perform complete fork maintenance Perform complete shock absorber maintenance Clean and lubricate steering-head bearing and sealing elements Clean and adjust the carburetors Treat the electrical contacts and switches with contact spray Treat battery connections with contact grease...
-
Page 23: Maintenance Work On Chassis And Engine
ALL SERVICING AND ADJUSTMENT PROCEDURES DESIGNATED BY AN ASTERISK * REQUIRE THE KNOWLEDGE AND SKILLS OF A PROFESSIONAL. IN THE INTEREST OF YOUR OWN SAFETY, HAVE THESE PROCEDURES CARRIED OUT AT A AUTHORIZED KTM WORKSHOP! AT A KTM WORKSHOP YOUR MOTORCYCLE WILL RECEIVE OPTIMAL SERVICING BY SPECIALLY TRAINED MECHANICS. -
Page 24: Adjusting The Fork And Shock Absorber
» MAINTENANCE WORK ON CHASSIS AND ENGINE Adjusting the fork and shock absorber There are a number of ways to adjust the fork and shock absorber to match the chassis to your driving style and the payload. BASIC SETTING We have provided a table with pragmatical values to help you tune up your FORK motorcycle. -
Page 25: Compression Damping Of Shock Absorber
» MAINTENANCE WORK ON CHASSIS AND ENGINE BASIC SETTING BASIC SETTING SHOCK ABSORBER SHOCK ABSORBER 950 ADVENTURE 950 ADVENTURE S Compression adjuster Low Speed (clicks) 25 20 15 15 Compression adjuster Low Speed (clicks) 25 20 15 15 2 1.5 1 1 2 1.5 1 1 Compression adjuster High Speed (turns) Compression adjuster High Speed (turns) -
Page 26: Adjusting The Preload Of The Shock Absorber
» MAINTENANCE WORK ON CHASSIS AND ENGINE Adjusting the preload of the shock absorber The baggage and passenger put the main load on the shock absorber. To guar- antee maximum handling performance, the preload of the shock absorber must be adapted to the load. The preload is hydraulically adjusted by turning the hand wheel [1]. -
Page 27: Correct Chain Tension
IF YOU DON’T HAPPEN TO HAVE A TORQUE WRENCH AT HAND, MAKE SURE YOU HAVE THE TIGHTENING TORQUE CORRECTED BY A KTM DEALER AS SOON AS POS- SIBLE. A LOOSE AXLE MAY LEAD TO AN UNSTABLE DRIVING BEHAVIOR OF YOUR MOTORCYCLE. -
Page 28: General Informations About Ktm Disc Brakes
In this case, consult an authorized KTM dealer immediately. BRAKE FLUID: KTM fills the brake systems with Motorex Brake Fluid DOT 5.1 brake fluid, one of the best brake fluids that is currently available. We recommend that you continue to use it. DOT 5.1 brake fluid is based on glycol ether and of an amber color. -
Page 29: Adjusting Of Free Travel At The Hand Brake Lever
SYSTEM HAS A LEAK OR THE BRAKE PADS ARE COMPLETELY WORN DOWN. IN THIS CASE, CONSULT AN AUTHORIZED KTM DEALER IMMEDIATELY. – HAVE THE BRAKE FLUID CHANGED AT AN AUTHORIZED KTM WORKSHOP EVERY 2 YEARS. Refilling the front brake fluid reservoir * It is not necessary to refill brake fluid under normal conditions (see General information on KTM disk brakes). -
Page 30: Changing The Basic Position Of The Foot Brake Lever
SYSTEM HAS A LEAK OR THE BRAKE PADS ARE COMPLETELY WORN DOWN. IN THIS CASE, CONSULT AN AUTHORIZED KTM DEALER IMMEDIATELY. – HAVE THE BRAKE FLUID CHANGED AT AN AUTHORIZED KTM WORKSHOP EVERY 2 YEARS. Refilling the rear brake fluid reservoir * It is not necessary to refill brake fluid under normal conditions (see General information on KTM disk brakes). -
Page 31: Dismounting And Mounting The Front Wheel
15 Nm. – IF YOU DO NOT HAVE A TORQUE WRENCH TO MOUNT THE WHEEL, HAVE THE TORQUES CORRECTED BY AN AUTHORIZED KTM WORKSHOP AS SOON AS POS- SIBLE. A LOOSE AXLE PASSAGE CAN CAUSE THE MOTORCYCLE'S HANDLING PERFORMANCE TO BECOME INSTABLE. -
Page 32: Dismounting And Mounting The Rear Wheel
– IF YOU DON’T HAPPEN TO HAVE A TORQUE WRENCH AT HAND, MAKE SURE YOU HAVE THE TIGHTENING TORQUE CORRECTED BY A KTM DEALER AS SOON AS POSSIBLE. A LOOSE WHEEL SPINDLE MAY LEAD TO AN UNSTABLE DRIV- ING BEHAVIOR OF YOUR MOTORCYCLE. -
Page 33: Tires, Air Pressure
2.4 bar (34psi) 2.8 bar (40psi) mum driving comfort and extends the life of your tires. – DO NOT MOUNT TIRES WHICH HAVE NOT BEEN APPROVED BY KTM. OTHER TIRES COULD HAVE ADVERSE EFFECTS ON THE WAY YOUR MOTORCYCLE RIDES. -
Page 34: Demounting And Mounting The Battery
Always use special charging devices to charge maintenance-free batteries, e.g. the KTM charging device (item no. 58429074000). You can also use this charging device to test the off-load voltage and startability of the battery and generator. It is impossible to overcharge the battery with this device. -
Page 35: Main Fuse
The ACC 1 and ACC 2 fuses [9] are designed for accessory equipment with a maximum current consumption of 10 amperes each. The respective con- nectors for this equipment are provided under the headlight cover. For more information, contact an authorized KTM workshop. -
Page 36: Replacing The Headlight Lamps
» MAINTENANCE WORK ON CHASSIS AND ENGINE Replacing the headlight lamps * Remove the 5 screws on the left and right and take off both side covers [1]. Use a screwdriver to detach the retaining tabs [2], tilt the windshield and headlight forward and pull the connector off the connector support. -
Page 37: Adjusting The Headlight Range
» MAINTENANCE WORK ON CHASSIS AND ENGINE Adjusting the headlight range The payload can make it necessary to correct the headlight range. The headlight range can be adjusted with the adjusting screw [1]. Turning in a clockwise direction will increase the headlight range, turning in a counter- clockwise direction will reduce the headlight range. -
Page 38: Cooling System
ATURE IS 120°C (248°F) AND THE IGNITION IS ON. IF THE FAN IS NOT WORK- ING, AND THERE APPEARS TO BE SUFFICIENT COOLING LIQUID, THE ONLY THING YOU CAN DO IS TO DRIVE ON TO YOUR NEAREST AUTHORIZED KTM WORKSHOP AT THE LEAST POSSIBLE ENGINE LOAD. -
Page 39: Checking The Cooling Liquid Level In The Radiator
No air should be in the radiator. If any cooling liquid is missing, the cooling system may leak. Have the cooling system checked by an authorized KTM workshop. IF MORE THAN 1 LITER (0.26 USGAL) OF COOLING LIQUID NEEDS TO BE ADDED, THE COOLING SYSTEM MUST BE BLED. -
Page 40: Changing The Original Position Of The Clutch Lever
If necessary, add SAE 10 biodegradable hydraulic oil (Motorex clutch fluid 75), available from your authorized KTM workshop. KTM USES BIODEGRADABLE, HYDRAULIC MINERAL OIL TO ACTUATE THE HYDRAULIC CLUTCH. DO NOT MIX THIS OIL WITH ANY OTHER HYDRAULIC OIL. ALWAYS USE ORIGINAL KTM HYDRAULIC OIL (AVAILABLE FROM YOUR AUTHORIZED KTM WORK- SHOP) TO MAKE SURE YOUR CLUTCH OPERATES SMOOTHLY. -
Page 41: Checking And Adjusting The Choke Cable Play
32°F Only use fully synthetic engine oils that meet the JASO MA quality require- ments (see information on the can). KTM recommends Motorex Power Synt 4T in the 10W/50 viscosity (for tem- 5W/40 10W/50 peratures over 0°C, 32°F) or 5W/40 (for temperatures under 0°C, 32°F). -
Page 42: Changing The Engine Oil And The Oil Filter, Cleaning The Oil Screen
KTM workshop. During the guaranty period, the oil change must be performed by an author- ized KTM mechanic. Otherwise, the guarantee will become void. The engine oil change is to be carried out when the engine is still warm. - Page 43 » MAINTENANCE WORK ON CHASSIS AND ENGINE Remove the 3 screws [1], lift the tank approx. 15 mm and carefully tilt to the side. Disconnect the connector from the pickup cable (fuel level) and set the tank down. Remove the lower screw [2] on the right tank. Remove the HH screws and take off the battery cover [3].
- Page 44 Insert a new oil filter [1] in the engine case, grease the O-ring and mount the oil filter cover together with the O-ring. Tighten the screws to 6 Nm. ONLY USE ORIGINAL KTM OIL FILTERS. THE ENGINE CAN BE DAMAGED IF OTHER FILTERS ARE USED.
-
Page 45: Activating The Ignition Curve For Low-Octane Fuel
» MAINTENANCE WORK ON CHASSIS AND ENGINE Activating the ignition curve for low-octane fuel If you are traveling to a country where fuel having at least 95 octane (RON) is not available, you can easily activate the corresponding ignition curve. A plug and socket connection [1] on a brown/black cable is located near the upper shock absorber holder . -
Page 46: Trouble Shooting
We would like to point out that many operations cannot be performed by oneself. In case of uncertainty, please contact a KTM-dealer. - Page 47 Remove left engine cowl and check brown cable connector generator because on the voltage regulator, voltage regulator and generator should be checked by an authorized KTM workshop. No values are visible in the Blown fuse Replace fuse HORN BRAKELIGHT SPEEDO.
-
Page 48: Cleaning
» CLEANING Regular cleaning and paintwork care is part of the maintenance work and helps to maintain the value of your motorcycle. NEVER CLEAN YOUR MOTORCYCLE WITH A HIGH-PRESSURED CLEANER OR A HIGH-PRESSURED WATER JET. THE WATER COULD OTHERWISE RUN INTO THE ELECTRICAL COMPONENTS, CONNECTORS, SHEATHED CABLES, BEARINGS, CARBURETOR ETC. AND CAUSE DISTURBINGS OR LEAD TO A PREMATURE DESTRUCTION OF THESE PARTS. -
Page 49: Technical Specifications - Chassis
» TECHNICAL SPECIFICATIONS – CHASSIS CHASSIS 950 ADVENTURE / 950 ADVENTURE S Frame Tubular chrome-molybdenum-steel space frame Fork WP Suspension – Up Side Down 4860 MXMA (Multiadjuster) Wheel travel front ADVENTURE = 210 mm (8.3 in), ADVENTURE S = 245 mm (9.6 in) Rear suspension WP Suspension Progressive Damping System shock absorber with hydraulic preload adjuster Wheel travel rear... - Page 50 » TECHNICAL SPECIFICATIONS – CHASSIS TIGHTENING TORQUES – CHASSIS HH clamp bolts on top triple clamp 20 Nm HH clamp bolts for steering stem 20 Nm HH clamp bolts on bottom triple clamp 15 Nm AH bolt for handlebar mount 20 Nm Collar bolts for handlebar clamps 20 Nm...
-
Page 51: Technical Specifications - Engine
PON = Pump Octane Number PON / CLC RON / ROZ CLC = Cost of Living Council KTM recommends Motorex Power Synt 4T in the 10W/50 RON = Research Octane Number viscosity (for temperatures over 0°C, 32°F) or 5W/40 ROZ = Research Oktan Zahl 91 Premium 95 (for temperatures under 0°C, 32°F). -
Page 52: Head Word Index
Battery ....... . .32 General informations about KTM disc brakes . -
Page 53: Consumer Information For Usa Only
NOISE EMISSION WARRANTY KTM Sportmotorcycle AG warrants that this exhaust system, at the time of sale, meets all applicable U.S. EPA Federal noise stan- dards. This warranty extends to the first person who buys this exhaust system for purposes other than resale, and to all subsequent buyers. - Page 54 Sticker positions: on frame tube R/S on frame tube R/S under seat THIS KTM EXHAUST SYTEM 600.05.083.000 MEETS EPA NOISE on frame tube R/S EMISSION REQUIREMENTS OF 80 dBA FOR MODEL SPECIFIC CODE KTM 6210942. INSTALLATION OF THIS EXHAUST SYSTEM ON...
- Page 58 KTM Group Partner KTM-Sportmotorcycle AG A–5230 Mattighofen www.ktm.at...