
Related Manuals for Dreambox DM500 HD


Summary of Contents for Dreambox DM500 HD
- Page 1 DM500 HD Instruction manual Digital satellite receiver for free and encrypted Digital Video Broadcasting (DVB). HDTV Ethernet-Port DVB-S2 Tuner Smartcard Reader Linux OS...
-
Page 2: Table Of Contents
3.6 Network..........17 7.2.4 Time shift........38 4. Basic operation.......... 19 7.3 Watch a recording......... 38 4.1 Turning your Dreambox on and off..19 7.4 Setting a marker (Bookmarks)....40 4.2 Service selection........20 7.5 Delete a recording........ 41 4.3 Changing channel using the service list... 20 7.6 Movielist options........ - Page 3 11. Service searching........53 The Dreambox DM500 HD carries the CE-Sign and fulfills all requirements from the EU. 11.1 DVB-S2 Tuner configuration....53 11.1.1 Single satellite – direct Subject to change without prior notification. connection........53 DiSEqC is a registered trademark of EUTELSAT.
-
Page 4: Before Initial Operation Of The Receiver
During thunder storm the unit should also be physically disconnected from the power outlet. Additional safety instructions • (Dis-)Connecting to a LNB: Turn the Dreambox off before you connect or disconnect a cable coming from or going to a LNB. • Connecting to a TV: Before connecting or disconnecting your Dreambox to/from a TV please turn it off. -
Page 5: Disposal Instructions
• Please be careful that the batteries of your remote control are not exposed to heat, since they might explode. Disposal instructions The packaging of the Dreambox only consists of reusable materials. Please recycle if possible. This symbol on the product or on its packaging indicates that this product must not be disposed of with your other household waste. Instead, it is your responsi- bility to dispose of your waste equipment by handing it over to a designated coll- ection point for the recycling of waste electrical and electronic equipment. -
Page 6: Packaging Contents
1.2 Packaging contents Please check the completeness of the box’s contents. Included in box: 2 Batteries (1,5V Mignon / AA / LR6) Dreambox DM500 HD Power supply Remote control Power Cord Quickguide HDMI cable... -
Page 7: Views
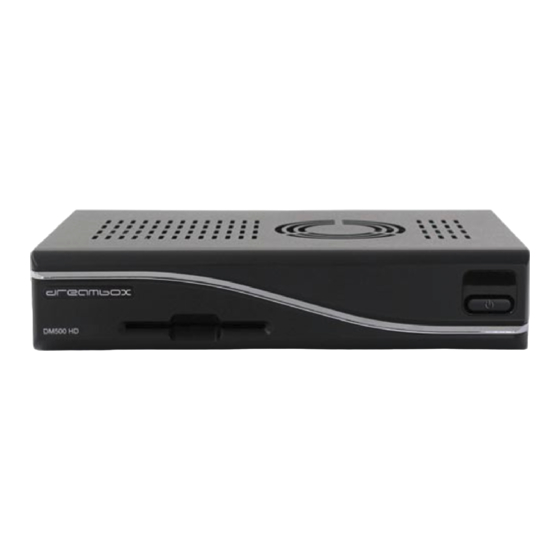
1.3 Views Front view Standby-LEDs Smartcard Reader Standby-Button Remote control sensor Rear view Power switch TV-Scart Modem LNB-In port Modem Scart TV LNB IN DC 12V Digital SERVICE eSATA Audio HDMI Ethernet Service Digital eSATA Network audio out port connector interface HDMI Power... -
Page 8: Explanation Front Panel
The 10/100Mbit Ethternet port is used to communicate with your Dreambox via HTTP, FTP, NFS, Telnet, SSH and Samba. This port is also used to update the operating system of your Dreambox. Please use a regu- lar patch cable to connect your Dreambox to your LAN. -
Page 9: Remote Control
All functions of the Dreambox can be controlled via OSD-Menu (On-Screen-Display). This makes the hand- ling of the Dreambox very easy for you. All options are indicated by four colored dots or beams ( red, green, yellow, blue ) in the OSD-Menu and can be started with the Option-Buttons on the Remote Control. - Page 10 The Power-Button switches your Dreambox on and off. See chapter 4.1 Turning your Dreambox on and off. DREAM-Mode-Button The DREAM-Mode-Button switches your remote control into Dreambox control mode. It will shortly light up once your press the button. TV-Mode-Button The TV-Mode-Button switches your remote control into TV control mode to control your preprogrammed TV.
- Page 11 -11- Numeric-Keypad Enter a service number to directly access the option by using the Numeric Keypad . The service numbers are on the left side of the service list. The Numeric Keypad can also be used to enter the teletext page number when you are in TV-Control-Mode and if your TV is teletext capable.
- Page 12 -12- OK-Button By pressing the OK-Button you confirm a selection in the menu or service list navigation. If no OSD menu is present on your screen, the infobar is shown once you press the OK-Button . MENU-Button If you are in TV- or RADIO-Mode, pressing this button will bring up the OSD main menu. The OSD main menu has the following options: You can switch to the needed option by pressing the Navigation-Buttons up or down.
-
Page 13: Installation
Dreambox. • If you are using a switchable power socket please shutdown your Dreambox into deep standby before switching off the power socket. See chapter 4.1 Turning your Dreambox on and off. • If you switch on your Dreambox for the first time, you will see the setup wizard. The setup wizard will guide you through the first time installation. Follow the instructions on the screen. -
Page 14: Start Wizard
You will be shown different video output modes for roughly 10 seconds, after you have connected and swit- ched on your Dreambox. Once you see a clear picture on your TV screen press the OK-Button to select it. If you prefer a different output than the selected one you can use the Navigations-Buttons up/down and the OK-Button to select it. -
Page 15: Language Selection
You will be asked if you want to set the basic settings for your Dreambox now or if you want to quit the start wizard. Using the Navigation-Buttons up and down select your desired option and press the OK-Button to activate your selection. -
Page 16: Tuner Setup
-16- 3.3 Tuner setup Detailed information about the tuner setup can be found in chapter 11.1 DVB-S2 Tuner configuration. 3.4 Default services list/Service scan Depending on your tuner configuration in the previous step, you might be offered to install default services lists. -
Page 17: Network
-17- Entering the pincode Finalizing the basic setup 3.6 Network The network wizard will assist you with the network setup of your Dreambox. Press the OK-Button on your remote control to get to start the configuration. - Page 18 OK-Button to select. Usually the standard setting (Use DHCP) should work if you have connected your Dreambox to a internet router. The DHCP-Server needed for this setting is most of the time activated by default on a router.
-
Page 19: Basic Operation
4.1 Turning your Dreambox on and off Use the Power-Button to turn your Dreambox on and off. To put your Dreambox into Standby-Mode either press the Power-Button on your remote control or directly on your Dreambox. Holding down the Power-Button on your remote control for three seconds will put your Dreambox into the Deep-Standby-Mode. -
Page 20: Service Selection
Puts your Dreambox into Deep-Standby-Mode. 4.2 Service selection Pressing the Left/Right-Buttons on your Dreambox remote control will take you to the previous or next service. Pressing the 0 on the Numeric-Keypad will enable you to skip back and forth between the two most recently watched services. -
Page 21: Changing The Audio Track
-21- 4.5 Changing the audio track Pressing the AUDIO-Button in TV or Radio Mode will reveal the “Audio” menu of the selected service. Use the Navigation-Buttons up and down to move to desired audio track. Press the OK-Button to select. The contents of this menu will vary from service to service. -
Page 22: Infobar
(See chapter 5.1) and pressing the blue Options-Button activates the “Multi-EPG“ (See chapter 5.2). The Dreambox automatically searches for similar broadcasts in the background. If one or more similar broadcasts are found the label “Similar” will appear in the red window. -
Page 23: Single-Epg
-23- Pressing the red Options-Button opens a listing of similar broad- casts. By pressing the green Options-Button you can set a timer for this rerun. 5.1 Single-EPG In this view you are supplied with detailed information about the currently selected channel’s programming. By pressing the yellow Options-Button your can ether sort the “Single-EPG”... -
Page 24: Graphical Multi-Epg
-24- General overview of the following General overview of the upcoming programming for_the following programming. days. (Depending on the station up_to_one week). Time/Date Input Press the Menu-Button in the Multi-EPG view. A window will appear where you can enter a time and date. After you have entered the desired time and date press the OK- Button to activate you selection. -
Page 25: Edit The Channellist
-25- Time/Date Input Press the Menu-Button in the Multi-EPG view. A window will appear where you can enter a time and date. After you have entered the desired time and date press the OK- Button to activate you selection. 6. Edit the channellist What is a bouquet? A bouquet can be thought of something like a folder. -
Page 26: Adding A Bouquet
-26- You cannot delete the channels in the “All” view. The use of the “All” view is to keep an internal list of all available stations. If you start a new channel search the result would be saved to the “All” view for example. -
Page 27: Add A Service To Favorites
-27- 6.2 Add a service to favorites If you want to add a service to your Favorites-view you can choose from services in the All-, Satellites - and Provider-views . You can switch views by pressing the red, green, yellow and blue Options-Buttons . At this point we only describe the process from the All-Bouquet since it is the same for the others. -
Page 28: Remove A Service From Favorites
-28- By pressing the Menu-Button the “Channellist menu“ will open up. Navigate to the option “enable bouquet edit“. The Allview will open up. All services that are in the selected bouquet are highlighted red. Use the Up/Down-Buttons to navigate to a desired service and press the OK-Button to select. -
Page 29: Moving A Service To Favorites
-29- Navigate to the option “remove service”. The selected service will be deleted from your favorites list. 6.5 Moving a service to favorites Pressing the Up/Down-Buttons on your remote control activates the service list. Use the Navigation-Buttons up/down to select the desired service and press the MENU-Button to open the “Channellist menu”. -
Page 30: Adding A Marker To Favorites
-30- Use the Navigation-Buttons up and down to move the service to the desired position. Press the OK-Button to release the service and thus placing it at it’s new position. You can move services as long as the move mode is activated. To disable the move mode press the MENU-Button to get into the “Channellist menu”... -
Page 31: Parental Control
-31- As an example we have added two markers as shown in the picture on the left. Use the Arrow-Left and Arrow-Right-Buttons to jump between those two markers. 6.7 Parental control Parental control makes it possible to lock selected channels. If no OSD menu is visible on your screen, press the Menu-Button to open the main OSD menu. - Page 32 -32- You have to enter the new pincode twice to ensure you didn’t make any typing errors. You now will be prompted to enter the old pincode and afterwards the new one. You will see this notice that the pincode has been changed. Press the OK-Button to get back into the Parental control menu.
- Page 33 -33- The Parental control services Editor will open up. All services be- ginning with the letter P are shown. Select “ProSieben” and press the OK-Button. A symbolized padlock will appear in front of the channel letting you know that it can only be watched when the right pincode is entered.
-
Page 34: External Esata Hard Disk
7. External eSATA Hard Disk Note: All options described in this chapter are only available if you have connected an external SATA hard disk to the eSATA connector at the rear of your Dreambox DM500 HD. 7.1 Management If no OSD menu is visible on your screen, press the Menu-Button to open the main OSD menu. Navigate to the option “Setup”... -
Page 35: Recording
-35- 7.2 Recording 7.2.1 Instant recording Press the red Options-Button . You have five available options: - Add recording (indefinitely) - Add recording (stop after current event) - Add recording (enter recording duration) - Add recording (enter recording endtime) - Don't record Use the up/down-Buttons to navigate to you desired selection and press the OK-Button to select. -
Page 36: Stop Recording
Use the Navigation-Buttons up and down to select. Press the OK-Button to activate. Your Dreambox will be turned on 5 minutes before the recording if a recording is supposed to start while the Dreambox is in Deep-Standby mode. Note: If your Dreambox is in Deep-Standby mode no timer recordings will be possible. -
Page 37: Manual Programming
You can decide what should happen after the recording finishes by selecting the “After event“ option. You can choose between • auto to keep your Dreambox in the same state as before the recording • do nothing to keep your Dreambox turned on after the recording • go to standby to put your Dreambox into Standby mode... -
Page 38: Timeshift
-38- Programming via EPG Change into on of the EPG views as described in chapter 5. By pressing the green Options-Button you have the option to automatically add the selected show with it’s start and end time as a timer. All other options are the same as in the manually added timer. - Page 39 -39- If you have previously watched the movie you will be asked to con- tinue where you left off when you start watching it the next time. If you do not make a selection within 10 seconds the window will disappear and the movie starts from the beginning. In PVR-Mode the Options-Buttons are mapped as described below: Green Options-Button Blue Options-Button...
-
Page 40: Setting A Marker (Bookmarks)
-40- Skipping in a recording Button Time Button Time 10 sec. back 10 sek. forward 1 min. back 1 min. forward 5 min. back 5 min. forward Spooling in a recording The following speeds for spooling in a recording are available: • Forward ( ): 2x,4x,8x,16x,32x,48x,64x,128x blue Options-Button • Back ( ): 8x,16x,32x,48x,64x,128x red Options-Button Every press on the button increases the speed by one step. -
Page 41: Delete A Recording
-41- 7.5 Delete a recording Press the Video-Button to get to the selection of recordings. Use the Navigation-Buttons up and down to select a recording. Press the Menu-Button . Use the Navigation-Buttons up and down to select “Delete” and press the OK-Button . You will be asked if you want to delete the recording. - Page 42 -42- List styles You have the choice between different list styles: • List style default • List style compact with description • List style compact • List style single line • Show extended description List styles List style single line List style default with extended List style default description List style compact List style compact with desciption...
-
Page 43: Teletext
-43- 8. Teletext You are in the TV or Radio mode. Press the Text-Button to enter the Teletext. Keep in mind that not every station transmits Teletext! Teletext - regular navigation: If you are viewing any Teletext page you can enter the interactive mode by pressing the OK-Button .Use the Navigation-Buttons to select a text page number and press the OK-Button to call this page. -
Page 44: Sleep Timer
For further information see www.tuxtxt.net 9. Sleep timer Using the sleep timer you can put your Dreambox into standby or turn it off after a predetermined amount of time. If no OSD menu is visible on your screen, press the Menu-Button to open the main OSD menu. Navigate to the option “Standby / Restart”... -
Page 45: Setup
Press the red Options-Button to change the status. Sleep timer action: Select “Deep Standby” to completely turn off you Dreambox or “Standby” to put it into standby mode. Press the green Options-Button to toggle the sleep timer action. Ask before shutdown: If this option is set to “Yes”... -
Page 46: Customize
-46- 10.2 Customize If no OSD menu is visible on your screen, press the Menu-Button to open the main OSD menu. Navigate to the option “Setup” and press the OK-Button to select. 1. Navigate to the option “System” and press the OK-Button. • The “System” menu will open up. -
Page 47: Setting The Time Zone
-47- Recordings always have priority: If this option is set to “Yes” your Dreambox will automatically switch to the service which is supposed to be recorded incase there is a conflict with an existing timer. If you set this option to “No” you will be asked if you want to switch to the service which is supposed to be recorded. -
Page 48: A/V Settings
This option selects to which output the video signal will be sent to. HDMI If you have connected your TV to the HDMI output of your Dreambox set the “Output type” option to HDMI. Scart If you have connected your TV to the Scart output of your Dreambox set the “Output type” option to Scart. - Page 49 -49- AC3 downmix: If you’re watching a show with a AC3 audio track it will be changed into a stereo signal. Set this option to “yes” if your have an AV-Receiver that does not support Dolby Digital. General AC3 Delay: Using this option you can set a delay for the AC3 signal.
-
Page 50: Network
Use DHCP: If set to “yes“ your Dreambox will get its IP from a DHCP server. If you are using a router to access the inter- net you usually have a DHCP server. Disable this option to set a static IP address. - Page 51 Domain name to an IP address. Normally, if the Type is set to LAN, there is no need for a DNS entry. If the Dreambox is connected to the Internet over a router, enter the router’s IP address here.
-
Page 52: Skin
1. Navigate to the option “Factory reset” and press the OK-Button. You are asked if you really want to reset all you settiongs to the factory defaults. If you choose “yes“ all you configuration data inclusing bouquets, sattelite data, etc. will be lost. Your Dreambox will automatically reboot afterwards. -
Page 53: Service Searching
Use this type of configuration if you want to receive a single satellite with a Single Universal LNB. The coax cable is directly connected from you Dreambox to the LNB. Please read the section 11.1 DVB-S2 configurati- on to learn how to get into this menu. -
Page 54: Two Satellites Via Toneburst A/B
Connect the two coax cables form the two LNBs to a so-called Toneburst switch and connect the coax cable from the Toneburst switch to your Dreambox. Please read the section 11.1 DVB-S2 configuration to learn how to get into this menu. -
Page 55: Four Satellites Via Diseqc A/B/C/D
-55- For Port A and Port B select the desired satellites just as described in the Single satellite – direct connection section. Make sure you know which satellite is connected to which input on the Toneburst switch. If you do not find any services in the trans- ponder scan later, exchange the two satellites in this list and try again. -
Page 56: Stab Positioner Using Usals
Use this type of configuration if you want to receive many satellites with a Stab positioner from a Single Uni- versal LNB. The coax cable is directly connected from you Dreambox to the LNB. Please read the section 11.1 DVB-S2 configuration to learn how to get into this menu. -
Page 57: Automatic Scan
-57- Navigate to the option “Use usals for this sat” and change the setting to “no” using the Navigation-Buttons left and right . Navigate to the option “Stored position“ and enter position of the selected satellite which is saved in the positioner by using the Numeric Keypad . -
Page 58: Manual Scan
-58- You can see the progress of the scan here. The scan is done once you see this menu. It shows how many channels were found during the scan. Press the OK-Button to close this menu. 11.3 Manual scan If no OSD menu is visible on your screen, press the Menu-Button to open the main OSD menu. Navigate to the option “Setup”... -
Page 59: Systeminformation
“Information” and press the OK-Button to select. 1. Navigate to the option “About” and press the OK-Button. • The “About” menu will open up. This window shows all relevant information about the Hard- and Software of your Dreambox. Press the OK-Button to close this menu. -
Page 60: Installing New Software
-60- 13. Installing new software How do I install new software on my Dreambox DM500 HD? Prerequisites: • PC with Windows operating system • DreamUP software (current version under http://www.dream-multimedia-tv.de) • 1 Mini-USB cable • 1 network cable (optional) 1. Disconnect you Dreambox from the power. 2. Connect the Mini-USB plug of you Mini-USB to USB cable to the service port of your Dreambox and the USB plug to your PC. - Page 61 11. The flash loader will now be transferred to your Dreambox. 12. After the flash loader has been transferred to your Dreambox select the Flash Box Button in the DreamUp software. Select the software image and click on the Open...
- Page 62 13. The new software is now being transferred to your Dreambox. 14. If the process was successful you will get a Box was flashed successfully message. 15. Click on OK and on Exit afterwards. 16. Disconnect and reconnect your Dreambox from power.
-
Page 63: Troubleshooting
(Dream-Mode, TV-Mode) button Software is not reacting Reboot Dreambox Dreambox does not react Dreambox is locked up Reboot Dreambox 15. TV-Mode setup A four digit device code is selected from the device list and entered into the remote control. -
Page 64: Programming The Remote Control
-64- 15.1 Programming the remote control • Press the TV-Mode-Button once. • Press the SHIFT/Setup-Button for 3 seconds, the TV-Mode-Button will flash twice. • Use the Numeric-Keypad to enter the four digit device code into the remote control. The TV-Mode-Button will flash once for every digit you enter. Once you have entered all four digit the TV-Mode-Button will flash twice. • The remote control exits the programming mode automatically. • If no code is entered within 10 seconds the remote control will exit the programming mode automatically. 16. - Page 65 -65- Digital out: Outputlevel 0,5 Vss at 75 Ohm Frequency 32 kHz, 44.1 kHz, 48kHz S/P-DIF-output optical Video out: Outputlevel FBAS 1 Vss +/- 0.3 dB at 75 Ohm Video parameters: Inputlevel FBAS 1 Vss +/- 0.3 dB at 75 Ohm Teletext according to ETS 300 427 standards TV-Scart: Output: FBAS, RGB, S-Video over OSD selectable...
-
Page 66: Contact & Support Information
-66- 17. Contact & support information Headquarter & Distribution: Dream-Multimedia GmbH Pierbusch 24-26 44536 Lünen Deutschland Dealer’s Hotline: (Dealers only) Tel.: +49 (0)180 - 3 44 11 30 992 Fax: +49 (0)180 - 3 44 11 30 993 0,09 €/min from german landline, mobile prices may vary You can reach the dealer’s hotline from : Mo - Fr. 09:00 am - 15:00 pm Enduser Hotline: Tel.: +49 (0)180 - 3 44 11 30 990 Fax: +49 (0)180 - 3 44 11 30 991... -
Page 67: Copyright Notes
-67- 18. Copyright notes © Dream-Multimedia 2010. All rights reserved. This document is copyrighted with all rights reserved. Under copyright laws the documentation may not be copied, photocopied, reproduced, translated, or reduced to electronic medium or machine readable form, in whole or in part without prior written consent of Dream-Multimedia GmbH. Failure to comply with this condition may result in prosecution. -
Page 68: Gnu General Public License
-68- 18.1 GNU GENERAL PUBLIC LICENSE Version 2, June 1991 Copyright (C) 1989, 1991 Free Software Foundation, Inc. 51 Franklin Street, Fifth Floor, Boston, MA 02110-1301, USA Everyone is permitted to copy and distribute verbatim copies of this license document, but changing it is not allowed. Preamble The licenses for most software are designed to take away your freedom to share and change it. - Page 69 -69- the right to control the distribution of derivative or collective works based on the Program. In addition, mere aggregation of another work not based on the Program with the Program (or with a work based on the Program) on a volume of a storage or distribution medium does not bring the other work under the scope of this License.
- Page 70 -70- 9. The Free Software Foundation may publish revised and/or new versions of the General Public License from time to time. Such new versi- ons will be similar in spirit to the present version, but may differ in detail to address new problems or concerns. Each version is given a distinguishing version number.
-
Page 71: Service Slip
Place, date, signature NOTE: PLEASE PUT THE DREAMBOX INTO A PLASTIC BAG OR WRAP IT IN PLASTIC FOIL. THEN PUT IT INTO IT‘S ORIGINAL PACKAGIN IF POSSIBLE. OTHERWISE INTO A STURDY BOX. THIS PREVENTS SCRATCHES FROM THE TRANSPORT PROCESS. THANK YOU!