Panasonic Lumix DMC-TZ30 Basic Operating Instructions Manual
Hide thumbs
Also See for Lumix DMC-TZ30:
- Operating instructions manual (197 pages) ,
- Operating instructions for advanced features (197 pages) ,
- Basic operating instructions manual (28 pages)
Table of Contents
Advertisement
Basic Operating Instructions
Digital Camera
DMC-TZ30/DMC-ZS20
Model No.
Before use, please read these instructions completely.
More detailed instructions on the operation of this
camera are contained in "Operating Instructions
for advanced features (PDF format)" in the
supplied disc. Install it on your PC to read it.
VQT4B85-1
GC GA GH SG
M0212KZ1032
Advertisement
Table of Contents

Related Manuals for Panasonic Lumix DMC-TZ30


Summary of Contents for Panasonic Lumix DMC-TZ30
-
Page 1: Basic Operating Instructions
Basic Operating Instructions Digital Camera DMC-TZ30/DMC-ZS20 Model No. Before use, please read these instructions completely. More detailed instructions on the operation of this camera are contained in “Operating Instructions for advanced features (PDF format)” in the supplied disc. Install it on your PC to read it. -
Page 2: Information For Your Safety
Dear Customer, We would like to take this opportunity to thank you for purchasing this Panasonic Digital Camera. Please read these Operating Instructions carefully and keep them handy for future reference. Please note that the actual controls and components, menu items, etc. of your Digital Camera may look somewhat different from those shown in the illustrations in these Operating Instructions. - Page 3 ■ About the battery pack CAUTION • Danger of explosion if battery is incorrectly replaced. Replace only with the type recommended by the manufacturer. • When disposing the batteries, please contact your local authorities or dealer and ask for the correct method of disposal. •...
- Page 4 ■ About the AC adaptor (supplied) CAUTION! To reduce the risk of fire, electric shock or product damage, • Do not install or place this unit in a bookcase, built-in cabinet or in another confined space. Ensure this unit is well ventilated. •...
-
Page 5: Cautions For Use
• Always use a genuine Panasonic HDMI mini cable (RP-CDHM15, RP-CDHM30: optional). Part numbers: RP-CDHM15 (1.5 m), RP-CDHM30 (3.0 m) • Always use a genuine Panasonic AV cable (DMW-AVC1: optional). The optional HDMI mini cable and AV cable are available only for DMC- TZ30GC/DMC-TZ30GA/DMC-ZS20GH. -
Page 6: Table Of Contents
Contents Information for Your Safety ..2 Taking pictures ......15 Before use ........6 Taking motion pictures ....16 Standard accessories ....7 Viewing your pictures Names and Functions of [Normal Play] ......18 Main Parts ........8 Deleting pictures ......18 Touch operations ......9 GPS and map functions ...19 Inserting and removing the Reading the Operating card (optional)/the battery ..10... -
Page 7: Standard Accessories
Standard accessories Check that all the accessories are supplied before using the camera. Part numbers are as of January 2012. Battery pack Hand strap DMW-BCG10E VFC4297 • Charge the battery before use. USB connection Battery pack is indicated as cable battery pack or battery in the K1HY08YY0025 text. -
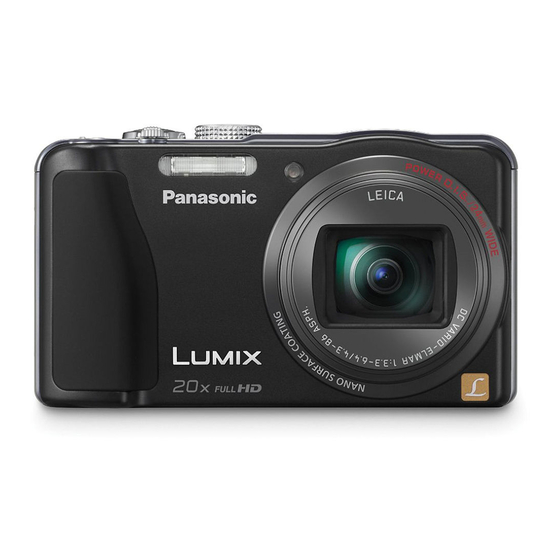
Page 8: Names And Functions Of Main Parts
Names and Functions of Main Parts Camera ON/OFF switch Shutter button Mode dial Flash Self-timer indicator/AF Assist Lamp Lens barrel Lens Zoom lever Built-in GPS antenna Microphone GPS status indicator Speaker [EXPOSURE] button Motion picture button REC/PLAY switch [MAP] button [HDMI] socket LCD monitor [AV OUT/DIGITAL]... -
Page 9: Touch Operations
Touch operations This camera’s touch screen senses pressure that is applied to the screen. Touch To “touch” is to press the touch screen and then pull the finger back again. Touching is used to select icons or pictures, among other actions. -
Page 10: Inserting And Removing The Card (Optional)/The Battery
Always use genuine Panasonic batteries (DMW-BCG10E). ● If you use other batteries, we cannot guarantee the quality of this product. ● Keep the Memory Card out of reach of children to prevent swallowing. ● We recommend using a Panasonic Memory card. VQT4B85 (ENG) -
Page 11: Charging The Battery
Charging the battery • The battery is not charged when the camera is shipped. Charge the battery before use. • Charge the battery with the AC adaptor (supplied) indoors (10 °C to 30 °C). • Always use the dedicated AC adaptor (supplied), USB connection cable (supplied), and battery. -
Page 12: Setting The Clock
Setting the clock The clock is not set when the camera is shipped. Set REC/PLAY switch to before turning the camera on. Disconnect the unit from the AC adaptor (supplied). Turn the camera on ( ) Press [MENU/SET] ( ) Press to select the language, and press [MENU/SET]... - Page 13 When [Please set the home area] is displayed, press [MENU/SET] Press to set your home area and press [MENU/SET] The current time and home area are set. ■ To change the time setting Select [Clock Set] from [Rec] or [Setup] menu, perform (ENG) VQT4B85...
-
Page 14: Setting The Menu
Setting the menu Refer to the following procedures to operate the menus. Example: Setting [AF Mode] from in the [Program AE] Mode Press [MENU/SET] to display the menu Switching to the [Rec] menu Use cursor button to select [Rec] and press [MENU/SET]. -
Page 15: Taking Pictures
Taking pictures Shutter button Turn the camera on ( ) Slide the REC/PLAY switch ( ) Set to the desired recording mode ■ Recording mode Take pictures with automatic settings. The subjects are recorded using your own settings. The shutter speed is automatically determined by the aperture value you set. -
Page 16: Taking Motion Pictures
Taking motion pictures Recording mode: You can record motion pictures with audio (stereo). Zoom can also be used during recording. Slide the REC/PLAY switch ( ) Press the motion picture button ( ) to start recording Press the motion picture button ( ) again to end recording Remaining recording time (approx.) Elapsed recording time... - Page 17 ● We recommend you use a battery with sufficient battery power when recording motion pictures. ● Immediately release the motion picture button after pressing it all the way. ● You can continuously record a motion picture in [MP4] for up to 29 minutes 59 seconds or approx.
-
Page 18: Viewing Your Pictures [Normal Play]
Viewing your pictures [Normal Play] Slide the REC/PLAY switch ( ) Drag your finger across the screen, and select the picture to be played back ● To play back a motion picture, touch or press after selecting a picture. ● You can print pictures by connecting a camera to your computer or printer, or by giving an SD card to a shop assistant at a photo shop. -
Page 19: Gps And Map Functions
GPS and map functions Before using the camera, be sure to read “Licence Agreement for Place Name and Map Data” (Operating Instructions for advanced features). This camera can record the location information of a place where a picture was taken on the pictures. The camera can also automatically adjust the time or display a place where a picture was taken on a map during playback. -
Page 20: Displaying The Status And Result Of Positioning
GPS and map functions ■ Displaying the status and result of positioning The icons that indicate the status and result of positioning will appear on the LCD monitor. When positioning is successful, camera will search the place name information (name of place and landmark) inside its internal database and display it. - Page 21 Confirming the place where you took a picture using a map You can display a map showing the location where a picture was taken or your current location. ● If you copy the map data stored on the supplied DVD to a memory card, you can display more detailed maps.
-
Page 22: Reading The Operating Instructions (Pdf Format)
Reading the Operating Instructions (PDF format) More detailed instructions on the operation of this camera are contained in “Operating Instructions for advanced features (PDF format)” in the supplied disc. Install it on your PC to read it. To read the supplied DVD, use a DVD drive with single-sided dual layer support. -
Page 23: Installing Supplied Software
Installing supplied software This software allows you to acquire pictures to the PC, and also categorise these acquired pictures by their recording date or the model name of the camera used. • Before inserting the disc, close all running applications. Check the environment of your PC Operating environment of PHOTOfunSTUDIO 8.1 PE Windows XP (32 bit) SP3... -
Page 24: Specifications
Specifications Digital Camera: Information for your safety Power Source DC 5.1 V Power When recording: 1.4 W Consumption When playing back: 1.1 W Camera effective 14,100,000 pixels pixels Image sensor 1/2.33” MOS sensor, total pixel number 15,300,000 pixels Primary colour filter Lens Optical 20 x zoom [NANO SURFACE... - Page 25 LCD monitor 3.0” TFT LCD (4:3) (Approx. 460,800 dots) (field of view ratio about 100%) / Touch screen Microphone Stereo Speaker Monaural Recording media Built-in Memory (Approx. 12 MB) SD Memory Card / SDHC Memory Card / SDXC Memory Card Recording file format Still picture...
- Page 26 Specifications AC adaptor (Panasonic VSK0775 (DMC-TZ30GC/DMC-ZS20GH)): Information for your safety Input ~ 110 V to 240 V, 50/60 Hz, 0.2 A Output 5 V, 800 mA AC adaptor (Panasonic VSK0772 (DMC-TZ30GA)): Information for your safety Input ~ 110 V to 240 V, 50/60 Hz, 0.2 A...
- Page 27 (ENG) VQT4B85...
- Page 28 Multimedia Interface are trademarks or registered trademarks of HDMI Licensing LLC in the United States and other countries. • HDAVI Control™ is a trademark of Panasonic Corporation. • “AVCHD Progressive”, “AVCHD”, the “AVCHD Progressive” Logo and the “AVCHD” Logo are trademarks of Panasonic Corporation and Sony Corporation.