Table of Contents
Advertisement
Available languages
Available languages
Advertisement
Table of Contents

Related Manuals for Alesis Q49


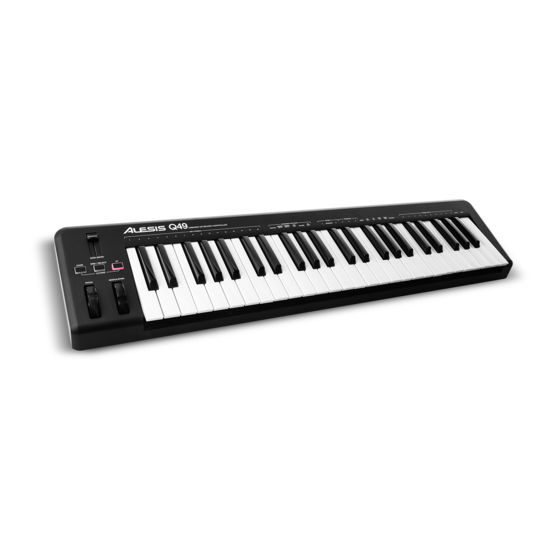
Summary of Contents for Alesis Q49
- Page 1 USB/MIDI KEYBOARD CONTROLLER QUICKSTART GUIDE ENGLISH ( 3 – 5 ) GUÍA DE INICIO RÁPIDO ESPAÑOL ( 6 – 8 ) GUIDE D'UTILISATION RAPIDE FRANÇAIS ( 9 – 11 ) GUIDA RAPIDA ITALIANO ( 12 – 14 ) KURZANLEITUNG DEUTSCH ( 15 – 17 )
-
Page 3: Connection Diagram
INTRODUCTION This Quickstart Guide is intended to give you a brief overview of the functionality and features of the Q49. In this manual you will find instructions on how to connect the Q49 and how to use its basic features. Enjoy! CONNECTION DIAGRAM Please refer to the following scenario for connecting the Q49. -
Page 4: Top Panel Overview
/ # – Lowers or raises (respectively) the pitch of the entire KEYBOARD a semitone. RESET – Press this key followed by the Enter key to send a reset message to all controllers and return the Q49 to its original settings. -
Page 5: Troubleshooting
Unplug the Q49 from the USB hub and connect directly a USB hub. to the computer. Ensure that the Q49 or USB MIDI device is listed as an Software application not set active MIDI source in your application. Usually, the... -
Page 6: Diagrama De Conexión
Este Manual de inicio rápido tiene la finalidad de brindarle una breve descripción general de la funcionalidad y las características del Q49. Encontrará en el mismo instrucciones sobre cómo conectar el Q49 y cómo usar sus características básicas. ¡Que lo disfrute! DIAGRAMA DE CONEXIÓN... - Page 7 Pulse MIDI / SELECT. CANAL MIDI – Selecciona el canal MIDI (1 a 16) por el cual el Q49 transmite los mensajes MIDI. El valor predeterminado es el Canal 1. VELOCIDAD – Pulse esta tecla para configurar el CURSOR DATA ENTRY para ajustar la velocidad de nota. Al aumentar este valor se incrementa el valor de velocidad MIDI generado por una pulsación ligera de la tecla.
-
Page 8: Solución De Problemas
REINICIACIÓN – Pulse esta tecla y a continuación la tecla Enter para enviar un mensaje de reiniciación a todos los controladores y regresar el Q49 a sus valores de parámetros originales. Nota: Este botón no reinicia la gama de octavas actual o la transposición del TECLADO. -
Page 9: Schéma De Connexion
INTRODUCTION Ce guide d’utilisation simplifié vous propose une vue d’ensemble des fonctions et des caractéristiques du Q49. Vous trouverez dans ce guide les instructions de raccordement et d’utilisation du Q49. Amusez-vous bien! SCHÉMA DE CONNEXION Veuillez vous reporter aux consignes suivantes pour le raccordement du Q49. - Page 10 Appuyez sur la touche Enter ou Cancel du clavier afin de confirmer ou d’annuler votre sélection. Appuyez sur la touche MIDI / SELECT. MIDI CHANNELS – Ces touches permettent de sélectionner le canal MIDI (1 à 16) sur lequel le Q49 transmettra les messages MIDI. Le canal 1 est celui par défaut.
-
Page 11: Guide De Dépannage
Le Q49 est mal branché. ordinateur. Si vous commandez un module externe matériel, assurez-vous que le câble MIDI est branché du Q49 à l’entrée MIDI de l’appareil. Le Q49fut branché après que Relancez le logiciel seulement après avoir branché le Aucun son provenant de le logiciel soit lancé. -
Page 12: Schema Dei Collegamenti
INTRODUZIONE Questa guida rapida di utilizzo è intesa a fornire una breve panoramica sulle funzioni e caratteristiche del Q49. In questo manuale troverete le istruzioni su come collegare il Q49 e su come servirsi delle sue funzioni base. Buon divertimento! - Page 13 Premere MIDI / SELECT. CANALI MIDI – Seleziona il canale MIDI (1-16) sul quale il Q49 trasmetterà i messaggi MIDI. Quello predefinito è il Canale 1. VELOCITÀ – Premere questo tasto per fare in modo che il CURSORE DI INSERIMENTO DATI regoli la velocità delle note.
-
Page 14: Risoluzione Di Problemi
Nota bene: dopo aver inserito un numero di CC, questo verrà Change. memorizzato dal Q49. Tuttavia, se si desidera inviare un CC o un messaggio Program Change occorre inserire il valore servendosi dei tasti numerati sulla TASTIERA ogni volta (anche se il valore desiderato compare sullo schermo LCD) prima di premere Enter. - Page 15 EINLEITUNG Diese Schnellanleitung enthält eine kurze Übersicht der Bedienelemente und Funktionen des Q49. Hier finden Sie auch Anweisungen, wie das Q49 angeschlossen und bedient wird. Wir wünschen Ihnen damit viel Freude! ANSCHLUSSDIAGRAMM Legen Sie beim Anschluss des Q49 bitte die folgende Situation zugrunde.
- Page 16 Mit Enter bestätigen oder mit Cancel löschen. MIDI / SELECT-Taste drücken. MIDI-KANÄLE – Damit kann der MIDI-Kanal (1-16) gewählt werden, über welchen das Q49 MIDI-Mitteilungen sendet. Ab Werk ist hier immer Kanal 1 eingestellt. VELOCITY – Mit dieser Taste stellt man den DATENEINGABEREGLER darauf ein, die Notengeschwindigkeit einzustellen.
-
Page 17: Fehlerbehebung
RESET – Durch Drücken dieser Taste und einer Bestätigung mit ENTER wird ein Rücksetzbefehl an alle Steuerungseinheiten gesendet und das Q49 stellt wieder die ab Werk eingegebenen Werte ein. Hinweis: Diese Taste ändert den augenblicklichen Oktavenbereich oder die Notenverlagerung des KEYBOARDS nicht. -
Page 18: Midi Implementation Chart
MIDI IMPLEMENTATION CHART Transmit/Export Recognize/Import Remarks 1. Basic Information MIDI channels 1-16 Default = 1 Note numbers 12-108 With Octave +/- buttons Program change 1-128 Bank Select response 0-127 Modes supported: Mode 1: Omni-On, Poly Mode 2: Omni-On, Mono Mode 3: Omni-Off, Poly Mode 4: Omni-Off, Mono Multi Mode Note-On Velocity... - Page 20 www.alesis.com...