Viking VCSB423 Installation Instructions Manual
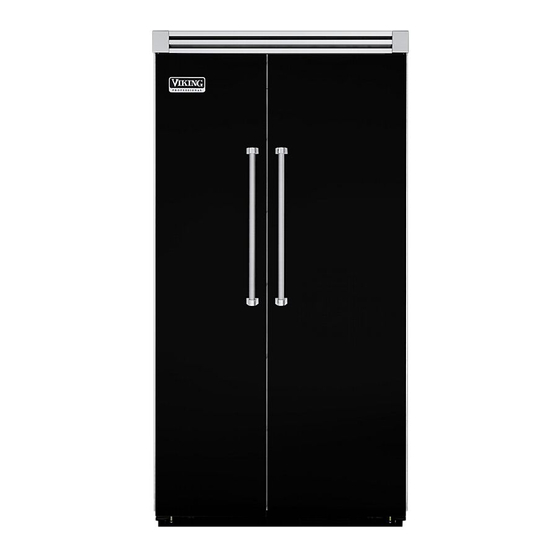
Built-in side-by-side refrigerator/freezer
Hide thumbs
Also See for VCSB423:
- Brochure & specs (64 pages) ,
- Install manual (24 pages) ,
- Installation manual (24 pages)
Table of Contents
Advertisement
INSTALLATION
INSTRUCTIONS
BUILT-IN SIDE-BY-SIDE REFRIGERATOR/FREEZER
Retain for Future Reference
IMPORTANT - PLEASE READ AND FOLLOW
Make sure that incoming voltage is the same as unit rating. An electric rating plate specifying voltage, frequency, wattage,
amperage, and phase is attached to the product.
To reduce the risk of fire, electric shock, or injury to persons, installation work and electrical wiring must be done by qualified
people in accordance with all applicable codes and standards, including fire-rated construction.
The installer should leave these instructions with the consumer who should retain them for local inspector's use and for
future reference.
GENERAL INFORMATION
Y Y o o u u r r s s a a f f e e t t y y a a n n d d t t h h e e s s a a f f e e t t y y o o f f o o t t h h e e r r s s
i i s s v v e e r r y y i i m m p p o o r r t t a a n n t t . .
We have provided many important safety
messages in this manual and on your
appliance. Always read and obey all
safety messages.
This is the safety alert symbol. This
symbol alerts you to hazards that
can kill or hurt you and others.
All safety messages will be
preceded by the safety alert
symbol and the word "DANGER" or
"WARNING". These words mean:
DANGER
Y Y o o u u w w i i l l l l b b e e k k i i l l l l e e d d o o r r s s e e r r i i o o u u s s l l y y i i n n j j u u r r e e d d i i f f y y o o u u
d d o o n n ' ' t t f f o o l l l l o o w w i i n n s s t t r r u u c c t t i i o o n n s s . .
WARNING
Y Y o o u u c c a a n n b b e e k k i i l l l l e e d d o o r r s s e e r r i i o o u u s s l l y y i i n n j j u u r r e e d d i i f f
y y o o u u d d o o n n ' ' t t f f o o l l l l o o w w i i n n s s t t r r u u c c t t i i o o n n s s . .
All safety messages will identify the
hazard, tell you how to reduce the chance
if injury, and tell you what can happen if
the instructions are not followed.
WARNING
T T I I P P O O V V E E R R H H A A Z Z A A R R D D
R R e e f f r r i i g g e e r r a a t t o o r r i i s s t t o o p p h h e e a a v v y y a a n n d d t t i i p p s s e e a a s s i i l l y y
w w h h e e n n n n o o t t c c o o m m p p l l e e t t e e l l y y i i n n s s t t a a l l l l e e d d . .
K K e e e e p p d d o o o o r r s s c c l l o o s s e e d d u u n n t t i i l l r r e e f f r r i i g g e e r r a a t t o o r r i i s s
c c o o m m p p l l e e t t e e l l y y i i n n s s t t a a l l l l e e d d a a n n d d s s e e c c u u r r e e d d p p e e r r
i i n n s s t t a a l l l l a a t t i i o o n n i i n n s s t t r r u u c c t t i i o o n n s s . .
U U s s e e t t w w o o o o r r m m o o r r e e p p e e o o p p l l e e t t o o m m o o v v e e a a n n d d
i i n n s s t t a a l l l l r r e e f f r r i i g g e e r r a a t t o o r r . . F F a a i i l l u u r r e e t t o o d d o o s s o o c c a a n n
r r e e s s u u l l t t i i n n d d e e a a t t h h o o r r s s e e r r i i o o u u s s i i n n j j u u r r y y . .
It is your responsibility to :
-comply with installation specifications and dimensions
-properly install refrigerator
-remove any moldings or decorative panels that prevent the refrigerator
from being serviced
-make sure that you have these materials (not provided with your
refrigerator), which are necessary for proper installation:
1/4" (6 mm) copper tubing with shutoff valve
6 - #8 x 3" (7.6 cm) wood screws (Longer screws may be required.)
1 - Saddle valve (Do not use self-piercing feature of the valve)
-assure that floor will support refrigerator, door panels and contents
(approximately 1200 pounds [540 kg])
-provide a properly grounded electrical outlet
-assure that location will permit appliance doors to open 90
VIKING RANGE CORPORATION
111 Front Street
Greenwood, Mississippi 38930 USA
(662) 455-1200
M M o o s s t t o o f f t t h h e e r r e e f f r r i i g g e e r r a a t t o o r r ' ' s s
w w e e i i g g h h t t i i s s a a t t t t h h e e t t o o p p . . E E x x t t r r a a c c a a r r e e
i i s s n n e e e e d d e e d d w w h h e e n n m m o o v v i i n n g g t t h h e e
r r e e f f r r i i g g e e r r a a t t o o r r t t o o p p r r e e v v e e n n t t t t i i p p p p i i n n g g . .
U U s s e e c c a a r r d d b b o o a a r r d d s s h h i i p p p p i i n n g g
m m a a t t e e r r i i a a l l o o r r p p l l y y w w o o o o d d u u n n d d e e r r
r r e e f f r r i i g g e e r r a a t t o o r r u u n n t t i i l l i i t t i i s s i i n n s s t t a a l l l l e e d d i i n n
t t h h e e o o p p e e r r a a t t i i n n g g p p o o s s i i t t i i o o n n t t o o
p p r r o o t t e e c c t t f f l l o o o o r r s s u u r r f f a a c c e e . .
minimum
o
Advertisement
Table of Contents

Related Manuals for Viking VCSB423


Summary of Contents for Viking VCSB423
-
Page 1: General Information
INSTALLATION VIKING RANGE CORPORATION 111 Front Street Greenwood, Mississippi 38930 USA INSTRUCTIONS (662) 455-1200 BUILT-IN SIDE-BY-SIDE REFRIGERATOR/FREEZER Retain for Future Reference IMPORTANT - PLEASE READ AND FOLLOW Make sure that incoming voltage is the same as unit rating. An electric rating plate specifying voltage, frequency, wattage, amperage, and phase is attached to the product. -
Page 2: Features Of Your Refrigerator
FEATURES OF YOUR REFRIGERATOR (NON-DISPENSER MODEL) 1. Electronic controls 8. Non-adjusting freezer shelf (1) 2. Dairy compartments (2) 9. Ice bucket (1) 3. Adjustable door bins (4) 10. Glide-out frezzer baskets (2) 4. Meat Savor TM /Produce Drawer (1) 11. Adjustable freezer shelves (3) 12. -
Page 3: Features
FEATURES OF YOUR REFRIGERATOR (ICE AND WATER DISPENSER MODEL) 1. Electronic controls 8. Spillproof shelves (5) 2. Dairy compartments (2) 9. Adjustable freezer shelves (3) 3. Adjustable door bins (4) 10. Non-adjusting freezer shelf (1) 4. Meat Savor TM /Produce Drawer (1) 11. - Page 4 SITE PREPARATIONS AND CONSIDERATIONS PROFESSIONAL MODEL SIDE-BY-SIDE CABINET OPENING DIMENSIONS ( ( 2 2 ) ) 2 2 ” ” x x 4 4 ” ” M M o o u u n n t t i i n n g g b b o o a a r r d d ( ( 1 1 1 1 / / 2 2 ”...
- Page 5 SITE PREPARATIONS AND CONSIDERATIONS DESIGNER/FULL OVERLAY MODEL SIDE-BY-SIDE CABINET OPENING DIMENSIONS ( ( 1 1 ) ) 2 2 ” ” x x 4 4 ” ” M M o o u u n n t t i i n n g g b b o o a a r r d d ( ( 1 1 1 1 / / 2 2 ” ” ( ( 3 3 . . 8 8 c c m m ) ) x x 3 3 1 1 / / 2 2 ” ” ( ( 8 8 . . 9 9 c c m m ) ) N N o o t t e e : : I I f f u u n n i i t t i i s s i i n n s s t t a a l l l l e e d d d d e e e e p p e e r r t t h h a a n n 2 2 4 4 ”...
-
Page 6: Water Supply Requirements
WATER SUPPLY REQUIREMENTS U U s s e e o o n n l l y y 1 1 / / 4 4 ” ” ( ( 6 6 m m m m ) ) c c o o p p p p e e r r t t u u b b i i n n g g f f o o r r w w a a t t e e r r l l i i n n e e . . D D o o WARNING N N o o t t i i n n s s t t a a l l l l c c o o p p p p e e r r t t u u b b i i n n g g i i n n a a r r e e a a w w h h e e r r e e t t e e m m p p e e r r a a t t u u r r e e s s E E L L E E C C T T R R I I C C A A L L S S H H O O C C K K H H A A Z Z A A R R D D... - Page 7 Plumbing Dimensions * * N N O O T T E E : : M M u u s s t t b b e e u u n n d d e e r r 1 1 ” ” ( ( 2 2 . . 5 5 c c m m ) ) f f r r o o m m b b a a c c k k w w a a l l l l *1”...
-
Page 8: Area Requirements
AREA REQUIREMENTS V V e e r r i i f f y y t t h h e e f f o o l l l l o o w w i i n n g g : : •Refrigerator can fit into residence and can be moved around corners and through doorways. - Page 9 DOOR SWING AND TIPPING CONSIDERATIONS 42” W. PROFESSIONAL MODEL 42” (106.7 cm) (10-19/32” 12-21/32” (26.3 CM) (32.1 cm) 41” (104,1 cm) 8-1/8” 9-1/16” (20.6 cm) (24.6 cm) 24-23/32” 41-5/16” 3” 3” (62.8 cm) (104.9 cm) (7.6 cm) 45-31/32” (7.6 cm) (116.8 cm) 40-19/32”...
- Page 10 DOOR SWING AND TIPPING CONSIDERATIONS 48” W. PROFESSIONAL MODEL 48” (121.9 cm) 26,3 cm 15-13/32” (10 19/32”) (39.1 cm) 47” (119.4 cm) 21,0 cm 11-9/16” (8-9/32”) (29.4 cm) 62,7 cm 41-27/32” 2-31/32” 2-31/32” (24 11/16”) (106.3 cm) (7.5 cm) 51-7/16” (7.5 cm) (130.7 cm) 41-1/8”...
- Page 11 DOOR SWING - 42" W. DESIGNER MODEL 42” (106.7 cm) 41” (104.1 cm) 9-1/2” 11/27-32” (24.1 cm) (30.1 cm) 24” 7-5/32” 8-3/4” (61.0 cm) (18.2 cm) (22.2 cm) 43-1/2” 1-27/32” 1-27/32” 39-15/32” (110.5 cm) (4.7 cm) (4.7 cm) (100.3 cm) 44-31/32”...
- Page 12 DOOR SWING - 48" W. DESIGNER MODEL DOOR SWING - 48" W. FULL OVERLAY MODEL...
-
Page 13: Tipping Considerations
TIPPING CONSIDERATIONS 42” W. DESIGNER AND FULL OVERLAY MODELS 4 4 2 2 ” ” ( ( 1 1 0 0 6 6 . . 7 7 c c m m ) ) S S I I D D E E T T I I P P P P I I N N G G R R A A D D I I U U S S 4 4 2 2 ”... - Page 14 SIDE-BY-SIDE REFRIGERATOR OVERALL DIMENSIONS PROFESSIONAL MODEL T T O O P P 9/32” (.7 cm 22 3/16” (56.4 cm) 24 3/4” (62.9 cm) 5/16” (0.8 cm) P P O O R R T T E E 5/16” Side Trim (0.8 cm) 1 1/2”...
- Page 15 CABINET INFORMATION - PROFESSIONAL MODELS Professional models fit “semi-flush” in standard 24” (61.0 cm) deep cabinet openings. The door face protrudes 2-1/2” (6.4 cm) from the cabinet face. The handle protrudes an additional 2-1/2” (6.7 cm) into the room 42" W 41-1/2"...
- Page 16 CUSTOM SIDE PANEL DIMENSIONS - PROFESSIONAL MODELS FOR 3/4" 1.9 cm) SIDE PANELS 15,2 cm (6”)
- Page 17 SIDE-BY-SIDE REFRIGERATOR OVERALL DIMENSIONS - DESIGNER MODELS T T O O P P P P O O R R T T E E S S I I D D E E F F R R O O N N T T 8 8 2 2 - - 7 7 / / 8 8 "...
- Page 18 CABINET AND PANEL INFORMATION - DESIGNER MODELS Designer models fit flush in standard 24” (61.0 cm) deep cabinet openings with no protrusion into the room except 2” (5.1 cm) curved handle depth DÉTAIL A-A DÉTAIL B-B WITH ADJACENT CABINETS; OVERLAPPING CABINET DOORS DÉTAIL A-A DÉTAIL B-B WITH ADJACENT CABINETS;...
- Page 19 SIDE-BY-SIDE REFRIGERATOR OVERALL DIMENSIONS - FULL OVERLAY MODELS T T O O P P S S I I D D E E F F R R O O N N T T 8 8 2 2 - - 7 7 / / 8 8 " " ( ( 2 2 1 1 0 0 .
- Page 20 CABINET AND PANEL INFORMATION - FULL OVERLAY MODELS Full overlay models, (with 3/4” [1.9 cm], thick panels and custome handles locally supplied), fit flush in 25” (63.5 cm) deep (countertop depth) cabinet openings with no protrusin into room except custom handles A A - - A A B B - - B B D D É...
- Page 21 CABINET AND PANEL INFORMATION - FULL OVERLAY MODELS (CONTINUED) Full overlay models can be installed in standard 24” (61.0 cm) deep openings. However, the door faces and top ventilation grille will protrude 3/4” (1.9 cm) into the room. This is ideal for alignment with full overlay cabinet doors. C C - - C C D D É...
- Page 22 CUSTOM DOOR PANEL DIMENSIONS - FULL OVERLAY MODELS 42” W. MODELS Non-Dispenser Model 3 3 / / 4 4 ” ” ( ( 1 1 . . 9 9 c c m m ) ) F F u u l l l l O O v v e e r r l l a a y y P P a a n n e e l l 1 1 / / 4 4 "...
- Page 23 CUSTOM DOOR PANEL DIMENSIONS - FULL OVERLAY MODELS 48” W. MODELS Non-Dispenser Models D D i i s s p p e e n n s s e e r r M M o o d d e e l l S S E E C C T T I I O O N N Y Y - - Y Y N N O O S S C C A A L L E E...
- Page 24 ICE AND WATER DISPENSER BEZEL REMOVAL AND INSTALLATION FULL OVERLAY MODELS To Remove: 1. Remove packaging material surrounding bezel. 2. Grasping the sliding lever, pull away from bezel. 3. Remove spill tray from lower part of bezel exposing two screws. 4.
- Page 25 “Z” BRACKET INSTALLATION - FULL OVERLAY MODELS PORTE PORTE N N o o n n - - D D i i s s p p e e n n s s e e r r M M o o d d e e l l D D i i s s p p e e n n s s e e r r M M o o d d e e l l...
-
Page 26: Custom Side Panel Dimensions
CUSTOM SIDE PANEL DIMENSIONS DESIGNER/FULL OVERLAY MODELS F F O O R R 3 3 / / 4 4 ” ” ( ( 1 1 . . 9 9 c c m m ) ) S S I I D D E E P P A A N N E E L L S S N N O O T T E E : : A A d d d d i i n n g g a a 3 3 / / 4 4 ”... -
Page 27: Refrigerator Installation
REFRIGERATOR INSTALLATION T T I I P P O O V V E E R R H H A A Z Z A A R R D D R R e e f f r r i i g g e e r r a a t t o o r r i i s s t t o o p p h h e e a a v v y y a a n n d d t t i i p p s s e e a a s s i i l l y y w w h h e e n n n n o o t t c c o o m m p p l l e e t t e e l l y y i i n n s s t t a a l l l l e e d d . - Page 28 E E l l e e c c t t r r i i c c a a l l S S h h o o c c k k H H a a z z a a r r d d D D i i s s c c o o n n n n e e c c t t p p o o w w e e r r a a t t b b r r e e a a k k e e r r o o r r t t u u r r n n p p o o w w e e r r d d i i s s c c o o n n n n e e c c t t s s w w i i t t c c h h t t o o O O F F F F p p o o s s i i t t i i o o n n b b e e f f o o r r e e p p e e r r f f o o r r m m i i n n g g a a n n y y i i n n s s t t a a l l l l a a t t i i o o n n p p r r o o c c e e d d u u r r e e .
-
Page 29: Positioning
Before moving the refrigerator in place, confirm the finished dimensions, electrical location, minimum door and shelf clearances, and door panel instructions. (See pages 3, 4, & 5). 1. Position refrigerator in front of cutout. 2. Verify operation by plugging power cord in receptacle. P P o o w w e e r r s s w w i i t t c c h h w w i i l l l l b b e e s s h h i i p p p p e e d d i i n n t t h h e e “ “ O O N N ” ” p p o o s s i i t t i i o o n n a a n n d d s s h h o o w w r r o o o o m m s s w w i i t t c c h h w w i i l l l l b b e e i i n n t t h h e e “... - Page 30 WATER CONNECTION •Refer to water supply requirement section for preliminary installation and site preparation (see page 4). • • D D o o n n o o t t u u s s e e p p l l a a s s t t i i c c w w a a t t e e r r l l i i n n e e s s b b e e t t w w e e e e n n r r e e f f r r i i g g e e r r a a t t o o r r a a n n d d s s u u p p p p l l y y . . P P l l a a s s t t i i c c w w a a t t e e r r l l i i n n e e s s c c a a n n f f a a i i l l d d u u e e t t o o f f a a t t i i g g u u e e o o v v e e r r t t i i m m e e a a n n d d c c a a u u s s e e e e x x t t e e n n s s i i v v e e d d a a m m a a g g e e t t o o p p r r o o d d u u c c t t a a n n d d t t h h e e h h o o m m e e .
- Page 31 WATER CONNECTION (ICE AND WATER DISPENSER MODEL) •Refer to water supply requirement section for preliminary installation and site preparation (see page 4). •Do not use plastic water lines between refrigerator and supply . If moved repeatedly, plastic water lines can fail due to fatigue over time and cause extensive damage to product and the home.
-
Page 32: Water Filter Installation
H H O O W W T T O O O O R R D D E E R R R R E E P P L L A A C C E E M M E E N N T T F F I I L L T T E E R R C C A A R R T T R R I I D D G G E E S S Replacement filters are available through your local Viking Range dealer. You may also order them by calling Viking... - Page 33 S S Y Y S S T T E E M M S S P P E E C C I I F F I I C C A A T T I I O O N N A A N N D D P P E E R R F F O O R R M M A A N N C C E E D D A A T T A A S S H H E E E E T T This system has been tested according to NSF/ANSI 42/53 for reduction of the substances listed below.
-
Page 34: Kickplate Installation
KICKPLATE INSTALLATION Align the holes on both ends of the louvered panel with the holes in the base of the refrigerator. Adjust the kickplate to the desired height and fasten in place by tightening the screws in the slot. Attach the kickplate to the refrigerator on each side with the two black phillips head screws provided. -
Page 35: Basic Specifications And Dimensions
BASIC SPECIFICATIONS AND DIMENSIONS - PROFESSIONAL MODELS 42” W. MODELS D D E E S S C C R R I I P P T T I I O O N N V V C C S S B B 4 4 2 2 3 3 V V C C S S B B 4 4 2 2 3 3 D D Overall Width 42”... - Page 36 BASIC SPECIFICATIONS AND DIMENSIONS - DESIGNER MODELS 42” W. MODELS D D E E S S C C R R I I P P T T I I O O N N D D D D S S B B 4 4 2 2 3 3 D D D D S S B B 4 4 2 2 3 3 D D Overall Width 42”...
- Page 37 BASIC SPECIFICATIONS AND DIMENSIONS - FULL OVERLAY MODELS 42” W. MODELS D D E E S S C C R R I I P P T T I I O O N N D D f f S S B B 4 4 2 2 3 3 D D f f S S B B 4 4 2 2 3 3 D D Overall Width 42”...
-
Page 38: Wiring Diagram
WIRING DIAGRAM BUILT-IN SIDE-BY-SIDE 42” W. REFRIGERATOR - NON-DISPENSER MODEL W W A A R R N N I I N N G G : : E E L L E E C C T T R R I I C C A A L L G G R R O O U U N N D D I I N N G G I I N N S S T T R R U U C C T T I I O O N N S S This appliance is... - Page 39 WIRING DIAGRAM BUILT-IN SIDE-BY-SIDE 42” W. REFRIGERATOR - DISPENSER MODEL W W A A R R N N I I N N G G : : E E L L E E C C T T R R I I C C A A L L G G R R O O U U N N D D I I N N G G I I N N S S T T R R U U C C T T I I O O N N S S This appliance is...
- Page 40 WIRING DIAGRAM BUILT-IN SIDE-BY-SIDE 48” W. REFRIGERATOR - NON-DISPENSER MODEL W W A A R R N N I I N N G G : : E E L L E E C C T T R R I I C C A A L L G G R R O O U U N N D D I I N N G G I I N N S S T T R R U U C C T T I I O O N N S S This appliance is...
-
Page 41: Wiring Diagram
W W I I T T H H T T H H I I S S U U N N I I T T . . VIKING RANGE CORPORATION 111 Front Street • Greenwood, Mississippi 38930 USA • (662) 455-1200 Specifications subject to change without notice For more product information, call 1-888-VIKING1 (845-4644), or visit our web site at http://www.vikingrange.com...