
Related Manuals for Trio Stealth G4


Summary of Contents for Trio Stealth G4
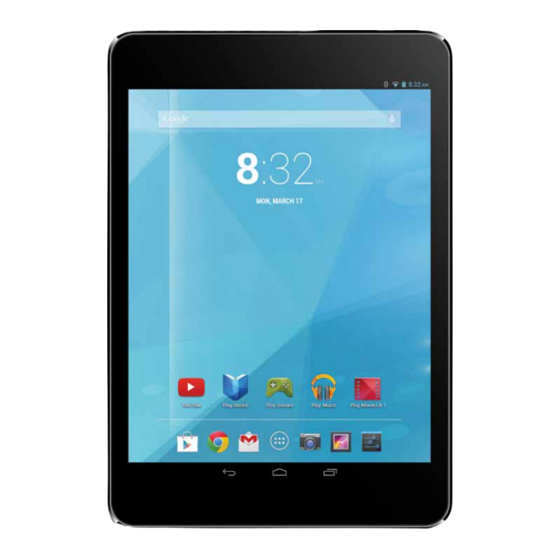
- Page 1 User Manual Stealth G4 7.85” Stealth G4 Before operating your Stealth G4 Tablet, please read, understand, and follow these instructions.
-
Page 2: Table Of Contents
CONTENTS Welcome Important Safety Instructions Care of the Environment What’s in the Package Layout of your Tablet Getting Started Charging the battery Powering up Checking out the controls and connections Physical controls Virtual controls Connections and plug-ins Basic operations Power monitoring and charging Reset Connecting to your computer and loading files Powering on your tablet... -
Page 3: Welcome
• Do not place your Tablet on or near any heat source, such as a radiator, heat register, stove, or other apparatus that produces heat. • Do not leave your Tablet in direct sunlight. • Very high volume of sound in earphones may cause permanent damage to your hearing. Make sure that the volume is not too high when you use earphones. • Use only the charger that is provided with your Tablet. Use of other chargers may damage or destroy your Tablet. • Do not try to charge your Tablet during lightning storms. A power surge during a lightning storm could damage or destroy your charger and/or your Tablet. • There are no user-serviceable parts inside the case. If you attempt to take your Tablet apart, you may damage or destroy it. You will certainly void the warranty! • This product may contain lead and mercury. Disposal of these materials may be regulated due to environmental considerations. For disposal or recycling information, please contact your local authorities or the Electronic Industries Alliance: www.eiae.org. CARE OF THE ENVIRONMENT Your Tablet is designed and manufactured with high quality materials and components, which can be recycled and reused. Do not dispose of it with other household waste. Please inform yourself about the local rules on the separate collection of electrical and electronic products and batteries. The correct disposal of these products helps prevent potentially negative consequences on the environment and human health. Please visit : www.eiae.org for additional information on recycling your Tablet. WHAT’S IN THE PACKAGE • Trio Stealth G4 7.85” Tablet • Charger • USB/charger cable • Quick-Start Guide. -
Page 4: Tablet Overview
LAYOUT OF YOUR TABLET Once you have unpacked your Tablet, take a look around it so that you know where all the controls and connections are located. Front Back SD card slot Headphone Volume (+ / -) Jack Rear Power on/off Camera USB/Charger Front Camera Port Mic. It’s now time to get your Tablet ready for use. Follow the instructions for getting started, then you will be able to check out and try the various controls, icons, connections and features so that you will be comfortable using your new device. -
Page 5: Getting Started
GETTING STARTED Charging the Battery MOST IMPORTANT - You will need to charge up the USB/Charger battery before you use your Stealth G4 Tablet for the first time. Port Connect the charger to your Stealth G4, using the USB/Charger cable. The cable plugs in to the USB/Charger Port at the top of your Tablet. The connection should look like this: Plug the charger into a power outlet. Keep the battery on charge for 6 to 8 hours to make sure that it is fully charged. Powering Up When the battery is fully charged, switch on your Infinity Tablet. To do this, press and hold the power on/off button until the Infinity logo appears: The logo remains until the startup operation is finished; the startup screen then appears: Touch the screen at the lock symbol and swipe sideways. This will unlock your tablet and display the home screen. This is sometimes called a desktop screen, as on a laptop or personal computer. At the bottom of the home screen you will see the following icon: Touch this symbol and the Apps page appears. Touch any icon on the Apps page and it will open the application that... -
Page 6: Checking Out The Controls And Connections
CHECKING OUT THE CONTROLS AND CONNECTIONS Physical Controls These are controls that you can see and touch at all times, even when your Tablet is switched off. They are separate items that actually move when you operate them. There are just three of these: • On/Off – Press to switch on; press again to switch off. For some operations you need to hold the on/off button down for a couple of seconds; this will be explained for each operation that uses this control. • Volume UP – press to increase volume • Volume DOWN – press to reduce volume Virtual Controls These controls are simply images on the screen. They appear as icons (small figures) and are displayed only when they are needed. At different times different icons will show up on the same part of the screen. This is a typical icon. It is usually shown at the bottom of the screen, but it can also show up in other places. There are a large number of virtual controls. What they are, what they do and how they work is explained in the “Basics” section, or in the section where they are used. Connections and Plug-ins USB/Charger Port – This is used with the USB/Charger cable when you need to charge the battery on your Stealth G4 Tablet, or if you wish to connect your Tablet to another device (such as a personal computer or notebook). Audio Jack – You can plug headphones into this jack for personal listening or when you are making a phone call. Micro-SD Card Slot – If you wish to increase the data storage on your Tablet you can purchase a micro-SD card and plug it in here. Your Tablet will accept cards up to 32GB capacity. BASIC OPERATIONS Power monitoring and charging You can see the battery icon on the upper right hand corner of most screens and monitor battery capacity. When the power runs out, the device will automatically turn off. When the screen shows low battery , users can use the computer to charge it. It takes approximately 4 hours to fully charge. -
Page 7: Main System Menu
Main System Menu Your main system menu allows you to access applications you have downloaded and adjust the settings on your tablet. Please note: We are unable to provide support for third party appli- cations. Please contact the software manufacturer for issues with an application. File Manager: Select this to browse images, audio files, movies, ebook files, etc. saved on the internal memory or SD card you have installed. Selecting one of these files will open the file in the appropriate program. Browser: Selecting this option will open your web browser. For detailed instructions, please refer to the “Main Functions” section below. Settings: This option will allow you to adjust most of your settings, including Wi-Fi, screen brightness, etc. For detailed in- structions, please refer to the “Main Functions” section below. Multi-Media Your device supports the following media formats Audio file formats supported: MP3,WMA (non encrypted),MP2,OGG,M4A,MA4,FLAC,3GP,WAV Supported video formats: AVI(H.264, DIVX, , XVID), RM, RMVB, MKV(H.264, DIVX, DIVX, XVID), WMV, MP4(H.264, MPEG, DIVX, XVID), MPEG, MPG, FLV (H.263,H.264), HD 1080P max. Supported image formats: JPG, JPEG, GIF, BMP, PNG Music Your music can be divided into four types: artists, album, all music, and play list. Choose a type to view the list. If you enter one type, continue to narrow your selection, until the music you want to play appears. For example, if you choose artist type, you can see the artist name from A to Z, if you choose one artist, a list will display the artists’ albums and album list. Find and play music 1. Tap the music application. -
Page 8: Video
1. Tap “new”. 2. Input a name for your new play list. 3. Tap “save”. Delete the music in a play list 1. Tap music. 2. Tap and hold the music you want to delete from the play list. 3. In the pop up music setting menu, tap delete to finish. Video Tap the video application 1. Tap gallery or list selections. 2. The device will display all compatible video files. 3. Tap the file you want play. Images View images 1. Tap the image gallery application. 2. This will bring up the image gallery, tap the file or folder you want to view and 3. Tap the image you want to view, the system will view the image in full screen. 4. When you view images, you can zoom in and out by pinching or sliding two fingers apart. Edit and setting images as a contact or desktop After opening an image, tap the image again to bring up your menu and delete icons. Tapping the delete icon will allow you to delete the image. Tapping the menu icon will bring up your image sub menu. Slideshow: Tap to enable slideshow mode. Edit: Tap to edit the image. Rotate left/Rotate right: Tap to Rotate the image. Crop: Tap allows you to crop the image. Set picture as: Tap to set the picture as a “Contact image” or “Wallpaper”... -
Page 9: Browser
Delete an email account You can delete the set POP3 or IMAP email account from your Device. 1. Tap email. 2. Enter your inbox. 3. Touch the menu button. 4. Tap setting. 5. Select the account you wish to remove. 6. A menu list will appear, select delete account . 7. Tap OK to delete. Sending E-mail 1. Tap Email to display your mail box. 2. Tap the inbox, it will refresh the new emails automatically; tap it to read new email. 3. Touch the button at the top of screen. 4. Input the receiver’s email address in the receiver column. 5. Input subject and email content. 6. Tap to add attachment, touch menu button, it will pop up a menu. 7. Tap “add attachment”. 8. Select the attachment you want to send (pictures, videos) 9. Tap send button to send the email. Browser When you select the browser icon, your browser will open. You can tap the browser bar to bring up the virtual keyboard and input the web address you would like to view. The Browser will open to the last page you visited. If you have not opened the browser yet, it will go to your homepage. Set the homepage: 1. Tap the browser icon 2. Tap the menu icon on the top right corner. 3. Tap the setting menu. 4. Tap General. 5. Tap Set homepage. Visit webpage 1. Touch browser icon 2. Input the website you want to search on the keyboard. 3. Tap finish to go to the website. -
Page 10: System Settings
Bookmark management Setting webpage bookmark 1. Go to any webpage. 2. Tap and select “OK” to add this website to bookmark. Opening a bookmark 1. Tap , and it will show bookmark list in the browser. 2.Tap the bookmark you want to open that webpage System settings Voice and display Sound and volume setting 1. Tap the setting icon. 2. Tap “Sound”. 3. Tap volume to adjust the volume for music and video. 4. Or press “VOL +” or “VOL – Button” to adjust the volume. Display settings Adjust the brightness of your screen 1. Tap the setting icon. 2. Tap display Tap brightness, a slide bar will open. Slide this bar to the right to increase brightness, and to the left to decrease brightness 3. Tap OK. Adjust screen standby time 1. Tap the setting icon. -
Page 11: Sd Card And Internal Memory
SD card and Internal memory View SD card and MID memory available space 1. Tap the setting icon. 2. Tap memory. 3. View the available space on the SD card. 4. View internal memory space. Safely remove the SD card Please follow this procedure when removing the SD card to prevent damage to your SD card and files 1. Tap the setting icon. 2. Tap memory. 3. Tap remove SD card. 4. Pull out the SD card. Date and Time Manually adjust the date, time and time zone 1. Tap the setting icon. 2. Scroll the screen down, and tap date and time. 3. Tap time zone, and choose your zone in the list. scroll down to view more zone information. -
Page 12: Uninstalling An Application
1. Tap file manager; choose the application you wish to install. 2. Tap “Install”. 3. Follow the installation instructions listed on the screen. Uninstalling an application Tap the settings icon. 1. Tap Application. 2. Select the application you want to uninstall, tap uninstall. 3. Tap OK to finish uninstalling the app. Troubleshooting 1. It takes a long time to power up when I power on for the first time. The first time you power the device on, or after updating the device, it may take as long as 3 minutes to power on as it initial- izes files. Subsequent power sequences should take less than a minute 2. Sometimes, the device feels warm to the touch. When charging, or after a long period of use, it is common for the device to feel slightly warm. This is normal as the battery charges or discharges and is not a cause for concern. -
Page 13: Warranty
Warranty 1. MACH SPEED products carry a one year from date of purchase warranty. This warranty is nontransferable. 2. Mach-Speed Technologies warrants to the original registered end-user purchaser that Mach Speed products will be free from defects in materials and workmanship for one year from the date of new purchase. During the warranty period, and upon proof of purchase the product will be repaired or replaced (with the same or a similar model, which may be a refurbished model) at Mach Speed Technologies option, without charge for either parts or labor. This warranty shall not apply if the prod- uct is modified, tampered with, misused, physically damaged, or subjected to abnormal working conditions (including, but not limited to, electrical, fire, and water damage). THIS WARRANTY DOES NOT GUARANTEE YOU UNINTERRUPTED SERVICE. REPAIR OR REPLACEMENT AS PROVIDED UNDER THIS LIMITED WARRANTY IS THE EXCLUSIVE REMEDY OF THE PURCHASER. To obtain service under this warranty, you must contact our Technical department at (580) 272-0035 to obtain an RMA num- ber. Mach Speed Technologies will only replace or repair product that is sent to us with an authorized RMA number. Discrepancy & Shipping Damage: 1. For wrong items, missing items, shipping damage, or other discrepancy; customer should report to RMA department on the day in which the items were received. Any claims after one business day of receipt will not be honored. 2. For any shipping damage, customer must file a claim with their carrier immediately. All items are shipped insured, thus must be reported for coverage. 3. Customer is responsible for paying any freight charge caused by refused shipment or unclaimed goods. 4. Mach Speed Technologies will make every reasonable effort to deliver on time however; Mach Speed Technologies will not be liable for late or lost shipments.