Hoover VisionHD Instructions For Use Manual
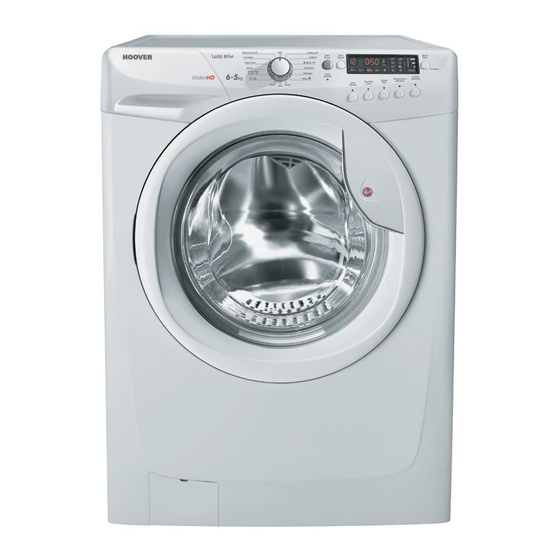
Washing machine
Hide thumbs
Also See for VisionHD:
- Instruction book (218 pages) ,
- Instructions for use manual (32 pages) ,
- Instruction book (43 pages)
Table of Contents
Advertisement
Advertisement
Table of Contents

Related Manuals for Hoover VisionHD


Summary of Contents for Hoover VisionHD
- Page 1 ® Washing machine Instructions for use...
-
Page 2: Introduction
Introduction Please read these instructions for use carefully and all other information enclosed with the washing machine. Keep all documentation in a safe place for future reference or for any future owners. Note: this machine is solely for domestic use. Notes on disposal All packaging material used is environmentally-friendly and recyclable. -
Page 3: Table Of Contents
Contents Page Introduction General delivery notes Safety notes Quick start Description of controls Programme Table Programme selector Detergent drawer Detergents, washing aids and amounts to use Useful advice for the user The main wash Cleaning and routine maintenance Investigating malfunctions Technical data Setting up + installation BEFORE SWITCHING ON THE APPLIANCE MAKE SURE... -
Page 4: General Delivery Notes
A) Pull out the plug B) Turn off the tap C) Hoover equips all its appliances with earthing. Ensure that the mains supply is earthed, and if it is not, seek assistance from a qualified person. D) Do not touch the appliance when hands or feet are wet or damp. Do not use the appliance with bare feet. -
Page 5: Quick Start
M) N.B! If the appliance is installed on a carpeted floor ensure that the ventilation holes on the base of the appliance are not obstructed. N) If the appliance is not running properly or breaks down, switch it off, turn off the tap and do not tamper with the appliance. -
Page 6: Description Of Controls
Description of controls Door handle "Door Security" indicator light "Start/Pause" button "Fast Iron" button "Temperature" Selection button "Delay Start" button "Sensitive Care" button "Stain Blaster" button "Spin Speed" Selection button Digital Display "Wash Time" button Programme selector with "OFF" position Buttons indicator light Detergent drawer... - Page 7 “Kg MODE” (Function active only on Cotton and Synthetics programmes) Through every wash phase “Kg MODE” allows to monitor information on the wash load in the drum. So, as soon as the “Kg MODE” is set in motion, in the first 4 minutes of the wash, it: - adjusts the amount of water required - determines the length of the wash cycle - controls rinsing...
- Page 8 Door handle Press the finger-bar inside the door handle to open the door. DOOR SECURITY indicator light The “Door Security” indicator light is illuminated when the door is fully closed and the machine is ON. When "Start/Pause" is pressed on the machine with the door closed the indicator will flash momentarily and then illuminate.
- Page 9 The option buttons should be selected before pressing the "Start/Pause" button. “FAST IRON” button The Fast Iron function (Not available on COTTON programmes) minimizes creases as much as possible with a uniquely designed anti-crease system that is tailored to specific fabrics. MIXED FABRICS - the water is gradually cooled throughout the final two rinses with no spinning and then a delicate spin assures the maximum relaxation of the fabrics.
- Page 10 “DELAY START” button This button allows you to pre-programme the wash cycle to delay the start of the cycle for up to 24 hours. To delay the start use the following procedure: Set the required programme. Press the button once to activate it (h00 appears on the display) and then press it again to set a 1 hour delay (h01 appears on the display);...
- Page 11 “STAIN BLASTER” button By pressing this button, which can only be activated in the Cotton cycles, the sensors in the new system come into operation. They affect both the selected temperature, keeping it at a constant level throughout the wash cycle, and the mechanical function of the drum. The drum is made to turn at two different speeds at crucial moments.
- Page 12 2) SPIN SPEED Once the programme has been selected, the maximum spin speed allowed for that programme appears on the display. Pressing the spin button will reduce the speed by 100 rpm each time the button is pressed. The minimum speed allowed is 400 rpm, or it is possible to omit the spin by pressing the spin button repeatedly.
- Page 13 PROGRAMME selector with "OFF" position When the programme selector is turned the display lights up to show the settings for the programme selected. N.B. To switch the machine off, turn the programme selector to the “OFF” position. Today, most detergents have been improved to wash efficiently at lower temperatures, therefore we have set the default temperature settings of each programme to a lower level, saving electricity and reducing the carbon footprint of your machine.
-
Page 14: Programme Table
TABLE OF PROGRAMMES CHAPTER 7 PROGRAM FOR: PROGRAMME WEIGHT RECOMMENDED CHARGE DETERGENT SELECTOR ON: MAX TEMP. TEMP. °C °C Resistant fabrics Up to: Cotton, linen 60° 90° with Prewash Cotton, mixed Up to: resistant, 40° 60° Coloureds Mixed fabrics and synthetics Up to: 40°... - Page 15 Please read these notes The spin speed may also be reduced, to match any guidelines suggested on the fabric label, or for very delicate fabrics cancel the spin completely this option is available with a spin speed button. * Programme recommended for normally soiled loads with max wash time and a temperature of 40°C at 1400rpm spin speed.
-
Page 16: Programme Selector
Programme selector For the various types of fabrics and various degrees of dirt the washing machine has different programme bands according to: wash cycle, temperature and lenght of cycle (see table of washing cycle programmes). RESISTANTS FABRICS The programmes have been designed for a maximum wash and the rinses, with spin intervals, ensure perfect rinsing. - Page 17 3 rinses and a short spin. SPORTS Hoover has given sports items their own wash care programme. The washing machine has a unique Sportswear programme. It is specially designed to wash mixed sportswear fabrics that cannot be washed on hotter programmes and is designed to remove the soil and staining created by participation in sports activities.
-
Page 18: Detergent Drawer
Detergent drawer The detergent drawer is split into 3 compartments: - the compartment labelled "1" is for prewash detergent; - the compartment labelled " " is for special additives, fabric softeners, fragrances, starch, brighteners etc; - the compartment labelled "2" is for main wash detergent. -
Page 19: Detergents, Washing Aids And Amounts To Use
Detergents, washing aids and amounts to use Choice of detergent General purpose detergents - Powder detergents, for a thorough wash, with bleaching agent, particularly suitable for use in hot wash programmes (60°C and over), for heavily soiled and stained laundry. - Liquid detergents, particularly suitable for grease stains, such as greasy skin marks, cosmetics and oil. - Page 20 Dosages Only use detergents which are suitable for use in a washing machine. You will obtain the best results from your wash with the minimum use of chemical products and the best care for your laundry if you take into consideration the degree of soiling as well as the type of detergent to choose.
-
Page 21: Useful Advice For The User
Useful advice for users Tips on using your domestic appliance in the most environmentally-friendly and economical Do a full load in your washing machine To prevent any possible waste of energy, water or detergent we recommend that you put a full load in your washing machine, not exceed the recommended maximum load size. -
Page 22: The Main Wash
Main wash Sorting the laundry - It is recommended you wash only items which are machine washable with water and detergent and not dry-clean items. - If you need to wash rugs, bedspreads or other heavy items, it is best not to spin them. - Sort the laundry according to fabric type, degree of soiling and wash temperature: Always follow the wash care advice on the garment label for the most suitable care and treatment of the laundry... -
Page 23: Selecting The Wash Programme
The correct way to wash Preparing the laundry A) Select the laundry. Loading the laundry B) Open the porthole. C) Put the laundry in the washing machine. Close the porthole again, ensuring that no items of laundry are obstructing the lock. Putting detergent in machine D) Open the drawer, choose the detergent and put in the correct amount, according to the manufacturer’s... -
Page 24: Cleaning And Routine Maintenance
Cleaning and routine maintenance Do not use alcohol-based scourers and / or thinners on the outside of your washing machine, just a wipe with a damp cloth will suffice. The washing machine needs very little maintenance: - Cleaning the drawer compartments. - Cleaning the filter. - Page 25 Attention: if the filter needs cleaning while there is washing still in the drum, follow the instructions on the following page to empty the water. This will prevent excessive loss of water via the filter. Cleaning the door glass Regularly clean the door glass with a damp cloth. A build up of soiling and residues from the water may result in water leaking from the door.
-
Page 26: Investigating Malfunctions
Investigating malfunctions What might be the cause of… Defects you can remedy yourself MALFUNCTION CAUSE REMEDY 1. Does not work on any Plug not in socket. Plug it in. programme Not switched on. Switch on. Power failure. Check. Fuse blown. Check. -
Page 27: Technical Data
Note: The use of environmentally-friendly, phosphate-free detergents can have the following effects: - waste water from rinsing may be cloudier because of the presence of zeolites held in suspension, without the rinse performance being adversely affected; - presence of white powder (zeolites) on laundry after washing, which is not absorbed by the fabric and does not alter the colour of the fabric. -
Page 28: Setting Up + Installation
SETTING UP + INSTALLATION Remove the polystyrene base and place the machine near its permanent position (diagram 1). Carefully cut through the hose retaining clip at the rear of the appliance (diagram 2). Remove the 4 fixing screws marked (A) and remove the 4 spacers marked (B) (diagram 3). -
Page 29: Water Connection
Note: we recommend you keep the screws to immobilise the machine for future transit. The Manufacturers will not be responsible for any possible damage to the machine caused by not following the rules relating to releasing the mechanism. The user is responsible for all costs of installation. Water connection The appliance must be connected to the water mains using new hose-sets. - Page 30 All Hoover washing machines comply with the safety requirements laid down by the Quality Trademark Institute. Should the power supply cord of this appliance be damaged, it must be replaced by an...
- Page 31 NOTES ....................................................................................................................................................................................................................................................................................................................................................................................................................................................................................................................................................................................................................................................................................................................................................................................................................................................................................................................................................................................................................................................................
- Page 32 ® This appliance is marked according to the European directive 2002/96/EC on Waste Electrical and Electronic Equipment (WEEE). By ensuring this product is disposed of correctly, you will help prevent potential negative consequences for the environment and human health, which could otherwise be caused by inappropriate waste handling of this product.