
Related Manuals for Husqvarna 327RD


Summary of Contents for Husqvarna 327RD
- Page 1 Operator’s manual 323RII 327R X-series 327RD X-series Please read the operator’s manual carefully and make sure you understand the instructions before using the machine. E E E E n n n n g g g g l l l l i i i i s s s s h h h h...
-
Page 2: Key To Symbols
2 – English KEY TO SYMBOLS Wear sturdy, non-slip boots. Only use non-metallic, flexible cutting attachments, i.e. trimmer heads with trimmer cord. Other symbols/decals on the machine refer to special certification requirements for certain markets. The engine is switched off by moving the stop switch to the stop position. -
Page 3: Table Of Contents
WARNING! A clearing saw, brushcutter or trimmer can be dangerous if used incorrectly or carelessly, and can cause serious or fatal injury to the operator or others. It is extremely important that you read and understand the contents of this operator’s manual. -
Page 4: Introduction
Dear customer! Congratulations on your choice to buy a Husqvarna product! Husqvarna is based on a tradition that dates back to 1689, when the Swedish King Karl XI ordered the construction of a factory on the banks of the Huskvarna River, for production of muskets. -
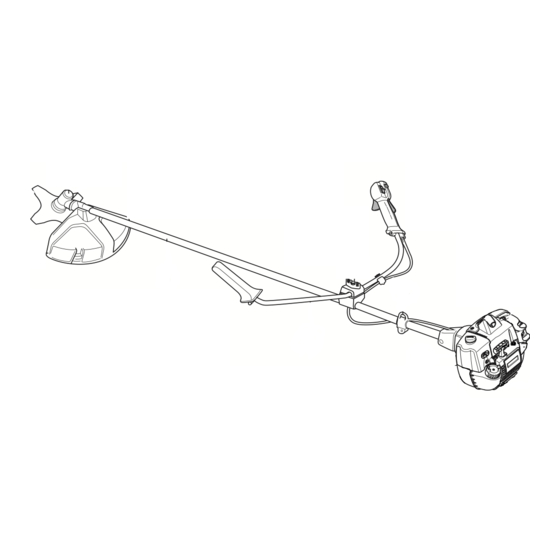
Page 5: What Is What
16 Air filter cover WHAT IS WHAT? 17 Handle adjustment 18 Locking nut 19 Support flange 20 Support cup 21 Drive disc 22 Trimmer head 23 Socket spanner 24 Operator’s manual 25 Transport guard 26 Allen key 27 Locking pin 28 Harness... -
Page 6: General Safety Precautions
Personal protective equipment IMPORTANT! A clearing saw, brushcutter or trimmer can be dangerous if used incorrectly or carelessly, and can cause serious or fatal injury to the operator or others. It is extremely important that you read and understand the contents of this operator’s manual. -
Page 7: Machine's Safety Equipment
GENERAL SAFETY PRECAUTIONS EYE PROTECTION Always wear approved eye protection. If you use a visor then you must also wear approved protective goggles. Approved protective goggles must comply with standard ANSI Z87.1 in the USA or EN 166 in EU countries. GLOVES Gloves should be worn when necessary, e.g., when fitting cutting attachments. - Page 8 GENERAL SAFETY PRECAUTIONS Check that the throttle control and throttle lockout move freely and that the return springs work properly. See instructions under the heading Start. Start the machine and apply full throttle. Release the throttle and check that the cutting attachment stops and remains at a standstill.
- Page 9 GENERAL SAFETY PRECAUTIONS WARNING! Overexposure to vibration can lead to circulatory damage or nerve damage in people who have impaired circulation. Contact your doctor if you experience symptoms of overexposure to vibration. Such symptoms include numbness, loss of feeling, tingling, pricking, pain, loss of strength, changes in skin colour or condition.
-
Page 10: Cutting Equipment
Cutting equipment Saw blades are intended for cutting fibrous types of wood. Grass blades and grass cutters are intended for cutting coarse grass. A trimmer head is intended for trimming grass. -
Page 11: Sharpening The Saw Blade
GENERAL SAFETY PRECAUTIONS General rules Only use cutting attachments with the guards we recommend! See the chapter on Technical data. Keep the teeth of the blade correctly sharpened! Follow our instructions and use the recommended file gauge. An incorrectly sharpened or damaged blade increases the risk of accidents. -
Page 12: Trimmer Head
• Make sure that the cutter on the trimmer guard is intact. This is used to cut the cord to the correct length. • To increase the life of the cord it can be soaked in water for a couple of days. -
Page 13: Assembly
Fitting the handlebar (323RII) • Remove the screw at the rear of the throttle handle. • Slide the throttle handle onto the right side of the handlebar, (see diagram). • Align the screw hole in the throttle handle with the hole in the handlebar. -
Page 14: Assembling And Dismantling The Two-Piece Shaft (327Rdx)
• Position the handlebar as shown. Fit the mounting components and tighten the knob lightly. • Put on the harness and hang the machine from the support hook. Now make a final adjustment so that the machine is in a comfortable working position when it hangs from the harness. -
Page 15: Assembling The Cutting Equipment
Assembling the cutting equipment WARNING! When fitting the cutting attachment it is extremely important that the raised section on the drive disc/support flange engages correctly in the centre hole of the cutting attachment. If the cutting attachment is fitted incorrectly it can result in serious and/or fatal personal injury. -
Page 16: Fitting Other Guards And Cutting Attachments
Fitting other guards and cutting attachments • Fit the trimmer guard/combination guard (A) intended for use with the trimmer head/plastic blades. Hook the guard onto the fitting on the shaft and secure it with the bolt (L). • Fit the drive disc (B) on the output shaft. -
Page 17: Adjusting The Harness And Brush Cutter
Adjusting the harness and brush cutter WARNING! When using a brush cutter it must always be hooked securely to the harness. Otherwise you will be unable to control the brush cutter safely and this can result in injury to yourself or others. Never use a harness with a defective quick release. -
Page 18: Fuel Handling
When working at continuous high revs a higher octane rating is recommended. Two-stroke oil • For best results and performance use HUSQVARNA two-stroke engine oil, which is specially formulated for our air-cooled two stroke-engines. • Never use two-stroke oil intended for water-cooled engines, sometimes referred to as outboard oil (rated TCW). -
Page 19: Fueling
Mixing • Always mix the gasoline and oil in a clean container intended for fuel. • Always start by filling half the amount of the gasoline to be used. Then add the entire amount of oil. Mix (shake) the fuel mixture. Add the remaining amount of gasoline. -
Page 20: Starting And Stopping
Check that the trimmer head and trimmer guard are not damaged or cracked. Replace the trimmer head or 20 – English STARTING AND STOPPING trimmer guard if they have been exposed to impact or are cracked. • Never use the machine without a guard nor with a defective guard. - Page 21 Choke: Set the choke control in the choke position. WARNING! When the engine is started with the choke in either the choke or start throttle positions the cutting attachment will start to rotate immediately. Hold the body of the machine on the ground using your left hand (CAUTION! Not with your foot!).
-
Page 22: Working Techniques
General working instructions IMPORTANT! This section describes the basic safety precautions for working with brush cutters and trimmers. If you encounter a situation where you are uncertain how to proceed you should ask an expert. Contact your dealer or your service workshop. Avoid all usage which you consider to be beyond your capability. - Page 23 WARNING! Neither the operator of the machine nor anyone else may attempt to remove the cut material while the engine is running or the cutting equipment is rotating, as this can result in serious injury. Stop the engine and cutting equipment before you remove material that has wound around the blade shaft as otherwise there is a risk of injury.
-
Page 24: Brush Cutting With A Saw Blade
• To fell to the left, the bottom of the tree should be pushed to the right. Tilt the blade and bring it diagonally down to the right, exerting firm pressure. At the same time push the stem using the blade guard. Cut with the area of the blade between 3 o’clock and 5 o’clock. -
Page 25: Grass Clearing Using A Grass Blade
Cutting • The trimmer is ideal for cutting grass that is difficult to reach using a normal lawn mower. Keep the cord parallel to the ground when cutting. Avoid pressing the trimmer head against the ground as this can ruin the lawn and damage the tool. -
Page 26: Maintenance
Carburetor Your Husqvarna product has been designed and manufactured to specifications that reduce harmful emissions. After the engine has used 8-10 tanks of fuel the engine will be run-in. To ensure that it continues to run at peak performance and to minimise harmful exhaust... -
Page 27: Muffler
If the start throttle speed is too low (below 4000 rpm), turn the adjuster screw A clockwise until the cutting attachment starts to rotate. Then turn A clockwise a further 1/2 turn. If the start throttle speed is too high, turn the adjuster screw A anticlockwise until the cutting attachment stops. -
Page 28: Bevel Gear
See instructions under the heading Oiling the air filter. Oiling the air filter Always use HUSQVARNA filter oil, art. no. 531 00 92-48. The filter oil contains a solvent to make it spread evenly through the filter. You should therefore avoid skin contact. -
Page 29: Spark Plug
Use of the wrong spark plug can damage the piston/ cylinder. Note: Use only HUSQVARNA replacement parts. Use of other brands of replacement parts can cause damage to your unit or injury to the operator or others. Your warranty does not cover damage or liability caused by the use of accessories and/or attachments not specifically... -
Page 30: Maintenance Schedule
An off-centre blade will cause vibration that could result in damage to the machine. Check that the trimmer head is undamaged and not cracked. Replace the trimmer head if necessary. Check that the locking nut of the cutting equipment is tighten correctly. -
Page 31: Technical Data Technical Data
Equivalent vibration levels (a hv,eq according to ISO 22867, m/s Equipped with trimmer head (original), left/right Equipped with grass blade (original), left/right Note 1: Reported data for equivalent sound pressure level for the machine has a typical statistical dispersion (standard deviation) of 1 dB (A). - Page 32 Approved accessories Centre hole in blades/cutters, Ø 25,4 Arbor shaft thread M10 Grass blade/grass cutter Saw blade Plastic blades Trimmer head Support cup 32 – English TECHNICAL DATA Type Grass 255-4 1" (Ø 255 4-teeth) Grass 255-8 1" (Ø 250 8-teeth) Scarlet 200-22 1"...
-
Page 33: Federal And California Emissions Control Warranty Statement
first scheduled replacement point for that part. If the part fails prior to the first scheduled replacement, the part will be repaired or replaced by Husqvarna Forest & Garden at no cost. Any such part repaired or replaced under warranty is warranted for the remainder of the period prior to the first scheduled replacement point for... - Page 34 EPA may not be used. The use of any non-exempted add-on or modified parts will be grounds for disallowing a warranty claim. Husqvarna Forest & Garden will not be liable to warrant failures of warranted parts caused by the use of a non-exempted add-on or modified part.
- Page 36 8,5 m 10 cm 4" 4,2 m "Clic" 15 cm 6"...
- Page 37 4,25 m 4,25 m 15 cm 6" 15 cm 6"...
- Page 38 T35, T35x 15 cm 6" 8,5 m 10 cm 4" 4,3 m "Clic"...
- Page 39 15 cm 6" 6,0 m 10 cm 4" 3,05 m "Clic"...
- Page 44 Original instructions 1153290-95 ´®z+U=)¶5S¨ ´®z+U=)¶5S¨ 2010-02-22...