Table of Contents
Advertisement
Quick Links
Advertisement
Table of Contents
Troubleshooting

Related Manuals for Robin America RGV4100


Summary of Contents for Robin America RGV4100
- Page 1 Models PUB-GS1277 Rev. 1/04...
-
Page 2: Table Of Contents
Section Title 1. SPECIFICATIONS ... 1 2. PERFOMANCE CURVES ... 3 3. FEATURES ... 5 3-1 BRUSHLESS ALTERNATOR ... 5 3-2 CONDENSER TYPE VOLTAGE REGULATOR ... 5 3-3 OIL SENSOR ... 5 3-4 QUIET OPERATION ... 5 3-5 NO RADIO NOISE ... 5 3-6 LARGE FUEL TANK ... - Page 3 Section Title 9-4 STATOR ... 33 9-5 ROTOR ASSEMBLY ... 34 9-6 CONDENSER ... 34 9-7 DIODE RECTIFIER ... 35 9-8 OIL SENSOR ... 36 10.DISASSEMBLY AND ASSEMBLY ... 37 10-1PREPARATION and PRECAUTIONS ... 37 10-2 DISASSEMBLY PROCEDURES ... 37 10-3 ASSEMBLY PROCEDURES ...
-
Page 4: Specifications
1. SPECIFICATIONS ENGINE ALTERNATOR - 1 -... - Page 5 ALTERNATOR ENGINE - 2 -...
-
Page 6: Perfomance Curves
2. PERFOMANCE CURVES ( Hz ) ( V ) ( 125 ) ( 120 ) ( 115 ) ( 110 ) 230V/115V Load - 3 - Rated... - Page 7 DC OUTPUT DC Voltage ... 12 V DC Ampere ... 8.3 A DC output ... 100 W The voltage curve shown in the left indicates the characteristic of DC output when charging a battery. The voltage may be decreased by 20% when the resistance load is applied. NOTE : It is possible to use both DC and AC outputs simultaneously up to the rated output in total.
-
Page 8: Features
3. FEATURES 3-1 BRUSHLESS ALTERNATOR Newly developed brushless alternator eliminates troublesome brush maintenance. 3-2 CONDENSER TYPE VOLTAGE REGULATOR A trouble free condenser type voltage regulator ensures a stable voltage under all working conditions. 3-3 OIL SENSOR Oil sensor automatically shuts off the engine whenever the oil level falls down below the lower limit to protect the engine from seizure. -
Page 9: Minimal Maintenance
3-9 MINIMAL MAINTENANCE * A brushless alternator release the operator from periodical brush maintenance. * A trouble free condenser type voltage regulator. * A drip-proof alternator design. * No-fuse circuit breakers. * An electronic pointless ignition system. * A dust-proof cyclone air cleaner. 3-10 LONG-LIFE DURABILITY The heavy-duty 4 stroke Robin Rro OHV engine and virtually maintenance-free brushless alternator ensure greater durability with :... -
Page 10: General Description
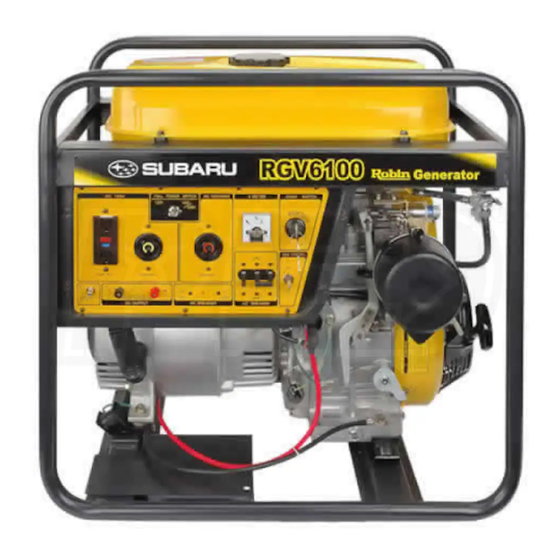
4. GENERAL DESCRIPTION 4-1 EXTERNAL VIEW FUEL GAUGE FULL POWER SWITCH RECEPTACLE EARTH TERMINAL DC OUTPUT TERMINAL DC CIRCUIT BREAKER NO-FUSE BREAKER SPARK PLUG ENGINE EMISSION LABEL OIL DRAIN PLUG TANK CAP VOLTMETER IDEL CONTROL SWITCH OIL SENSOR OILGAUGE (OIL FILLER) - 7 - ENGINE SWITCH CHOKE KNOB... -
Page 11: Control Panel
4-2 CONTROL PANEL * RGV2800 : U.S.A., 60Hz-120V [NEMA RECEPTACLE] AC OUTPUT AC MAX 20A DC 12V-8.3A BATTERY CHARGE ONLY DC OUTPUT * RGV4100 : U.S.A., 60Hz-120V/240V [NEMA RECEPTACLE] AC 120V RESET RESET TEST TEST 125V AC MAX 20A AC MAX 30A DC 12V-8.3A... -
Page 12: Location Of Serial Number And Specification Number
* RGV6100 : U.S.A., 60Hz-120V/240V [NEMA RECEPTACLE] AC 120V RESET RESET TEST TEST 150V AC MAX 30A AC MAX 20A DC 12V-8.3A BATTERY CHARGE ONLY DC OUTPUT 4-3 LOCATION of SERIAL NUMBER and SPECIFICATION NUMBER Serial number and specification number are stamped on the LABEL (MODEL NAME) stuck on the side wall of control box. -
Page 13: Construction And Function
5. CONSTRUCTION AND FUNCTION 5-1 CONSTRUCTION END COVER MOUNT RUBBER 5-2 FUNCTION 5-2-1 STATOR The stator consists of a laminated silicon steel sheet core, a main coil and a condenser coil which are wound in the core slots. The condenser coil excites the rotor field coil which generates AC voltage in the main coil. - Page 14 5-2-2 CONDENSER One or two condensers are installed in the con- trol box and are connected to the condenser coil of the stator. These condensers and condenser coil regulate the output voltage. 5-2-3 ROTOR The rotor consists of a laminated silicon steel sheet core and a field coil which is wound over the core.
- Page 15 5-2-4 NO-FUSE BREAKER The no-fuse breaker protects the generator from getting damage by overloading or short circuit in the appliance. Table 5-1 shows the capacity of no-fuse breaker by each spec. and their object of protection. 5-2-5 DC CIRCUIT BREAKER The 10 ampere DC circuit breaker mounted on the control panel protects whole DC circuit from getting damage by overload or short circuit.
- Page 16 NOTE : If your generator has receptacles pecu- liar to your country, Table 5-2 does not apply. Caution : The duplex 120V receptacle is protected by a GFCI (Ground Fault Circuit Interrupter). GFCI shuts off the output current from the duplex 120V receptacle when a ground fault occurs in the generator or the appliance.
- Page 17 5-2-8 CONNECTING TO DOMESTIC CIRCUITS (HOUSE WIRING) WARNING : All Robin generators are a neutral ungrounded type. If a generator is to be connected to residential or commercial power lines, such as a stand-by power source during power outage, all connections must be made by a licensed electrician. Failure in connection may result in death, personal injury, damage to generator, damage to appli- ances, damage to the building's wiring or fire.
- Page 18 Utility high line Meter box X W Y Generator ( W ) ( X ) ( G ) (c) Operating the generator. Set the full power switch to 120V/ 240V side. Turn the house AC breaker off before starting the generator. Start the generator and warm it up.
-
Page 19: Generator Operation
5-3 GENERATOR OPERATION 5-3-1 GENERATION of NO-LOAD VOLTAGE (1) When the generator starts running, the permanent magnet built-in to the rotor generates 3 to 6V of AC voltage in the main coil and condenser coil wound on the stator. (2) As one or two condensers are connected to the condenser coil, the small voltage at the condenser coil generates a minute current a which flows through the condenser coil. - Page 20 5-3-3 FULL POWER SWITCH (Dual Voltage Type) The full power switch is provided for the dual voltage type to take out the full rated power from one receptacle in each voltage. Fig. 5-14 Fig. 5-12 Fig. 5-13 Table. 5-3 - 17 -...
- Page 21 Two main coils are wound over stator core. Each main coil outputs half the rated power at the lower voltage (120V). These main coils are wound to be in the same phase. The full power switch reconnects these main coils in parallel or in series. Fig.
-
Page 22: Oil Sensor
5-4 OIL SENSOR 5-4-1 DESCRIPTION * The oil sensor mainly functions to detect posi- tion of the surface of engine oil in the crankcase of engines for general use and to stop the en- gine automatically when the oil level goes down below the lower limit specified. - Page 23 [Judgement of oil level] When sufficient oil is in the crankcase, both of inner and outer electrodes are immersed in the oil through which current flows across the electrodes. The sensor judges that oil in the crankcase is sufficient. When oil level goes down and the inner electrode is exposed to the air due to consumption of oil, no current flow between the electrodes as air is considered to be electrically nonconductive.
- Page 24 2 Detection circuit ... This detects quantity of oil, sufficient or not, according to difference of electric resistance across inner and outer electrodes. 3 Delay circuit ... This his prevents the sensor from making an unnecessary stop of the engine by momentary lowering of the oil level due to the engine being slanted or affected by vibration in spite of sufficient oil in the crankcase.
-
Page 25: Safety Precautions
6. SAFETY PRECAUTIONS 1. Use extreme caution near fuel. A constant danger of explosion or fire exists. Do not fill the fuel tank while the engine is running. Do not smoke or use open flame near the fuel tank. Be careful not to spill fuel when refueling. If spilt, wipe it and let dry before starting the engine. 2. -
Page 26: Range Of Applications
7. RANGE OF APPLICATIONS Generally, the power rating of an electrical appliance indicates the amount of work that can be done by it. The electric power required for operating an electrical appliance is not always equal to the output watt- age of the appliance. - Page 27 (5) Appliances without any indication as to power consumption Some appliances have no indication as to power consumption; but instead the work load (output) is indicated. In such a case, power consumption is to be worked out according to the numerical formula mentioned below.
- Page 28 NOTES : Wiring between generator and electrical appliances 1. Allowable current of cable Use a cable with an allowable current that is higher than the rated input current of the load (electrical appliance). If the input current is higher than the allowable current of the cable used, the cable will become excessively heated and deteriorate the insulation, possibly burning it out.
-
Page 29: Measuring Procedures
8. MEASURING PROCEDURES 8-1 MEASURING INSTRUMENTS 8-1-1 “Dr. ROBIN” GENERATOR TESTER The “Dr. Robin” generator tester is exclusively designed for fast, easy diagnosis and repair of Robin generators. The “Dr. Robin” has the follow- ing features : (1) Functions of voltmeter, frequency meter, megger tester, capacitance meter and circuit tester are combined in one unit. - Page 30 8-1-2 INSTRUMENTS (1) VOLTMETER AC voltmeter is necessary. The approximate AC voltage ranges of the voltmeters to be used for various types of generators are as follows: 0 to 150V : Type with an output voltage of 110 or 120V 0 to 300V : Type with an output voltage of 220, 230 or 240V 0 to 150V, 0 to 330V : Dual voltage type...
- Page 31 (4) CIRCUIT TESTER Used for measuring resistance, etc. (5) MEGGER TESTER Used for measuring generator insulation re- sistance. Select one with testing voltage range of 500V. (6) TACHOMETER Use the contactless type tacho meter. Fig. 8-5 Fig. 8-6 Fig. 8-7 - 28 -...
-
Page 32: Ac Output Measuring
8-2 AC OUTPUT MEASURING Use a circuit like the shown in Fig.8-8 for measuring AC output. A hot plate or lamp with a power factor of 1.0 may be used as a load. Adjust the load and rpm. and check that the voltage range is as specified in Table 8-2 at the rated amperage and rated rpm. -
Page 33: Measuring Insulation Resistance
8-4 MEASURING INSULATION RESISTANCE Use a “Dr. Robin” generator tester in megger tester mode or use a megger tester to check the insula- tion resistance. Connect a megger tester to one of receptacle output terminals and the ground ter- minal, then measure the insulation resistance. An insulation resistance of 1 megohm or more is nor- mal. - Page 34 * CONTROL PANEL Measure the insulation resistances between the live parts and the grounded parts. Fig. 8-13 Any part where the insulation resistance is less than 1MΩ has faulty insulation, and may cause electric leakage and electric shock. Replace the faulty part. - 31 -...
-
Page 35: Checking Functional Members
9. CHECKING FUNCTIONAL MEMBERS 9-1 VOLTMETER Check the voltmeter if it is turned on by applying specific voltage. Voltmeter cannot be checked with circuit tester because its resistance is too large. 1 Check that no disconnection nor short-circuit occurs with a tester, and the internal resistance is around 00k ohms normally. -
Page 36: Stator
9-4 STATOR Disengage connectors on the wires from stator and check the resistance between wires with a “Dr. Robin” or a circuit tester referring to the fol- lowing table. NOTE : If the circuit tester is not sufficiently accurate, it may not show the values given and may give erroneous readings. -
Page 37: Rotor Assembly
NOTE : Be sure to discharge condensers by shorting condenser leads each other before checking their capacitance, or the accurate reading cannot be obtained. Ω Table. 9-2 - 34 - ( Ω ) Ω Ω Fig. 9-5 Fig. 9-6B Type RGV4100, RGV6100... -
Page 38: Diode Rectifier
2 μF * If such an instrument is unavailable, the condenser can be checked by replacing with a new one. If the generator performs good with new condenser, the cause of trouble is defect in original condenser. 9-7 DIODE RECTIFIER Fig. -
Page 39: Oil Sensor
* Checking table for digital circuit tester. NOTE 1 : Because of the difference of measuring method between the analogue circuit tester and the digital circuit tester, polarity of tester needles should be reversed. NOTE 2 : ”Continuity” means forward direction characteristics of the diode, and different from short circuit condition (in which a pointer of the tester goes out of its normal scale), shows resistance to some extent. -
Page 40: Disassembly And Assembly
10. DISASSEMBLY AND ASSEMBLY 10-1 PREPARATION and PRECAUTIONS 1) Be sure to memorize the location of individual parts when disassembling the generator so that the generator can be reassembled correctly. Tag the disassembled part with the necessary information to facilitate easier and smoother reassembly. 2) For more convenience, divide the parts into several groups and store them in boxes. -
Page 41: Disassembly Procedures
10-2 DISASSEMBLY PROCEDURES Fig. 10-1 s t l Fig. 10-3 - 38 - Fig. 10-2... - Page 42 RUBBER PIPE HOSE CLAMP Fig. 10-5 Fig. 10-4 s t l - 39 - t i l . y l t l i f e i l Fig. 10-6...
- Page 43 l f f l f f l f f l f f l f f Fig. 10-8 s t l x i f l f f l f f - 40 - Fig. 10-7...
- Page 44 MOUNT RUBBER (ALTERNATOR SIDE : 2 pcs) M5 SCREW : 1 pce. x i f n i l FUEL STRAINER ( For RGV6100 ) MOUNT RUBBER (ENGINE SIDE : 2 pcs) Fig. 10-9 SPACER : 1 pce. MOUNT RUBBER : 2 pcs. FRAME EARTH CORD...
- Page 45 6φ 6φ Fig. 10-11 s t l t t i c i t REAR COVER Fig. 10-13 - 42 - Fig. 10-12 c i t...
- Page 46 STATOR STATOR COVER Fig. 10-14 STATOR COVER REAR COVER SPRING GROMMET WASHER : 4 pcs. COVER BOLT : 4 pcs. Fig. 10-15 - 43 - STATOR BRUSHING...
- Page 47 Fig. 10-17 . t l . t l Fig. 10-16 n i l o l l l i o . t f l l i l i o o l l . t l - 44 - SEAL TAPE Fig. 10-18 c i t...
- Page 48 . t f l i t . t f l i o . t f Fig. 10-19 s t l Fig. 10-20 - 45 - i t s...
-
Page 49: Checking, Disassembly And Reassembly Of The Front Panel
10-3 ASSEMBLY PROCEDURES 10-3-1 FRONT COVER Attach the front cover to the engine main bearing cover. Match the faucet joint and tighten the bolts. M8 x 20 mm bolt . . . 4 pcs. M8 spring washer . . . 4 pcs. - t f 10-3-2 ROTOR (1) Wipe off oil, grease and dust from the tapered... - Page 50 10-3-3 STATOR (1) Put the stator in the rear cover setting the four grooves on the side of stator with thread holes of the rear cover. (2) Attach the stator cover around the stator. 10-3-4 REAR COVER (1) Put the rear cover with stator over the rotor. Tap on the rear cover evenly with a plastic hammer to press the rotor bearing into the rear cover.
- Page 51 10-3-5 END COVER (RGV4100 only) Attach the end cover to the rear cover. 10-3-6 FRAME (1) Attach the mount rubbers to the frame. Insert the setting tongue of mount rubber into the hole on the frame and tighten the nut from the bot- tom of the frame.
- Page 52 (4) Attach the muffler with muffler cover to the engine and the rear cover . 1 Tighten the two nuts for the muffler first. Use the spring washers for RGV4100 and RGV6100. 8 mm stainless nut . . . 2 pcs.
- Page 53 M8 x 20 mm bolt and washer Ass’y . . . 4 pcs. (for RGV2800 and 6100) - t f 10-3-8 FUEL TANK (1) For RGV2600 and RGV4100 only : Attach the fuel strainer to the bottom of the fuel tank. Screw in the fuel strainer all the way and return one to two turns, and then lock it with the lock nut.
- Page 54 10-4-2 DISASSEMBLY (1) Remove the control panel from the front panel. M4 screw . . . 6 pcs. (RGV2800, RGV4100) M4 screw . . . 7 pcs. (RGV6100) (2) Disconnect the connectors on the wires to detach the control panel and front panel.
- Page 55 (3) Connect the wires of control panel components and front panel. (4) Attach the control panel to the front panel. M4 screw . . . 6 pcs. (RGV2800, RGV4100) M4 screw . . . 7 pcs. (RGV6100) - t f...
-
Page 56: Troubleshooting
(2) Measure the resistance between terminals on stator leads. (See Fig.11-2) Refer to Table 9-1 for normal resistance. If stator is faulty, replace it with a new one. 2 μ 2 μ Table. 11-1 COUPLER - 53 - Fig. 11-1B Type RGV4100, RGV6100 STATOR Fig. 11-2... - Page 57 (3) Check the insulation resistance between sta- tor core and each stator lead using a Dr. Robin generator tester in megger tester mode or a megger tester. (Fig. 11-3) If insulation is bad, replace stator with a new one. 11-1-3 CHECKING ROTOR (1) Remove rear cover and stator.
-
Page 58: Ac Voltage Is Too High Or Too Low
(3) Measure the insulation across one of the sol- dered terminals of the rotor and the core. (Fig.11-6) If insulation is bad, replace rotor with a new one. 11-2 AC VOLTAGE IS TOO HIGH OR TOO LOW 11-2-1 CHECKING ENGINE SPEED If the engine speed is too high or too low, adjust it to the rated r.p.m. -
Page 59: Ac Voltage Is Normal At No-Load, But The Load Cannot Be Applied
11-3 AC VOLTAGE IS NORMAL AT NO-LOAD, BUT THE LOAD CANNOT BE APPLIED. 11-3-1 CHECK THE ENGINE SPEED. If the engine speed is low, adjust it to the rated r.p.m. *Refer to Step 11-2-1 for engine speed adjustment. 11-3-2 CHECK THE TOTAL WATTAGE OF APPLIANCES CONNECTED TO THE GENERATOR. Refer to Section 7 “RANGE OF APPLICATIONS”... -
Page 60: No Dc Output
11-4 NO DC OUTPUT 11-4-1 CHECK THE AC OUTPUT. Check the generator by following Step 11-1-1 through Step 11-1-3. 11-4-2 CHECK THE DC BREAKER. If the DC breaker turned off while charging a bat- tery, check the cables for short-circuit or connec- tion in reverse polarity before resetting it on. -
Page 61: Idle Control(Optional Equipment)
The normal idling speed by the IDLE CON- TROL is as follows : RGV2800 ... 1900 to 2100 r.p.m. RGV4100, 6100 ... 2000 to 2200 r.p.m. The above speed setting is for cold engine con- dition. If the engine speed is out of adjusting range of the adjusting screw, move the sole- noid backward. - Page 62 (4) Check the wiring through ZCT on the IDLE CONTROL UNIT. * Single Voltage Type Make sure that an output wire from main coil is passing through the ZCT on the IDLE CONTROL UNIT. * Dual Voltage Type Check that two output wires (black wire and red wire) from main coils are passing through the ZCT on the IDLE CONTROL UNIT in the same direction.
- Page 63 11-5-2 ENGINE SPEED IS NOT REDUCED WHEN LOAD IS OFF. (1) Check the distortion of the SOLENOID BRACKET as shown in step 11-5-1-(1). (2) Check the wiring of SOLENOID. Check two leads from SOLENOID are securely connected. (3) Check the wiring of IDLE CONTROL UNIT. Check all leads from IDLE CONTROL UNIT are securely and correctly connected.
-
Page 64: Wiring Diagram
* RGV2800 : U.S.A., 60Hz-120V TYPE [NEMA RECEPTACLE] GRNERATOR CONTROL BOX 2.0Blk 2.0Blu 2.0R 2.0W Auxiliary Winding 1.25Y condenser 1.25Y 1.25Brn 1.25Brn 1.25Grn * RGV4100 : U.S.A., 60Hz-120V/240V TYPE [NEMA RECEPTACLE] GENERATOR CONTROL BOX No-fuse breaker 2.0Blk 2.0Blu Voltmeter 2.0R Auxiliary Winding condenser 2.0W 1.25Y 1.25Y 1.25Brn 1.25Brn... - Page 65 *RGV6100 : U.S.A., 50Hz-120V/240V TYPE [NEMA RECEPTACLE GENERATOR CONTROL BOX No-fuse breaker 1 2.0Blk 2.0Blu Voltmeter 2.0R Auxiliary Winding condenser 2.0W 2.0Y 2.0Y Diode stack 1.25Brn Assy Circuit breaker 1.25Brn 1.25Brn/W Auto idle switch 0.75W 0.75W 0.75W Idle 0.75Blu control 0.75Blu unit 0.75Blk/W...
- Page 66 *RGV4100, 6100 : ELECTRIC STARTER TYPE CONTROL BOX 1.25Grn Diode stack Assy 0.75Gry 1.25Or 1.25Grn 1.25R Key switch Earth (Ground) terminal Wiring color cord : Black Brn/W Blk/W : Black/White : Blue Grn/W LBlu : Light blue : Brown ENGINE 0.75Blu ( RGV4100 )
-
Page 67: Troubleshooting Manual Rgv4101/Rgv6101
1. SPECIFICATIONS... -
Page 68: Generator Troubleshooting
2. GENERATOR TROUBLESHOOTING 2-1 NO AC OUTPUT 2-1-1 CHECKING CONDENSER (1) Check the capacity of condensers using a “Dr. Robin” generator tester in capacitance meter mode. NOTE : Be sure to discharge condensers by shorting condenser leads each other before checking their capacitance, or the accurate reading cannot be obtained. - Page 69 (3) Check the insulation resistance between sta- tor core and each stator lead using a Dr. Robin generator tester in megger tester mode or a megger tester. (Fig. 2-3) If insulation is bad, replace stator with a new one. 2-1-3 CHECKING ROTOR (1) Remove rear cover and stator.
-
Page 70: Ac Voltage Is Too High Or Too Low
(3) Measure the insulation across one of the sol- dered terminals of the rotor and the core. (Fig.2-6) If insulation is bad, replace rotor with a new one. 2-2 AC VOLTAGE IS TOO HIGH OR TOO LOW 2-2-1 CHECKING ENGINE SPEED If the engine speed is too high or too low, adjust it to the rated r.p.m. -
Page 71: Ac Voltage Is Normal At No-Load, But The Load Cannot Be Applied
2-3 AC VOLTAGE IS NORMAL AT NO-LOAD, BUT THE LOAD CANNOT BE APPLIED. 2-3-1 CHECK THE ENGINE SPEED. If the engine speed is low, adjust it to the rated r.p.m. *Refer to Step 2-2-1 for engine speed adjustment. 2-3-2 CHECK THE TOTAL WATTAGE OF APPLIANCES CONNECTED TO THE GENERATOR. Refer to Section 3 “RANGE OF APPLICATIONS”... -
Page 72: No Dc Output
2-4 NO DC OUTPUT 2-4-1 CHECK THE AC OUTPUT. Check the generator by following Step 2-1-1 through Step 2-1-3. 2-4-2 CHECK THE DC BREAKER. If the DC breaker turned off while charging a bat- tery, check the cables for short-circuit or connec- tion in reverse polarity before resetting it on. - Page 73 Fig. 2-13 Circuit inside of the diode rectifiers is as shown in Fig. 2-13. Check continuity between each terminal by using a circuit tester as shown in Fig. 2-14. The rectifier is normal when condtinuity is as follows: * Checking table for analogue circuit tester. * Checking table for digital circuit tester.
-
Page 74: Idle Control (Optional Equipment)
NOTE 2 : ”Continuity” means forward direction characteristics of the diode, and different from short circuit condition (in which a pointer of the tester goes out of its normal scale), shows resis- tance to some extent. When results of the checking indicates failure even in one section, replace with a new one. - Page 75 (4) Check the wiring through ZCT on the IDLE CONTROL UNIT. * Single Voltage Type Make sure that an output wire from main coil is passing through the ZCT on the IDLE CONTROL UNIT. * Dual Voltage Type Check that two output wires (black wire and red wire) from main coils are passing through the ZCT on the IDLE CONTROL UNIT in the same direction.
- Page 76 (6) Checking the IDLE CONTROL UNIT (RGV6101) Check the resistance between five leads of IDLE CONTROL UNIT with circuit tester. 110 kΩ 110 kΩ 110 kΩ 〇 110 kΩ 110 kΩ 85 kΩ 85 kΩ 2-5-2 ENGINE SPEED IS NOT REDUCED WHEN LOAD IS OFF. (1) Check the distortion of the SOLENOID BRACKET as shown in step 2-5-1-(1).
-
Page 77: Range Of Applications
3. RANGE OF APPLICATIONS Generally, the power rating of an electrical appliance indicates the amount of work that can be done by it. The electric power required for operating an electrical appliance is not always equal to the output watt- age of the appliance. - Page 78 (5) Appliances without any indication as to power consumption Some appliances have no indication as to power consumption; but instead the work load (output) is indicated. In such a case, power consumption is to be worked out according to the numerical formula mentioned below.
- Page 79 NOTES : Wiring between generator and electrical appliances 1. Allowable current of cable Use a cable with an allowable current that is higher than the rated input current of the load (electrical appliance). If the input current is higher than the allowable current of the cable used, the cable will become excessively heated and deteriorate the insulation, possibly burning it out.
-
Page 80: Wiring Diagram
4. WIRING DIAGRAM RGV4101 GENERATOR CONTROL BOX No-fuse breaker 2.0Blk 2.0Blu Voltmeter 2.0R Auxiliary Winding condenser 2.0W 1.25Y 1.25Y 1.25Brn 1.25Brn RGV4101 (Electric starter model) GENERATOR CONTROL BOX No-fuse breaker 2.0Blk 2.0Blu Voltmeter 2.0R Auxiliary Winding condenser 2.0W 1.25Y 1.25Y 1.25Brn Diode stack Assy... - Page 81 RGV6101 GENERATOR CONTROL BOX No-fuse breaker 2.0Blk 2.0Blu Voltmeter 2.0R Auxiliary Winding condenser 2.0W 2.0Y 2.0Y 1.25Brn Diode stack Assy Circuit breaker 1.25Brn RGV6101 (Electric starter model) GENERATOR CONTROL BOX No-fuse breaker 2.0Blk 2.0Blu Voltmeter 2.0R Auxiliary Winding condenser 2.0W 2.0Y 2.0Y Diode stack...
- Page 82 e-mail: sales@robinamerica.com • www.robinamerica.com PRINTED IN THE USA...