NComputing L230 User Manual
Access devices with vspace
Hide thumbs
Also See for L230:
- User manual (95 pages) ,
- Selection manual (2 pages) ,
- User manual (53 pages)
Table of Contents
Advertisement
PAT230
L230 and L130
Access Devices
with vSpace
TM
User Guide
This guide applies to both Windows Server 2003 R2 SP2 and Server 2008 R1 SP2. Except for the vSpace
Version numbers at the top of the installer window frames, the installation screens are generally identical for
both products. Unless specifically noted, all screen shots shown were captured from a Windows Server
2003 installation
www.ncomputing.com
Advertisement
Table of Contents
Troubleshooting

Related Manuals for NComputing L230


Summary of Contents for NComputing L230
-
Page 1: User Guide
PAT230 L230 and L130 Access Devices with vSpace User Guide This guide applies to both Windows Server 2003 R2 SP2 and Server 2008 R1 SP2. Except for the vSpace Version numbers at the top of the installer window frames, the installation screens are generally identical for both products. - Page 2 “Microsoft Windows Server to Windows XP License Rights” section of the NComputing EULA. In all cases, your rights and obligations with respect to the use of vSpace software with Windows Server software and Windows Client software are defined by both the NComputing vSpace software EULA and the applicable Microsoft Software License Agreement or EULA.
-
Page 3: Table Of Contents
Installation ........................7 Install the vSpace software ................... 7 Connect the Access Device ..................13 Network connection ....................13 Installation with monitor mount (L130 and L230 only) ..........15 Product Registration ....................17 Online Registration ....................18 Offline Registration ....................21 Add Additional vSpace License ................ -
Page 4: Safety Information
L230/L130 User Manual Safety Information Refer to the following to prevent any physical injury or loss of assets caused by damage to the product. A user must read this User Guide carefully before use and properly follow the instructions. Make sure that the place of installation is not too hot (above 35˚C), too cold (below 0˚C), or too wet (above 85% relative humidity). -
Page 5: Regulatory Compliance
(2) This device must accept any interference received, including interference that may cause undesired operation. MIC 인증사항 기기의 명칭(모델명) : Multi-User Computing Access Device (L230) 인증 번호 : NCC-L230 (B) 인증 받은 자의 상호 : 엔컴퓨팅 주식회사... -
Page 6: Product Overview
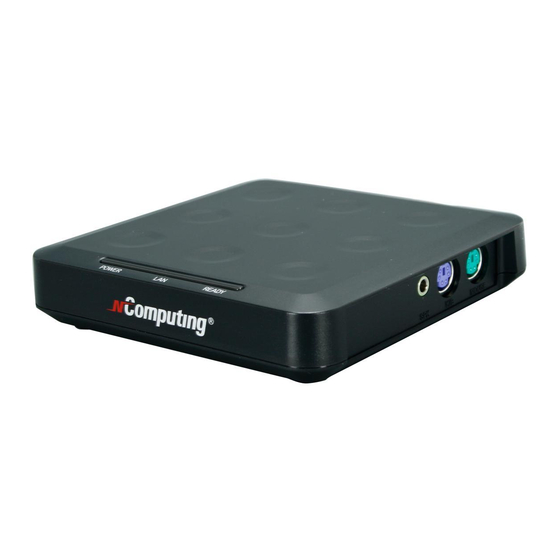
PC applications. What is vSpace Virtual Desktop software? NComputing vSpace desktop virtualization software divides your host PC's resources into independent virtual workspaces that give each user their own full PC experience. With a server operating system on the host (e.g., Microsoft Windows Server 2003, Server 2008, or Linux), up to 30 users can be supported simultaneously. -
Page 7: Minimum System Requirements
Windows Server operating system software or the Windows XP Client operating system software but not both. Microsoft does not provide any support for vSpace or for the Windows XP operating system in this configuration; you should seek support from NComputing for issues relating to vSpace and its use with the Windows XP Client operating system. -
Page 8: Installation
NComputing server. This check for the latest software version should work if either of TCP ports 80 or 3630 is open. If a later version is available on the NComputing server, the following prompt will appear to ask if you want to use the version on the CD or if you want to install the latest version. - Page 9 L230/L130 User Manual At the installer’s "Welcome" screen, click on the "Next" button. At the antivirus and firewall warning screen, click on the "Next" button. Note: - When dealing with firewall applications, you may need to make sure that our .exe files have proper access permission to the network.
- Page 10 L230/L130 User Manual At the software terms of use screen, you may read the software terms of use document and print it out. When you are finished, click on the "I agree" checkbox, and then click on the "Next" button.
- Page 11 L230/L130 User Manual At this point, one of the following “ready to copy files” screens will be displayed. If this is the first time vSpace has been installed on this system, the “Create sys info file” check box will appear on the screen. Unless it is requested by support, we recommend you leave the box unchecked.
- Page 12 L230/L130 User Manual Click “Next” and the vSpace software will then be installed. At the "Add new users" pop-up, select whether or not you would like to add new users to the system. If you click on the "Yes" button, the installation program will launch a screen to administer user accounts on the host PC.
- Page 13 L230/L130 User Manual At the "vSpace successfully installed" screen, you have the opportunity to display and read/print the latest “readme” file. This file normally contains notes specific to the version of vSpace you have just installed. Then select whether or not to immediately restart the computer.
-
Page 14: Connect The Access Device
L230/L130 User Manual Connect the Access Device The access device must be connected via Ethernet to the host PC. This can be done using an Ethernet switch, a router, or some other network connection method. When registering the software, all the access devices must be connected to the host PC... - Page 15 L230/L130 User Manual In the "Network" tab, select whether to use a dynamic IP address or a static IP address. If you setup the access device to use a dynamic IP address, you don't need to enter anything as the IP address. Click on the "Save" button.
-
Page 16: Installation With Monitor Mount (L130 And L230 Only)
L230/L130 User Manual Installation with monitor mount The L130 and L230 products include a monitor mount, mounting collar, monitor mount screws (silver color) and mounting collar screws (black color) for mounting it to the back of a monitor. To mount the access device, first secure the monitor mount to the back of the monitor, as in the following pictures. - Page 17 The above picture shows the mounting collar holding the access device in place with the four black screws. The above picture shows the L130 on the mounting bracket, secured with the mounting collar, and all cables connected. This picture shows the L230.
-
Page 18: Product Registration
L230/L130 User Manual Product Registration Product registration is required to enable normal product use enables downloading updates and technical support. Select "vSpace Registration" in the Windows Start menu. At any time during the registration process, you can click on the "Cancel" button and the process will be cancelled, or you can use the "Back"... -
Page 19: Online Registration
L230/L130 User Manual Next, you are presented with the vSpace End User License Agreement (EULA). Click in the “I agree” check box, and then click the “Next” button. Online Registration In the case of Online Registration, follow the instructions below. Otherwise skip to the section titled “Offline Registration”. - Page 20 L230/L130 User Manual Select the “Register online, using your internet connection” and click “Next.” The registration wizard will then show you a list of all unregistered L-series access devices that are currently connected to this vSpace host. You cannot select which devices will be registered –...
- Page 21 L230/L130 User Manual You then get a registration progress screen followed by “Registration results.” When your registration is complete, you see the “Registration results” screen. Be sure to click the check box for the “Register future L-series devices in the background” option, if you want vSpace to automatically register any unregistered L-series access devices that connect to this system in the future.
-
Page 22: Offline Registration
L230/L130 User Manual Offline Registration In the case of Offline Registration, follow the instructions below. If you have completed the online registration section, skip to “Using the access device”. If you don’t have standard internet connectivity, you can use standard email to register your vSpace software and L-series access devices. - Page 23 You’ll need to select the location where you wish to store the registration data file that you’ll later email to NComputing. Note that you cannot type directly into the “Create activation file” field, but you must click on the “Select” button to navigate to the directory where you wish to store the offline registration data file.
-
Page 24: Add Additional Vspace License
If the data is correct, click on the “Register” button or click “Back” if you wish to change any of the information. Then email the created “txt” file to registration@ncomputing.com. You can copy the “txt” file to another PC, if necessary to send the email. -
Page 25: Completing The Offline Registration Process
L230/L130 User Manual Completing the Offline Registration Process You will normally receive an immediate email that your registration file has been received, and the vSpace license file should be returned within another 5 to 10 minutes. When you receive the host system’s license files, save it in a convenient disk location, and restart the “Registration Wizard,”... -
Page 26: Uninstallation
L230/L130 User Manual Uninstallation To uninstall the vSpace program, select “Uninstall vSpace” in the “Start” menu. Follow the prompts and the programs are removed from the host PC. After the programs are uninstalled, you must restart the host PC to complete the process. -
Page 27: Using The Access Device
L230/L130 User Manual Using the access device Configure the Access Device The access device screen The available connection list shows the vSpace hosts to which the device can connect. Select a host from the list and click on the "Connect" button to start. - Page 28 L230/L130 User Manual "Loaded from . . .": How the access device loaded its latest firmware update. The "Close" button closes the options menu. The “Setup” Menu Within the “Options” screen, the "Setup" button brings up a set of tabs for viewing and changing the access device settings.
- Page 29 L230/L130 User Manual The “Options” Tab The "Options" tab contains settings for host PC connections. The "Server Connection List" is a list of three connection profiles. There is a check mark to the right of each profile that is enabled.
- Page 30 L230/L130 User Manual In each profile, there are the following settings: The “Autoconnect Enabled” radio button, when activated, sets the access device to automatically connect to the selected server when the device is turned on. In the “User name” field, you can enter the user name that you want to be entered into the Windows login dialog box upon access device connection.
-
Page 31: Using The Vspace Management Console
NComputing recommends setting the password to improve security. The “Update” Tab Your NComputing L-Series access device may at times require a firmware update. To do this, select the "Update" tab and click on the "Update" button. When the access device asks you for a password, enter "updateme"... - Page 32 MS update is removed or until an NComputing update for the module has been applied. – See screen shot below.) If a Microsoft update has created one of these conflicts, a new software version will be distributed very quickly through the vSpace automatic software update feature.
-
Page 33: Software Settings (Local)
L230/L130 User Manual Software Settings (local) The "Software Settings (local)" tree allows you to see and change settings for the host PC. Sessions The "Sessions" item shows information about all the sessions currently active on the vSpace software. By clicking on a session in the left window pane, you will see two tabs of available information. - Page 34 L230/L130 User Manual The "Information" tab shows the following information about the selected session: The "Station name" field shows the access device's name that was defined via the vSpace admin console. The "Logged in user" field shows the username that is currently logged in.
-
Page 35: Information & Settings
L230/L130 User Manual To send a message to a session, select the session and click on the “Send Message” button in the toolbar. The “Broadcast” tab allows you to select an access device to send the message to, a “From” entry, and a message. The access device must be connected to the same host PC. - Page 36 L230/L130 User Manual The "Licensee information" tree item shows the information entered during the registration process. The "System Settings" tree item shows the following settings for the vSpace software. Double-clicking on the name of the setting allows you to adjust it (unless it is read-only, which is specified below).
- Page 37 UTMA/UTSA USB port support: Displays whether the administrator has set the vSpace software to allow using the USB port on L230 access devices. Administrator Password: Displays whether an administrator password is set.
-
Page 38: Usb-Device Assignment(S)
USB-Device Assignment(s) Note: This feature is only available on the L200 & L230. In the "USB-Device Assignment(s)" tree item, you can control connections between USB ports on the host and vSpace sessions. To use this function, navigate the tree to select a USB port. -
Page 39: Software Settings (Lan)
L230/L130 User Manual of available USB ports is displayed where you can select which one(s) is/are to be connected to the selected device. This list shows each access device's MAC address and its serial number along with a checkbox. When you click on the "Apply" button, changes to the USB-Device assignments are saved. -
Page 40: Hardware Settings (Lan/Local)
L230/L130 User Manual Hardware Settings (LAN/local) The "Hardware Settings (LAN/local)" tree allows you to see and change settings for all access devices on the network. When you select the "UTMA/UTSA Devices" tree item, there is a table in the right side of the window that contains information about each access device. - Page 41 You can print the access devices's information by clicking on the "Print" button. For L230 devices, a check box appears on the Device Properties screen that allows the administrator to specify whether or not the USB port can be used on that access device.
- Page 42 L230/L130 User Manual In the "UTMA/UTSA Device Group(s)" tree item, you can create groups of access devices for administrative purposes. You can use groups to organize your access device records by any criteria. Access devices can belong to as many groups as necessary.
-
Page 43: Troubleshooting Error Messages
L230/L130 User Manual Troubleshooting error messages Error messages on the access device DHCP server was not found If the access device cannot find a DHCP server, this error message appears. Make sure there is a DHCP server on the current network. -
Page 44: Ts Error - Invalid Or No Serial Number
L230/L130 User Manual Make sure the host computer and access device are in the same subnet/local area network. Make sure any firewall or anti-virus programs installed in the host computer or network equipment are compatible with the vSpace software. TS ERROR – INVALID OR NO SERIAL NUMBER! This message appears when no serial number exists in the host computer. -
Page 45: Ts Error - Stations Limit Exceeded
MS update is removed or until an NComputing update for the module has been applied. – See screen shot below.) If a Microsoft update has created one of these conflicts, a new software version will be distributed very quickly through the vSpace automatic software update feature. -
Page 46: Glossary
It doesn't use CPU, VGA, and PC chipsets; it only uses a programmable SoC to connect to a Host PC. An access device using NComputing User eXtension Protocol (UXP) can be connected to Host PCs by using the LAN cable. Also, it can be connected to remote PCs through the Internet using TCP/IP. - Page 47 Ethernet address.) When you're connected to the Internet from your computer, a correspondence table relates your IP address to your computer's physical (MAC) address on the LAN. vSpace: NComputing Desktop Virtualization software PC: Personal Computer ...
-
Page 48: Faq
(see below). If you click the “Keep Blocking” button, you will not be able to find NComputing servers. If you select the “Unlock” button, the port will be open unless you block it manually. If you select the “Ask Me Later” button, the port will be open temporarily and the security message will continue to appear whenever the port is accessed.