Table of Contents
Advertisement
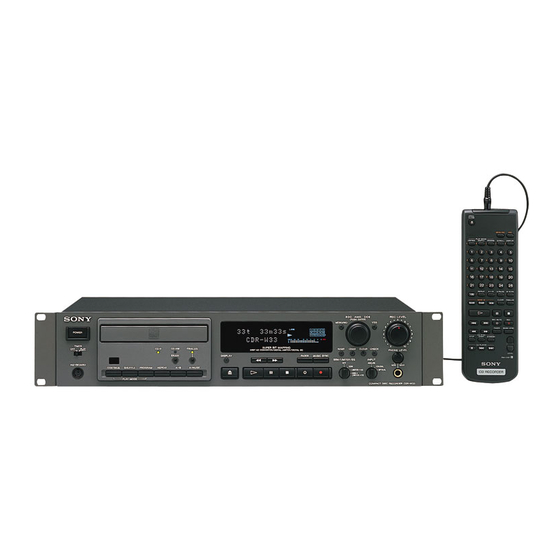
Compact Disc Recorder
CDR-W33
Operating Instructions
Recordable
Thank you very much for purchasing this Sony product.
Sony products are designed with safety in mind. If electrical
products are used incorrectly, however, there is a risk of death
or serious injury, so be sure to obey the following to avoid
accidents.
© 2000 Sony Corporation
TABLE OF CONTENTS
Safety .........................................
Getting Started ..........................
Discs ..........................................
Recording ..................................
Area ........................................
Playback ....................................
and Settings ...........................
Setup Menu Operations ............
Miscellaneous ...........................
2-347-284-11(1)
2
5
6
9
10
18
23
27
28
29
Advertisement
Table of Contents

Related Manuals for Sony CDR-W33


Summary of Contents for Sony CDR-W33
-
Page 1: Table Of Contents
Recordable Setup Menu Operations .... Thank you very much for purchasing this Sony product. Sony products are designed with safety in mind. If electrical Miscellaneous ......products are used incorrectly, however, there is a risk of death or serious injury, so be sure to obey the following to avoid accidents. - Page 2 CAUTION WARNING Use of this product other than directed may result in injury. Notice for the Customers in DANGER the United Kingdom INVISIBLE LASER RADIATION WHEN OPEN. The following caution label is located AVOID DIRECT EXPOSURE TO BEAM. IMPORTANT inside the unit. The wires in this mains lead are DANGER coloured in accordance with the...
-
Page 3: Safety
The model and serial numbers are located on the rear of the unit. Record the serial number in the space provided below. Refer to them whenever you call upon your Sony dealer regarding this product. Compatible with both CD-R and CD-RW media Model No. - Page 4 (Music Synchro-recording) Troubleshooting Adding Mute Sections (Mute) Display Messages Fade-in /Fade-out Recording DSP (Digital Signal Processing) Settings Synchro-recording with a Sony CD Player (CD Synchro-recording) Digital Recording Without Sampling Rate Converter Operations on the Disc’s TOC Area Finalizing (FINALIZE) Adding Track Name and Disc Name (NAME) 18...
-
Page 5: Getting Started
If any of the above items are not enclosed, contact your cable with sufficient length to ensure that the plug Sony dealer, or the Sony Service Center. does not come use due to shock or vibration. Inserting Batteries into the Remote... -
Page 6: Location And Function Of Parts
Location and Function of Parts Front Panel Descriptions !º!¡ !™ !£ !∞ !¢ @∞@§ @¶ @• #∞ !§ !• !¶ !ª @º @¡ @™ @£ @¢@ª#£#º#¡#¢ #™ #¶ #§ 1 Power switch !£ FINALIZE button and FINALIZE indicator Press to finalize. When a finalized disc is inserted, Press to turn ON or OFF the CD recorder. -
Page 7: Back Panel Descriptions
Location and Function of Parts @∞ MUSIC SYNC button #¡ CLEAR button Press to start Music Synchro-recording. Clear the characters and program that has been entered. @§ MENU/NO button #™ CHECK button Use to select the Setup menu. Displays the program details. @¶... -
Page 8: Remote Descriptions
!¡ STANDBY button !¢ Press to enter standby for CD Synchro-recording. CD PLAYER (X/./>) Use to output a Sony CD player remote signal. You can perform the following operations using these buttons instead of a CD player remote control. !™ X button Press to pause play. -
Page 9: Discs
Discs Discs Recordable Using Finalizing the CD recorder Finalizing is the process of writing a TOC (Table of Contents, track time and other information) to a CD-R Use discs with the following markings or or CD-RW disc. Before a disc is finalized, you can add inscriptions . -
Page 10: Recording
Recording Recording on a Disc Select the input signal using the INPUT switch Press the H or X button. on the front panel. Recording will start, and the recording time will be displayed. (N [REC] will be displayed.) ANALOG: Selects an analog signal input from the analog terminal. -
Page 11: Recording Precautions
Recording Recording Precautions Switching Display During Recording When recording on a previously recorded disc Make sure to add the new recording after the existing Pressing the DISPLAY button during recording one. You cannot record while overwriting existing changes the display as follows. recordings. -
Page 12: Adjusting The Recording Level
Recording Adjusting the Recording Monitoring Sound Inputs Level (Input Monitor) REC LEVEL If the z button is pressed when no disc has been inserted, you can make the selected input signal a monitor output. During input monitoring, if an analog input is selected, “AD-DA”... -
Page 13: Adding Mute Sections (Mute)
Recording Analog Inputs (Level Sync) Adding Mute Sections Track numbers are added when the signal sinks below the threshold for approximately 3 seconds, and then (Mute) rises above the threshold level again. Set the threshold level using L.Sync Level in the Setup menu. For Setup You cannot edit tracks after recording as with an MD, menu details, refer to page 28, “Setup Menu so the CD recorder is equipped with a mute function... -
Page 14: Fade-In /Fade-Out Recording
Recording Fade-in/Fade-out DSP (Digital Signal Recording Processing) Settings You can make recordings of analog input signals while applying the following processes: Digital equalizer, digital limiter, and Super Bit Mapping. The block diagram of the analog input signal part to the CD recorder is shown below. - Page 15 Recording Using the Digital Limiter and Digital Equalizer Digital Equalizer Setting To make recordings using the limiter and equalizer The CD recorder is equipped with a 3-band digital effects, set the “SBM/LIMITER/EQ” control to equalizer, a shelving equalizer for bass and trable “LIMITER + EQ”...
- Page 16 Recording Digital Limiter Using Digital Limiter Effectively The digital limiter, which is used when performing CD mastering, can also be used without adjustment for 1 Convert the signal to high level. simulation processing. Low level parts of isgnal are When setting the analog input recording level, raised without distortion, and high level parts of signal basically set the REC LEVEL control so that hard are processed using soft clip signal waveforms to...
-
Page 17: Digital Recording Without Sampling Rate Converter
(CD Synchro-recording) will continue to record even if CD playback has stopped. By connecting a Sony CD player to the CD recorder, you can easily record from CDs just by pressing the CD To pause synchro recording, press the CD-SYNC SYNC key on the remote. -
Page 18: Operations On The Disc's Toc Area
Operations on the Disc’s TOC AreaOC Area Finalizing (FINALIZE) Adding Track Name and Disc Name (NAME) CD-R/CD-RW CD-R/CD-RW CD-R discs can be played on ordinary CD players when they have been finalized, but you cannot change the disc status, such as adding additional tracks. You can add disc names and track names in to discs in CD-text format. - Page 19 Operations on the Disc’s TOC Area Adding Names Using the CD recorder Adding Names Using the Remote In stop mode, press the NAME button. Press the NAME button. Select whether you want to enter the disc name Select whether you want to enter the disc name or track number.
-
Page 20: Setting Skip/Unskip Tracks
Operations on the Disc’s TOC Area Adding Names Using a Personal Computer Finally, press the MENU/NO button to quit the Keyboard (Sold Separately) name input setup menu screen. For the basic keyboard settings, refer to page 27, “Keyboard Terminal”. Press the Num Lock (NAME) key to enter the Setting Skip/Unskip Tracks name input setup menu screen. -
Page 21: Unfinalizing
Operations on the Disc’s TOC Area Unfinalizing “PMA Write?” will be displayed. Select whether to record in the PMA area. CD-RW If you write to the PMA area, the setting information will remain even if the disc is You can restore CD-RW disc to the status they were removed from the CD recorder, and so remains immediately before the disc was finalized. -
Page 22: Erasing Tracks (Track Erase)
Operations on the Disc’s TOC Area Erasing Tracks Erasing All Tracks (TRACK ERASE) (DISC ERSE) CD-RW CD-RW You can erase tracks recorded on CD-RW discs. If You can delete all the tracks currently written to a CD- erasing, you can erase (a specified number of tracks RW disc, and reuse the disc. -
Page 23: Playback
PlaybackOC Area Playing a Disc Switching Display During Playback Pressing the DISPLAY button during recording Insert a disc. changes the display window as follows: When a disc is inserted, the CD recorder will enter stop mode, and the following will be displayed in the display window: Total number Current track number and elapsed track time of tracks on the disc, total recording time, and... -
Page 24: Playing A Specific Track
Playback Playing a Specific Track Playing Tracks Repeatedly (Repeat Play) Selecting previous or next tracks while playing or Cycle between the following by pressing the REPEAT paused (AMS track selection). button: Normal play n Repeat all tracks n Repeat 1 To select the start of a preceding or later track while track n Normal play. -
Page 25: Creating Your Own Program (Program Play)
Playback To cancel A-B repeat and resume normal play, press Press the YES button, or wait 20 seconds for the REPEAT button. the display to automatically quit setting mode. Press the CLEAR button in program mode to To change the repeat area, press the A-B button while delete the last track from the program. -
Page 26: Music Scan
Playback Playing Tracks in Random Music Scan Order (Shuffle Play) You can play all tracks on the disc in random order. You can play the start of tracks one after the other for a fixed time only to check the order of tracks. SHUFFLE Press the SHUFFLE button. -
Page 27: Control Terminal Functions And Settings
PS/2 interface. You can use either a are shown in the following diagram. Japanese or English keyboard. (Recommended keyboard: SONY KB-10.) Use a keyboard with a current Entering Track Names and Disc Name Using the Keyboard consumption of 120 mA max. -
Page 28: Setup Menu Operations
Setup Menu OperationsOC Area Basic Setup Menu Turn the AMS control to change the setting (set value). Operations Items marked with a * in the table below changes at this step. Press the MENU/NO button. Press the AMS control or the YES button, to Turn the AMS control to select the desired quit the setting changes. -
Page 29: Miscellaneous
Disc Maintenance normally. If normal operation is not restored even after • Fingerprints, dust, and dirt may cause incorrect several hours, consult the Sony Service Center. operation. • Basically, take care not to dirty the signal side of the Disc Handling Precautions disc. -
Page 30: Dimensions
Miscellaneous Dimensions Unit : mm To rackmount The unit can be mounted on EIA 19-inch rack. Move the four feet away and mount it on the rack. To move them away, pull out the plastic pins piercing them, then feet will be removed. -
Page 31: Specifications
Miscellaneous Power requirements: Specifications Where purchased Power requirements U.S.A. and Canada 120VAC,60Hz Other countries 120V/230V AC selectble, 50/60Hz Playable discs: CD, CD-R, CD-RW Recordable discs: CD-R, CD-RW (for music use) Power consumption: 15 W Recording method: Track At Once (TAO) 482 ×... -
Page 32: Troubleshooting
Miscellaneous The recorded data does not stay on the disc. Troubleshooting , If the power supply is turned OFF during recording or while PMA Writing is displayed, writing to the PMA area will be incorrect, and “TOC Reading” is displayed for a long time. the recording disabled. -
Page 33: Display Messages
Miscellaneous Display Messages Message Meaning No Disc Disc has not been inserted. 0Tr 0M00s Time display when unrecorded disc is inserted. TOC Reading Disc TOC information is read immediately after a disc is inserted. OPC Adjust Optimizing laser power for recording. Disc Error Disc is not inserted correctly. - Page 34 Printed in Japan...