
Related Manuals for Electrolux T5130


Summary of Contents for Electrolux T5130
-
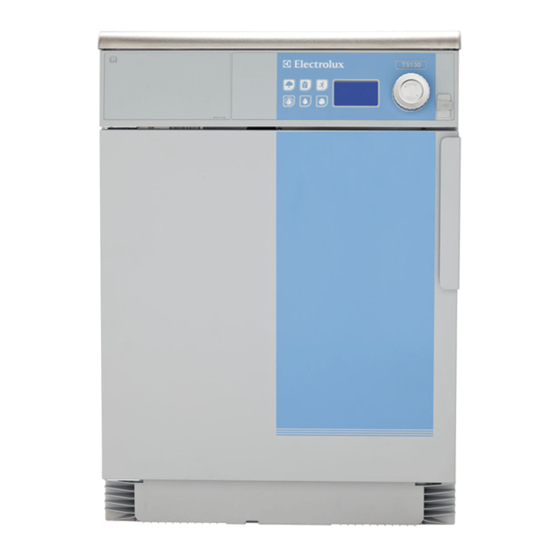
Page 1: Tumble Dryer
Service Manual Tumble dryer T5130, T5130C Type N1130 438 9038-30/EN 2012.02.24 Service manual in original language... -
Page 3: Table Of Contents
Contents Contents 1 Safety Precautions ......................5 2 Technical data ........................7 2.1 Drawing ........................7 2.2 Technical data......................8 2.3 Connections........................ 8 3 Machine presentation......................9 4 Function check ........................10 5 Sensors and overheating thermostats ................12 5.1 Inlet air........................12 5.1.1 Overheating thermostat .................. - Page 4 Contents 12.2 Error code......................... 72 12.3 Description of error codes and causes ..............74 MAIN COMMON ......................74 MAIN DRYER ......................75 DRUM MOTOR COMMON ..................82 FAN MOTOR COMMON....................83 INTERNAL COM......................84 EXTERNAL COM. PAYMENT..................85 EXTERNAL COM. CMIS....................86 13 Maintenance........................
-
Page 5: Safety Precautions
Safety Precautions 1 Safety Precautions The machine is not intended for use by persons (including children) with reduced physical, sensory or mental capabilities, or lack of experience and knowledge, unless they have been given supervision or instruction concerning use of the appliance by a person responsible for their safety. Children should be supervised to ensure that they do not play with the machine. - Page 6 Safety Precautions All external equipment which is connected to the machine must be CE/EMC-approved and connected using an approved shielded cable. In order to prevent damage to the electronics (and other parts) that may occur as the result of condensation, the machine should be placed in room temperature for 24 hours before being used for the first time.
-
Page 7: Technical Data
Technical data 2 Technical data 2.1 Drawing fig.7250A Operating panel Door opening, ⌀ 370 mm Electrical connection Exhaust connection Condense connection... -
Page 8: Technical Data
Technical data 2.2 Technical data T5130 T5130C Weight, net Drum volume litres Drum diameter Drum depth Drum speed G-factor, max. Rated capacity, filling factor 1:22 (Max. load) Heating: Electricity Airborne sound level dB(A) 2.3 Connections T5130 T5130C ⌀ mm —... -
Page 9: Machine Presentation
Machine presentation 3 Machine presentation T5130C T5130 fig.7552 ① Sensors and overheating thermostats Door Motor Heating unit Drum Control panel with program unit I/O modules After a repair has been made Whenever a repair has been made, a function check must be performed before the machine can... -
Page 10: Function Check
Function check 4 Function check May only be carried out by qualified personnel. A function check must be made when the installation is finished and before the machine can be ready to be used. Check the automatic stop of the machine •... - Page 11 Function check Check the heat • Let the machine work for five minutes on a program with heat. • Check that the heating is working by opening the door and feel if there is heat in the drum. Ready to use If all tests are OK the machine is now ready to be used.
-
Page 12: Sensors And Overheating Thermostats
5 Sensors and overheating thermostats 5.1 Inlet air 5.1.1 Overheating thermostat Description T5130 There are two inlet overheating thermostats. One is placed at the back of the machine and one is placed on the bottom of the machine on the heating element. - Page 13 Sensors and overheating thermostats Resetting — T5130C Disconnect the power to the machine. Press the reset button (A) on the overheating thermostat. fig.7594 ⑤...
- Page 14 Sensors and overheating thermostats Replacement of overheating thermostat T5130 Disconnect the power to the machine. Demount the casing over the rear panel. Demount the cover panel over the overheating thermostat. Disconnect the overheating thermostat and remove it. Connect the new overheating thermostat.
- Page 15 Sensors and overheating thermostats Replacement of overheating thermostat T5130C Disconnect the power to the machine. Demount the casing over the rear panel and the plastic cover. Disconnect the air channel panel. Disconnect the overheating thermostat and remove it. Connect the new overheating thermostat. It is recommended to replace the complete heating element cover with the overheating thermostat fig.7595 ⑦...
-
Page 16: Heating Sensor (Pt100)
Replacement of heating sensor (PT100) Disconnect the power to the machine. Disconnect the heating sensor and remove it. Connect the new heating sensor and put it in position. Make sure the sensor gets all the way down. T5130 T5130C fig.7588 ⑧... -
Page 17: Outlet Air
Sensors and overheating thermostats 5.2 Outlet air 5.2.1 Overheating thermostat Description T5130 The outlet overheating thermostat is placed on the bottom of the machine on the outlet air flow. The overheating thermostat ensures that the machine does not overheat during program operation. - Page 18 Sensors and overheating thermostats Resetting T5130C Disconnect the power to the machine. Open the door and demount the door switch. Press the reset button (A) on the overheating thermostat. fig.7593 ⑩ Remount the door switch. Replacement of overheating thermostat Disconnect the power to the machine. Demount the rear panel.
- Page 19 Sensors and overheating thermostats Replacement of overheating thermostat — T5130C Disconnect the power to the machine. Open the door and demount the door switch. Disconnect the overheating thermostat and remove it. Connect the new overheating thermostat. fig.7596 ⑫ Remount the door switch.
-
Page 20: Heating Sensor (Ntc-Sensor)
Sensors and overheating thermostats 5.2.2 Heating sensor (NTC-sensor) Description T5130C The heating sensor is placed next to the outlet overheating thermostat behind the door switch. The heating sensor measures the temperature in the outlet air and the signal is returned to the PCB. The PCB turns the heating unit off when the outlet air thermistor indicates that the required temperature has been reached. -
Page 21: Door
Door 6 Door 6.1 Door switch The door switch (A) ensures that the machine stops automatically if the door is opened during operation. If the machine does not stop when the door is opened or if the door is closed and the error code DOOR IS OPEN is displayed (and the machine is unable to start), for example, the door switch needs to be replaced. - Page 22 Door Replacement of door magnets Remove the magnet to be replaced and mount the new one. fig.7459 ⑯...
-
Page 23: Reversing The Door
Door 6.2 Reversing the door Disconnect the power to the machine. Demount the lower hinge and lift off the door. Note! Make sure to hold the door in position when loosening the hinge mounting. Demount the upper hinge. fig.W00180A ⑰ Demount the cover screws on the other side and mount them where the hinges was. - Page 24 Door Demount the door handle and remount the screws. Mount the door handle on the opposite side using the existing scews. Remove the upper and lower pivot and mount them at the opposite side. fig.W00183A ⑲ Demount the locking panels by loosening the barb with a screwdriver. Press out the locking panels, swap them over and press into position.
-
Page 25: Motor
Disconnect the power to the machine. Demount the casing over the rear panel and the cover panel at the air outlet. Demount the top panel. Disconnect the overheating thermostat and the heating sensor and push the connections into the hole. T5130 T5130C fig.7519A... - Page 26 Motor Demount the air channel panel. On condense machines: Pull out the hose to the drain from its upper connection. Loosen the belt around the drum. T5130 T5130C fig.7522A Unscrew the four screws at the panel around the heating element.
- Page 27 Motor Unscrew the rest of the screws on the panel. Disconnect the RMC and cut the cable ties. If there is a “FREE” connection, disconnect it. At the front of the machine: Open the door and remove the two plugs. Loosen the screws counter clockwise until they stop to release the support rollers.
- Page 28 Motor Carefully tilt the machine backwards and remove the four screws under the machine. Remove the motor with the fan. fig.7540 Demount the fan from the motor by looseing the set screw. The set screw can be accessed through a hole in one of the blades. fig.7541...
- Page 29 Motor Mount the fan on the new motor and mount the new motor with the fan in the machine. Fasten the four screws under the machine. Carefully put the new drum package back in the machine. Fasten the support rollers at the front of the machine. Connect the RMC and the “FREE”...
-
Page 30: Replacement Of The Belt Around The Motor Pulley
Demount the casing over the rear panel and the cover panel at the air outlet. Demount the top panel. Disconnect the overheating thermostat and the heating sensor and push the connections into the hole. T5130 T5130C fig.7519A Demount the air channel panel. On condense machines: Pull out the hose to the drain from its upper connection. - Page 31 Motor Unscrew the four screws at the panel around the heating element. Demount the cover panel to the electrical connections and disconnect all wires. fig.7527 Unscrew the rest of the screws on the panel. Disconnect the RMC and cut the cable ties. If there is a “FREE” connection, disconnect it. At the front of the machine: Open the door and remove the two plugs.
- Page 32 Motor Remove the belt (A) and put the new belt in position. fig.7536 Carefully put the drum package back in the machine. Fasten the support rollers at the front of the machine. Connect the RMC and the “FREE” connection if disconnected. Connect the wires and mount the cover panel to the electrical connections.
-
Page 33: Replacement Of Fan
Demount the casing over the rear panel and the cover panel at the air outlet. Demount the top panel. Disconnect the overheating thermostat and the heating sensor and push the connections into the hole. T5130 T5130C fig.7519A Demount the air channel panel. On condense machines: Pull out the hose to the drain from its upper connection. - Page 34 Motor Unscrew the four screws at the panel around the heating element. Demount the cover panel to the electrical connections and disconnect all wires. fig.7527 Unscrew the rest of the screws on the panel. Disconnect the RMC and cut the cable ties. If there is a “FREE” connection, disconnect it. At the front of the machine: Open the door and remove the two plugs.
- Page 35 Motor Disconnect the earth cable and the motor cable. fig.7539 Carefully tilt the machine backwards and remove the four screws under the machine. Remove the motor with the fan. fig.7540...
- Page 36 Motor Demount the fan from the motor by loosening the set screw. The set screw can be accessed through a hole in one of the blades. fig.7541 Use a puller to remove the fan from the motor. Mount the new fan on the motor. Make sure the air cover and the pressure spring gets in position. Mount the motor with fan in the machine.
-
Page 37: Replacement Of Fan Motor
Motor 7.4 Replacement of fan motor T5130C Disconnect the power to the machine. Demount the casing over the rear panel and the cover panel at the air outlet. Disconnect the overheating thermostat and the heating sensor and push the connections into the hole. - Page 38 Motor Demount the plastic cover and the air channel panel. Disconnect the fan motor and replace the fan motor with the new one and connect it. fig.7599 Mount the air channel panel and the plastic cover. Connect the overheating thermostat and the heating sensor. Mount the cover panel at the air outlet and the casing over the rear panel.
-
Page 39: Heating Unit, Electric
8.1 General Spare part number, effect and voltage are printed on each heating element. 8.2 Replacement of heating element T5130 Disconnect the power to the machine. Demount the casing over the rear panel and the cover panel at the air outlet. - Page 40 Heating unit, electric Demount the air channel panel. Loosen the belt around the drum. fig.7522C Unscrew the four screws at the panel around the heating element. Demount the cover panel to the electrical connections and disconnect all wires. fig.7527...
- Page 41 Heating unit, electric Unscrew the rest of the screws on the panel. Disconnect the RMC and cut the cable ties. If there is a “FREE” connection, disconnect it. At the front of the machine: Open the door and remove the two plugs. Loosen the screws counter clockwise until they stop to release the support rollers.
- Page 42 Heating unit, electric Connect the new element. Reconnect the wires as before, use the electric schematic supplied with the machine. Mount the element unit back in the machine and fasten the three screws under the machine. Carefully put the drum package back in the machine. Fasten the support rollers at the front of the machine.
- Page 43 Heating unit, electric Demount the the plastic cover and the air channel panel. Unscrew the screws to the heating element cover. Disconnect the wires and remove the heating element. fig.7547 Connect the new element. Reconnect the wires as before, use the electric schematic supplied with the machine.
-
Page 44: Drum
Disconnect the power to the machine. Demount the casing over the rear panel and the cover panel at the air outlet. Demount the top panel. Disconnect the overheating thermostat and the heating sensor and push the connections into the hole. T5130 T5130C fig.7519A... - Page 45 Drum Demount the air channel panel. On condense machines: Pull out the hose to the drain from its upper connection. Loosen the belt around the drum. T5130 T5130C fig.7522A Unscrew the four screws at the panel around the heating element.
- Page 46 Drum Unscrew the rest of the screws on the panel. Disconnect the RMC and cut the cable ties. If there is a “FREE” connection, disconnect it. At the front of the machine: Open the door and remove the two plugs. Loosen the screws counter clockwise until they stop to release the support rollers.
- Page 47 Drum Carefully put the new drum package back in the machine. Fasten the support rollers at the front of the machine. Connect the RMC and the “FREE” connection if disconnected. Connect the wires and mount the cover panel to the electrical connections. Fasten the four screws at the panel around the heating element and the rest of the screws on the panel.
-
Page 48: Replacement Of Bearing
Demount the casing over the rear panel and the cover panel at the air outlet. Demount the top panel. Disconnect the overheating thermostat and the heating sensor and push the connections into the hole. T5130 T5130C fig.7519A Demount the air channel panel. On condense machines: Pull out the hose to the drain from its upper connection. - Page 49 Drum Unscrew the four screws at the panel around the heating element. Demount the cover panel to the electrical connections and disconnect all wires. fig.7527 Unscrew the rest of the screws on the panel. Disconnect the RMC and cut the cable ties. If there is a “FREE” connection, disconnect it. At the front of the machine: Open the door and remove the two plugs.
- Page 50 Drum Remove the screws, bolt and washer on the bearing. Remove the bearing and mount the new one. fig.7532A Carefully put the new drum package back in the machine. Fasten the support rollers at the front of the machine. Connect the RMC and the “FREE” connection if disconnected. Connect the wires and mount the cover panel to the electrical connections.
-
Page 51: Replacement Of The Belt Around The Drum
Demount the casing over the rear panel and the cover panel at the air outlet. Demount the top panel. Disconnect the overheating thermostat and the heating sensor and push the connections into the hole. T5130 T5130C fig.7519A Demount the air channel panel. On condense machines: Pull out the hose to the drain from its upper connection. - Page 52 Drum Unscrew the four screws at the panel around the heating element. Demount the cover panel to the electrical connections and disconnect all wires. fig.7527 Unscrew the rest of the screws on the panel. Disconnect the RMC and cut the cable ties. If there is a “FREE” connection, disconnect it. At the front of the machine: Open the door and remove the two plugs.
- Page 53 Drum Remove the belt from the outer drum. Put the new belt temporarely in position on the outer drum and carefully put the drum package back in the machine. fig.7538 Fasten the support rollers at the front of the machine. Connect the RMC and the “FREE”...
-
Page 54: Control Panel
Control panel 10 Control panel 10.1 Program unit 10.1.1 Description The program unit is electronic and comprises a circuit board containing microprocessor, program memory, serial interface to the motor, I/O boards etc. The program unit receives its power from a separate power supply unit. fig.7553 The program unit receives information from the I/O boards about input like temperature sensors, RMC, vacuum, door status etc, and output like drum, fan and heat control. -
Page 55: Connections
Control panel 10.1.2 Connections The program unit board has the following connections: Board connector Function M-COM Communication, motor control (not used) D-BUS Databus D-BUS Databus TACHO Tachometer (not used) COIN Coin meter (coin 1, coin 2, blocking) EMERG / INP 1 Input FREE / INP 2 Free program (key switch) / Input... - Page 56 Control panel Demount the control knob Insert a screwdriver in the upper hole. fig.7491 Gently push the screwdriver inwards and turn the control knob counter-clockwise until the screwdriver goes further in. fig.7492 Continue turning a quarter of a turn until it is possible to remove the control knob. fig.7493...
- Page 57 Control panel Demount the cover ring When the control knob is removed, insert the screwdriver in the lower hole and press gently. Turn the cover ring counter-clockwise until it is possible to remove the cover ring. fig.7490 Demount the program unit Demount the CPU and disconnect the cables.
- Page 58 Control panel Mount the new program unit Mount the new CPU. Make sure that the guide pins (A) are in position. fig.7511 Connect the cables. Mount the cover ring and the control knob Mount the cover ring and rotate it clockwise until it is in position. Rotate the inner knob until the locking device is pointing downwards.
-
Page 59: Control Knob
Control panel Mount the control knob on the inner knob. Continue to press with the screwdriver and turn the control knob clockwise until it stops when it is in position. fig.7495A 10.2 Control knob 10.2.1 Replacement of control knob Disconnect the power to the machine. Insert a screwdriver in the upper hole. - Page 60 Control panel Continue turning a quarter of a turn until it is possible to remove the control knob. fig.7493 Cover ring When the control knob is removed, insert the screwdriver in the lower hole and press gently. Turn the cover ring counter-clockwise until it is possible to remove the cover ring. fig.7490 Mount the new cover ring and rotate it clockwise until it is in position.
- Page 61 Control panel Rotate the inner knob until the locking device is pointing downwards. Insert the screwdriver and press the locking device. fig.7494 Mount the new control knob on the inner knob. Continue to press with the screwdriver and turn the control knob clockwise until it stops when it is in position. fig.7495A...
-
Page 62: O Modules
Machine fitted with two I/O modules 6G82 LG1 EL T5130 81O 2J 81O = Function options I/O module type 81 (internal functions). 2J = Function options I/O module type 2 (external functions). - Page 63 I/O modules Location The parameter software installed in the machine’s program device on delivery is specified at the front and back of the machine. Using this article number, you can find the program designation and thereby identify I/O module function options on the web. fig.W00281...
-
Page 64: Replacement Of I/O Module
I/O modules 11.2 Replacement of I/O module I/O module type 81 and I/O module type 2 are installed in the same way. If the machine has I/O module type 2, it is located on I/O module type 81. The illustration shows replacement of I/O module type 81. - Page 65 I/O modules Remove the plastic cover and the electrical connections on the module. (Note the position of the connections). Remove the module by lifting it upwards. fig.7601 Insert the new module and make sure it is in position. Connect the electrical connections in the same way as before and mount the plastic cover. If both I/O module type 81 and I/O module type 2 is to be replaced it is recommended to fit the modules together before mounting in the machine.
-
Page 66: External Connections To I/O Module Type 2
I/O modules 11.3 External connections to I/O module type 2 Inputs The signal level may be 5 - 24V DC/AC or 100 - 240V AC. At 5 - 24V, the signal reference must be connected to 3 and at 100 - 240V to 4. Note! Do not mix potentials on the inputs. -
Page 67: Circuit Diagram Of Function Options For I/O Module Type 2
I/O modules 11.4 Circuit diagram of function options for I/O module type 2 11.4.1 Central payment (2J) To start the machine from a central payment system, the payment system must transmit a start pulse to the machine. The start pulse can be either 230V or 24V. In order to receive a feedback signal once the machine has started, 230V or 24V must be connected to connection 19. -
Page 68: Central Payment (2J)
I/O modules 11.4.2 Central payment (2J) The central payment or booking system shall transmit an active (high) signal to the machine once permission has been granted to start the machine. The signal must remain active (high) during drying. The signal can be either 230V or 24V. In order to receive a feedback signal once the machine has started, 230V or 24V must be connected to connection 19. -
Page 69: External Coin Meter/Central Payment (2K)
I/O modules 11.4.3 External coin meter/Central payment (2K) The signal received from external coin meters must be a pulse. fig.7438... -
Page 70: Price Reduction (2K)
I/O modules 11.4.4 Price reduction (2K) By maintaining an activated (high) signal on connection 5 ("Price red"), the price of the program can be reduced. This function has a number of uses, including providing reductions during a specific period of the day. Whilst the signal remains active (high), the price of the program is reduced by the percentage entered in the price programming menu. -
Page 71: Troubleshooting
Troubleshooting 12 Troubleshooting 12.1 General The troubleshooting section is used to trace errors in the machine to a defective component or unit. There is a memory in the CPU that will save the selected program for 10 minutes in the case of power failure. -
Page 72: Error Code
Troubleshooting 12.2 Error code An error in the program or in the machine is indicated on the display by an error code and a descriptive text. The error codes are divided into different groups called “Major” comprising different error codes called “Minor”. - Page 73 Troubleshooting Error code Text Major Minor INTERNAL COM. I/O BOARD MISHMASH I/O COMMUNICATION Error code Text Major Minor EXTERNAL COM. NO CBT COMMUNICATION PAYMENT Error code Text Major Minor EXTERNAL COM. CMIS COMMUNICATION ERROR CMIS...
-
Page 74: Description Of Error Codes And Causes
Troubleshooting 12.3 Description of error codes and causes MAIN COMMON 10:11 REAL TIME CLOCK OUT OF ORDER The real time clock is used by the CPU, measuring time, power failure, error codes, etc. The error code is activated if there is a time out in the communication with the internal real time clock in the CPU or if the data sent to/from the real time clock is incorrect. -
Page 75: Main Dryer
Troubleshooting MAIN DRYER 12:1 O.H. THERMOSTAT - INLET AIR The error code is activated if the protection thermostat for inlet air has trigged due to overheating. The overheating thermostat for inlet air will be trigged at 195 °C. The overheating thermostat for inlet air needs to be mechanically restored. When the overheating thermostat for inlet air is restored it is possible to reset the error code from the timer by a short press on the control knob/start button and the ongoing program will continue. - Page 76 Troubleshooting 12:3 INLET AIR SENSOR - OPEN The error code is activated if the inlet air sensor (PT100) or its wires is open. If the inlet air temperature in the SHOW INPUTS menu show a temperature of 222 °C the inlet air sensor is open.
- Page 77 Troubleshooting 12:5 OUTLET AIR SENSOR - OPEN The error code is activated if the outlet air sensor or its wires is open. If the outlet air temperature in the SHOW INPUTS menu show a temperature of -10 °C the outlet air sensor is open.
- Page 78 Troubleshooting 12:8 CONDENSE WATER CONTAINER IS FULL The pump will run when a program starts for normally 15 seconds. Then it will run again after normally 3 minutes. The pump will also run if the input for the float is trigged. The error code is activated if the pump has tried to empty the condense water container without the signal from the float in the condense water container has been deactivated.
- Page 79 Troubleshooting 12:12 DRYING ERROR WITH AUTOSTOP PROGRAM The error code is activated if the Auto Stop system does not register that the clothes are dry within the maximum drying time. When the error is trigged the machine will automatically go to the cooling module before the program ends.
-
Page 80: Vacuum & Jumper Troubleshooting
Troubleshooting 12:15 NO VACUUM The error code is activated if the vacuum/pressure switch (normally open) is not trigged within set time, normally 15 seconds. The error code is reset from the timer by a short press on the control knob/start button. A long press on the control knob/start button will make the timer reset and ongoing program will be ended. - Page 81 Troubleshooting 12:255 JUMPER 3 The error code is activated if the jumpers that has trigged the error code is missing. Jumpers are a by-pass of input not used in the machine. How many jumpers used is depending on configuration. When the jumper is restored the error code is automatically reset and the ongoing program will continue.
-
Page 82: Drum Motor Common
Troubleshooting DRUM MOTOR COMMON 20:1 O.H. DRUM MOTOR Not valid for washer extractors with MCU. This error code is activated if the overheating protection for the drum motor has trigged. The overheating protection is automatically restored. When the overheating protection is restored the error code is automatically reset and the ongoing program will continue. -
Page 83: Fan Motor Common
Troubleshooting FAN MOTOR COMMON 30:1 O.H. FAN MOTOR The error code is activated if the overheating protection for blower motor has trigged. The overheating protection is automatically restored. When the overheating protection is restored the error code is automatically reset and the ongoing program will continue. A long press on the control knob/start button will make the timer reset and the ongoing program will be ended. -
Page 84: Internal Com
Troubleshooting INTERNAL COM. 40:1 I/O BOARD MISHMASH The error code is activated if wrong I/O board is adressed to wrong position in the machine. After addressing of I/O boards the CPU reads the type of board in every position. If there is a mishmash between what the CPU reads and what the software expect on any address the error code will be displayed. -
Page 85: External Com. Payment
Troubleshooting EXTERNAL COM. PAYMENT 51:22 NO CBT COMMUNICATION Machine with payment system using serial communication to machine. Serial communication with payment system interrupted. Check network cable between machine and payment system. Check that payment system is operational. To reset machine to working state without repairing payment system, use Reset CBT communication in service mode. -
Page 86: External Com. Cmis
Troubleshooting EXTERNAL COM. CMIS 52:1 CMIS COMMUNICATION ERROR Communication between machine and network computer has been interrupted. Check network cable between machine and network. Check that CMIS on network computer is operational. The machine can be operated but statistics could be affected and data could be lost. -
Page 87: Maintenance
Maintenance 13 Maintenance 13.1 Clean the fan, the exhaust duct and the fresh-air intake to the room Check that the following are not clogged by lint and dust or otherwise blocked and clean with a vacuum cleaner: • The fan. Be careful not to damage the fan. •... -
Page 88: Clean The Area Around The Drum
Maintenance 13.3 Clean the area around the drum Disconnect the power to the machine. Demount the top panel. Remove all lint around the drum and in the area over the drum with a vacuum cleaner. fig.7603... -
Page 89: Clean The Motor
Demount the casing over the rear panel and the cover panel at the air outlet. Demount the top panel. Disconnect the overheating thermostat and the heating sensor and push the connections into the hole. T5130 T5130C fig.7519A Demount the air channel panel. On condense machines: Pull out the hose to the drain from its upper connection. - Page 90 Maintenance Unscrew the four screws at the panel around the heating element. Demount the cover panel to the electrical connections and disconnect all wires. fig.7527 Unscrew the rest of the screws on the panel. Disconnect the RMC and cut the cable ties. If there is a “FREE” connection, disconnect it. At the front of the machine: Open the door and remove the two plugs.
- Page 91 Maintenance Disconnect the earth cable and the motor cable. fig.7539 Clean the motor and the fan with a vacuum cleaner. Also clean the area around the motor and fan and other areas if needed. fig.7540B...
-
Page 92: Check The Belt
Connect the overheating thermostat and the heating sensor. Mount the top panel, the cover panel at the air outlet and the casing over the rear panel. 13.5 Check the belt Check that both of the belts are not worn out. Replace if necessary. T5130 T5130C fig.7522A... - Page 94 Electrolux Laundry Systems Sweden AB 341 80 Ljungby, Sweden www.electrolux.com/laundrysystems Share more of our thinking at www.electrolux.com...