Icom IC-2300H Instructions
Hide thumbs
Also See for IC-2300H:
- Instruction manual (66 pages) ,
- Instructions (2 pages) ,
- Service manual addendum (42 pages)
Advertisement
Quick Links
Download this manual
See also:
Instruction Manual
INSTRUCTIONS
FM TRANSCEIVER
i2300H
This instruction sheet describes only basic operations. For more detailed instructions, go to our web site (URL: http://www.icom.
co.jp/world/index.html) to view or download the full IC-2300H instruction manual.
In the instruction manual, some options or some functions may not be available for this version. Please ask your dealer for details.
■
Precautions
RWARNING RF EXPOSURE!
This device emits Ra-
dio Frequency (RF) energy. Extreme caution should be observed
when operating this device. If you have any questions regarding RF
exposure and safety standards, please refer to the Federal Com-
munications Commission Offi ce of Engineering and Technology's
report on Evaluating Compliance with FCC Guidelines for Human
Radio frequency Electromagnetic Fields (OET Bulletin 65).
RWARNING! NEVER
connect the transceiver to an AC
outlet. This may pose a fi re hazard or result in an electric shock.
RWARNING! NEVER
cut the DC power cable be-
tween the DC plug and fuse holder. If an incorrect connection is
made after cutting, the transceiver may be damaged.
RWARNING! NEVER
operate the transceiver while
driving a vehicle. Safe driving requires your full attention—any-
thing less may result in an accident.
RWARNING! NEVER
connect the transceiver to a
power source of more than 16 V DC or use reverse polarity. This
could cause a fi re or damage the transceiver.
RWARNING! NEVER
operate or touch the transceiver
with wet hands. This may result in an electric shock or damage
the transceiver.
RWARNING! NEVER
place the transceiver where
normal operation of the vehicle may be hindered or where it
could cause bodily injury.
RWARNING! NEVER
let metal, wire or other objects
touch any internal part of the transceiver. This may result in an
electric shock.
■ Panel description— Front panel
Function display
q
MW
w
VOL
S.MW
SQL
e
r
t
y
u
q POWER KEY [ ]
Hold down for 1 second to turn power ON or OFF.
w MEMORY WRITE KEY [S.MW MW]
➥ Push to enter the memory write mode.
➥ Hold down for 1 second to program the selected mem-
ory channel.
• Continue to hold down the key to automatically incre-
ment the memory channels.
e MICROPHONE CONNECTOR
Connect the supplied microphone here.
r VOLUME CONTROL [VOL]
Rotate to adjust the audio level.
t SQUELCH CONTROL [SQL]
Rotate to adjust the squelch level.
• The S-meter squelch or attenuator squelch is activated,
when you rotate [SQL] clockwise from the center position.
y SET•LOCK KEY [SET LOCK]
➥ Push to enter to the Set mode.
➥ Hold down for 1 second to turn the Lock function ON or OFF.
u MONITOR•CHANNEL NAME•PA KEY [MONI ANM PA]
➥ Push to turn the monitor function ON or OFF.
➥ In the memory or Call channel mode, hold down for 1
second to turn the channel name or number ON or OFF.
➥ In the marine channel mode, hold down for 1 second to
turn ON the Public Address function.
i OUTPUT POWER•DUPLEX KEY [LOW DUP]
➥ Push to select the output power.
➥ Hold down for 1 second to select the minus duplex,
plus duplex or simplex mode.
■ Panel description— Function display
!9
!8
!7
!6
q
w
e
r
t
y
q FREQUENCY READOUT
Displays the operating frequency, channel name, Set
mode contents, and so on.
• The frequency decimal point blinks during a scan.
• While the DTMF memory function is in use, "d" appears
in the 100 MHz digit.
w TRANSMIT ICON
➥ Appears while transmitting.
➥ Blinks while transmitting with the One-Touch PTT func-
tion ON.
e AUDIO MUTE ICON
Appears when the Audio Mute function is activated.
r NARROW MODE ICON
Appears when the narrow FM mode is selected.
t OUTPUT POWER ICONS
Displays the selected transmit output power level.
y KEY ICONS
Displays the function(s) of the front panel keys directly
below the function display.
u SKIP ICON
Appears when the selected memory channel is set as a
skip channel.
i MEMORY CHANNEL NUMBER READOUT
➥ Displays the selected memory channel number.
➥ "C" appears when the Call channel is selected.
o MEMORY ICON
Appears when the Memory mode is selected.
!0 S/RF INDICATOR
➥ Displays the relative signal strength, while receiving signals.
➥ Displays the output power level, while transmitting.
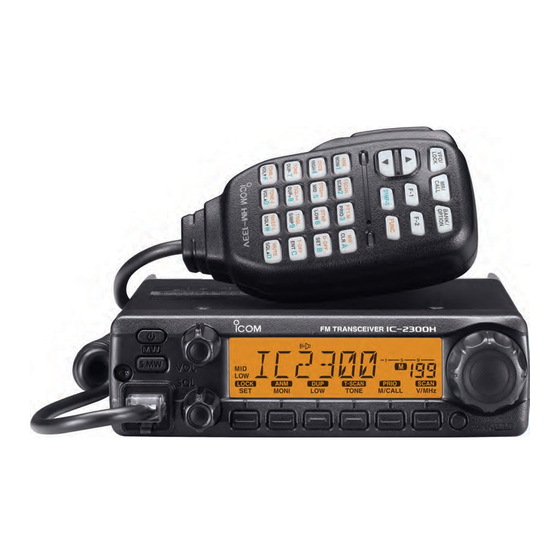
Thank you for purchasing the IC-2300H
FM TRANSCEIVER
with Icom's state of the art technology.
Please read all instructions carefully before using the IC-
2300H.
CAUTION: NEVER
expose the transceiver to rain, snow
or any liquids. The transceiver may be damaged.
DO NOT
push the PTT when not actually intending to transmit.
KEEP
the transceiver out of the reach of children.
DO NOT
During mobile operation,
operate the transceiver
without running the vehicle's engine. When the transceiver's
power is ON and your vehicle's engine is OFF, the vehicle's bat-
tery will soon become exhausted.
BE CAREFUL!
The transceiver will become hot when op-
erating it continuously for long periods of time.
DO NOT
set the transceiver in a place without adequate ven-
tilation. Heat dissipation may be affected, and the transceiver
may be damaged.
DO NOT
use or place the transceiver in direct sunlight or in areas
with temperatures below –10°C (+14˚F) or above +60°C (+140˚F).
DO NOT
use harsh solvents such as benzine or alcohol
when cleaning, as they will damage the transceiver's surfaces.
USE
only Icom microphones (supplied or optional). Other
manufacturer's microphones have different pin assignments and
may damage the transceiver if attached.
Approved Icom optional equipment is designed for optimal per-
formance when used with an Icom transceiver.
Icom is not responsible for the destruction or damage to an Icom
transceiver in the event the Icom transceiver is used with equip-
ment that is not manufactured or approved by Icom.
!3
BANK
OPT
i
o
!0
!1
!2
o TONE•TONE SCAN KEY [TONE T-SCAN]
➥ Push to select the tone function.
➥ Hold down for 1 second to start a Tone Scan.
!0 MEMORY/CALL•PRIORITY KEY [M/CALL PRIO]
➥ Push to select and toggle memory, Call and marine
channel modes.
➥ Hold down for 1 second to start a priority watch.
!1 VFO/MHz TUNING•SCAN KEY [V/MH z SCAN]
➥ Push to select the VFO mode.
• In the VFO mode, push to select the tuning step.
➥ Hold down for 1 second to start a scan.
• Push to cancel an active scan.
!2 BANK•OPTION KEY [BANK OPT]
➥ Push to select a memory bank in the memory mode.
➥ Hold down for 1 second to enter the Option Set mode.
• In the marine channel mode, hold down for 1 second
to enter the Marine Set mode.
!3 TUNING DIAL [DIAL]
➥ Selects the operating frequency, memory channel.
➥ Selects an item in the Set mode.
➥ Changes the scanning direction.
D Microphone connector (front panel view)
q +8 V DC output (Max. 35 mA)
w Channel up/down
e 8 V control IN
q
i
r PTT
t GND (microphone ground)
y MIC (microphone input)
u GND
i Data IN
!5
!4
!3
!2
!1
!0
o
i
u
!1 BUSY ICON
➥ Appears when receiving a signal, or the squelch is open.
➥ Blinks while the monitor function is turned ON.
!2 S-METER SQUELCH ICON
Appears while the S-meter Squelch function is turned ON.
!3 SQUELCH ATTENUATOR ICON
Appears while the Squelch Attenuator function is turned ON.
!4 PRIORITY WATCH ICON
Appears during Priority Watch.
!5 AUTO POWER OFF ICON
Appears when the Auto Power OFF function is turned ON.
!6 TONE ICONS
➥ The " " icon appears while the subaudible tone en-
coder is in use.
➥ The " " and " " icons appear while the DTCS encoder
is in use.
➥ The " " icon appears while the Tone Squelch (CTCSS)
function is in use.
➥ The " " and "
" icons appear while the Reverse Tone
Squelch (CTCSS) function is in use.
➥ The " " icon appears while the Tone Squelch (DTCS)
function is in use.
➥ The " " and "
" icons appear while the Reverse Tone
Squelch (DTCS) function is in use.
➥ The " " icon appears with the " " or " " icon, while the
pocket beep function (CTCSS or DTCS) is in use.
!7 DUPLEX ICONS
The "+" icon appears in the plus duplex mode, and the "–"
icon appears in the minus duplex mode.
!8 FOGHORN ICON
Appears while the Foghorn function is turned ON.
!9 LOCK ICON
Appears while the Lock function is turned ON.
■ Microphone (HM-133V)
!1
!0
q
o
w
i
e
u
r
y
Mic element
t
q VFO/LOCK KEY [VFO/LOCK]
➥ Push to select the VFO mode.
➥ Hold down for 1 second to turn the Lock function ON or
OFF.
w PTT SWITCH
➥ Hold down to transmit; release to receive.
➥ Toggles between transmitting and receiving while the
One-Touch PTT function is in use.
e UP/DOWN KEYS [Y] or [Z]
➥ Push either key to change the operating frequency,
memory channel, mode setting, and so on.
➥ Hold down either key for 1 second to start scanning.
■ HM-133V keypad
KEY
FUNCTION
SECONDARY FUNCTION (
Opens and closes the squelch.
Turns the channel names or number display ON or OFF,
in the memory mode.
Starts and stops scanning.
Starts and stops tone scanning.
Starts and stops priority watch.
Turns the One-Touch PTT function ON or OFF.
Selects high output power.
Turns ON the DTCS squelch.
Selects mid output power.
Turns ON the DTCS pocket beep function.
Selects low output power.
Turns ON the DTMF memory encoder function.
Selects the minus duplex mode.
Turns ON the subaudible tone encoder.
Selects the plus duplex mode.
Turns ON the CTCSS pocket beep function.
Selects the simplex mode.
Turns ON the tone squelch function.
Adjusts the audio level.
Sends a 1750 Hz tone signal while held down.
➥ Cancels frequency entry.
➥ Selects the memory channel programming mode.
➥ Cancels a scan or priority watch.
➥ Advances the memory channel number when con-
➥ Exits the Set mode.
tinuously pushed after programming is completed.
➥ Enters the Set mode.
Turns OFF the DTMF memory mode.
➥ Selects the next item in the Set mode.
➥ Sets the keypad for numeral input.
Turns OFF the subaudible tone encoder, pocket beep or
➥ Selects the previous item in the Set mode.
CTCSS/DTCS tone squelch.
Adjusts the squelch level.
Mutes the audio.
• The Mute function is released when any operation is
performed.
Adjusts the audio level.
Sends a 1750 Hz tone signal for 1 second.
Adjusts the squelch level.
Locks the digit keys on the keypad (including the [A] to
[D], [#] and [M] keys).
• The activity indicator lights orange while the Micro-
phone Keypad Lock function is activated.
■
Basic operation
[ ]
[VOL]
[S.MW] (MW)
[SQL]
[V/MHz] (SCAN)
[SET] (LOCK)
[M/CALL] (PRIO)
[MONI] (ANM PA)
[LOW] (DUP)
[TONE] (T-SCAN)
D
Turning power ON/OFF
➥ Hold down [ ] for 1 second to turn the power ON or OFF.
D VFO mode selection
The IC-2300H has two basic operating modes; the VFO
mode and the memory mode.
➥ Push [V/MH z] to select the VFO mode.
• Push [M/CALL] one or more times to select the memory,
Call or marine channel* mode.
D Setting a frequency
q If necessary, push [V/MH z] to select the VFO mode.
w Rotate [DIAL] to set the frequency.
• The frequency changes according to the selected tuning step.
• Push [V/MH z] one or more times, to toggle the frequency
step between 1 MHz and 10 MHz, if desired.
D Tuning step selection
The tuning step is the smallest selectable frequency incre-
ment you can use to set the operating frequency. The follow-
ing tuning steps are selectable.
• 5 kHz
• 6.25 kHz
• 10 kHz
• 12.5 kHz
• 15 kHz
• 20 kHz • 25 kHz
• 30 kHz
• 50 kHz
NOTE: For convenience, select the tuning step that match-
es the frequency intervals of the repeaters in your area.
q If necessary, push [V/MH z] to select the VFO mode.
w Push [SET] to enter the Set mode.
e Push [SET] or [MONI] one or more times, until "TS" appears.
r Rotate [DIAL] to select the desired tuning step.
t Push any key, other than [SET] or [MONI], to save the
entry and exit the Set mode.
D Call channel selection
➥ Push [M/CALL] one or more times to select the Call channel.
• "C" appears instead of a memory channel number.
• Push [M/CALL] to select the marine channel* mode, push
again to return to the memory mode, or push [V/MHz] to
select the VFO mode.
D Lock function
Use the Lock function to prevent accidental channel changes
and unnecessary function access.
➥ Hold down [LOCK] (SET) for 1 second to turn the Lock
function ON or OFF.
• [PTT], [MONI], [VOL] and [SQL] can be used, even
while the Frequency Lock function is ON.
D Monitor function
This function is used to listen to weak signals without dis-
turbing the squelch setting, or to open the squelch manually,
even when the tone squelch is in use.
➥ Push [MONI] to open the squelch.
• The "BUSY" icon blinks.
• Push [MONI] again to cancel the function.
r ACTIVITY INDICATOR
➥ Lights red while any key other than [FUNC]
[DTMF-S]
, is pushed, or while transmitting.
➥ Lights orange while the Microphone Keypad Lock func-
tion is activated.
➥ Lights green while the One-Touch PTT function is in use.
t KEYPAD
➥ Push the keys to activate various functions.
y FUNCTION INDICATOR
➥ Lights orange while [FUNC]
is activated—indicat-
ing the secondary function of keys can be accessed.
➥ Lights green when [DTMF-S]
is activated—DTMF
signals can be transmitted using the keypad.
u FUNCTION KEY [FUNC]
i DTMF MEMORY SELECT KEY [DTMF-S]
o FUNCTION KEYS [F-1] or [F-2]
Program and recall your desired transceiver setting.
!0 BANK/OPTION KEY [BANK/OPTION]
➥ In the memory mode, push to select the memory bank option.
➥ Hold down for 1 second to enter the Option Set mode.
• In the marine channel mode, hold down for 1 second to
enter the Marine Set mode.
➥ In the Marine Set mode, push to select the next item.
!1 MEMORY/CALL KEY [MR/CALL]
➥ Push to select the memory mode.
➥ Hold down for 1 second to select the Call channel.
➥ In the Marine Set mode, push to select the previous item.
+key)
OTHER FUNCTION
After pushing
, transmits
the appropriate DTMF code.
When the DTMF memory
encoder is activated, push
[A] to [D], [M], [#], [0] to [9]
to transmit the appropriate
DTMF memory contents.
• [SQL] control
Noise squelch
Squelch
[DIAL]
threshold
Squelch attenuator
[BANK] (OPT)
or
Squelch is
S-meter squelch
open.
Shallow
Deep
D Squelch attenuator
The transceiver has an RF attenuator related to the squelch
level setting. Approximately 20 dB of attenuation is obtained
at the maximum setting.
Turn ON the Squelch Attenuator function:
q Push [ ] to turn OFF the power.
w While holding down [LOCK] (SET), hold down [ ] for
1 second to turn ON the power and enter the Initial Set
mode.
e Push [SET] or [MONI] one or more times, to select the "SQL"
item.
r Rotate [DIAL] to select "AT" (Attenuator).
t Push [ ] to save and exit the Initial Set mode.
y Rotate [SQL] clockwise past the 12 o'clock position, to
activate the squelch attenuator.
• The attenuation level can be adjusted up to approximate-
ly 20 dB, between the 12 o'clock and fully clockwise posi-
tions.
• When setting the squelch from the microphone, a level
greater than '17' activates the attenuator.
NOTE: When using with the Monitor function.
The squelch attenuator functions even when the Monitor
function is in use. It is recommended to set [SQL] be-
tween 10 and 12 o'clock (7 to 17 level when it is set using
the HM-133V).
D S-meter squelch
The transceiver has an S-meter squelch. The S-meter
squelch allows you to set minimum signal level needed to
open the squelch.
Turn ON the S-meter squelch function:
q Push [ ] to turn OFF the power.
w While holding down [LOCK] (SET), hold down [ ] for 1 sec-
ond to turn ON the power and enter the Initial Set mode.
e Push [SET] or [MONI] one or more times, to select the
"SQL" item.
r Rotate [DIAL] to select "SS" (S-meter squelch).
t Push [ ] to exit the Initial Set mode.
y Rotate [SQL] clockwise past the 12 o'clock position, to
activate the S-meter squelch.
D Selecting output power
Set the output power level to suit your operating require-
ments. Lower output power during short-distance commu-
nications may reduce the possibility of interference to other
stations and will reduce current consumption.
➥ Push [LOW] one or more times to select the output pow-
er.
• The power level can be changed even while transmitting.
*: Transmission is inhibited in the marine channel mode.
and
Advertisement

Related Manuals for Icom IC-2300H


Summary of Contents for Icom IC-2300H
-
Page 1: Basic Operation
Mic element ➥ Push the keys to activate various functions. This instruction sheet describes only basic operations. For more detailed instructions, go to our web site (URL: http://www.icom. co.jp/world/index.html) to view or download the full IC-2300H instruction manual. y FUNCTION INDICATOR In the instruction manual, some options or some functions may not be available for this version. -
Page 2: Memory Channels
S ET MONI TONE M/CALL V/MHz The IC-2300H has a total of 207 memory channels for stor- r Hold down [MW] (S.MW) for 1 second. receiving on a TAG ing often used operating frequencies, repeater settings, and channel. • 3 beeps sound and the selected channel is added.