
Related Manuals for GE ZV800SJSS


Summary of Contents for GE ZV800SJSS
- Page 1 GE Consumer & Industrial TECHNICAL SERVICE GUIDE Monogram 36-in. Chimney Vent Hood MODEL SERIES ZV800SJSS ZV800BJBB PUB # 31-9132 03/05...
- Page 2 If grounding wires, screws, straps, clips, nuts, or washers used to complete a path to ground are removed for service, they must be returned to their original position and properly fastened. GE Consumer & Industrial Technical Service Guide Copyright © 2005 All rights reserved.
-
Page 3: Table Of Contents
Table of Contents Cleaning ......................................8 Components ....................................10 Component Locator View ................................ 9 Control Features ................................... 8 Duct Cover ....................................14 Fan Motor Assembly ................................17 Filters ......................................10 Glass Visor ....................................... 8 Installation Information ................................7 Introduction ....................................4 Lights ...................................... -
Page 4: Introduction
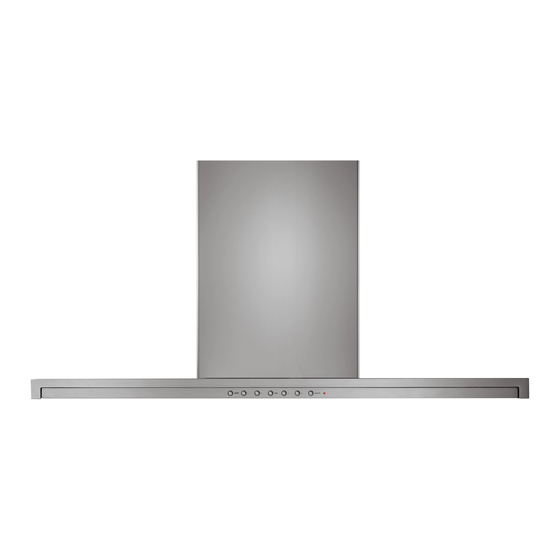
Introduction The new Monogram 36-in. Chimney Vent Hood has the following features: • Under-cabinet or stand-alone installation ― The chimney hood may be installed beneath a wall- mounted cabinet, above most cooktops and ranges. For a more contemporary look, the system can be wall-mounted with matching 8-to-10-foot duct cover. -
Page 5: Nomenclature
Nomenclature Model Number Z V 800 S J SS SS = Stainless Steel Monogram ® BB = Black on Black Vent Model Year S = Stainless Steel B = Black Features Serial Number Mini-manual The fi rst two characters of the serial number identify the month and year of manufacture. -
Page 6: Technical Data
Technical Data ZV800SJSS, ZV800BJBB Electrical Specifi cations This information is intended for use by persons possessing adequate backgrounds of electrical, electronic and mechanical experience. Any attempt to repair a major appliance may result in personal injury and property damage. The manufacturer or seller cannot be responsible for the interpretation of this information, nor can it assume any liability in connection with its use. -
Page 7: Duct Cover
Under-Cabinet Installations Installation Information The hood may be installed beneath a cabinet. The vent hood is heavy. Adequate structural support The cabinet must measure at least 20-in. from should be provided in all types of installations. The the bottom frame to the inside top. Both venting hood should be secured to vertical studs in the wall, options can be accomplished in an under-cabinet or to a horizontal support. -
Page 8: Cleaning
Stainless Steel Magic™. Stainless 7 - BOOST – The highest fan speed. Steel Magic™ is available through GE Parts and Accessories, 800.626.2002 or GE Appliances.com. Note: The BOOST fan speed can only be selected Order part number WX10X15. -
Page 9: Component Locator View
Component Locator View Front View ( Shown with decorative duct cover removed Power Supply Housing Cover Canopy Visor Fan assembly Bottom View Light Light Power Supply Housing Components 1 - Transformer 2 - Triac 3 - PTC Board 4 - Capacitor 5 - Power Control Board (PCB) –... -
Page 10: Components
Components Filters Visor The chimney vent hood comes supplied with The visor houses the push-button assembly and 2 metal grease fi lters. (Also supplied is a single slides forward over the cooktop surface and retracts charcoal fi lter for installations not vented to the when not in use. -
Page 11: Visor Tracks
6. Remove the 2 Phillips-head screws that attach Visor Tracks the ribbon receptacle to the left track. The visor tracks are mounted on each side of the 7. Remove the single Phillips-head screw that holds canopy. the black ribbon protector in place. To remove the visor tracks: 1. -
Page 12: Lights
Note: When replacement is necessary, use only a Visor new 12-volt, 20-watt halogen bulb for a G-4 base (GE part #WB08X10045). To remove a lightbulb, insert a small fl at-bladed screwdriver to remove the glass cover from the Push-Button Assembly receptacle, then carefully pull the bulb out of the socket. -
Page 13: Light Receptacles
3. Lower the light shield and slide it toward the Light Receptacles rear to clear the front tabs. The 2 light receptacles are recessed in the light 4. Disconnect the light receptacles on each side of shield and are located on the underside of the the light shield. - Page 14 3. Carefully lower the upper duct section into the Duct Cover lower duct section. The duct cover consists of two telescoping sections. The lower section is attached to the canopy. The upper section is attached to a duct bracket or air defl...
- Page 15 Transformer Power Supply Housing WARNING: Components in the power supply Triac housing are electrically HOT when voltage is connected to the hood. PTC Board The power supply housing is located above the fan housing behind the duct cover. To access the power supply housing, remove the duct cover, (see Duct Capacitor...
- Page 16 Power Control Board (PCB) To remove the power control board (PCB) ribbon: The power control board (PCB) has an AC to DC 1. Access the power control board (PCB). (See power converter, microprocessor, and fan relays. It is Power Supply Housing located inside the lower component box.
-
Page 17: Power Supply Housing
10. Remove the 4 Phillips-head screws that hold the Fan Motor Assembly inner bracket to the canopy. Lower the inner bracket. The fan motor assembly is located inside the fan motor housing above the canopy. The fan motor has 4 speeds and utilizes a start/run capacitor. Fan speeds are selected at the push-button assembly located in the visor. - Page 18 12. Grasp the fan motor assembly from the bottom. Note: To make installation of the fan motor easier, Remove the 4 Phillips-head screws that hold the tape the fan ground wire to the fan power cable. fan motor to the fan housing. Insert the fan wiring through the power supply housing wire entry inlet.
-
Page 19: Troubleshooting
Troubleshooting SERVICE DIAGNOSTIC FLOW CHART PUSH BUTTONS STUCK? UNSTICK/ADJUST NOTE #2 PUSH BUTTONS STUCK? ORDER/INSTALL ORDER/INSTALL ENTRY/DISPLAY ENTRY SUBASSEMBLY SUBASSEMBLY HOOD CONTROL • TURN HOUSE CIRCUIT DONE DEAD? • BREAKER OFF, THEN ON • IS CONTROL OPERATION OK? CHECK IF 120V AC CHECK IF 120V AC IS PRESENT AT MOTOR IS PRESENT AT MOTOR... -
Page 20: Push-Button Assembly
FAN MOTOR TEST The fan motor is a 2 pole induction capacitor motor. To test the resistance values of the fan motor windings: 1. Access the PCB, then disconnect the fan harness from CN1 (See Power Supply Housing Note: Jump, then test each speed individually. 2. -
Page 21: Schematics And Wiring Diagrams
Schematics and Wiring Diagrams – 21 –... -
Page 22: Warranty
Warranty YOUR MONOGRAM HOOD WARRANTY Staple sales slip or cancelled check here. Proof of original purchase date is needed to obtain service under warranty. WHAT IS FULL ONE-YEAR WARRANTY COVERED For one year from date of original purchase, we will provide, free of charge, parts and service labor in your home to repair or replace any part of the hood that fails because of a manufacturing defect.