Samsung Galaxy Tab 10.1 User Manual
Hide thumbs
Also See for Galaxy Tab 10.1:
- User manual (301 pages) ,
- Start manual (23 pages) ,
- Manual del usuario (145 pages)

Related Manuals for Samsung Galaxy Tab 10.1


Summary of Contents for Samsung Galaxy Tab 10.1
- Page 1 A N D R O I D T A B L E T User Manual Please read this manual before operating your device and keep it for future reference.
-
Page 2: Intellectual Property
All Intellectual Property, as defined below, owned by or which is otherwise the property of Samsung or its respective suppliers relating to the SAMSUNG Galaxy Tab, including but not limited to, accessories, parts, or software relating there to (the “Galaxy Tab System”), is proprietary to Samsung and protected under federal laws, state laws, and international treaty provisions. - Page 3 Samsung device. During the testing, the device is tested with the security solutions to see if the solutions work with the device as described by the third party security solution providers.
- Page 4 For complete statement of limited warranty, please refer to www.samsung.com/us/safe, available on the web and where Samsung smartphone and Galaxy Tab™ devices are sold. [101212]...
- Page 5 Do you have questions about your Samsung Mobile Device? For 24 hour information and assistance, we offer a new FAQ/ARS System (Automated Response System) at: www.samsung.com/us/support ® ® ® Nuance , VSuite , T9 Text Input, XT9 Smart Input, and the Nuance logo are trademarks or registered trademarks of Nuance ™...
- Page 6 > About device > Legal information > License settings > DivX® VOD > Register). Go to vod.divx.com for more information on how to complete your registration.
-
Page 7: Table Of Contents
Features ......20 Using the Samsung Keyboard ... . . 48 Front View . - Page 8 Section 4: Contacts and Accounts ...56 Section 7: Connections ......112 Accounts ......56 Internet .
- Page 9 Battery Use and Safety ....228 Samsung Mobile Products and Recycling . . . 230 UL Certified Travel Charger ... . . 230 Display / Touch-Screen .
-
Page 10: Section 1: Getting Started
Section 1: Getting Started This section helps you to quickly start using your tablet. Note: Unless stated otherwise, instructions in this user manual Understanding This User Manual start with the tablet unlocked, at the Home screen. The sections of this manual generally follow the features of your tablet. -
Page 11: Battery
Text Conventions Battery Indicator This manual provides condensed information about how to The Battery icon in the Status Bar shows the battery use your tablet. To make this possible, the following text power level. When battery power is 15% or less, your tablet conventions are used to represent often-used steps: prompts you to charge the battery. - Page 12 1. Assemble the Wall/USB Charger by removing the 2. Insert the USB cable into the Charging Head (1). protective plastic sheets from the Outlet Connector and the Charging Head and inserting the Outlet Connector (1) into the receptacle on the Charging Head (2) as shown.
- Page 13 3. Insert the USB cable into the tablet’s Charger/ 5. When charging is complete, unplug the Charging Head Accessory Port (2). from the power outlet and remove the USB cable from the tablet. Warning! While the tablet is charging, if the touch screen does not function due to an unstable power supply, unplug Note: You cannot charge the battery using the USB cable and the USB power adapter from the power outlet or...
-
Page 14: Installing The Sim Card
Installing the SIM Card Caution! Make sure that the SIM card’s gold contacts face When you subscribe to a cellular network, you are provided downward and that the notched corner of the card with a plug-in SIM card loaded with your subscription details, goes in first. -
Page 15: Turning Your Tablet On And Off
Turning Your Tablet On and Off Setting Up Your Tablet Turning Your Tablet On When you first turn on your tablet, you are asked to set up a few things. To do that, the following screens appear. Some Press and hold the Power/Lock Key screens can be skipped (touch Skip) or re-displayed (touch (For more information, refer to Back). - Page 16 Wi-Fi Samsung Account Make sure the Wi-Fi OFF / ON icon is set to ON Sign in to your Samsung account to use Samsung services. choose one of the following options: 1. Touch variety of services to learn more. Touch Add Wi-Fi network to enter a Network SSID that is 2.
- Page 17 Got Google? • If you do not have a Google account, touch No. The Make it Google screen appears. To use all of the Android features of your tablet, you need to create a Google account the first time you use your device. –...
- Page 18 Enable Purchases This Tablet Belongs To ... This screen displays if you signed in to your Google account. To personalize the tablet with your name: Enter purchase information for your Google account 1. Touch the First and Last fields and use the on-screen and touch Save.
-
Page 19: Creating A New Google Account
Creating a New Google Account Google Services This screen displays if you did not sign in to your Google Your new device uses a Google account to fully use its account. The use of this device is subject to the privacy Android features, including Gmail, Maps, Navigation, and policy and other terms. -
Page 20: Using Google Maps
Using Google Maps Task manager Screen The Task manager screen provides information about Active In order to use some applications related to Google Maps, applications and includes a RAM manager. you must first connect Wi-Fi. (For more information, refer to “Wi-Fi”... -
Page 21: Memory Card
Task Manager Application 3. Touch Downloaded to view applications installed from Google Play™ Store. Touch Uninstall to remove an The Task Manager application provides information about application from your device. applications, including Active applications, Downloaded, RAM manager, Storage, and Help. 4. -
Page 22: Installing A Memory Card
Installing a Memory Card Removing a Memory Card 1. Open the Memory Card Slot cover and turn to expose Important! To prevent damage to information stored on the the slot. memory card, unmount the card before removing it 2. With the gold contacts facing down, carefully slide the from the device. -
Page 23: Galaxy Tab Accessories
“Lock screen” on page 192.) To find accessories for your Galaxy Tab: (For other settings related to securing your device, see 1. Go to http://www.samsung.com/us/mobile/galaxy-tab- “Location services” on page 191.) accessories. Galaxy Tab accessories display. Note: Unless stated otherwise, instructions in this User Manual start with the device unlocked, at the Home screen. - Page 24 The Lock screen displays. 2. Swipe across the screen as shown. The last accessed screen displays. Tip: You can launch any of five applications from the Lock screen. Just touch and swipe one of the app shortcut icons to launch its associated application. You can change your Lock screen settings to enable access to the Popup Note application by using your S Pen.
-
Page 25: Troubleshooting
Troubleshooting Note: You can customize the Lock screen and set the type of If your device has fatal errors, hangs up, or freezes, you may Screen Unlock you want to use (Face unlock, Pattern, need to reset the device to regain functionality. PIN, or Password). -
Page 26: Section 2: Understanding Your Device
Section 2: Understanding Your Device • This section outlines key features of your device and Messaging Features: ™ describes the screen and the icons that appear when the – Gmail device is in use. It also shows how to navigate through the –... -
Page 27: Front View
4. Display Screen: The orientation of the display screen ® Books, Play Store, Polaris Office, and Samsung Media Hub. (For rotates with the tablet as you turn it. You can turn this more information, refer to “Applications and Widgets” on page function on or off. -
Page 28: Top View
Top View Back and Bottom Views The following items can be found on the top The following items can be found on the back and bottom of of your device as illustrated. your device. 1. Power/Lock Key: Press and hold to 1. -
Page 29: S Pen
S Pen Removing the S Pen From Your Tablet The S Pen is conveniently stored in your tablet to protect it With the S Pen stylus, you can do anything you can do with and to keep it available. one finger, only more accurately. Tip: Removing the S Pen awakens your tablet’s screen (if dark), unlocks the screen if the lock is set to Swipe, and launches the S Pen App Tray. -
Page 30: Using The S Pen
Rich S Pen Functionality Using the S Pen • Air View: Hover the S Pen over the screen to preview information. There are several different functions you can perform using • the S Pen. Effectively express yourself: Write/Draw directly into an email, S Pen Screen Operations or the calendar, annotate Word, Excel, PowerPoint, and PDF documents, capture your ideas in S Note, write a note on the back... - Page 31 Back Function Menu Button To move to a previous screen, hold the S Pen button and To display the menu from any screen, hold the S Pen button touch and drag the screen as shown in the illustration below. and touch and drag the screen as shown in the illustration The previous screen displays.
- Page 32 Launch Popup Note Screen Capture Popup Note is an application that you can launch from any To take a screen capture, press and hold the S Pen button screen to take quick notes or jot down ideas. To open Popup and touch and hold the S Pen anywhere on the screen.
-
Page 33: Air View
Air view Write on any Screen after Capture To write on a screen capture, use the S Pen to draw or write When you hold the S Pen near the screen, a pointer appears on the image. Files are saved in the My Files Storage on the screen. -
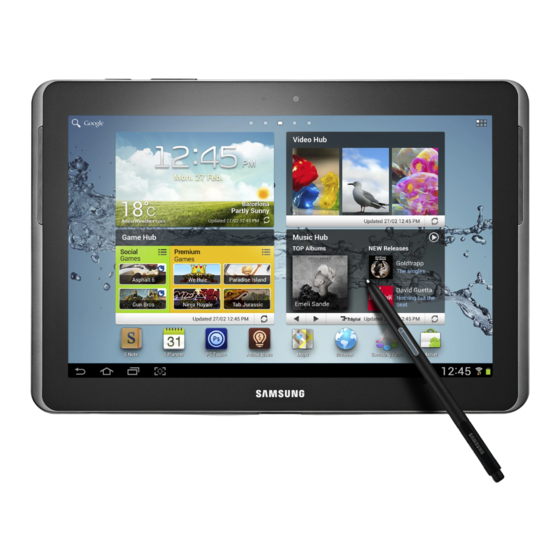
Page 34: Home Screen
Home Screen The Home screen is the starting point for using your tablet. Note: Unless stated otherwise, instructions in this user manual start with the device unlocked, at the Home screen. 1. Google Search: Search the web by typing or speaking. (For more information, refer to “Google”... -
Page 35: Display Settings
Display Settings 10. App Shortcuts: Shortcuts to applications. (For more information, refer to “App Shortcuts” on page 40.) You can customize display screen settings to your 11. Multi window tray: Shortcuts to apps pop-ups that you preferences. (For more information, refer to “Display” on page 185.) can use anytime, such as a Alarm, Calculator, and Extended Home Screen... - Page 36 Adding Home Screen Panels 4. Under Add to Home screen the following options are available: Your device comes with five active Home screen panels. You • Apps and widgets: Add application shortcuts or widgets to can add panels to a maximum of 7. the current Home screen panel.
- Page 37 Removing Home Screen Panels Selecting a New Home Screen You can remove (disable) Home screen panels you aren’t You can change which Home screen panel appears you touch using. Home. 1. From a Home screen panel, pinch the screen from the 1.
-
Page 38: Navigating Your Device
Navigating Your Device Screen Capture 1. Touch Screen Capture to capture and add an Use command buttons and the touch screen to navigate. image of the current screen to the clipboard. Command Buttons 2. Touch and hold Screen Capture to capture an Back image of the current screen and edit the image, then Touch... - Page 39 Other Buttons Touch and Hold Google Search Activate on-screen items. For example: • Touch and hold a widget on the home screen to move it. Touch Google to search the web or your device. Context-Sensitive Menus • Touch and hold on a field to display a pop-up menu of options. Swipe, Flick, or Slide Context-sensitive menus offer options for features or screens.
- Page 40 Using Motions – Move the device left or right to migrate it to a new location. • Pan to browse images: Once enabled, By activating the various gesture features within the Motion – Touch and hold a desired on-screen image to pan around it. Settings menu, you can access a variety of time saving –...
-
Page 41: Notifications
Notifications Status Details When you receive a notification, the Notification icon displays To display the current date and time, battery status, and in the System Bar, to the left of the Time. Notifications Wi-Fi connectivity status, open Status Details. indicate the arrival of Gmail, Email, alarms, and more. 1. -
Page 42: Quick Settings
Quick Settings 2. Touch the time at the top of the pop-up to display a Date and time pop-up. The following options are To view and control the most common settings for your available: tablet, as well as accessing the complete Settings •... - Page 43 • Bluetooth: Touch to enable or disable Bluetooth. (For more These additional options are available: information, refer to “Bluetooth” on page 123.) • Brightness: Touch and drag the slider to set the brightness or touch Auto to allow the device to set brightness automatically Sweep the pop-up to the left to see additional settings.
- Page 44 Google Talk. Wi-Fi networks available: An open Wi-Fi network is in range. Wi-Fi Connected: Your device is connected to a Wi-Fi network. Samsung account: Set up your Samsung account. (For more information, refer to “Samsung Account” on page 10.)
-
Page 45: Status Bar
Status Bar Airplane Mode: Indicates that the Airplane Mode is active, which allows you to use many of your The Status Bar is part of the System Bar and displays icons device’s features, but it cannot access online to show network status, battery power, and other details. information or applications. -
Page 46: App Shortcuts
App Shortcuts GPS Active: Displays when GPS is active. Use App Shortcuts for quick access to applications or features, such as Email or Camera. Alarm Set: Displays when you set an alarm to ring at 1. Navigate to the Home screen on which you want to a specified time. -
Page 47: Widgets
Widgets Note: There must be room on the screen where you want to When you first turn on your tablet, there are various widgets place the widget, otherwise the widget will not add to on the center Home screen. They can also appear on the the Home screen. -
Page 48: Folders
Folders Managing Folders To name a folder: Place Folders on the Home screen to organize items together on the Home screen. Touch the folder, touch the Unnamed folder field, and Adding Folders use the keyboard to enter a name for the folder. To add an App shortcut to a folder: To create a folder on a Home page: 1. -
Page 49: Wallpapers
Wallpapers • Wallpapers: Choose from pre-loaded wallpaper images. Touch an image to view it. Touch Set wallpaper to save it as You can choose a picture to display on the Home Screen, wallpaper. Touch Back to return to the Home screen. Lock screen, or on both the Home and Lock screens. -
Page 50: Multi Window Tray
Multi window tray 4. Touch items in the body of the pop-up, such as an email entry or keys on the Calculator. There are shortcuts available that link to apps that you might 5. Touch to close the Multi window tray. need while working in other apps, such as Alarm, Calculator, Calendar, Email, Music Player, and World Clock. -
Page 51: S Pen App Tray
S Pen App Tray Customizing the Multi window tray You can choose which applications appears in the Multi The S Pen App Tray gives you quick access to window tray and arrange them in any order. the S Pen-enabled applications on your tablet. 1. - Page 52 Restoring the S Pen App Tray • Crayon physics: Your drawings are transformed into physical objects in a game in which you solve puzzles with your artistic 1. Touch the time display at the bottom right side of the vision and creative use of physics. display.
-
Page 53: Section 3: Entering Text
By default, your tablet provides an on-screen QWERTY the Voice input feature. Your device recognizes your speech and keyboard for text entry called the Samsung keyboard. You enters text for you. (For more information, refer to “Using can use the Samsung keyboard to enter letters, punctuation, Speech Recognition”... -
Page 54: Using The Samsung Keyboard
Handwriting Configuring the Keyboard methods” on page 196.) Using the Samsung Keyboard To configure the Samsung keyboard to your preferences: The Samsung keyboard is a custom on-screen QWERTY Touch Set up input methods in the Status bar and keyboard, featuring Predictive text. Input characters by... -
Page 55: Entering Upper And Lower Case Letters
Entering Upper and Lower Case Letters Other Keyboard Functions The default case is lower case (abc). Enter upper and lower The current Samsung keyboard input language displays on case alphabet letters by touching the Shift key to toggle the space bar. To change the input language: the case, before touching the letter key(s). - Page 56 Set up input methods in the Status bar. The Set up input methods pop-up appears. 2. Touch next to Samsung keyboard to display the Samsung keyboard settings screen. 3. Touch Predictive text to turn Predictive text Touch the Predictive text tab to modify associated settings.
-
Page 57: Editing Text
Editing Text Copying, Deleting, or Replacing Text To select and copy, delete, or replace text: You can edit the text you enter in text fields by cutting, copying, or pasting text. These operations can be performed 1. Touch and hold the text or word you want to select. within and across apps. - Page 58 Closing the Keyboard Pasting Text To paste previously copied text: To close the keyboard: 1. Touch the text at the point you want to paste the copied Touch Close Keyboard on the bottom left corner of text. the screen. Cursor displays at the point you touched. 2.
- Page 59 Using Continuous input Here are a few tips to get you started: • Auto-spacing: When you finish a word, just lift your finger and T9 Trace allows you to enter words by gliding your finger start the next word. over the virtual QWERTY keypad, lifting your finger between words.
-
Page 60: Using The Handwriting Feature
Using the Handwriting Feature Input Writing / Line Return You can enter text simply by using your finger to handwrite Word Change to Options Keyboard letters on your screen. 1. Touch and hold Voice Recognition/Options and Numbers Text Input Delete slide to Handwriting. -
Page 61: Using Speech Recognition
For uppercase letters, write capital letters instead of lowercase You can use your voice to enter text using the Voice input letters. feature, which lets you enter text by speaking. The Samsung • Write a dash (horizontal line) to add a space. -
Page 62: Section 4: Contacts And Accounts
Settings. The Settings menu appears. • Samsung account: Add your Samsung account. (See “Samsung 2. Under Accounts, touch Add account. Account” on page 10.) 3. In the Add account pop-up, select the account type. -
Page 63: Contacts
Contacts Creating Contacts 1. From a Home screen, touch Contacts Store contact information for your friends, family, and colleagues to quickly access information or to send a 2. Touch Device or an account. message. 3. Touch the Photo ID to set up a photo to identify the contact. -
Page 64: Updating Contacts
Updating Contacts • Phone: Enter a telephone number, then touch the Label tab to choose a label from Mobile, Home, Work, Work Fax, To update an existing contact: Home Fax, Pager, Other, Custom, or Callback. 1. From a Home screen, touch Contacts. -
Page 65: Contacts Display Options
Send email from Contacts Contacts Display Options To send an email to one or more contacts: There are various ways to display your Contacts and general Contacts settings. 1. From a Home screen, touch Contacts. 1. From a Home screen, touch Contacts. - Page 66 • Print contact info: Check mark the fields you want to print and Send all namecards: Allows you to transmit all of your then touch Done. You can only print on a Samsung printer. current Contact entries at one time. If the recipient device •...
-
Page 67: Joining Contacts
• Change order: Changes the order of how the groups display. Send individual namecards: Allows you to transmit Linked Contacts single contacts, one at a time. The recipient must accept Your device can synchronize with multiple accounts, each namecard as it is received. This method of including Google, Corporate Exchange, and other email transmission ensures all contacts are received. - Page 68 Separating Contacts 1. From a Home screen, touch Contacts. 1. From a Home screen, touch Contacts. 2. Touch Menu Share namecard via. 2. Touch a contact in the Contacts list to view its Tip: Set up a contact record for yourself to share your information.
-
Page 69: Importing And Exporting Contacts
Importing and Exporting Contacts Synchronize Contacts with Accounts To back up and restore your contacts information, you can To synchronize your contacts with an account: export your contacts list to a storage device, such as a PC, or 1. From a Home screen, touch Contacts. -
Page 70: Groups
Groups Renaming a Group To rename a group that you created: Assign contacts to Groups to make searching for contacts faster or to quickly send messages to group members. 1. From a Home screen, touch Contacts. Creating a New Group 2. -
Page 71: Adding Group Members
Adding Group Members Removing Group Members To add a contact to a group, just Edit a contact’s Group field. To remove contacts from a group: (For more information, refer to “Updating Contacts” on 1. From a Home screen, touch Contacts. page 58.) 2. -
Page 72: Favorites
Favorites Accessing Favorites You can view your favorites two ways for fast viewing or Mark contact records with a gold star to identify them as messaging. favorites. Adding Favorites To view your favorites list: 1. From a Home screen, touch Contacts. - Page 73 Removing Favorites To remove one or more contacts from your favorites list: 1. From a Home screen, touch Contacts. 2. Touch the Contacts tab, then touch Favorites. 3. Touch Menu Remove from favorites. 4. Touch Select all or the name of each contact to remove. 5.
-
Page 74: Section 5: Messaging
Section 5: Messaging Email This section describes how to send and receive different types of messages. It also includes the features and Use Email to access and manage all your email accounts functionality associated with messaging. with one application. Types of Messages Setting Up Email Accounts Your tablet provides the following message types: From the Home screen, touch... - Page 75 2. Touch > Next. The Email app proceeds to automatically 4. The Account options screen appears. Available options set itself up to communicate with your email service. vary, depending on the email service provider: • Peak schedule: Set how often to check for new email sent to 3.
- Page 76 Setting up Microsoft Exchange Email Accounts 5. Touch > Next to go to the next screen, or touch < Previous to go to the Apps screen. Use the following procedure to configure your tablet to The Email app communicates with the appropriate synchronize with a business, Microsoft Exchange email account.
- Page 77 6. Touch > Next at the top of the screen. The Email app 10. Select the desired values in the displayed fields, then begins retrieving your account information from your touch Next. provider’s Exchange server. 11. If an Activate device administrator? pop-up appears, 7.
-
Page 78: Composing And Sending Email
Composing and Sending Email • Tracking options: Lets you select to receive Read receipt and/ or Delivery receipt messages for messages you send. 1. Navigate to a Home screen panel, then touch Applications Email. • Security options (MS Exchange ActiveSync accounts only): Allows you to assign security options to the current message. - Page 79 Managing Your Email Conversations 3. Touch Menu for these options: • Sort by: Choose a method for listing your email conversations. In addition to managing your Email account, there are options for changing the status of one or more Email •...
-
Page 80: Gmail
Gmail 2. Touch Existing to sign in to an existing account. • At the Sign in screen, use the on-screen keyboard to enter Your tablet includes the Gmail app, that lets you send your Google Email name and Password, then touch Sign in. and receive email using Gmail, Google’s web-based email system. -
Page 81: Google
Google+ Messenger Google+ makes messaging and sharing with your friends a With Google Messenger, you can bring groups of friends lot easier. You can set up Circles of friends, visit the Stream together into a simple group conversation, putting everyone to get updates from your Circles, use Messenger for fast on the same page. -
Page 82: Talk
Talk Open Talk and Sign In 1. From a Home screen, touch Apps Talk. Talk is Google’s instant messaging and audio and video chat service. You can use it to communicate, in real time, with If you are not signed in to a Google account, the Add a other people who also use Talk on another Android tablet or Google Account screen displays. -
Page 83: Section 6: Multimedia
This section describes the various multimedia applications available on your device such as Media Hub, Music Player, Samsung Media Hub is your one stop for the hottest movie Play Music, Video Player, Play Movies & TV, Gallery, Camera, and TV content. With hundreds of titles available at your Camcorder, and Photo Editor. -
Page 84: Media Hub Notices
Media Hub Notices 3. Browse content using these options: • Home: Recently-added titles for rent or purchase. • Any media item (Media Content) may be rented or purchased after • Movies: Movies you can rent or purchase. you create an account in Media Hub. •... -
Page 85: Game Hub
You may begin watching downloaded Media Content as soon as a) license acquisition has occurred and b) sufficient amount of the Samsung Game Hub is a premium game service that lets Media Content has been buffered. you play, connect and share games. Game Hub comes pre- •... -
Page 86: Music Player
• Menu: Music Player plays music and other audio files that you copy from – Sign in: Create a new Samsung account or Sign in to your your computer. existing Samsung account. 1. From a Home screen, touch Apps –... - Page 87 Managing Your Music 2. Touch Songs, Playlists, Albums, Artists, Genres, Folders, Searching for Music Composers, Years, or Music square to change the way you view the contents of your library. To find music in your library: 3. Touch the Music application icon at the top-left of 1.
- Page 88 Renaming a Playlist Removing Songs from Playlists 1. From a Home screen, touch Apps 1. From a Home screen, touch Apps Music Player. Music Player. 2. Touch Playlists, touch a playlist, and then touch 2. Touch and touch a playlist. Menu Rename playlist.
-
Page 89: Deleting A Playlist
Playing a Playlist Changing Music Settings 1. From a Home screen, touch Apps To change settings in the Music application: Music Player. 1. From a Home screen, touch Apps 2. Display the Playlists library view. Music Player. 3. Touch Favorites, Most played, or Recently added, or 2. -
Page 90: Listening To Music
Listening to Music • Settings: The following settings display: Advanced You can listen to music by using your tablet’s built-in – Sound settings: Choose SoundAlive and Play speed speakers, a wired headset, or a wireless Bluetooth stereo settings. headset. – Lyrics: Display the lyrics of the song, if available. -
Page 91: Playing Music
Playing Music Accessing the Music Player To play a song: If you navigate away from the Music Player application and music is playing, you can change songs or easily return to 1. From a Home screen, touch Apps the Music Player: Music Player. - Page 92 3. Touch the music player to enlarge it and touch the 4. During playback, use the sound and playlist controls: screen to display the sound and playlist controls. • Favorite: Touch the star to mark the current song as a favorite and add the song to the Favorites playlist.
-
Page 93: Options While Playing A Song
Options While Playing a Song • Playback Controls: These buttons control the playback of songs: There are various options and controls available while a song – Touch to advance to the next song. Touch and hold is playing: to scan forward through the current song. 1. -
Page 94: Video Player
Video Player 3. To display the sound and playlist controls, touch the screen. Video Player and your tablet’s 10.1-inch, 1280x800 pixels, WXGA TFT (PLS) LCD screen support playback of SD (standard File name Video Screen Popup definition) and HD (high definition) videos. Use Video Player Player Volume Mute... - Page 95 4. During playback, use the sound and playlist controls: • Progress Bar: Touch and drag the end of the progress bar to • File name: The name of the currently playing video file. scan forward or backward through the current video. Touch the left end of the progress bar to restart the video.
-
Page 96: Playing A Video
Playing a Video 5. Touch a video to play it. While playing a video, touch the screen to display or hide on-screen playback 1. From a Home screen, touch Apps controls. Video Player. 6. Touch the icon in the lower left corner of the video 2. - Page 97 9. During playback, press Menu for options: • Scan for nearby devices: Discover and connect directly to • Share via: Send the video by Bluetooth, ChatON, Dropbox, nearby devices. Email, Gmail, Google+, Picase, S Note, Wi-Fi Direct, or • Settings: Touch this option to view the following: YouTube.
-
Page 98: Play Movies & Tv
Play Movies & TV Camera The Play Movies & TV app is available for select Android Use your tablet’s built-in camera and camcorder to take devices. Any movie you rent using the Play Store app can be photos and record videos. downloaded for offline viewing through this application. -
Page 99: Taking Photos
Taking Photos Storage Settings To take a photo: Indicator Shortcuts 1. From the Home screen, touch Camera. 2. Using the display as a viewfinder, compose your Mode picture by aiming the lens at the subject. (To configure settings, see “Camera Settings” on page 94.) Camera 3. -
Page 100: Camera Settings
Camera Settings 3. To remove an existing shortcut from the camera screen, touch and drag the shortcut to the available Before you start taking photos, use the camera settings to replacement shortcut array. The selected shortcut configure the camera for best results. Camera settings are represented by icons on the left side of the screen. -
Page 101: Configuring Camera Settings
Configuring Camera Settings – Smile shot: Touch Take to automatically focus on the subject’s face and take the photo. To configure Camera settings: – While in Camera mode, touch Settings to Cartoon: Gives your photo the appearance of being a cartoon. configure the following camera settings: •... -
Page 102: Viewing Photos With The Image Viewer
Viewing Photos with the Image Viewer • Metering: Set how the camera measures or meters the light source: Matrix, Center-weighted, or Spot. After taking a photo, use the Image Viewer to view, share, • Outdoor visibility: Enhances screen readability in bright light. delete, or edit photos. -
Page 103: Camcorder
Camcorder 8. To delete the photo being displayed, touch Delete and then touch OK to delete the photo or Cancel to exit. Use your device’s built-in Camcorder to record high- 9. Touch Menu to select Set as to assign the photo as definition video in 1080p resolution. -
Page 104: Recording Videos
Recording Videos Camcorder Settings 1. From the Home screen, touch Camera. Before you start taking videos, use the camcorder settings to configure the camcorder for best results. Camcorder settings 2. Slide Mode to the Camcorder setting. are represented by icons on the left side of the screen. 3. - Page 105 Configuring Camcorder Settings • Resolution: Set a size for the video. Options are: 1280x720, 720x480, 640x480, or 320x240. To configure Camcorder settings: While in Camcorder mode, touch a settings shortcut or • White balance: Set the light source. Options are: Auto, touch Settings to configure the following Daylight, Cloudy, Incandescent, or Fluorescent.
-
Page 106: Gallery
Viewing Videos with the Image Viewer Gallery After recording a video, use the Image Viewer to play, share, Your device’s 10.1-inch 1280x800 WXGA TFT (PLS) LCD screen or delete your video. provides a high-resolution display of photos and videos. Use Gallery to view, capture, and manage photos and videos. Note: Videos are stored in the /Root/sdcard/DCIM/Camera Selecting Photos and Videos to View folder as MPEG4 (.mp4) files. - Page 107 Viewing Groups of Photos and Videos 5. Touch Menu to display the following options: • Slideshow: Choose to Start slideshow or to configure 1. From a Home screen, touch Apps Gallery. Slideshow settings. All albums display. • New album: Add an album to your Gallery. 2.
-
Page 108: Viewing Photos And Videos
Viewing Photos and Videos 7. Touch Menu Slideshow to view a slideshow of the available pictures and videos. Touch the screen to 1. From a Home screen, touch Apps Gallery. stop the slideshow and view the photo or video being All albums display. - Page 109 • Buddy photo share: Send the picture to the people tagged in the picture. There are only two options for videos that are not • Print: Print the picture via Wi-Fi to a compatible Samsung playing: printer. • Slideshow: Lets you view your pictures and videos in a •...
- Page 110 Setting a Picture As Note: Videos are stored in the /Root/sdcard/DCIM/Camera You can use the photos you take as a contact’s photo or as folder as mp4 files. (For more information, refer to “My wallpaper for the Home or Lock screen: Files”...
-
Page 111: Playing Videos
Playing Videos 5. Touch and drag the crop box or the sides or corners of the crop box to create the crop area, then touch Done 1. From a Home screen, touch Apps Gallery. to save the cropped photo as the contact’s icon or 2. -
Page 112: Video Editor
Sharing Photos and Videos Video Editor Share photos and videos with your friends. Video Editor lets you assemble videos you have recorded 1. From a Home screen, touch Apps Gallery. with the tablet’s camera-camcorder with a selected theme, edit the resulting project, add color effects and additional 2. - Page 113 Composing a Project Otherwise, the Video Editor screen appears. Selecting a Theme 1. From the Select theme screen, drag the None frame to the left to view the available theme frames: • None • Home video • Party • Travel •...
- Page 114 Adding Media Visual Text S Pen Preview Sound Sound Record 1. From the Video Editor screen, touch Add media in the effects entry control window controls effects sounds project time line. The Add media screen appears. Cursor Cursor Project location time line 2.
- Page 115 Editing a Project 4. To add photos and/or graphic images to your project, touch Images and select the desired source folder and Using Video Editor’s editing options, you can remove image(s). unwanted portions of a project, change its color balance, add formatted text, hand drawings made with the S Pen, and add 5.
- Page 116 Adding Formatted Text Adding S Pen Drawings and Handwriting 1. From the Video Editor screen, touch Text. A list of five 1. From the Video Editor screen, drag the timeline to the formatted Text options appears. frame where you wish to add a drawing or handwriting. 2.
- Page 117 Changing transition effects Automatic Editing 1. From the Video Editor screen, drag the timeline to the Using the Video Editor’s Auto edit feature, you can generate a transition point you wish to change. “draft” version of a project by letting Auto edit insert default transitions and remove long, repetitious sequences from your 2.
-
Page 118: Section 7: Connections
Section 7: Connections This section describes the various connections your device can make including accessing the Internet with your Browser, Wi-Fi, Bluetooth, and Connecting to your PC. Internet The Internet browser is your access to the mobile web. This section explains how to navigate Internet and introduces you to the basic features. - Page 119 Selecting Items On a Page • Touch Forward to go forward to a recent page. • Touch Refresh to reload the current page. While browsing, use gestures and menus to navigate: Touching and Dragging • Touch an item to select it. •...
- Page 120 Using Browser Windows 3. Touch a match to complete the URL. – or – You can have multiple windows open at one time and easily switch between windows. Continue entering characters and touch the Go key to 1. From the Home screen, touch Internet.
-
Page 121: Using Bookmarks
Copying and Pasting a Hyperlink or URL Accessing Bookmarks and History 1. From the Home screen, touch Internet. Launch a bookmarked page or reload recent pages. 2. Browse to a webpage. 1. From the Home screen, touch Internet. 3. Touch and hold on the link or URL, then touch Copy link 2. -
Page 122: Browser Menu
Browser Menu 4. On the History tab, touch Today, Yesterday, Last 7 days, Last month, Older, or Most visited to use these options: While viewing a webpage, touch Menu for the following • Touch a page to reload it. options: •... -
Page 123: Browser Settings
• – Print: Print the current screen or page to a Samsung printer. State: Enter your state. • – Settings: Configure web settings. For more information, refer to Postcode: Enter your ZIP code. “Browser Settings” on page 117 – Country: Enter your country. - Page 124 • Remember passwords: When enabled, saves user names • Inverted screen rendering: Use the Preview screen and the and passwords for sites you visit, to make future visits easier. following controls to configure inverted screen rendering: – • Clear passwords: Clear all saved user names and passwords. Inverted rendering: Enable the display of websites with inverted colors –...
- Page 125 • Default zoom: Adjusts the zoom feature. Set to Far, Medium, • Load images: When enabled, images are automatically loaded or Close. when you visit a page. When disabled, images are indicated by a link, which you can touch to download the picture. •...
-
Page 126: Wi-Fi
Browser Quick Controls 4. Without lifting your finger, move to an option and then lift your finger to initiate the option. Use Quick Controls to maximize your viewing area while browsing the Internet. 5. To cancel, display the Quick controls and touch 1. - Page 127 Finding Wi-Fi Networks Scanning and Connecting to a Wi-Fi Network You can have your device automatically notify you of When you turn on Wi-Fi, your device searches for available available networks. (For more information, refer to “Wi-Fi Wi-Fi connections, then displays them on screen. Settings”...
-
Page 128: Wi-Fi Direct
Adding a Wi-Fi Network Manually Wi-Fi Direct 1. From a Home screen, touch Apps Using Wi-Fi Direct you can establish direct, device-to-device Settings. Wi-Fi connections, allowing you to share files at Wi-Fi speeds and without using a Wi-Fi network hotspot. 2. -
Page 129: Bluetooth
Bluetooth Turning Bluetooth On or Off Bluetooth is a short-range wireless communications Note: When Bluetooth is on, the Bluetooth icon displays in technology for exchanging information over a distance of the Status Bar. about 30 feet. You don’t need to line up the devices to send information To turn Bluetooth on or off: with Bluetooth. - Page 130 Connecting with a Bluetooth Device 4. From the Available devices list, touch the target device, then follow the prompts to complete the pairing: Search for a Bluetooth device, pair with it, and connect with • If the target device requires a PIN, enter a PIN for the target it to exchange information between your device and the device and touch OK.
-
Page 131: Sharing Data With A Bluetooth Device
Disconnecting a Paired Device Deleting a Paired Device (Unpair) Disconnecting a paired device breaks the connection Deleting a device from your Paired devices list removes its between the device and your tablet, but retains the pairing connection record. Once a device is unpaired, reconnection information. -
Page 132: Portable Wi-Fi Hotspot
Receiving Data from a Bluetooth Device Portable Wi-Fi Hotspot To receive data from a Bluetooth device: Use Portable Wi-Fi Hotspot to share your tablet’s Internet 1. Turn Bluetooth on. (For more information, refer to connection with a PC or other device through Wi-Fi, using your tablet as the mobile hotspot. - Page 133 Activating Portable Wi-Fi Hotspot Connecting a Device via Portable Wi-Fi Hotspot Activate your tablet’s Portable Wi-Fi Hotspot application to Use the other device’s Wi-Fi control to connect to your allow other devices to use your tablet’s internet connection. tablet’s Portable Wi-Fi Hotspot. 1.
-
Page 134: Tethering
Tethering Use Tethering to share your tablet’s internet connection with You can use your phone’s VPN (Virtual Private Network) a computer connected to your device using the USB data/ feature to connect to VPNs. Configuring VPN Settings charging cable. (For more information about USB tethering, touch Help on the For information about configuring your phone’s VPN settings, Tethering and portable hotspot screen.) see “VPN”... -
Page 135: Nearby Devices
Nearby devices AllShare Cast Share files with nearby DLNA certified devices over Wi-Fi. AllShare Cast lets your phone share the contents of its (For information on configuring Nearby devices, see “Nearby display with other Digital Living Network Alliance (DLNA) devices” on page 181.) certified devices, such as Smart televisions. -
Page 136: Kies Via Wi-Fi
Kies Via Wi-Fi Connecting With Samsung Kies 1. Install Samsung Kies software on your PC. Samsung Kies is a software that enables you to update your device firmware, synchronize files, and transfer data to and Warning! Close any running applications before connecting from your device directly by connecting to the PC. -
Page 137: Managing Downloads
Managing Downloads Uninstalling an App Some apps come pre-installed on your device, and you can Files, apps, and other items you download in Browser, Gmail, download additional apps using Play Store. If you decide to, Email, or in other ways, are stored on your tablet’s internal you can uninstall apps you downloaded from Play Store and storage. -
Page 138: Synchronizing With Windows Media Player
Synchronizing with Windows Media To uninstall an app from the Apps screen: Player 1. From a Home screen, touch Apps. 2. Touch Menu Downloaded applications. Ensure that Windows Media Player is installed on your PC. The Downloaded applications screen displays. 1. -
Page 139: Connecting As A Mass Storage Device
Connecting as a Mass Storage Device Memory Card You can connect your device to a PC as a removable disk and Your device supports removable microSD™ or microSDHC™ access the file directory. If you insert a memory card in the memory cards for storing music, photos, videos, and files. - Page 140 Formatting a Memory Card Formatting erases all content from the memory card and prepares it for use with your device. Formatting a Memory Card Using Your Device 1. From a Home screen, touch Apps Settings Storage. 2. After mounting the SD card, touch Format SD card. 3.
-
Page 141: Section 8: Applications And Widgets
Applications that you download and install window tray, and how to launch the applications. from Google Play™ Store, from Samsung Apps, or from the For instructions on how to access the widgets by adding web are also added to a Home screen panel. -
Page 142: Update Available
Application Information To manually change the order of the icons on the Apps screen: 1. From a Home screen, touch Apps Apps tab. To view information about an App, such as the amount of 2. Touch Menu View type Customizable grid. storage it uses, force the App to stop, uninstall updates, and clear data: 3. -
Page 143: Gps Applications
You can locate and download additional apps onto your tablet GPS applications allow you to achieve real-time, GPS- using Samsung Apps (see “Samsung Apps” on page 162), enabled, turn-by-turn navigation and to access local Game Hub (see “Game Hub” on page 149), Play Store (see searches based on a variety of category parameters. - Page 144 Alarm Location of Internal Antennas Set alarms for reminders or for wake-up times. You can be Bluetooth/Wi-Fi reminded or awakened by your tablet playing a melody, GPS Antenna Antenna vibrating, or reading a briefing of the current time, your daily schedule, weather information, and news headlines.
- Page 145 Editing and Deleting Alarms • Snooze: Enable or disable the snooze option for the alarm. If enabled, set the following options: 1. From the Apps screen, touch Alarm. – Interval: Set the snooze duration to 3, 5, 10, 15, or 30 2.
-
Page 146: Allshare Play
4. Touch Create new account, if you have not set up a communicating devices to the same Wi-Fi network, and use Samsung account, or touch Sign in, if you have already a registered and active Samsung account. (For more set up a Samsung account. - Page 147 Using Group Play The AllShare Play - Group Play screen appears and the device waits for other connected recipients to accept While using various applications, such as Gallery, when you touch Share to share a file, you see Group Play as an the connection and enter the PIN on their screens.
- Page 148 Calculator 9. Touch and hold entries in the Calculator’s display field to select them. The following options are available: The calculator provides the basic arithmetic functions to • Select all: Selects all entries in the Calculator’s display field. solve simple arithmetic problems and advanced operators to solve more complex problems.
- Page 149 Calendar • List: Display only event and task names and dates for a selected year. Touch a year at the bottom of the screen to Your device includes a powerful Calendar to help you display another year. Touch a date to hide or show the event or organize your schedules more conveniently and effectively.
- Page 150 6. Touch Menu for these options: 8. Touch Calendars to configure which events to display. • Zoom in: In the Week and Day views, increase the size of the Touch Add account to add additional accounts from area being viewed. which calendar events can be synced.
- Page 151 Managing Events Add Additional Calendar Accounts You can delete, send, and edit events on your mobile device: To add additional accounts: 1. From the Apps screen, touch Calendar. 1. From the Apps screen, touch Calendar Calendars Add account. 2. Touch an event. –...
- Page 152 Calendar Settings Event notification • Set alerts & notifications: Touch to select, which allows you to To set up Calendar preferences: set the Alert, Status bar notification, or Off. 1. From the Apps screen, touch Calendar. • Select ringtone: Choose a tone for calendar notifications. 2.
- Page 153 Camera ChatON Take photos and record video with your device’s built in ChatON is a global mobile social communication service. You Camera. can chat with multiple “buddies” at the same time. 1. From the Home screen, touch ChatON. (For more information, refer to “Camera” on page 92.) –...
-
Page 154: Crayon Physics
Contacts Downloads Store contact information for your friends, family and Files, apps, and other items you download in Browser, Email, colleagues, to quickly access information or to send a Gmail, or in other ways, are stored on your tablet’s internal message. - Page 155 (For more information, refer to “Gallery” on page 100.) From the Apps screen, touch Dropbox. Game Hub Email Samsung Game Hub is your one stop for the hottest social Send and receive email using popular email services. and premium games. From the Apps screen, touch Email.
- Page 156 Google Google+ Search the internet using the Google™ search engine. Google+ makes messaging and sharing with your friends a lot easier. You can set up Circles of friends, visit the Stream 1. From the Lock screen, touch and slide to get updates from your Circles, use Messenger for fast –...
-
Page 157: Group Play
Group Play Internet Share your experiences with friends in real time while you Your device includes a full HTML Browser, to access the view documents and photos or listen to music. Internet. 1. From the Apps screen, touch Group Cast. (For more information, refer to “Internet”... - Page 158 Local Maps Google Local is an application that uses Google Maps and Use Google Maps to find your current location, get directions, your location to help you find Restaurants, Cafes, Bars, and other location-based information. Attractions, and other businesses. You can also add your own Note: You must enable location services to use Maps.
-
Page 159: Music Hub
Media Hub Music Hub Samsung Media Hub is your one stop for the hottest movie Samsung Music Hub is a subscription based music app that and TV content. gives you unlimited access to over 3 million songs from most major record labels. - Page 160 Music Player My Files Play music and other audio files that you copy from your Find, view, and manage folders and files, such as music files, computer. photo files, video files, and so on, stored on your tablet. If the file is associated with an application on your device, you can (For more information, refer to “Music Player”...
- Page 161 4. While browsing files, use these controls: 5. To view a photo file: • Touch the file. Up: Display a higher directory. The Gallery app is used to open the photo. (For more information, refer to “Viewing Photos and Videos” on Search: Use the keyboard to enter a search page 102.) term.
-
Page 162: Paper Artist
Paper Artist Play Books Using Paper Artist, you can draw or convert photos or images Use the Play Books app to read eBooks from the Internet- into line art of any of several types and edit and color them. based Google Play™ Books service. Google eBooks is a new way to discover, buy, and enjoy your favorite books online 1. -
Page 163: Play Magazines
Play Magazines Play Movies & TV Google Play™ Magazines helps you subscribe to your The Play Movies & TV app is available for select Android favorite magazines so you can have them available to read devices. Any movie you rent using the Play Store app can be on your tablet at your leisure. -
Page 164: Play Store
Play Store Updates to Downloaded Apps You can check for new versions of applications by visiting the Google Play™ Store provides access to downloadable Play Store. Items that have a new version available will say applications and games to install on your device. It also Update. -
Page 165: Polaris Office
Polaris Office PS Touch ® ® ® ® Polaris Office Mobile for Android is a Microsoft Office You can use Adobe Photoshop (PS) Touch to combine compatible office suite. This application provides a central images, apply professional effects, and share the results place for managing your documents online or offline. - Page 166 S Note 4. Touch Menu for the following options: • Refresh: Redisplay the list of memos. Create and manage text memos and use Bluetooth to send memos to paired Bluetooth devices. • Sort by: Select whether to sort the memo list by Date, Name, From the Lock screen, touch and swipe Tag, Favorites, or User settings.
- Page 167 PIN number to view the memo. 5. Follow the on-screen download and installation • Set as shortcut: Create a shortcut to access this memo on the instructions. Home screen. • Print: Send this memo to a Samsung printer. Applications and Widgets...
-
Page 168: Samsung Apps
Access downloadable applications and games to install on commands. your device. 1. From the Apps screen, touch S_Voice. Note: Samsung Apps service requires a Samsung account and 2. Follow the prompts. depends on service availability. From the Apps screen, touch Samsung_Apps. -
Page 169: Smart Remote
1. From the Apps screen, touch Smart Remote. The Samsung Disclaimer displays. 2. Touch Agree. 3. Touch Set Up Smart Remote Now: US & Canada. 4. Follow the on-screen instructions. -
Page 170: Voice Search
Video Player Wi-Fi Now View and manage videos stored on your tablet. Wi-Fi Now provides free access to your Wireless Provider’s Wi-Fi network. (For more information, refer to “Video Player” on page 88.) From the Apps screen, touch Wi-Fi Now. Tip: A shortcut to Video Player displays on a Home screen by For more information, touch Help. -
Page 171: World Clock
World Clock 5. Touch Reorder to change the order of the cities. Touch and hold the grid on an entry and drag the View the date and time in any time zone. entry to a new position in the list. Touch Done to 1. -
Page 172: Widgets
YouTube Widgets View YouTube videos on your tablet and upload videos from Widgets are self-contained applications that you can place your tablet to your YouTube account. on the Home screen panels to access your favorite features. 1. From the Apps screen, touch YouTube. - Page 173 • Bookmark: Directly access an Internet browser bookmark. (For • Dropbox Folder: Directly access one of your Dropbox folders. more information, refer to “Internet” on page 151.) (For more information, refer to “Dropbox” on page 149.) • Bookmarks: View and directly access Chrome browser •...
- Page 174 • Picture frame: Allows you to select one or more pictures and then touch the arrow on the widget for a slide show. (For more • Media Hub: Samsung Media Hub is your one stop for the information, refer to “Gallery” on page 100.) hottest movie and TV content.
- Page 175 • S Note: Select, read, and/or changea memo on a Home • Traffic: Enter a name for the widget and a destination, and screen. (For more information, refer to “S Note” on page 160.) then touch Save. Touch the widget to use the Traffic component of the Maps application.
-
Page 176: Section 9: Settings
Section 9: Settings Accessing Settings Accessing Additional Options To access additional setting options, touch the setting From a Home screen panel, touch Apps tab. Settings. – or – From any screen, touch the Time in the System Bar, then touch Settings. -
Page 177: Wireless And Network
Wireless and network Turn Wi-Fi Off: Wi-Fi From the Settings screen, touch Wi-Fi – or – Set up and manage your mobile device’s connections to Wi- From the Home screen and others, touch and swipe the Fi networks. Your mobile device supports Wi-Fi a/b/g/n. Status Bar downward, then touch Wi-Fi. -
Page 178: Advanced Wi-Fi Settings
Advanced Wi-Fi settings • Touch Menu to access the following additional options: 1. From the Settings screen, touch Wi-Fi Menu – Advanced: View and configure your device’s Advanced Wi-Fi Advanced. settings. (see Advanced Wi-Fi settings.) 2. Configure settings: – WPS push button: Automatically establish a Wi-Fi Protected •... -
Page 179: Bluetooth Profiles
Bluetooth Wi-Fi Direct settings 1. From the Settings screen, touch Wi-Fi Wi-Fi Direct. ® Your tablet supports Bluetooth 4.0. Bluetooth profiles 2. To establish multiple connect Wi-Fi Direct connections, touch Multi-connect. Follow the prompts to Bluetooth profiles are specifications for services supported connect to compatible devices. - Page 180 Turning Bluetooth On or Off Bluetooth settings Turn Bluetooth On: Pair and connect with other Bluetooth devices, manage your Bluetooth connections, and control your device’s visibility to From the Settings screen, touch Bluetooth other devices. Turn Bluetooth Off: From the Settings screen, touch Bluetooth Note: Bluetooth must be turned On to access Bluetooth settings.
-
Page 181: Data Usage
• Touch Menu to access the following options: 1. From the Settings screen, under Wireless and network, touch Data usage. The Data usage screen appears. – Rename device: Change your tablet’s Bluetooth device name. – Visibility timeout: Select how long your tablet will remain 2. - Page 182 Viewing data usage by app or process Additional Options 1. From the Settings screen, under Wireless and network, 1. From the Settings screen, under Wireless and network, touch Data usage. The Data usage screen appears. touch Data usage. The Data usage screen appears. 2.
-
Page 183: More Wireless And Network Settings
More Wireless and Network Settings 2. Set these options: Airplane mode • Mobile data: Enable or disable your tablet’s connection to the mobile data network. You can also control this setting on the When Airplane mode is enabled, all your tablet’s wireless Quick settings pop-up with the Mobile data toggle. - Page 184 Portable Wi-Fi Hotspot Turning Portable Wi-Fi Hotspot On or Off 1. From the Settings screen, under Wireless and network, Use Portable Wi-Fi Hotspot to share your tablet’s internet connection with up to 5 other devices, through Wi-Fi. touch More settings Tethering and portable hotspot Portable Wi-Fi hotspot.
- Page 185 Allowed Devices List Configuring Portable Wi-Fi Hotspot 1. From the Settings screen, under Wireless and network, Control whether devices connect to your Portable Wi-Fi Hotspot with the Allowed devices list. After you add devices touch More settings Tethering and portable hotspot to the list, they can scan for your device and connect using Portable Wi-Fi hotspot.
- Page 186 3. Touch Menu Timeout settings to set the idle time limit for the Wi-Fi hotspot from Never time-out to Set up and manage Virtual Private Networks (VPNs). (For 5 minutes – 60 minutes. more information about using VPNs, see “VPN” on page 128.) 4.
- Page 187 Nearby devices 3. Under Advanced, touch options to control how content is shared from your device: Share files with nearby devices via DLNA (Digital Living Network Alliance) over Wi-Fi. • Shared contents: Choose the type of content to share, from Videos, Photos, or Music.
-
Page 188: Device
Device AllShare Cast Blocking Mode AllShare Cast lets your device share the contents of its display with other Digital Living Network Alliance (DLNA) When Blocking mode is enabled, notifications for selected certified devices, such as Smart televisions. features will be disabled. (For more information, refer to “AllShare Cast”... - Page 189 Sound Vibration intensity From the Settings screen, under Device, touch Sound. Set the level for vibration to accompany ringtones and notifications. The Sound menu appears. Volume 1. From the Sound menu, touch Vibration intensity. The Vibration intensity menu pops-up. Set the system volume level, and set default volume for call 2.
- Page 190 Default notifications Touch sounds Choose a default sound to play for notifications, such as for Touch sounds play when you touch items on the screen, such new messages and event reminders. as when making a selection. 1. From the Sound menu, under Notifications, touch From the Sound menu, under System, touch Touch Default notifications.
-
Page 191: Notification Panel
Display Notification panel From the Settings screen, under Device, touch Display. Customize the background of the Home and Lock screens. The Display menu appears. 1. From the Display menu, under General, touch Wallpaper Notification panel. 2. Touch Brightness adjustment to enable or disable the Customize the background of the Home and Lock screens. -
Page 192: Screen Timeout
Brightness Smart stay Set the default screen brightness. When On, the Smart stay feature prevents screen timeout, if you are using your tablet. For example, the tablet uses the 1. From the Display menu, under Screen, touch front camera to identify your eyes, and keeps the screen Brightness. -
Page 193: Font Size
Storage Font size Set the font size for screen displays. Manage the use of memory resources in your tablet’s Device 1. From the Display menu, under Font, touch Font size. memory, and on an installed microSD card. 1. From the Settings screen, under Device, touch Storage. 2. -
Page 194: Power Saving Mode
Power saving mode – Available space: Shows the total device memory available for use. Configure Power saving settings to conserve battery power. • SD card: View usage for, and manage, storage space on an 1. From the Settings screen, under Device, touch optional memory card. - Page 195 Battery 3. Under Power saving mode settings, Touch the following options to enable or disable them. (When an option is See how much battery power is being used by device enabled, a check mark appears in its check box.): activities. •...
-
Page 196: Application Manager
Application manager 3. Touch an app or service to display the App info or Active app screen which provides more detailed storage You can download and install applications using the Play usage information, and lets you Stop/Force stop or Store app, or create applications using the Android SDK (Software Development Kit) and install them on your tablet. -
Page 197: Personal
Personal Note: Use GPS satellites must be enabled to use some Location services applications. You can also enable or disable GPS from the Notifications panel. (For more information, refer to Location services control your device's use of GPS signals. “Notifications” on page 35.) Some apps may require one or more location services be turned On for full app functionality. -
Page 198: Lock Screen
Lock screen – Pattern: When enabled, you draw a pattern, which you create, on the screen to unlock the tablet. Touch the option, then follow Choose settings for locking and unlocking your tablet’s the prompts to create or change your screen unlock pattern. screen. - Page 199 – – Information ticker: When enabled, a news or stock Weather: When enabled, weather information for your current information ticker appears on the lock screen. location appears on the lock screen. Touch Information ticker to enable the lock Touch Information ticker to enable the lock screen information ticker.
- Page 200 Security • Popup Note on lock screen: Touch this option to enable/disable accessing the Popup Note feature from your lock screen by From the Settings screen, under Personal, touch using the S Pen. Security. The Security screen appears. Encryption • Owner information: Touch this option to enter text you want displayed on the Lock screen.
- Page 201 Device administration • Encrypt external SD card: Touch this option to encrypt selected information stored on a microSD memory card under View or disable device administrators. Some applications, a password you specify. The following additional Encryption such as corporate Email, may require you allow access to your device by device administrators in certain settings are available: circumstances, such as if your tablet is lost or stolen.
-
Page 202: Credential Storage
(When enabled, a Note: You must have installed a memory card containing check mark appears in the check box.): encrypted certificates to use this feature. • Default: Select Samsung keyboard or Swype as the default method for manually entering text. - Page 203 Note: This option cannot be disabled. into a field. Touch beside Google voice typing to configure the following options: – Input languages: Select languages for the Samsung – Choose input languages: Select languages for Google voice keyboard. typing. Select Automatic to use the Default language Tip: When you have more than one language selected, you can exclusively, or choose other language(s).
- Page 204 Tutorial: View help for using T9 Predictive text. Recognition time: Select 100 ms, 300 ms, 500 ms, – Reset settings: Touch to reset Samsung keyboard settings to 1000 ms, or 2000 ms. the defaults, except for My word list and the Auto substitution Pen thickness: Select 1 pixel, 3 pixels, 5 pixels, 7 pixels, or list.
- Page 205 – – Preferences: The following settings are available: Swype Connect: Activate social media personalization and configure data settings. Vibrate on keypress: activates a vibration sensation as you enter text using the keypad. Register now: Select or add an email account to register with Sound on keypresses: turns on sounds generated by the Swype for automatic new word downloads, backup of your Swype application.
- Page 206 Speech Gmail: allows you to sign in to your existing Gmail account from where existing contact information is added to your personal From the Language and input screen, under Speech, the dictionary. Helps recognize familiar names. following options are available: –...
- Page 207 Caller ID for The Cloud settings let you link your phone to a cloud-based incoming calls. storage site for backing up your Samsung account personal data and your apps data. – Preferred TTS engine: Select Google Text-to-speech 1.
-
Page 208: Back Up And Reset
Back up and reset Personal data Factory data reset Set options for backing up your information and resetting your device. Use Factory data reset to return all settings to the defaults, From the Settings screen, under Personal, touch and remove all data from the tablet. Backup and reset. -
Page 209: Accounts
– Sync Picasa Web Albums – Sync Tasks Set up and manage accounts, including your Samsung, Email, Google, and social networking accounts. 3. Return to the Account type screen by touching 1. From the Settings screen, under Accounts, touch an Back. -
Page 210: Samsung Account
Priority senders: Lets you create and maintain a list of senders 1. From the Settings screen, under Accounts, touch Add whose messages will be marked as priority when they are account Samsung account. The Samsung account received. screen appears. –... -
Page 211: Email Account Settings
Email Account Settings • Device backup: – Auto backup: When set to On for at least an hour and 1. From the Settings screen, under Accounts, touch Email. connected to a Wi-Fi network and with the screen off and the The respective Account type screen appears. - Page 212 – Forward with files: Enables including copies of any attached • Notification settings: files when forwarding a copy of an email message. – Email notifications: Enable or disable display of a new email – Recent messages: Select the number of messages (25, 50, icon in the Annunciator line when new mail arrives.
-
Page 213: Gmail Account Settings
Gmail Account Settings • Hide pictures in messages: Stops pictures from displaying automatically in messages until you allow it for a sender. 1. From a Home screen, touch Apps Gmail. 3. In the left-hand column, touch a Gmail account name. 2. - Page 214 LDAP • Signature: Create a text signature to add to outgoing messages. 1. From the Settings screen, under Accounts, touch Add • DATA USAGE: account LDAP. The Set up an LDAP account screen appears. – Gmail sync is ON/OFF: Indicates whether you have Gmail synchronization turned on for this account in the Account and 2.
- Page 215 Microsoft Exchange ActiveSync Account – Always Cc/Bcc myself: Adds your email address to None of Settings send email messages or to Cc or Bcc field of send email messages. 1. From the Settings screen, under Accounts, touch Email. – The respective Account type screen appears. Forward with files: When enabled, includes copies of any attached files when forwarding a copy of an email message.
- Page 216 – Out of office settings: Enable/disable your account’s out of • Notification settings – office settings, choose the start/end dates, and enter/ Email notifications: Enable or disable display of a new email icon in the Annunciator line when new mail arrives. change your outgoing messages.
-
Page 217: System
System 3. Configure motion options by touch the options or by Motion touching the setting to enable them, or touching the setting to disable them: Motion lets you control a number of your tablet’s functions by • Tilt to zoom: When enabled, tilting the tablet while in Gallery or moving your hand or finger across the screen in a particular Internet causes the screen to zoom in or out. - Page 218 S Pen Accessory Configure your tablet’s responses to the S Pen. Configure your tablet’s behavior when you connect it to optional accessories (not included). 1. From the Settings screen, under System, touch S Pen. From the Settings screen, under System, touch The S Pen menu appears.
-
Page 219: Date And Time
Date and time HDMI Configure your tablet’s behavior when you connect it to an By default, your tablet receives date and time information HD television or an amplifier using an optional HDTV Adapter from the wireless network. When you are outside network (not included). -
Page 220: System Options
Accessibility • Accessibility shortcut: Adds an Accessibility settings option to the Device options menu (appears when you press and hold Your tablet offers features to make using it easier for those Power/Lock key. This provides quick access to with certain physical disabilities. Use the Accessibility settings to activate these services. - Page 221 Mobility option • Negative colors: Reverses the colors on the screen. From the Accessibility screen, under Mobility, touch the • Text-to-speech output: Select your Preferred TTS engine and following option: Speech rate, Listen to an example, and/or enable/disable • Tap and hold delay: Select the length of time the tablet Driving mode.
- Page 222 3. From the Developer options screen, under Debugging, 5. From the Developer options screen, under Drawing, touch the check box next to each of the following touch the check box next to each of the following options to enable it: (When enabled, a check mark options to enable it: (When enabled, a check mark appears in the check box.) appears in the check box.)
- Page 223 6. From the Developer options screen, under Monitoring, 7. From the Developer options screen, under Apps, touch touch the check box next to each of the following the check box next to each of the following options to options to enable it: (When enabled, a check mark enable it: (When enabled, a check mark appears in the appears in the check box.) check box.)
-
Page 224: About Device
About device Software Update Software Update lets your tablet connect to the network and View information about your tablet, including status, legal download any new device software directly to your tablet. information, hardware and software versions, and a tutorial. The tablet automatically updates with the latest available 1. - Page 225 Settings...
-
Page 226: Section 10: Health And Safety Information
Section 10: Health and Safety Information Do cell phones pose a health hazard? This section outlines the safety precautions associated with using your Galaxy Tab. The terms “GALAXY” or “mobile Many people are concerned that cell phone radiation will device” are used in this section to refer to your Galaxy Tab. cause cancer or other serious health hazards. - Page 227 Research Results to Date: Is there a connection The biological effects of radio frequency energy should not between RF and certain health problems? be confused with the effects from other types of electromagnetic energy. The results of most studies conducted to date say no. In Very high levels of electromagnetic energy, such as is found addition, attempts to replicate and confirm the few studies in X-rays and gamma rays, can ionize biological tissues.
- Page 228 Risk of Brain Cancer from Exposure to Radio slight increase in brain cancer. However, the authors Frequency Fields in Childhood and Adolescence determined that biases and errors prevented any conclusions (MOBI-KIDS) being drawn from this data. Additional information about Interphone can be found at MOBI-KIDS is an international study investigating the http://www.iarc.fr/en/media-centre/pr/2010/pdfs/pr200_E.pdf.
- Page 229 Reducing Exposure: Hands-Free Kits and Other Cell Phone Industry Actions Accessories Although the existing scientific data do not justify FDA Steps to Reduce Exposure to Radio Frequency Energy regulatory actions, the FDA has urged the cell phone industry to take a number of steps, including the following: If there is a risk from being exposed to radio frequency •...
- Page 230 Children and Cell Phones Because there are no known risks from exposure to RF emissions from cell phones, there is no reason to believe that The scientific evidence does not show a danger to any users hands-free kits reduce risks. Hands-free kits can be used for of cell phones from RF exposure, including children and convenience and comfort.
-
Page 231: Specific Absorption Rate (Sar) Certification Information
Specific Absorption Rate (SAR) • Environmental Protection Agency (EPA): Certification Information http://www.epa.gov/radtown/wireless-tech.html. • Occupational Safety and Health Administration (OSHA): Your wireless mobile device is a radio transmitter and http://www.osha.gov/SLTC/radiofrequencyradiation/. receiver. It is designed and manufactured not to exceed the (Note: This web address is case sensitive.) exposure limits for Radio Frequency (RF) energy set by the •... - Page 232 This is because the mobile device is designed to operate at The SAR information for this device can also be found on multiple power levels so as to use only the power required to Samsung’s website: reach the network. In general, the closer you are to a http://www.samsung.com/sar.
-
Page 233: Fcc Part 15 Information To User
Connect the equipment into an outlet on a circuit different from Samsung could void your authority to operate the device. that to which the receiver is connected. This device complies with part 15 of the FCC Rules. -
Page 234: Battery Use And Safety
Samsung is committed to promoting responsible Notice regarding legal restrictions on mounting this device in driving and giving drivers the tools they need to understand an automobile: and address distractions. Laws in some states may prohibit mounting this device on or Check the laws and regulations on the use of mobile devices near the windshield of an automobile. - Page 235 GALAXY. safety hazard. If the GALAXY and/or battery get wet, have them checked by your service provider or contact Samsung, even if WARNING! they appear to be working properly.
-
Page 236: Samsung Mobile Products And Recycling
FAILURE TO FOLLOW THE INSTRUCTIONS OUTLINED MAY Recycling LEAD TO SERIOUS PERSONAL INJURY AND POSSIBLE PROPERTY DAMAGE. Samsung cares for the environment and encourages its IMPORTANT SAFETY INSTRUCTIONS - SAVE THESE customers to recycle Samsung mobile devices and genuine Samsung accessories. -
Page 237: Display / Touch-Screen
Using excessive force or a metallic object when may be shared with third-parties, including your wireless pressing on the touch-screen may damage the service provider, applications providers, Samsung, and other tempered glass surface and void the warranty. For third-parties providing services. -
Page 238: Care And Maintenance
In some areas, complete information may not be Keep your Samsung Mobile Device away from: available. Therefore, you should always visually confirm that Liquids of any kind the navigational instructions are consistent with what you see Keep the mobile device dry. Precipitation, humidity, and before following them. -
Page 239: Responsible Listening
cloth slightly dampened in a mild soap-and-water permanent noise-induced hearing loss. This includes the use ® solution. of headphones (including headsets, earbuds, and Bluetooth or other wireless devices). Shock or vibration Exposure to very loud sound has also been associated in Do not drop, knock, or shake the mobile device. - Page 240 • When using headphones, turn the volume down if you cannot You can obtain additional information on this subject from the following sources: hear the people speaking near you or if the person sitting next to you can hear what you are listening to. American Academy of Audiology •...
-
Page 241: Operating Environment
Using Your Mobile Device Near Other Electronic National Institute for Occupational Safety Devices and Health (NIOSH) Most modern electronic equipment is shielded from Radio 395 E Street, S.W., Suite 9200 Frequency (RF) signals. However, certain electronic Patriots Plaza Building equipment may not be shielded against the RF signals from Washington, DC 20201 your wireless mobile device. - Page 242 Posted Facilities • Should read and follow the directions from the manufacturer of your implantable medical device. If you have any questions about Switch your mobile device off in any facility where posted using your wireless mobile device with an implantable medical notices require you to do so.
-
Page 243: Restricting Children's Access To Your Mobile Device
When your Device is Wet the National Fire Protection Standard (NFPA-58). For a copy of this standard, contact the National Fire Protection Do not turn on your device if it is wet. If your device is Association. already on, turn it off and remove the battery immediately, if Cautions applicable (if the device will not turn off or you cannot remove the battery, leave it as-is). - Page 244 • • Check regularly that all wireless mobile device equipment in your Failure to observe these instructions may lead to the suspension vehicle is mounted and operating properly. or denial of network services to the offender, or legal action, or both.
-
Page 245: Section 11: Warranty Information
1 Year conjunction or connection with accessories, products, or Internal Batteries) ancillary/peripheral equipment not furnished or approved by SAMSUNG; (g) defects or damage resulting from improper Case 90 Days testing, operation, maintenance, installation, service, or Other Tablet Accessories 1 Year adjustment not furnished or approved by SAMSUNG;... - Page 246 (iii) the battery has must return the Product to an authorized Tablet service been used in equipment other than the SAMSUNG Tablet for facility in an adequate container for shipping, accompanied which it is specified.
- Page 247 THIRD-PARTY SOFTWARE OR EQUIPMENT IS INCLUDED WITH THIS LIMITED WARRANTY. THE PRODUCT DISTRIBUTED BY SAMSUNG OR OTHERWISE. IN NO EVENT SHALL SAMSUNG BE LIABLE FOR DAMAGES IN RESPONSIBILITY FOR THE QUALITY, CAPABILITIES, EXCESS OF THE PURCHASE PRICE OF THE PRODUCT OR FOR, OPERATIONS, PERFORMANCE AND SUITABILITY OF ANY WITHOUT LIMITATION, COMMERCIAL LOSS OF ANY SORT;...
- Page 248 What is the procedure for resolving disputes? For any arbitration in which your total damage claims, ALL DISPUTES WITH SAMSUNG ARISING IN ANY WAY FROM exclusive of attorney fees and expert witness fees, are THIS LIMITED WARRANTY OR THE SALE, CONDITION OR $5,000.00 or less (“Small Claim”), the arbitrator may, if you...
- Page 249 You may opt out of this dispute resolution procedure by If any portion of this Limited Warranty is held to be illegal or providing notice to SAMSUNG no later than 30 calendar days unenforceable, such partial illegality or unenforceability shall from the date of the first consumer purchaser’s purchase of the...
-
Page 250: End User License Agreement For Software
2012 Samsung Telecommunications America. All rights RETAILER FOR A REFUND OR CREDIT. reserved. 1. GRANT OF LICENSE. Samsung Electronics Co. grants you No reproduction in whole or in part allowed without prior the following rights provided that you comply with all terms written approval. - Page 251 Software accompanied. In such event, the transfer must include all of the Software (including all component 4. CONSENT TO USE OF DATA. You agree that Samsung parts, the media and printed materials, any upgrades, this Electronics Co. and its affiliates may collect and use EULA) and you may not retain any copies of the Software.
- Page 252 License will terminate automatically without OBTAINED BY YOU FROM SAMSUNG ELECTRONICS CO. OR notice from Samsung Electronics Co. if you fail to comply ITS AFFILIATES SHALL BE DEEMED TO ALTER THIS with any of the terms and conditions of this EULA. Upon DISCLAIMER BY SAMSUNG ELECTRONICS CO.
- Page 253 SAMSUNG ELECTRONICS CO. available from such applications. You expressly acknowledge DISCLAIMS ANY RESPONSIBILITY FOR ANY DISCLOSURE OF...
- Page 254 ARE PROVIDED "AS IS" AND ON AN "AS AVAILABLE" BASIS, ADVICE OR INFORMATION, WHETHER ORAL OR WRITTEN, WITHOUT WARRANTIES OF ANY KIND FROM SAMSUNG OBTAINED BY YOU FROM SAMSUNG ELECTRONICS CO. OR ELECTRONICS CO., EITHER EXPRESS OR IMPLIED. TO THE ANY OTHER PERSON OR ENTITY SHALL BE DEEMED TO...
- Page 255 (INCLUDING SECTIONS 9, 10, 11 AND 12) SHALL APPLY TO parties. THE MAXIMUM EXTENT PERMITTED BY APPLICABLE LAW, (b) United States residents. ALL DISPUTES WITH SAMSUNG EVEN IF ANY REMEDY FAILS ITS ESSENTIAL PURPOSE. ELECTRONICS CO. ARISING IN ANY WAY FROM THIS EULA OR 13.
- Page 256 "Arbitration as part of any award, but may not grant Samsung Electronics Opt Out." You must include in the opt out e-mail (a) your Co. its attorney fees, expert witness fees or costs unless it is name and address;...
- Page 257 Software, and you will continue to enjoy the benefits of this license. 16. ENTIRE AGREEMENT; SEVERABILITY. This EULA is the entire agreement between you and Samsung Electronics Co. relating to the Software and supersedes all prior or contemporaneous oral or written communications, proposals and representations with respect to the Software or any other subject matter covered by this EULA.
-
Page 258: Index
Index Numerics 3.5mm Headset Jack 22 Back button 32 Camcorder Battery recording video 98 charging 5 settings 98 Accessibility settings indicator 5 Camera services 214 installing and removing 5 settings 94 Accounts Battery Use & Safety 228 taking photos 93 setting up 56 Blocking Mode 182 Care and Maintenance 232... - Page 259 Groups creating 64 Display / Touch-Screen 231 Gallery 100 Display settings sharing photos and video 106 brightness 186 viewing photos and video 102 Handwriting 54 font style and size 186 Gestures Health and Safety Information 220 screen timeout 186 Browse Image 34 Home button 32 Do cell phones pose a health Tilt to Zoom 34...
- Page 260 Photo ID setting 104 Maps 152 Namecards Photos Memory Card sending 62 Gallery 100 formatting 134 Navigation 32 sharing 106 installing 16 screen 33 taking 93 removing 16 Nearby Devices Play Store 158 Memory settings status 40 Playlists internal phone storage 187 Notification Panel 35 creating 81 Menu...
- Page 261 Specific Absorption Rate (SAR) entering text 48 input methods 47 Certification Information 225 Samsung Kies 130 Text settings Standard Limited Warranty 239 Samsung Mobile Products and default 196 Status Bar 39 Recycling 230 Google voice typing 197 Storage Screen Capture 141...
- Page 262 Videos Warranty Information 239 YouTube 166 Gallery 100 Widgets 41 recording 98 Wi-Fi sharing 106 adding a connection manually 122 accessing 128 Direct 62 settings 180 scanning and connecting 121 settings 171 turning on or off 121 using your phone as a hotspot 126 WiFi (see Wi-Fi) 120 Windows Media Player synchronizing with 132...