Table of Contents
Advertisement
Available languages
Available languages
Advertisement
Chapters
Table of Contents

Related Manuals for Bissell 47A2 Series


Summary of Contents for Bissell 47A2 Series
- Page 1 47A2, 80R4 SERIES...
-
Page 2: Important Safety Instructions
IMPoRtant SafEty InStRUctIonS REaD all InStRUctIonS bEfoRE USInG yoUR PoRtablE DEEP clEanER. When using an electrical appliance, basic precautions should be observed, including the following: WaRnInG » Do not pull or carry by cord, use » Do not use appliance in an cord as a handle, close a door on enclosed space filled with vapors cord, or pull cord around sharp... -
Page 3: Quick Start Guide
Quick Start Guide assembly 1. slide upper handle onto machine base 2. screw 2 screws into the marked holes 3. Place upper hose rack onto back of upper handle, and secure with screw 4. Wrap power cord to the left and flex hose to the right of the upper hose rack 5. -
Page 4: Table Of Contents
Thanks for buying a BISSELL deep cleaner We’re glad you purchased a BISSELL Safety Instructions... 2 deep cleaner. Everything we know Quick Start Guide... . 3 about floor care went into the design and construction of this complete, Product View. -
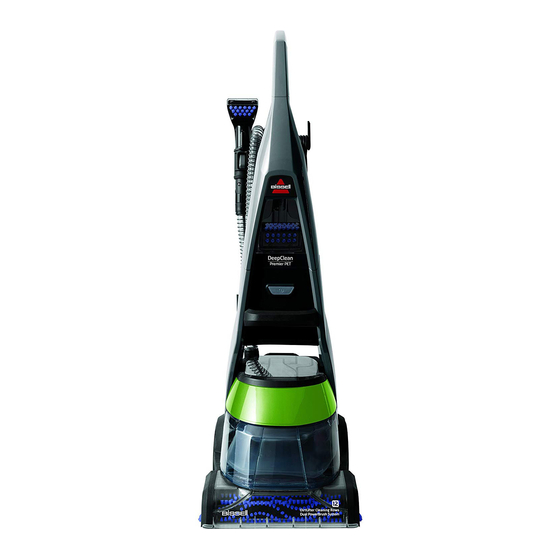
Page 5: Product View
Product View 1 Spray Trigger 9 Surround Suction® 2 Extra Long Power Cord 10 Easy To Remove Nozzle 3 Upper Handle 11 EdgeSweep® Brushes 4 Flex Hose 12 Lower Base 5 Power Switch 13 Upper Hose Rack 6 Easy Carry Handle 14 Lower Hose Rack 7 Tank Carry Handle 15 Handle Recline Pedal... -
Page 6: Assembly
Assembly WaRnInG Do not plug in your deep cleaner until you are familiar with all instructions and Your deep cleaner comes in three (four on select operating procedures. models) easy-to-assemble components: Upper Handle with Screws lower base Upper Hose Rack Upper tool Holder (select models) The only thing you will need to assemble your cleaner is a Phillips head screwdriver. -
Page 7: Before You Clean
Operations before you clean 1. Move furniture to another area if cleaning an entire room (optional). 2. Pick up all loose dirt, debris, and pet hair before deep cleaning. it is recommended that you vacuum the area prior to deep cleaning. 3. -
Page 8: Carpet Cleaning
Operations carpet cleaning 1. Plug into a proper outlet and push the on/off button located on the front of the handle. 2. Recline the handle by pressing on the lever at the back of the machine behind the 2-in-1 water tank. 3. - Page 9 Operations WaRnInG cleaning with attachments To reduce the risk of injury, be extra careful when cleaning stairs. Make sure machine is secure and level. Your deep cleaner comes equipped with a hose and at least one attachment for cleaning stairs, upholstery, and more. 1.
-
Page 10: Cleaning With Stain Trapper Tool
Operations cleaning with the Stain trapper tool (select models) Your deep cleaner may have come with a stain Trapper tool. This tool is great for keeping messes out of the machine’s hose system. 1. Attach the stain Trapper tool to the end of the hose. - Page 11 Operations 5. empty the Pet Hair basket (select models) by sliding it toward the front of the tank and lifting up. Replace the Pet Hair basket before storing/continuing to clean. 6. Fill the heavy duty bladder with clean hot tap water, following instructions on page 7. notE: Remember to secure the tank latches and test to make sure it is secure before picking up the tank.
-
Page 12: Machine Storage
Operations Hard floor cleaning (select models only) Your DeepClean Premier model may have come WaRnInG with a hard floor attachment and 2X Hard Floor solutions Formula. if not, these products are available for purchase by contacting the bissell To reduce the risk of fire and electric shock- when Consumer Care department by phone or at cleaning a hard floor, the BISSELL bare floor tool the website. -
Page 13: Maintenance & Care
Maintenance & Care Machine care For best results, a few simple steps can assure » Let all parts your machine is well maintained after your dry completely cleaning is complete. before storing 1. Flush your machine of any remaining residual solution. WaRnInG a. - Page 14 Maintenance & Care Drive belt removal & replacement Occasional replacement of one or both belts may become necessary. if that is needed, please follow the instructions below. 1. Turn off the machine, and unplug it from the outlet. 2. Remove the 2-in-1 water tank. set aside. 3.
- Page 15 Maintenance & Care brush removal and brush belt replacement brushes can be removed for cleaning or replacement as needed. 1. Follow drive belt removal instructions on page 14. 2. Remove brush rolls by pulling them off of the metal rods. be careful not to lose the small washer at each end of the brush rolls.
-
Page 16: Troubleshooting
Troubleshooting WaRnInG To reduce the risk of electric shock, turn power switch off and disconnect plug from electrical outlet before performing maintenance or troubleshooting checks. Problem Possible causes Remedies Water tank may be empty Fill heavy duty bladder with hot tap water Reduced Tank may not be seated... -
Page 17: Replacement Parts
Replacement Parts These items are available for your BISSELL DeepClean Premier deep cleaner. Call 1-800-237-7691 or visit www.BISSELL.com ParT # ParT name ParT # ParT name 160-0087 Tank Lid (Blackberry Purple) 160-0092 Tank Bottom 160-0097 Tank Cap & Insert Assembly 160-0098 Floor Nozzle with End Cap Assembly... -
Page 18: Accessories
Accessories These items are available for your BISSELL DeepClean Premier deep cleaner. Call 1-800-237-7691 or visit www.BISSELL.com ParT # ParT name ParT # ParT name 203-6651 3” Tough Stain Tool 203-6652 Powered TurboBrush® Hand Tool 203-6653 4” Upholstery Tool 203-6654 6”... -
Page 19: Warranty
Warranty Service This warranty gives you specific legal rights, and you may also If your bISSEll product should have other rights which may vary from state to state. If you need require service: additional instruction regarding this warranty or have questions Contact BISSELL Consumer Care to locate a BISSELL Authorized Service regarding what it may cover, please contact BISSELL Consumer Center in your area. - Page 20 Register your product today! Registering is quick, easy and offers you benefits over the lifetime of your product. You’ll receive: bISSEll Rewards Points Product Support Reminders Automatically earn points for and alerts discounts and free shipping on We’ll contact you with any future purchases.
- Page 21 SERIE 47A2, 80R4...
-
Page 22: Instrucciones Importantes De Seguridad
InStRUccIonES IMPoRtantES DE SEGURIDaD lEa toDaS laS InStRUccIonES antES DE USaR SU lIMPIaDoRa PRofUnDa PoRtÁtIl. Cuando se utiliza un electrodoméstico es necesario tomar precauciones básicas, que incluyen las siguientes: » Instale siempre el flotador antes » No recoja materiales inflamables aDVERtEncIa de iniciar las operaciones de ni materiales combustibles (fluido... - Page 23 Guía de inicio rápido armado 1. Deslice el mango superior en la base de la máquina. 2. sujete con dos tornillos en los agujeros marcados. 3. Coloque el soporte superior de la manguera en la parte trasera del mango superior y sujete con tornillo.
- Page 24 Muchas gracias por comprar una limpiadora profunda portátil BISSELL Nos complace que haya comprado Instrucciones de seguridad..2 una limpiadora profunda BISSELL. Guía de inicio rápido ... 3 Para diseñar y construir este completo sistema de alta tecnología, utilizamos Diagrama del producto .
-
Page 25: Diagrama Del Producto
Diagrama del producto 1 Gatillo para el rocío 9 Surround Suction® 2 Cordón de alimentación extra largo 10 Boquilla fácil de extraer 3 Mango superior 11 Cepillos EdgeSweep® 4 Manguera flexible 12 Base inferior 5 Interruptor de encendido 13 Soporte superior de la manguera 6 Manija para fácil transporte 14 Soporte inferior de la manguera 7 Manija para transportar el tanque... -
Page 26: Armado
Armado aDVERtEncIa No enchufe su limpiadora profunda hasta que se haya familiarizado con todas las instrucciones y los procedimientos su limpiadora profunda viene con tres (cuatro en de operación. algunos modelos) componentes fáciles de armar: Mango superior con tornillos base inferior Soporte superior de la manguera Soporte superior para herramientas (en algunos modelos) -
Page 27: Operaciones
Operaciones antes de limpiar 1. Mueva los muebles a otra área si va limpiar todo el cuarto (opcional). 2. Recoja toda la suciedad y residuos sueltos y pelo de mascotas antes de hacer una limpieza profunda. se recomienda aspirar el área antes de hacer una limpieza profunda. - Page 28 Operaciones limpieza de la alfombra 1. enchufe en el tomacorriente correcto y presione el botón de encendido y apagado en la parte delantera del mango. 2. Recline el mango presionando en la palanca de la parte trasera de la máquina atrás del tanque de 2 en 1.
- Page 29 Operaciones aDVERtEncIa Para reducir el riesgo de lesiones, tenga mucho cuidado al limpieza con accesorios limpiar escaleras. Asegúrese de que la máquina esté segura y nivelada. su limpiadora profunda viene equipada con una manguera y por lo menos un accesorio para limpiar escaleras, tapizado y mucho más.
- Page 30 Operaciones limpieza con la herramienta para atrapar manchas (algunos modelos) es posible que su limpiadora profunda haya venido con una herramienta para atrapar manchas. esta herramienta es muy buena para mantener la suciedad fuera del sistema de manguera de la máquina. 1.
- Page 31 Operaciones 5. Vacíe la canasta para pelo de mascotas (en algunos modelos) deslizando hacia la parte delantera del tanque y alzando. Vuelva a instalar la canasta para pelo de mascotas antes de guardar o seguir limpiando. 6. llene la bolsa de servicio pesado con agua corriente caliente de acuerdo con las instrucciones de la página 7.
- Page 32 Operaciones limpieza de pisos (solo algunos modelos) es posible que su modelo DeepClean Premier haya venido con un accesorio para pisos y 2X fórmula de aDVERtEncIa solución para pisos. si no es así, estos productos están disponibles para la compra llamando al departamento de atención al cliente de bissell o en su sitio web.
-
Page 33: Mantenimiento Y Cuidado
Mantenimiento y cuidado cuidado de la máquina Consejo Para obtener mejores resultados, unos pocos pasos pueden asegurar que su máquina reciba buen mantenimiento después que ha terminado la limpieza. » Deje que todas las 1. enjuague la máquina para extraer la solución piezas sequen completamente residual que haya quedado. - Page 34 Mantenimiento y cuidado Extracción y reemplazo de la correa de transmisión es posible que sea necesario reemplazar una o ambas correas ocasionalmente. si eso es necesario, siga las instrucciones a continuación. 1. Apague la máquina y desenchúfela de la pared. 2.
- Page 35 Mantenimiento y cuidado Extracción del cepillo y reemplazo de la correa del cepillo los cepillos se pueden extraer para limpiar o se los puede reemplazar en la medida que sea necesario. 1. siga las instrucciones para extraer la correa de transmisión de la página 14.
-
Page 36: Solución De Problemas
Solución aDVERtEncIa de problemas Para reducir el riesgo de choque eléctrico, apague (OFF) el interruptor de encendido y desconecte el enchufe del tomacorriente eléctrico antes de efectuar tareas de mantenimiento o identificar fallas. Problema causas posibles acciones correctivas es posible que el tanque de agua esté llene la bolsa de servicio pesado con agua vacío corriente caliente... -
Page 37: Piezas De Repuesto
Piezas de repuesto Estos artículos están disponibles para su limpiadora profunda BISSELL DeepClean Premier. Llame al 1-800-237-7691 o visite www.BISSELL.com PieZa nombre de la PieZa nombre de la n.° PieZa n.° PieZa 160-0087 Tapa del tanque 160-0092 Parte inferior del tanque (Púrpura arándano) 160-0097 Conjunto de tapa e inserto... -
Page 38: Accesorios
Accesorios Estos artículos están disponibles para su limpiadora profunda BISSELL DeepClean Premier. Llame al 1-800-237-7691 o visite www.BISSELL.com PieZa nombre de la PieZa nombre de la n.° PieZa n.° PieZa 203-6651 Herramienta para manchas 203-6652 Herramienta de mano rebeldes 3” motorizada TurboBrush®... -
Page 39: Garantía
Garantía Servicio Esta garantía le concede derechos legales específicos, y es posible Si su producto bISSEll requiere que tenga otros derechos que pueden variar de un estado al servicio: otro. Si necesita instrucciones adicionales con respecto a esta Comuníquese con Servicio al Consumidor de BISSELL para ubicar garantía, o si tiene preguntas con respecto a lo que puede cubrir, un centro de servicio autorizado de BISSELL en su área. - Page 40 ¡Registre su producto hoy mismo! el registro es fácil, y le ofrece beneficios durante la vida útil de su producto. Usted recibirá: Puntos de recompensa Recordatorios y alertas de de bISSEll apoyo para su producto Gane puntos automáticamente Nos comunicaremos con usted con para descuentos y envío gratis recordatorios y alertas importantes de compras futuras.