Table of Contents
Advertisement
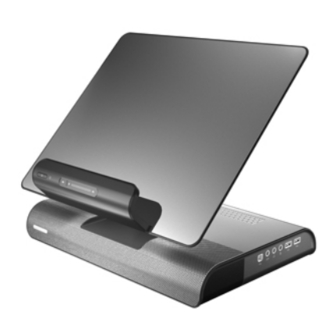
HP xb4 Notebook Media Docking Station
Maintenance and Service Guide
Document Part Number: 463777-001
October 2008
This guide is a troubleshooting reference used for maintaining and servicing the docking station. It provides
comprehensive information on identifying product features, components, and spare parts; troubleshooting docking
station problems; and performing basic disassembly procedures.
Advertisement
Table of Contents

Related Manuals for HP 463777-001


Summary of Contents for HP 463777-001
- Page 1 HP xb4 Notebook Media Docking Station Maintenance and Service Guide Document Part Number: 463777-001 October 2008 This guide is a troubleshooting reference used for maintaining and servicing the docking station. It provides comprehensive information on identifying product features, components, and spare parts; troubleshooting docking...
- Page 2 Windows is a U.S. registered trademarks of Microsoft Corporation. SD Logo is a trademark of its proprietor. The information contained herein is subject to change without notice. The only warranties for HP products and services are set forth in the express warranty statements accompanying such products and services. Nothing herein should be construed as constituting an additional warranty.
- Page 3 Safety warning notice Å WARNING: To reduce the possibility of heat-related injuries or of overheating the computer, do not place the computer directly on your lap or obstruct the computer air vents. Use the computer only on a hard, flat surface. Do not allow another hard surface, such as an adjoining optional printer, or a soft surface, such as pillows or rugs or clothing, to block airflow.
-
Page 4: Table Of Contents
Installing an optional hard drive ............4–3 Installing an HP Pocket Media Drive and HP Pocket Media Drive Adapter ....4–5... - Page 5 5 Specifications 6 Connector pin assignments Audio-in (microphone)..............6–1 Audio-out (headphone) .
-
Page 6: Product Description
USB hub, and a wireless keyboard and mouse kit. ✎ The wireless keyboard and mouse kit are available in select countries and regions. Compatability The docking station is compatible with all HP and Compaq notebooks having a USB 2.0 port. Maintenance and Service Guide 1–1... -
Page 7: Features
Features ■ Adjustable height ■ Support for display panel sizes up to 43 cm (17 inches) wide ■ Bottom-mounter sub-woofer speakers ■ Wireless keyboard, mouse, receiver (select models only) ■ Hard drive bay and power connector ■ Infrared pass-through support ■... -
Page 8: External Components
External components Front components Item Component Power button Power status light Volume mute button Volume scroll zone Speakers (2) Upper panel Maintenance and Service Guide Function Turns on the docked computer, and initiates or exits Hibernation and Standby. After the computer is docked, the power button on the docking station acts like the computer power button, using the computer management settings. -
Page 9: Bottom Components
Bottom components Item Component Vent Subwoofer 1–4 Function Enables airflow to cool internal components. Produces low audio-frequency sound. Maintenance and Service Guide... -
Page 10: Rear Components
Connects an optional external VGA monitor or projector. Connects an optional compatible audio/video receiver through a digital control cable (purchased separately). Connects an optional HP Personal Media Drive to dedicated external AC power. Docks a computer. On: The computer is correctly docked. -
Page 11: Right-Side Components
Right-side components Item Component PC port Auxilliary audio jack Audio-out (headphone) jack Audio-in (microphone) jack USB ports (2) 1–6 Function The (USB type B) PC port connects an optional secondary computer to the docking station. ✎ Do not use the PC port as a printer connection. Connects an optional MP3 player or other audio device to docking station speakers. -
Page 12: Left-Side Components
Wireless keyboard Wireless mouse (with receiver) Maintenance and Service Guide Description Holds an optional internal HP Personal Media Drive or HP Pocket Media Drive. Description Connects to the docking station without a cable. Connects to the docking station without a cable. -
Page 13: Design Overview
Design overview This section presents a design overview of key parts and features of the docking station. To identify replacement parts, refer to “Chapter 3, “Illustrated parts catalog.” The docking station provides the following device connections: ■ Expansion cable ■ S/PDIF (Sony/Philips Digital Interface) audio jack ■... -
Page 14: Using The Docking Station
Using the docking station Adjusting the docking station The upper panel on the docking station must be raised before a computer can be docked. To raise the upper panel: 1. Lower the lever 1 located on the left side of the upper panel to the down position. 2. -
Page 15: Connecting To Ac Power
To lower the upper panel: 1. Lower the lever 1 located on the left side of the upper panel to the down position. 2. Grasp the upper panel 2 with both hands, and tilt the upper panel down. 3. Lift the lever 3 to the up position to lock the upper panel position. Connecting to AC power WARNING: To reduce the risk of electric shock or damage to your equipment: Å... - Page 16 Connect the docking station to an AC power source using the computer AC adapter and power cord. 1. Identify the correct power connector to the docking station. ✎ Power cords and AC outlets vary in appearance by region and country. The AC adapter is included with the computer or purchased separately.
-
Page 17: Docking The Computer
Product description Docking the computer 1. Open the computer. 2. Slide the computer into the docking station with the keyboard facing you. ✎ The computer is held in place by a buffer pad, which prevents the computer from shifting out of position. 1–12 Maintenance and Service Guide... - Page 18 3. Move the expansion cable to either side of the docking station, depending on where the expansion port on your computer is located. ✎ The location of the expansion port on your computer varies by computer series and model. ✎ It is important to position the cable correctly, so that the cable can move freely.
- Page 19 4. Press and hold the buttons on the sides of the expansion cable connector 1. 5. Connect the expansion cable to the expansion port on the computer 2, matching the icon on the computer expansion port with the icon on the end of the expansion cable. Ä...
- Page 20 6. If the computer is off, press the power button on the docked computer or the power button on the docking station. ✎ The power button location on the docked computer varies by computer series and model. The power status light on the front of the docking station turns on. ✎...
-
Page 21: Troubleshooting
Å WARNING: Only authorized technicians trained by HP should repair this equipment. All troubleshooting and repair procedures are detailed to allow only subassembly-/module-level repair. Because of the complexity of the individual boards and subassemblies, do not attempt to make repairs at the component level or modifications to any printed wiring board. Improper repairs can create a safety hazard. -
Page 22: General Use And Connection Problems
General use and connection problems Problem Possible cause The connection The computer is not powered on. indicator light is not on. The docking station is not connected to AC power. The expansion cable on the docking station is not fully connected to the expansion port on the computer. -
Page 23: Video Problems
For comprehensive information about your computer, as well as government agency and safety information about the use of your computer, access Help and Support by selecting Start > Help and Support. ■ The HP Web site (http://www.hp.com) Maintenance and Service Guide Solution Disconnect the audio device from the headphone jack on the computer. -
Page 24: Illustrated Parts Catalog
Illustrated parts catalog Serial number location When ordering parts or requesting information, provide the docking station serial number and model number located on the bottom of the docking station. Maintenance and Service Guide 3–1... -
Page 25: Docking Station
Docking station Description HP xb4 Docking Station (whole unit replacement) Wireless components Item Description Wireless USB keyboard (U.S.) Wireless USB keyboard (Brazil) Wireless USB keyboard (Latin America) Wireless USB keyboard (South Korea) Wireless USB keyboard (Asia/Pacific, English) Wireless mouse (with receiver) 3–2... -
Page 26: Hard Drive Adapter
Refer to the spare parts list for your computer Sequential part number listing Description Wireless mouse (with receiver) HP xb4 Docking Station (whole unit replacement) Wireless USB keyboard (U.S.) Wireless USB keyboard (Asia/Pacific, English) Wireless USB keyboard (Latin America) Wireless USB keyboard (Brazil) -
Page 27: Removal And Replacement Procedures
Preliminary replacement requirements Plastic parts Using excessive force during disassembly and reassembly can damage plastic parts. Use care when handling the plastic parts. Apply pressure only at the points designated in the maintenance instructions. Cables and connectors Ä CAUTION: When servicing the docking station, be sure that cables are placed in their proper locations during the reassembly process. -
Page 28: Component Replacement Procedures
Serial number Report the docking station serial number to HP when requesting information or ordering spare parts. The serial number is located on the bottom of the docking station. The table below identifies the key information that you need when contacting HP for replacement parts or for service-related questions. -
Page 29: Installing An Optional Hard Drive
Installing an optional hard drive Installing an HP Personal Media Drive You can insert a Personal Media Drive (PMD) into the docking station for extra storage capacity. 1. Remove the hard drive security screw 1 on the rear panel of the docking station and remove the hard drive cover 2 from the hard drive bay. - Page 30 2. Insert the hard drive 1 into the hard drive bay until the drive is fully seated. ✎ If the hard drive light 3. Replace the hard drive security screw 3. 4. Connect the hard drive to dedicated external AC power. WARNING: To reduce the risk of electric shock or damage to your equipment: Å...
-
Page 31: Installing An Hp Pocket Media Drive And Hp Pocket Media Drive Adapter
Installing an HP Pocket Media Drive and HP Pocket Media Drive Adapter Å WARNING: To reduce the risk of electric shock or damage to your equipment: ■ Plug the power cord into an AC outlet that is easily accessible at all times. - Page 32 3. Insert the drive adapter 1 into the hard drive bay until the adapter is fully seated. 4. Replace the hard drive security screw 2. 5. Reconnect the docking station to AC power. 6. Insert the drive 1 into the adapter until the drive is fully seated. ✎...
-
Page 33: Specifications
This table provides physical and performance specifications for the docking station. Dimensions Length Width Height Weight With 2.5” PMD With 3.5” PMD Temperature Operating Nonoperating ✎ Applicable product safety standards specify thermal limits for plastic surfaces. The expansion base operates well within this range of temperatures. - Page 34 This table provides physical and performance specifications for the hard drive. Dimensions Height Width Weight Interface type Data transfer rate Disk to buffer Interface with or with IORDY Seek times (typical read, including setting) Single track Average Maximum Physical geometry Cylinders Heads Sectors...
-
Page 35: Connector Pin Assignments
Audio-in (microphone) Audio-out (headphone) Maintenance and Service Guide Connector pin assignments Signal Audio signal in Audio signal in Ground Signal Audio out, left channel Audio out, right channel Ground 6–1... -
Page 36: Cable Docking Connector
Cable docking connector Signal Dock present Battery out Microphone ground Battery out Microphone Left MDI0- Microphone Right MDI0+ Left headphone MDI1- Right headphone MDI1+ Audio Output ground MDI2- S/PDIF MDI2+ Vol_down MDI3- Vol_UP MDI3+ Jaco Detect USB+ 6–2 Signal Sleep Button Digital Ground Mute_LED Vsync... -
Page 37: External Monitor
External monitor Maintenance and Service Guide Signal Red analog Green analog Blue analog Not connected Ground Ground analog Ground analog Ground analog +5 VDC Ground Monitor detect DDC 2B data Horizontal sync Vertical sync DDC 2B clock 6–3... -
Page 38: Network)
RJ-45 (network) Universal Serial Bus 6–4 Signal Transmit + Transmit Receive + Unused Unused Receive - Unused Unused Signal +5 VDC Data - Data + Ground Maintenance and Service Guide... -
Page 39: Power Cord Set Requirements
The wide range input feature of the computer permits it to operate from any line voltage from 100 to 120 volts AC or from 220 to 240 volts AC. The 3-conductor power cord set included with the computer meets the requirements for use in the country or region where the equipment is purchased. -
Page 40: Requirements For Specific Countries And Regions
Requirements for specific countries and regions 3-Conductor power cord set requirements Country/region Accredited agency Australia Austria Belgium Canada Denmark Finland France Germany Italy Japan The Netherlands Norway The People's Republic of China South Korea Sweden Switzerland Taiwan The United Kingdom The United States 1. - Page 41 accessories, wireless 1–7 audio audio-in jack pin assignments 6–1 audio-out jack pin assignments 6–1 auxilliary jack 1–6 S/DPIF jack 1–5 audio problems 2–2 auxilliary audio jack 1–6 bottom components 1–4 button power 1–3 volume mute 1–3 cable docking connector pin assignments 6–2 cables, service considerations 4–1 components bottom 1–4...
- Page 42 pocket media drive installation 4–5 part number 3–3 power button 1–3 power connector 1 1–5 power connector 1 light 1–5 power connector 2 1–5 power connector 2 light 1–5 power connector, hard drive 1–5 power cord set requirements 7–1 power status light 1–3 problems audio 2–2 connection 2–2...