GE WSXH208 Owner's Manual
Hide thumbs
Also See for WSXH208:
- Owner's manual & installation instructions (44 pages) ,
- Owner’s manual & installation instruction (44 pages) ,
- Owner's manual (48 pages)

Related Manuals for GE WSXH208


Summary of Contents for GE WSXH208
- Page 1 GE Appliances Owner’s Manual WSXH208 ® GE Answer Center 800.626.2000 Part No. 175D1807P207-1 Pub. No. 49-9942-1 2-98 CG 131748100...
- Page 2 Congratulations! You Are Now Part of the GE Family. Welcome to the GE family. We’re proud of Best of all, you’ll experience these values our quality products and we are committed each time you do the laundry. That’s to providing dependable service. You’ll see it important, because your new washer will be in this easy-to-use Owner’s Manual and you’ll...
-
Page 3: Table Of Contents
Safety Information ..4–7 GE & You, A Service Partnership. Ask any GE appliance owner and they will tell you we stand behind our products with unmatched quality service. However, did you know that most questions result from... -
Page 4: Important Safety Information
IMPORTANT SAFETY INFORMATION. READ ALL INSTRUCTIONS BEFORE USING. WARNING! For your safety, the information in this manual must be followed to minimize the risk of fire or explosion, electric shock, or to prevent property damage, personal injury, or loss of life. WATER HEATER SAFETY Under certain conditions hydrogen gas may be produced in a water heater that has not been used for two weeks... -
Page 5: Proper Installation
Installation Instructions before it is used. If you did not receive an Installation Instructions sheet, you can receive one by calling us toll-free at the ® GE Answer Center , 800.626.2000. Install or store where it will not Properly ground washer to... -
Page 6: Important Safety Instructions
IMPORTANT SAFETY INSTRUCTIONS. READ ALL INFORMATION BEFORE USING. WARNING! Use this appliance only for its intended purpose as described in this Owner’s Manual. WHEN USING THE WASHER Never reach into washer while To minimize the possibility it is moving. Wait until the of electric shock, unplug this drum has completely stopped. -
Page 7: Save These Instructions
REMEMBER… Your continued health and safety are important to us. Please read and follow this Safety Information carefully. We want you to remain a happy and healthy part of our GE family. SAVE THESE INSTRUCTIONS... -
Page 8: About The Washer Control Panel
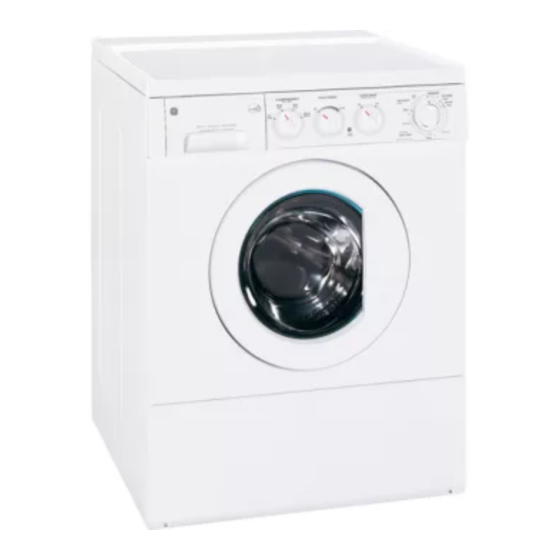
About the washer control panel. You can locate your model number behind the top inside of the door opening. Automatic Dispenser Wash/Rinse Temperature Cycle Signal Spacemaker Washer Warm Cold Quiet Cold Cold Loud Warm SAFETY LATCH / SLIDE TO OPEN Warm Cold Control Settings... -
Page 9: Operating Steps
Start Pre Wash Final Knits & Spin Extra Rinse Delicates Rinses & Heavy Wash Regular / Perm Press Spin Wash Wash Door Rinses & Spins Lock Final Spin Regular Rinses & Spins Wash Perm Fast Spin Press Operating Steps (Always follow garment manufacturer’s care label when laundering) Sort laundry into loads that can be washed together. -
Page 10: About The Washer Features
About the washer features. NOTE: Not all features are available on all washer models. The Dispenser Drawer Slowly open the dispenser drawer by first sliding the safety latch to the right, then pulling the drawer out until it stops. After adding laundry products, slowly close the dispenser drawer. Closing the drawer too quickly could result in early dispensing of the bleach and fabric softener. - Page 11 The Liquid Bleach Compartment If desired, measure out the recommended amount of liquid bleach, not to exceed 1/3 cup (80 ml) and pour into the center compartment labeled “LIQUID BLEACH” marked with this symbol Do not exceed the maximum fill line. Overfilling can cause early dispensing of the bleach which could result in damaged clothes.
-
Page 12: Care And Cleaning
Moving and Storage: Ask the service technician to remove water from drain pump and hoses. Do not store the washer where it will be ® exposed to the weather. Call the GE Answer Center , 800.626.2000 for information on how to keep the tub stationary when moving the washer. - Page 13 Dispenser Drawer Area: Detergent and fabric softener may build up in the dispenser drawer. Residue should be removed once or twice a month. Remove the drawer by first sliding the safety latch to the right, then pulling the drawer out until it stops. Reach back into the left rear corner of the drawer cavity and press down firmly on the lock tab, pulling out the drawer.
-
Page 14: Troubleshooting Tips
Before you call for service… Troubleshooting Tips Save time and money! Review the charts on the following pages first and you may not need to call for service. Problem Possible Causes What To Do Make sure cord is plugged Washer won’t operate Washer is unplugged •... - Page 15 Problem Possible Causes What To Do Make sure hose Water leaks Fill hoses or drain hose is • connections are tight at improperly connected washer and faucets and make sure end of drain hose is correctly inserted in and secured to drain facility.
- Page 16 Before you call for service… Problem Possible Causes What To Do Washer pauses in cycle The washer normally pauses between washing steps Add one to two similar Clothes too wet Load is too small • items. Redistribute load. • Load is out of balance Separate lint producers Lint or residue on clothes Incorrect sorting...
- Page 17 Problem Possible Causes What To Do Check fabric softener Colored spots • Incorrect use of fabric package for instructions softener and follow directions for using dispenser. Pretreat stain and rewash. • Sort whites or lightly colored • Dye transfer items from dark colors. Promptly remove wash load •...
- Page 18 Before you call for service… Problem Possible Causes What To Do Use correct amount of Grayed or yellowed Not enough detergent • detergent. clothes Use hottest water safe for Hard water • fabric. Use a water conditioner • like Calgon brand or install a water softener.
- Page 19 Any part of the washer which fails due to a defect in One Year materials or workmanship. During this full one-year From the date of the warranty, GE will also provide, free of charge, all labor original purchase and in-home service to replace the defective part. Five Years...
-
Page 20: Telephone Numbers
Service Satisfaction If you are not satisfied with the service you receive from GE, follow these three steps. First, contact the people who serviced your appliance. Next, if you are still not pleased, write all the details—...