Table of Contents
Advertisement
Advertisement
Table of Contents

Related Manuals for HP PhotoSmart 315


Summary of Contents for HP PhotoSmart 315
- Page 1 315 digital camera user’s guide English www.hp.com/photosmart...
-
Page 2: Table Of Contents
Using the 5-way controller ...14 Chapter 2: Taking Photos ... 17 Taking a photo ...17 Auto Focus and Auto Exposure ...19 Previewing your photos ...20 Using Instant Review ...22 Tips for taking the best photos ...23 hp photosmart 315 digital camera user’s guide... - Page 3 Changing the photo quality ...41 Using the digital zoom ...44 Using the self-timer ...47 Setting Instant Review ...48 Setting the image LCD brightness ...50 Setting the date and time ...51 Changing the camera language ...53 Setting the beep ...54 www.hp.com/photosmart...
- Page 4 Using a card reader ...64 Printing photos without a computer ...64 JetSending your photos ...65 Chapter 6: CompactFlash Memory ... 67 Installing a memory card ...68 Checking the memory card status ...70 Formatting a memory card ...71 hp photosmart 315 digital camera user’s guide...
- Page 5 Chapter 8: Troubleshooting ... 79 Problems and solutions ...79 Getting assistance ...88 Help us help you better ...88 Using HP Customer Care online resources ...89 Contacting HP Customer Care by phone ...90 ArcSoft support ...91 Chapter 9: Care and Safety ... 93 Caring for your camera and accessories ...93...
- Page 6 Regulatory notices ... 103 U.S.A..103 Canada ... 103 Japan ...104 Korea ...104 Hewlett-Packard limited warranty statement ... 105 Hewlett-Packard year 2000 warranty for consumer products distributed through authorized resellers ... 108 Index... 109 hp photosmart 315 digital camera user’s guide...
-
Page 7: Chapter 1: Getting Started
Your simple-to-use HP PhotoSmart 315 digital camera takes high-quality photos you can share with family and friends on the Internet or via email. It comes with HP software for manipulating, storing, and printing your photos. Your camera includes the following features: •... -
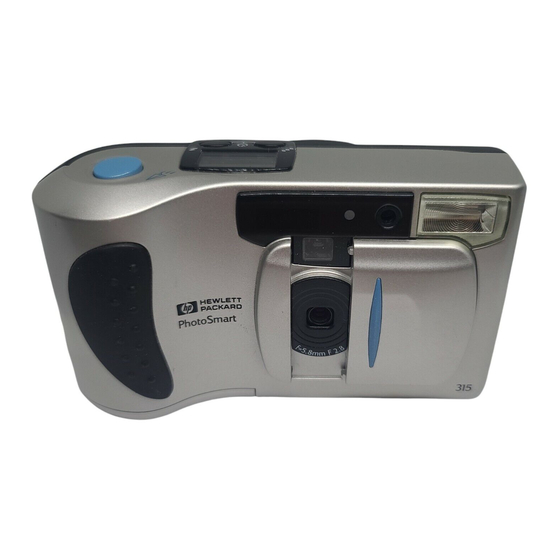
Page 8: Camera Parts
Camera parts The following illustrations show the front, back, and sides of the HP PhotoSmart 315 digital camera. flash button status LCD photo quality button shutter button infrared sensor lens lens cover viewfinder self-timer light flash sensor flash computer connection... -
Page 9: Quick Setup
Quick setup Setting up the HP PhotoSmart 315 digital camera is quick and easy—follow these steps and you’ll be ready to take photos. Step 1: Attach the wrist strap Open the memory card door. Using the wrist strap included in the box with your camera, thread the short loop through the wrist strap attachment. - Page 10 For details, see “Replacing batteries” on page 75. Note: Step 3: Choose the camera language The first time you turn on the HP PhotoSmart 315 digital camera, you are prompted to choose the language you want to use for the camera menus. Note: For replacement, use alkaline, lithium, or rechargeable Ni-Cd or Ni-MH batteries.
- Page 11 LCD. Use the up or down side of the 5-way controller to scroll to the language you want to use. Press to select the language. www.hp.com/photosmart button image LCD on/off...
- Page 12 Select the month, year, hour, minutes, and AM or PM in the same manner, then press To confirm the date and time, press Your camera is now ready to take photos. and 12- or 24-hour time format. . You can choose mm/dd/yy hp photosmart 315 digital camera user’s guide...
-
Page 13: Turning The Camera On And Off
To conserve battery power, the camera automatically turns itself off if 3 minutes elapse and you don’t press a button. If the camera is connected to a computer, the camera turns itself off if 30 minutes elapse and there is no interaction between the camera and the computer. www.hp.com/photosmart battery level... -
Page 14: Using The 5-Way Controller
For example, to select menu options: Press the image LCD on/off image LCD on. Press the button. menu menus display on the image button to turn the hp photosmart 315 digital camera user’s guide image LCD on/off button menu button 5-way controller... - Page 15 26 and “Using the digital zoom” on page 44. Specific instructions on using the camera menus appear throughout this guide. To exit the camera menus without making a selection, press the Note: www.hp.com/photosmart , push the selected icon highlight button.
- Page 16 315 digital camera user’s guide...
-
Page 17: Chapter 2: Taking Photos
This chapter describes the basic process of taking photos with your HP PhotoSmart 315 digital camera and gives you tips for taking the best photos. Once you are familiar with this process, see Chapter 4 for instructions on adjusting the camera settings to fit your needs. - Page 18 When you are taking a photo, be careful to keep your fingers away from the lens Tip: and the flash. The following illustrations give you examples of how to hold the camera. button 1/2 way down to allow the camera to adjust the focus shutter button. shutter hp photosmart 315 digital camera user’s guide shutter...
-
Page 19: Auto Focus And Auto Exposure
You can still take the photo, but the results may not be optimal. For better results, try the suggestions found under “Tips for taking the best photos” on page 23. www.hp.com/photosmart button. Prepare early by framing your photo and pressing the shutter... -
Page 20: Previewing Your Photos
Slide the lens cover open to turn the camera on. Press the image LCD on/off Frame your photo in the image LCD by pointing the camera lens at your subject. button to turn the image LCD on. hp photosmart 315 digital camera user’s guide... - Page 21 When you are finished using the image LCD to frame your photos, you can close the lens cover to turn the camera off, or press the image LCD off. www.hp.com/photosmart button 1/2 way down to allow the camera to adjust the focus shutter button.
-
Page 22: Using Instant Review
For instructions on how to turn Instant Instant Review or do nothing. The image LCD turns off. . The image LCD turns off. from the menu, the camera automatically saves the Save Delete hp photosmart 315 digital camera user’s guide Delete... -
Page 23: Tips For Taking The Best Photos
• If you are using the flash, keep the subject within the flash range (3m, or about 9.8 ft.). www.hp.com/photosmart flash setting to increase the light on the 3 meters setting, use a... - Page 24 1/2 way down. Wait until you see the steady green light to the right of shutter the viewfinder, then press the are not used to using a digital camera, you may want to practice to get used to the timing. •...
-
Page 25: Chapter 3: Reviewing Your Photos
To preserve battery life, connect an AC power adapter (optional) while using the Tip: image LCD to review your photos. See “Using an AC power adapter” on page 77. www.hp.com/photosmart Chapter 3: Reviewing Your Photos image LCD on/off button 5-way controller... -
Page 26: Viewing Your Photos
Use the 5-way controller to sequence through your photos. Each time you display a new photo on the LCD, a status overlay bar appears for a few seconds. button to turn the image LCD on. status overlay bar photo number hp photosmart 315 digital camera user’s guide... - Page 27 41, “Locking your photos” on page 27, and “Creating a Digital Print Order Format (DPOF) file” on page 36. When you are finished reviewing photos, be sure to turn off the image LCD to conserve battery power. www.hp.com/photosmart...
-
Page 28: Viewing Small Versions (Thumbnails) Of Your Photos
A yellow border frames one photo in the set; this is the currently selected photo. button to turn the image LCD on. currently selected photo Thumbnails hp photosmart 315 digital camera user’s guide... - Page 29 5-way controller. When you want to see one photo in normal view, use the 5-way controller to move the yellow border to the photo, and then press www.hp.com/photosmart...
-
Page 30: Magnifying Your Photos
Use the 5-way controller to pan left and right, or up and down. Press to return to normal view. button to turn the image LCD on. hp photosmart 315 digital camera user’s guide menu. Magnify... -
Page 31: Erasing Your Photos
If you are erasing all photos from the memory card, it doesn’t matter which Note: photo is displayed on the image LCD. Press the button. menu www.hp.com/photosmart button to turn the image LCD on. - Page 32 When you are finished erasing photos, use the up or down side of the 5-way controller to select , then press Exit if you want to erase all photos, then press , then press , and then press hp photosmart 315 digital camera user’s guide menu, then Erase if you want to...
-
Page 33: Locking Your Photos
For more information, see “Formatting a memory card” on page 71. To lock or unlock photos: Make sure the lens cover is closed (the camera is off). Press the image LCD on/off www.hp.com/photosmart button to turn the image LCD on. lock icon... - Page 34 Repeat this step until you are finished locking and unlocking photos. Use the up or down side of the 5-way controller to select if you want to lock or unlock all , and then press hp photosmart 315 digital camera user’s guide menu, then Lock if you want to...
-
Page 35: Rotating Your Photos
Select counter-clockwise. Press repeatedly to continue to rotate the photo in the same direction until you are happy with the photo’s position. www.hp.com/photosmart ° increments. button to turn the image LCD on. to rotate the photo... -
Page 36: Creating A Digital Print Order Format (Dpof) File
For example, when you gather with family and friends to view your photos, you can create a DPOF file to keep track of the photos they want copies of. , then press Exit hp photosmart 315 digital camera user’s guide... - Page 37 DPOF file. If you are marking or unmarking all photos on the memory card, it doesn’t Note: matter which photo is displayed on the image LCD. Press the button. menu www.hp.com/photosmart button to turn the image LCD on. DPOF icon...
- Page 38 10. Use the up or down side of the 5-way controller to select DPOF if you are Mark All Clear All , then press , and then press , then press Exit hp photosmart 315 digital camera user’s guide menu, if you are...
-
Page 39: Chapter 4: Adjusting The Camera Settings
Chapter 4: Adjusting the Camera Settings You can modify the HP PhotoSmart 315 digital camera’s settings to fit the current photo- taking conditions and your preferences. For example, you can adjust the flash settings to fit current lighting conditions, and you can select the camera language you prefer to use. This chapter contains the information you need to take the best photos and get the most out of your digital camera. - Page 40 If you are photographing people, tell them to wait for the second flash before moving. hp photosmart 315 digital camera user’s guide flash photo...
-
Page 41: Changing The Photo Quality
The photo quality setting you choose determines the quality of your photos and how many photos can be stored on the CompactFlash memory card. Photos taken with higher photo quality take up more space on the memory card; photos taken with lower photo quality take up less space. www.hp.com/photosmart... - Page 42 Produces the highest-quality photos and uses the most memory. Use this setting for taking photos that you plan to crop and enlarge using photo editing software, or print larger than 8x10 inches. hp photosmart 315 digital camera user’s guide Resolution 640x480 1200x1600...
- Page 43 To change the photo quality: Slide the lens cover open to turn the camera on. Press the photo quality level you want is displayed on the status LCD. www.hp.com/photosmart button repeatedly until the quality photo quality flash button button...
-
Page 44: Using The Digital Zoom
Digital zoom affects photo quality. The more you zoom in, the more photo quality is Note: reduced. There are two ways to zoom: using Quick Zoom or using the Digital Zoom camera menu. subject as it appears on the image LCD when digital zoom is active hp photosmart 315 digital camera user’s guide... - Page 45 1.5x, 2x, or 2.5x. To zoom out, use the up side of the 5-way controller. To cancel the digital Note: zoom and return to normal view, press Take your photo. www.hp.com/photosmart button to turn the image LCD on.
- Page 46 To zoom out, use the up side of the 5-way controller. To cancel the digital Note: zoom and return to normal view, press Take your photo. button to turn the image LCD on. hp photosmart 315 digital camera user’s guide Digital Zoom...
-
Page 47: Using The Self-Timer
The self-timer icon appears in the camera’s status LCD. photo quality button To cancel the self-timer, press the two buttons again. Note: www.hp.com/photosmart button, the camera waits 10 seconds before taking the photo. shutter button simultaneously to turn on the self-timer. flash... -
Page 48: Setting Instant Review
Instant Review is off by default. If you turn it on but decide that you do not want to Note: review every photo immediately after you take it, turn Instant Review off to conserve battery power. hp photosmart 315 digital camera user’s guide... - Page 49 The Instant Review menu icon changes its appearance depending on the current Note: setting. For example, If Instant Review is currently off, the icon displays a blank LCD and asks if you want to turn Instant Review on. www.hp.com/photosmart button to turn the image LCD on. instant review is...
-
Page 50: Setting The Image Lcd Brightness
The diamond icon in the camera’s image LCD indicates the current level of brightness. Press button to turn the image LCD on. menu, then press , then press hp photosmart 315 digital camera user’s guide current level indicator... -
Page 51: Setting The Date And Time
See “Step 4: Set the camera date and time” on page 12. You may want to change the camera’s clock settings at other times—for example, if you travel across time zones. You can change the camera’s date and time, or choose a different format for either, using the www.hp.com/photosmart menu. Setup... - Page 52 Select the month, year, hour, minutes, and AM or PM in the same manner, then press To confirm the date and time, press button to turn the image LCD on. . You can choose mm/dd/yy hp photosmart 315 digital camera user’s guide menu, Setup , then Date & Time...
-
Page 53: Changing The Camera Language
Use the up or down side of the 5-way controller to scroll to Use the right or left side of the 5-way controller to scroll to the language you want to use, then press www.hp.com/photosmart button to turn the image LCD on. menu, then press... -
Page 54: Setting The Beep
Use the up or down side of the 5-way controller to scroll to Use the right or left side of the 5-way controller to select button to turn the image LCD on. Setup menu. Setup hp photosmart 315 digital camera user’s guide icon highlighted. Beep , then press... -
Page 55: Chapter 5: Sharing And Printing Photos
Connecting the camera to your Windows PC You can connect your HP PhotoSmart 315 digital camera to a Windows PC using the USB cable that comes in the camera package. Before you can use your camera with your computer, you need to install the HP Photo Imaging software. -
Page 56: System Requirements For A Windows Pc
800x600, 16-bit color any speed Windows 98, Windows Me, Windows 2000, or Windows NT 4.0* For Windows 98, Windows Me, and Windows 2000: USB port For Windows NT 4.0*: CompactFlash card reader (purchased separately) hp photosmart 315 digital camera user’s guide... -
Page 57: Installing The Software On A Windows Pc
Installing the software on a Windows PC Insert the HP PhotoSmart 315 CD into your computer’s CD-ROM drive. The installation window automatically appears. If the installation window doesn’t appear, use Windows Explorer or My Note: Computer to locate your CD-ROM drive, and then double-click the file setup.exe... -
Page 58: Connecting The Camera To A Windows Pc
PC mode and the letters ready to download photos. When the camera is connected to your computer, the camera Note: buttons do not respond. appear on the status LCD. You are now hp photosmart 315 digital camera user’s guide... -
Page 59: Downloading Photos To A Windows Pc
Connect the camera to your computer using the USB cable. See “Connecting the camera to a Windows PC” on page 58. Slide the lens cover open to turn the camera on. The status LCD displays few seconds, the HP Photo Imaging Software window appears on your computer screen. Click Unload Camera www.hp.com/photosmart... - Page 60 Double-click the drive icon to access your photos. Then, use the Windows Clipboard and the hard drive. button to select the browse (...) section. . A new folder Save commands to transfer selected photos to your Copy Paste hp photosmart 315 digital camera user’s guide...
-
Page 61: Connecting The Camera To Your Macintosh
Print your photos • Share your photos with family and friends on the Internet See the HP Photo Imaging software’s online help for more information. Connecting the camera to your Macintosh System requirements for a Macintosh To work with your camera, your Macintosh must meet or exceed the following requirements:... -
Page 62: Connecting The Camera To A Macintosh
“computer” regardless of whether you are using a Macintosh or a Windows PC. You are now ready to download photos. When the camera is connected to your computer, the camera Note: buttons do not respond. appear on the status LCD. hp photosmart 315 digital camera user’s guide indicates... -
Page 63: Downloading Photos To A Macintosh
Untitled Open the hard drive window and open the folder you want to store the photos in. In the hard drive window, select www.hp.com/photosmart to indicate the camera is connected to a computer. drive icon on your desktop. from the... -
Page 64: Using A Card Reader
Printing photos without a computer If your printer has a slot for a CompactFlash memory card, like the HP PhotoSmart 1000 and 1200 Series printers do, you can print your photos directly from the memory card. Consult your printer’s documentation for details. -
Page 65: Jetsending Your Photos
HP JetSend allows for convenient, wireless transfer. You can transfer photos from your camera to any JetSend-receiving printer, such as the HP PhotoSmart 1000 and 1200 Series printers. To determine if a printer can receive JetSend transmissions, see the printer’s documentation. - Page 66 JetSend device During the transfer, a progress bar displays on the image LCD. You can cancel the transfer at any time by pressing any button on the camera except the Looking for button. shutter hp photosmart 315 digital camera user’s guide...
-
Page 67: Chapter 6: Compactflash Memory
Chapter 6: CompactFlash Memory The “film” used in the HP PhotoSmart 315 digital camera is a reusable CompactFlash memory card. The card is more economical than conventional film because you can erase unwanted photos from the card, making space available for new photos. The camera comes with a card already installed. -
Page 68: Installing A Memory Card
Opening the memory card door while the access light is on could damage Caution: the existing card or result in lost photos. Open the memory card door by inserting your thumb in the notch and lifting the door. memory card access light memory card door hp photosmart 315 digital camera user’s guide... - Page 69 Fold the card ejection lever down against the card. Close the memory card door. If you cannot close the memory card door, you may not have inserted the Tip: memory card correctly. Remove the memory card and try again. www.hp.com/photosmart...
-
Page 70: Checking The Memory Card Status
“Changing the photo quality” on page 41, “Downloading photos to a Windows PC” on page 59, “Downloading photos to a Macintosh” on page 63, or “Installing a memory card” on page 68. button. hp photosmart 315 digital camera user’s guide... -
Page 71: Formatting A Memory Card
If you insert a new, formatted card in the camera and it doesn’t work, try re-formatting it—it may have been formatted improperly. Also re-format cards that you previously used in a different camera, to optimize them for use with the HP PhotoSmart 315 digital camera. - Page 72 To avoid damaging the card, do not open the memory card door while the card is being formatted. button to turn the image LCD on. hp photosmart 315 digital camera user’s guide menu, Setup Format CF...
-
Page 73: Chapter 7: Powering Your Camera
The HP PhotoSmart 315 digital camera can be powered by batteries or an HP-approved AC power adapter. For convenience, use the batteries when you are taking photos. To preserve battery power, use an AC adapter (purchase separately) when you are reviewing photos on the image LCD for an extended period of time, or when you are transferring photos from the camera to your computer. - Page 74 When using the camera with a computer or when using the image LCD for extended periods of time, use an AC power adapter that HP has approved for use with the HP PhotoSmart 315 digital camera. For more information, see “Using an AC power adapter”...
-
Page 75: Replacing Batteries
If you choose to use rechargeable batteries, you will need to recharge them in a Note: separate device, outside the camera. The batteries do not recharge in the camera when you connect an AC adapter. www.hp.com/photosmart... - Page 76 Always follow instructions on the battery package when handling or disposing of batteries. Close the battery compartment cover by sliding it into place and then clicking it shut. hp photosmart 315 digital camera user’s guide...
-
Page 77: Using An Ac Power Adapter
LCD for an extended period. Only use an AC power adapter that HP has approved for use with the HP PhotoSmart 315 digital camera. Use of any other adapter will void your warranty and may damage your camera. - Page 78 If the AC adapter is connected to the camera, even if it is not connected to a power source, the camera will not use battery power. hp photosmart 315 digital camera user’s guide...
-
Page 79: Chapter 8: Troubleshooting
Problems and solutions If you have a problem using your HP PhotoSmart 315 digital camera, review this section first. If you cannot find the solution to your problem here, see “Getting assistance” on page 88 for information on contacting HP Customer Care. - Page 80 If you want to use battery power, disconnect the AC adapter. If you want to use AC power, connect the AC adapter to a working electrical outlet. hp photosmart 315 digital camera user’s guide...
- Page 81 USB hub and your USB hub is not compatible with the camera. www.hp.com/photosmart Solution Turn the camera off and then on again (slide the lens cover closed and then open). Remove the batteries and reinstall them. If you are using...
- Page 82 Purchase higher-grade batteries, such as “ultra-” or “premium-” grade alkaline or lithium batteries. Or, switch to rechargeable Ni-Cd or Ni-MH batteries. These batteries are available from various battery manufacturers. Always carry the camera securely in a case. hp photosmart 315 digital camera user’s guide...
- Page 83 Auto Focus system. —Continued (next page)— www.hp.com/photosmart Solution The camera’s Auto Focus range is 30 cm (11.8 in.) to infinity and focuses on the object in the center of the frame. Make sure you are not too close to the subject and that you have placed the subject in the middle of the frame.
- Page 84 68, “Erasing your photos” on page 31, “Downloading photos to a Windows PC” on page 59, “Downloading photos to a Macintosh” on page 63, or “Changing the photo quality” on page 41. hp photosmart 315 digital camera user’s guide...
- Page 85 The camera is connected to a computer. (The letters “PC” appear on the status LCD.) www.hp.com/photosmart Solution Format the memory card or replace it with a new, formatted card. Wait until the flash icon on the status LCD stops blinking before taking another flash photo.
- Page 86 For sharp focus, ask the subject to stay still. Hold the camera steady as you press the shutter button, or use a tripod. hp photosmart 315 digital camera user’s guide...
- Page 87 You were too close to the subject to use the flash. www.hp.com/photosmart Solution Wait for natural lighting conditions to improve or use the flash to illuminate your subject (see “Using the flash” on page 39).
-
Page 88: Getting Assistance
If you encounter a problem or question, we’d like to ask you to do a few things before you call. Please take a minute to walk through the steps below before you contact HP. It will help us make your support experience the best it can be! Record your HP product model number, serial number, and purchase date below. -
Page 89: Using Hp Customer Care Online Resources
If possible, visit one of our HP Customer Care Web sites. Most of the answers you need are as close as your computer screen! See “Using HP Customer Care online resources” below for specific information on how to connect. Organize your questions and note error messages, if any, that are displayed on the status LCD. -
Page 90: Contacting Hp Customer Care By Phone
Contacting HP Customer Care by phone Like most HP customers, you’ll probably never need to call us. But if you do, you’ll be connected to a service technician who specializes in your product and can help you find the answers you need. -
Page 91: Arcsoft Support
+65 272 5300 Spain + 34 902 321 123 For support numbers in other countries/regions, contact your local HP office. ArcSoft support For help with your ArcSoft PhotoImpression Software, visit the ArcSoft Web site at . The Web site offers an online manual for the software, answers to www.arcsoft.com... - Page 92 315 digital camera user’s guide...
-
Page 93: Chapter 9: Care And Safety
• If you move the camera from a cold to a warm location or vice versa, always allow the camera several minutes to adjust to the current ambient temperature before you use it. www.hp.com/photosmart Chapter 9: Care and Safety... -
Page 94: Ac Power Adapter
AC power adapter • Use only an AC power adapter that HP has approved for use with the HP PhotoSmart 315 digital camera. Use of any other adapter will void your warranty and may damage your camera. Batteries • Replace all the batteries at the same time. Do not replace the batteries individually. -
Page 95: Safety Precautions
Safety precautions • To avoid the risk of electric shock, do not open the camera case or attempt to repair the camera yourself. Contact an authorized HP Service Center for repairs. See “Getting assistance” on page 88. • Keep the camera dry. Exposing the camera to excessive moisture may cause malfunction. - Page 96 315 digital camera user’s guide...
-
Page 97: Appendix A: Reference
Icons Icon Meaning Batteries full Batteries partially-charged Batteries empty Automatic flash on Flash off Flash on www.hp.com/photosmart Appendix A: Reference... - Page 98 Meaning Automatic flash with red-eye reduction on Basic photo quality Fine photo quality Super-fine photo quality Photo included in DPOF file Photo locked (cannot be erased unless memory card is re-formatted) Self-timer on hp photosmart 315 digital camera user’s guide...
-
Page 99: Camera Indicator Lights
Indicator light State Viewfinder Green – steady Green – blinking Red – steady www.hp.com/photosmart memory card access light Meaning The camera has achieved the best focus and exposure and is ready to take a photo. The camera cannot find a focus or there is not enough light to take the photo. -
Page 100: Error Messages
What you should do Reset the camera. (See page 81.) If the error still occurs, contact HP Customer Care. See “Getting assistance” on page 88. See “Checking the memory card status” on page 70 for troubleshooting assistance. -
Page 101: Camera Specifications
Shutter speed Focus Sensitivity White balance Self-timer www.hp.com/photosmart 2.1 megapixels, 1/2.7” CCD 30-bit 2.1 megapixels (Super-fine and Fine photo quality settings: 1200 x 1600 pixels; Basic photo quality setting: 640 x480 pixels) CompactFlash Type I; all storage sizes supported (8MB card supplied) 6-element lens;... - Page 102 1.8 inch color LCD with 72K pixels (312x230); 4x playback magnification 4 AA batteries (included) or optional AC adapter USB, JetSend infrared 128 x 86 x 33mm; 5 x 2.7 x 1.3 in. 227g (8 oz.) without batteries hp photosmart 315 digital camera user’s guide...
-
Page 103: Appendix B: Regulatory And Warranty Information
For disposal or recycling information, please contact your local authorities. Canada This Class B digital apparatus meets all requirements of the Canadian Interference-Causing Equipment Regulations. Cet appareil numÈrique de la Class B respecte toutes les exigences du RÈglement sur le matÈriel brouiller du Canada. www.hp.com/photosmart... -
Page 104: Japan
Japan Korea hp photosmart 315 digital camera user’s guide... -
Page 105: Hewlett-Packard Limited Warranty Statement
3. HP’s limited warranty covers only those defects which arise as a result of normal use of the product, and does not cover any other problems, including those which arise as a result of: a. - Page 106 HP shall, within a reasonable time after being notified of the defect, refund the purchase price for the product. 6. HP shall have no obligation to repair, replace, or refund until the customer returns the defective product to HP. 7. Any replacement product may be either new or like-new, provided that it has functionality at least equal to that of the product being replaced.’...
- Page 107 3. FOR CONSUMER TRANSACTIONS IN AUSTRALIA AND NEW ZEALAND, THE TERMS IN THIS WARRANTY STATEMENT, EXCEPT TO THE EXTENT LAWFULLY PERMITTED, DO NOT EXCLUDE, RESTRICT, OR MODIFY, AND ARE IN ADDITION TO, THE MANDATORY STATUTORY RIGHTS APPLICABLE TO THE SALE OF THE HP PRODUCTS TO SUCH CUSTOMERS.
-
Page 108: Hewlett-Packard Year 2000 Warranty For Consumer Products Distributed Through Authorized Resellers
Subject to all of the terms and limitations of the HP Limited Warranty Statement provided with this HP Product, HP warrants that this HP Product will be able to accurately process date data (including, but not limited to,... -
Page 109: Index
Assistance Auto Exposure Auto Focus Auto Power Off Batteries checking the level of charge icons on status LCD inserting removing www.hp.com/photosmart replacing safety precautions what kind to use when to change Beep Brightness of image LCD Camera care and safety... - Page 110 Image LCD camera menus cleaning Instant Review previewing photos reviewing photos setting the brightness Indicator lights Infrared hp photosmart 315 digital camera user’s guide Installing batteries memory card software on a PC Instant Review turning on and off using JetSend...
- Page 111 Menu button Menus selecting options selecting www.hp.com/photosmart connecting the camera to downloading photos to installing software system requirements Photo Imaging software warranty Photo quality changing how it affects memory Photos...
- Page 112 System requirements Macintosh Taking photos using Instant Review using the flash using the self-timer using the zoom hp photosmart 315 digital camera user’s guide Time Tips for taking photos Transmitting photos. See JetSend Troubleshooting Unlocking photos Unmarking photos Viewing photos...